Utilizzare Timecode sulla Sony A7S III con Wireless PRO
In questo articolo, ti mostreremo come impostare il timecode sulla tua Sony A7S III con il Wireless PRO. L'A7S III non ha una porta dedicata per il timecode, ma puoi registrare il timecode come audio tramite l'ingresso microfono con il RØDE SC2 cavo 3.5mm incluso.
Passo 1
Collega il tuo Wireless PRO ricevitore a un computer o a un telefono che esegue RØDE Central.
Passo 2
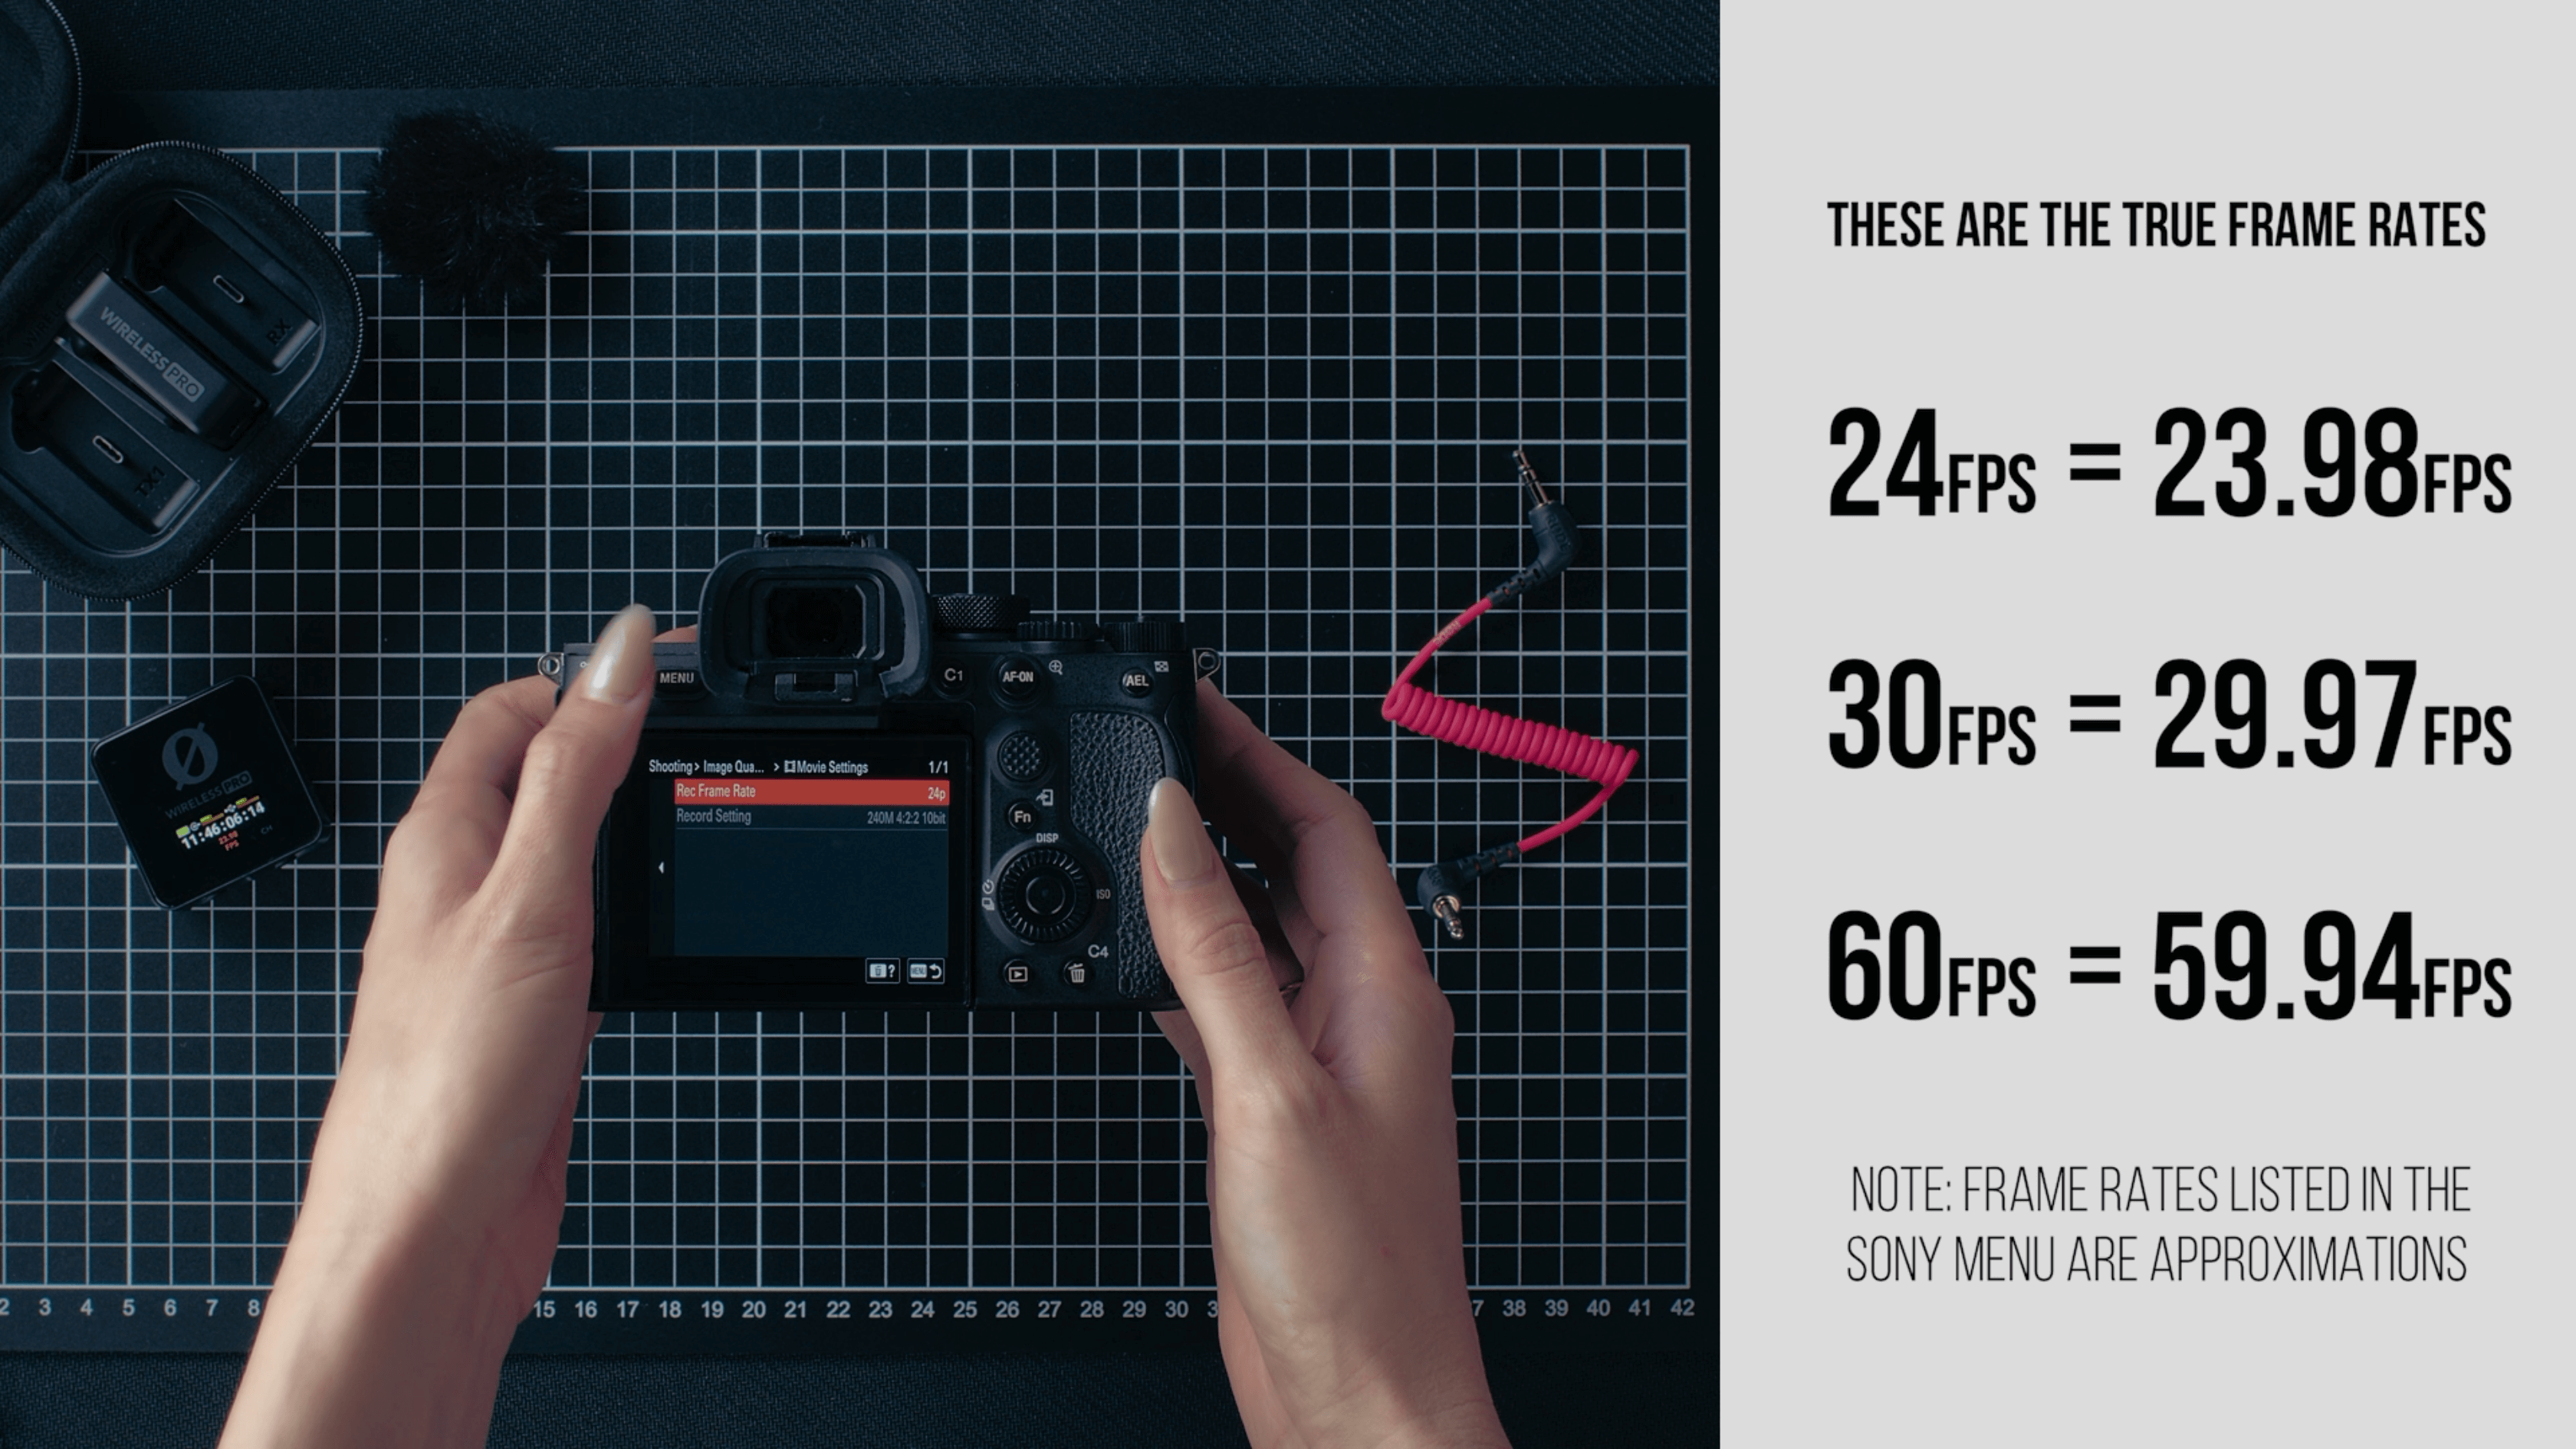
In RØDE Central, abilita il timecode e seleziona il frame rate con cui stai registrando. È importante notare che i frame rate elencati sulla Sony non sono del tutto accurati, sono approssimazioni del vero FPS. Se stai registrando a 24fps sulla tua Sony, seleziona 23.98fps in RØDE Central. Se stai registrando a 30fps o 60fps, seleziona 29.97fps in Central.
Step 3
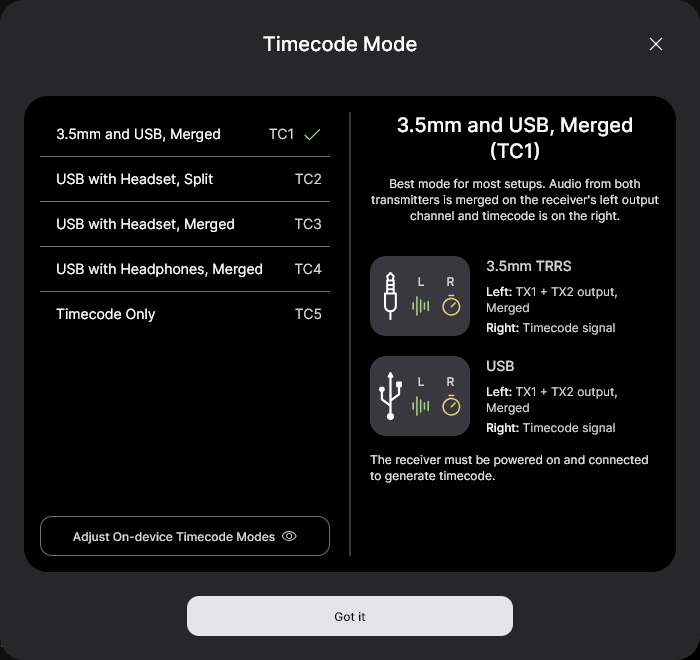
Toggle ‘Real Time’ on or off, depending on which format you’d like your timecode to appear in, then click ‘Timecode Modes’, choose ‘Timecode 1’ and click ‘Apply’.
Step 4
Ensure your camera’s framerate matches the one you just set for your timecode and adjust any other video and audio settings as per usual.
Passo 5
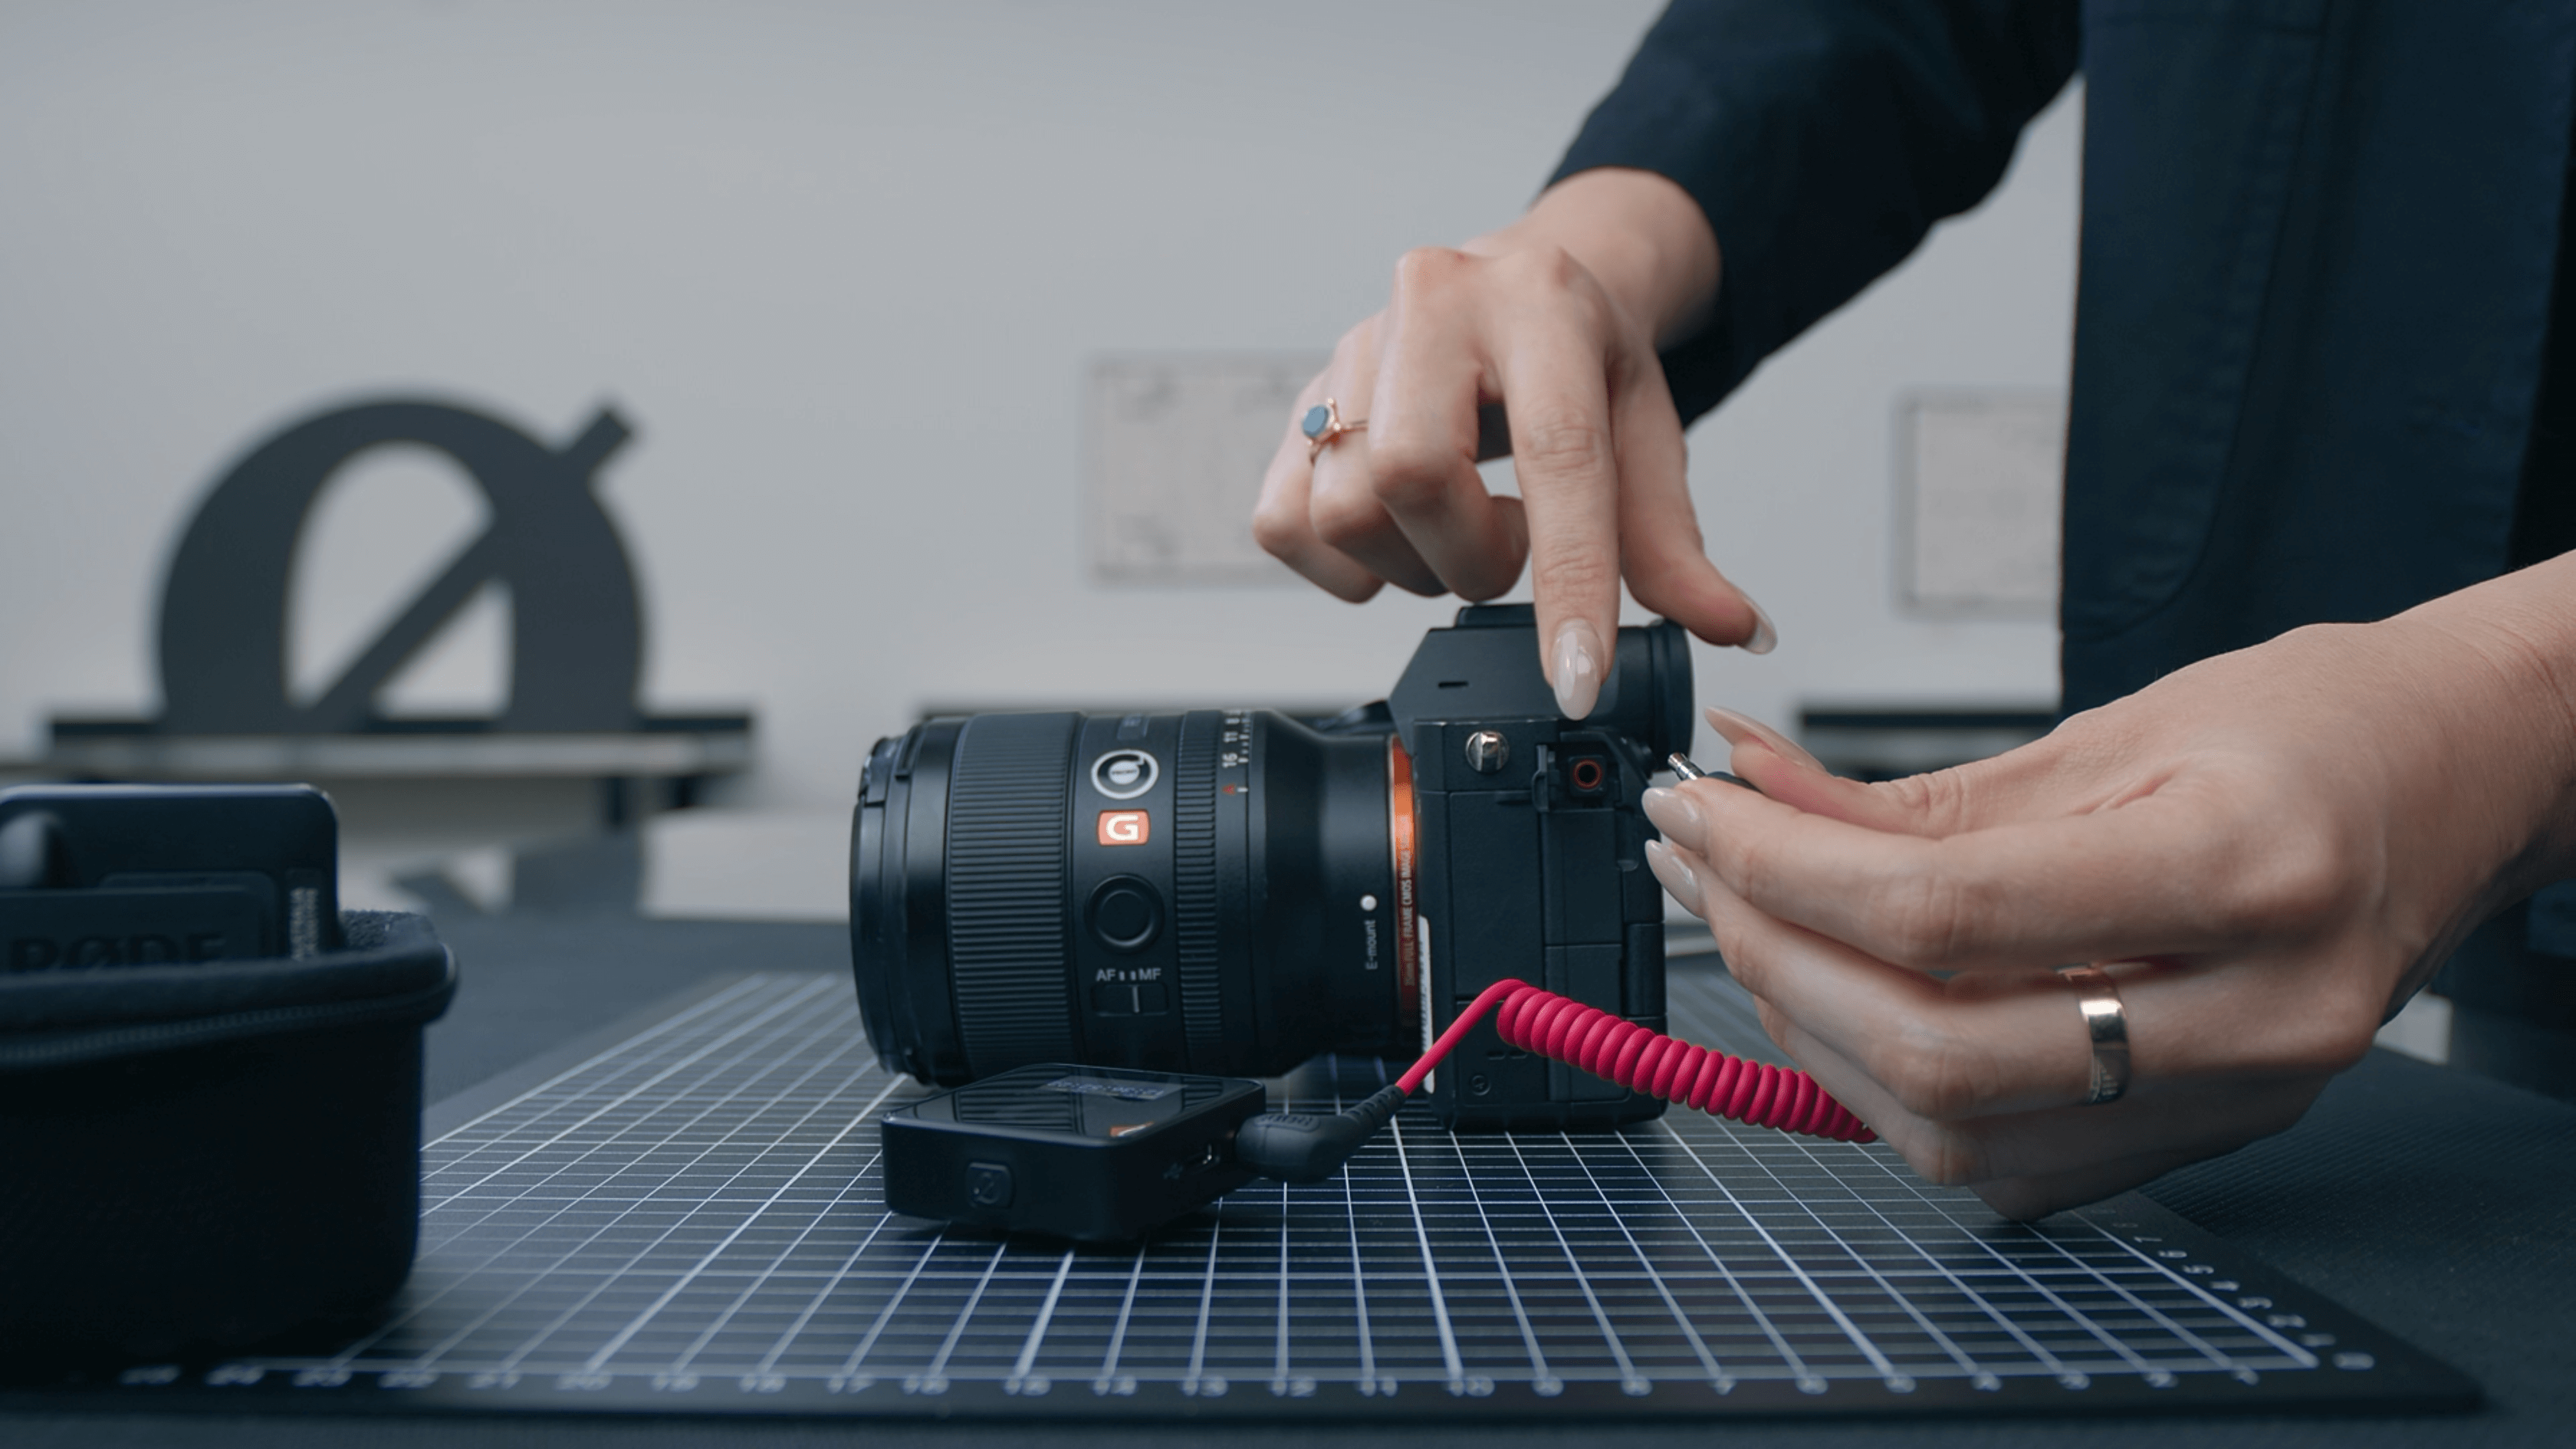
Collega il cavo SC2 da 3,5 mm incluso dal ricevitore Wireless PRO all'ingresso microfono rosso della tua Sony A7S III e inizia a registrare!
Poiché questa camera non accetta il timecode esterno, il suo display del timecode non corrisponderà a quello del tuo Wireless PRO, ma puoi comunque utilizzare il segnale audio del timecode per sincronizzare le tue riprese in post-produzione, basta seguire una delle nostre guide qui sotto.
Controlla la nostra guida per l'utente per ulteriori informazioni su Utilizzare Timecode con il Wireless PRO.