DS3
The DS3 ushers in the next generation of compact desktop studio arms, engineered for perfect placement of your microphone, camera, smartphone, light or other accessories.
Discover everything you need to know about using your DS3 here.
Assembling the DS3
The DS3 requires some minor assembly when you first take it out of the box. Start by making sure you have all the pieces with you – baseplate, arm, thread adaptors and D-ring screw.
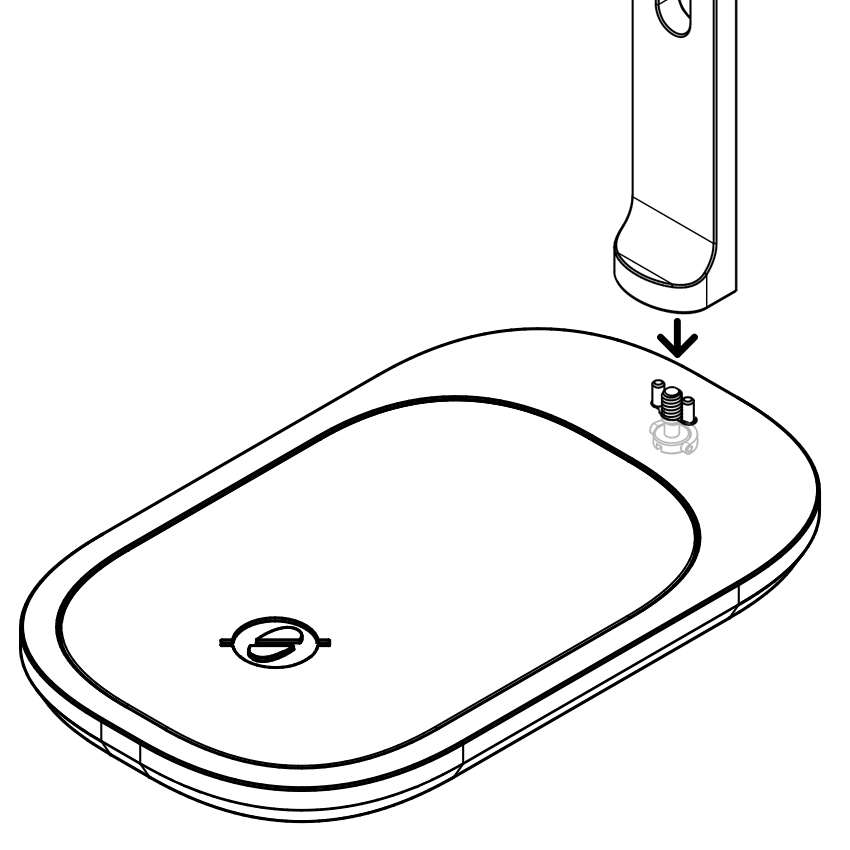
Align the DS3 arm with the location pins and screw hole on the baseplate
Insert the D-ring screw into the bottom of the baseplate and secure the arm firmly (a flathead screwdriver may be required to fasten tightly)
Mounting Your Microphone or Other Device on the DS3
The DS3 is designed to mount microphones or other devices (up to 1.5kg) via its screw thread. Some devices will have a screw thread directly on the device itself while others will feature one on their shock mount, arm or similar rig.
Thread Adaptors
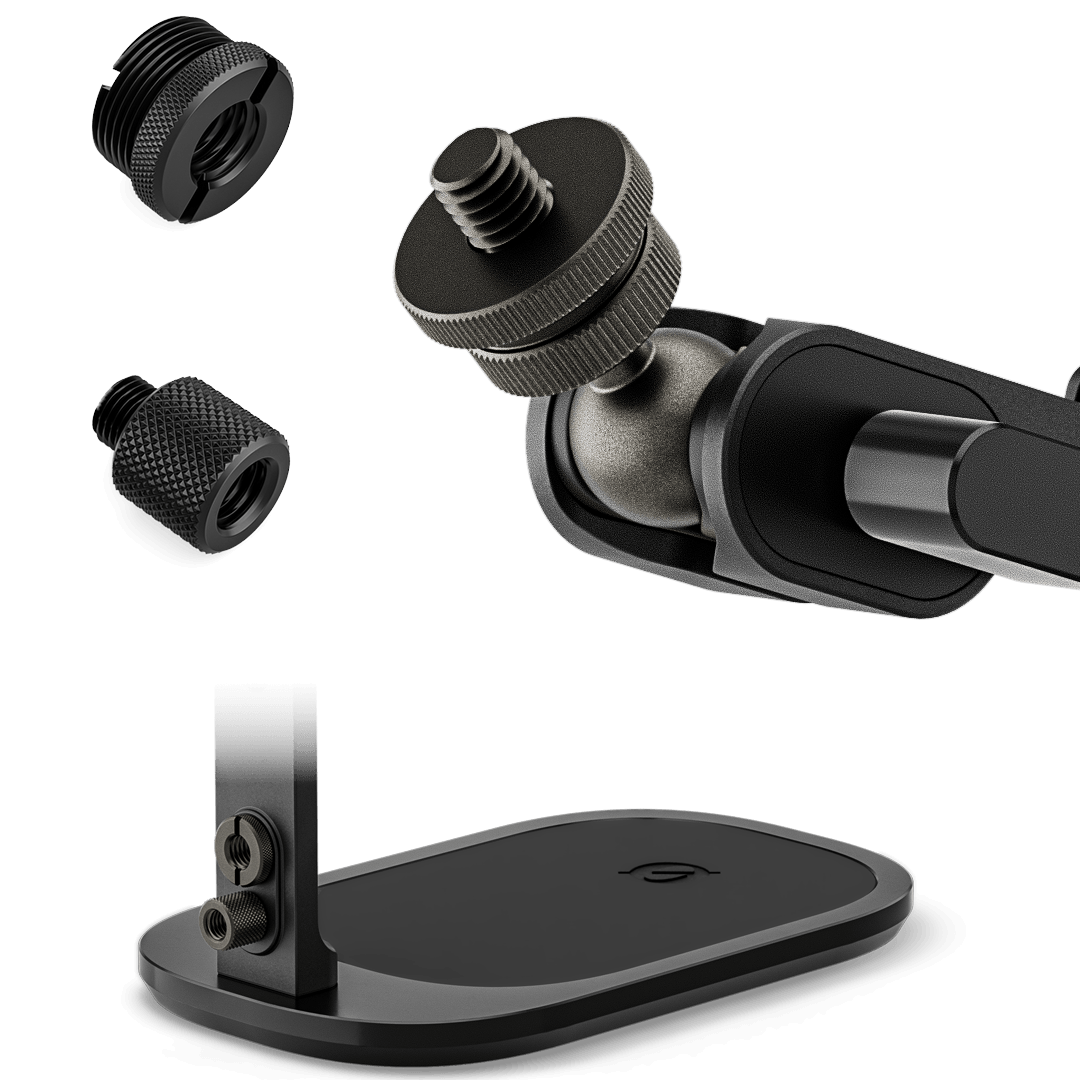
With the included thread adaptors, the DS3 can mount devices with 3/8-inch, 5/8-inch and 1/4-inch threads. By default, the DS3’s thread supports 3/8-inch threads, but if you want to mount a device with a 5/8-inch or 1/4-inch thread, simply screw on the appropriate adaptor.
You can also screw the thread adaptors into the bottom of the DS3's arm for storage.
Note
If you wish to secure your microphone or device in a particular orientation, you can use the precision ball head to quickly adjust the position.
First, ensure the mounted device is secure by using the mounting disc. Rotate it counterclockwise until it has been secured up against your mounted device. Next, loosen the side thumb screw on the DS3 to adjust the height, angle and orientation and tighten it once in position.
Cable Management
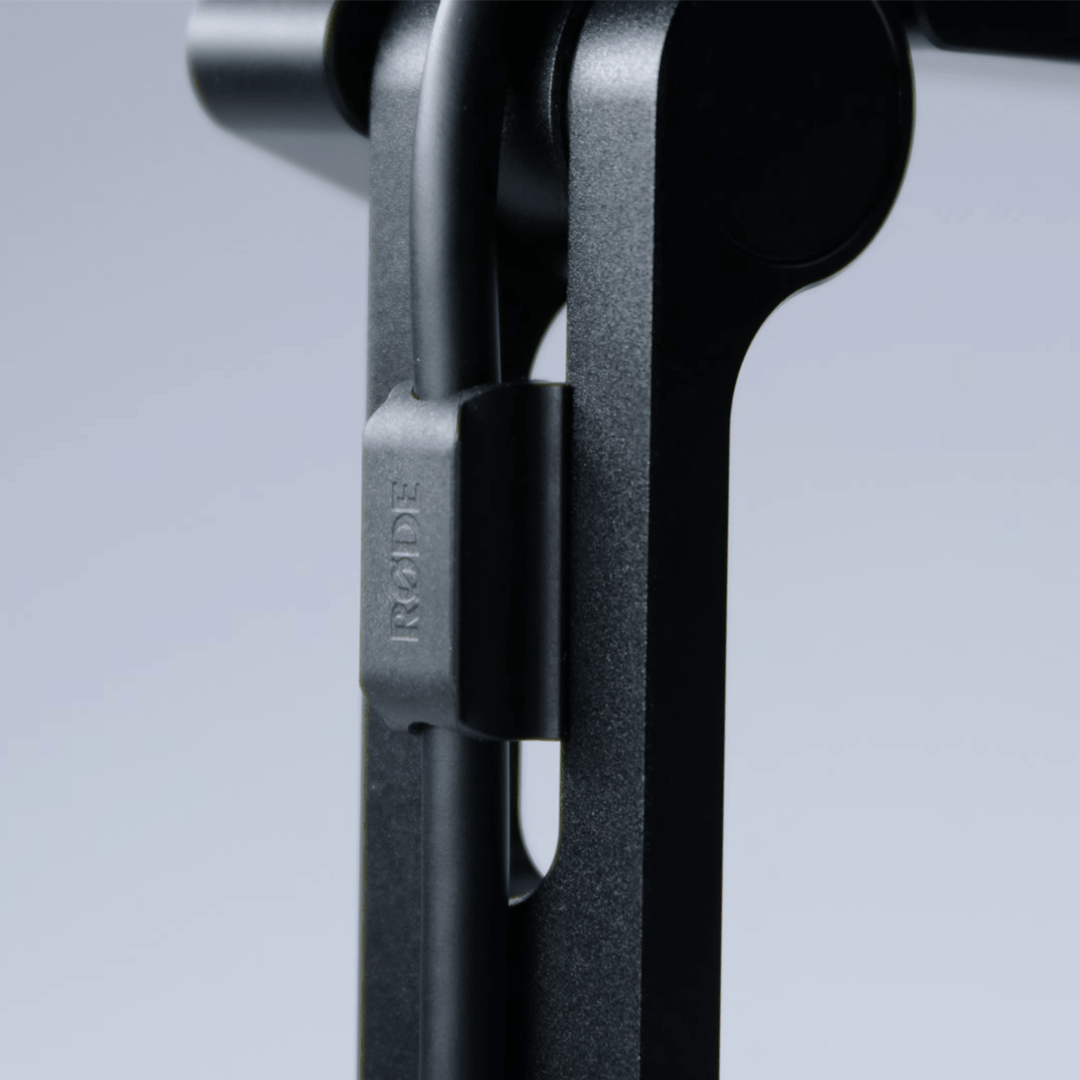
The DS3 comes with two cable clips for easy cable management. Simply route the cable along the back of the DS3's arm and click the cable clips into the available slots.
If you have any questions about your DS3 or require further support, contact us here.