Three Simple Techniques for Recording Better Acoustic Guitar
There’s no wrong way to record an acoustic guitar – it all depends on what sound you are going for and there’s plenty of room for experimentation. Trying out different recording techniques is a great way to learn just how drastically microphone placement can affect the sound of your recordings.
In this article, we’re going to take a look at three simple techniques for recording acoustic guitar that will give you a wide range of different sounds, serving as an excellent foundation for further experimentation.
Best Microphone for Recording Acoustic Guitar
Before we begin, let’s take a look at what you’ll need in terms of equipment. Firstly, you’ll need at least one microphone, potentially two. Condenser microphones are especially well-suited for recording acoustic guitar as they’re known for their ability to pick up a lot of detail across the full frequency spectrum, which is great for bringing out the finer details of your acoustic performance.
For the three techniques we’re looking at, we’ll be using two different types of condensers – a large-diaphragm condenser such as the NT1 Signature Series, as well as a pair of small-diaphragm condensers like the NT5, which are actually available as a matched pair for this very reason.
You’ll also need an audio interface such as the AI-1 or RØDECaster Duo to convert your analog (XLR) microphone signal to a digital (USB) signal that can be sent to your computer. Lastly, you’ll need recording software on your computer, typically a DAW (Digital Audio Workstation) such as GarageBand, Adobe Audition, Ableton Live or Reaper.
Technique 1: Single Microphone on 12th Fret
The first technique is a great one to begin with as it’s very simple and produces a nice, even tone that’s ideal for a wide range of recording and mixing applications.
For this technique, you’ll just need one mic – we recommend a large-diaphragm condenser like the NT1 Signature Series for a rich, detailed sound with lots of character, but you can experiment with small-diaphragm condensers, ribbon, dynamic and other microphones for different characters.
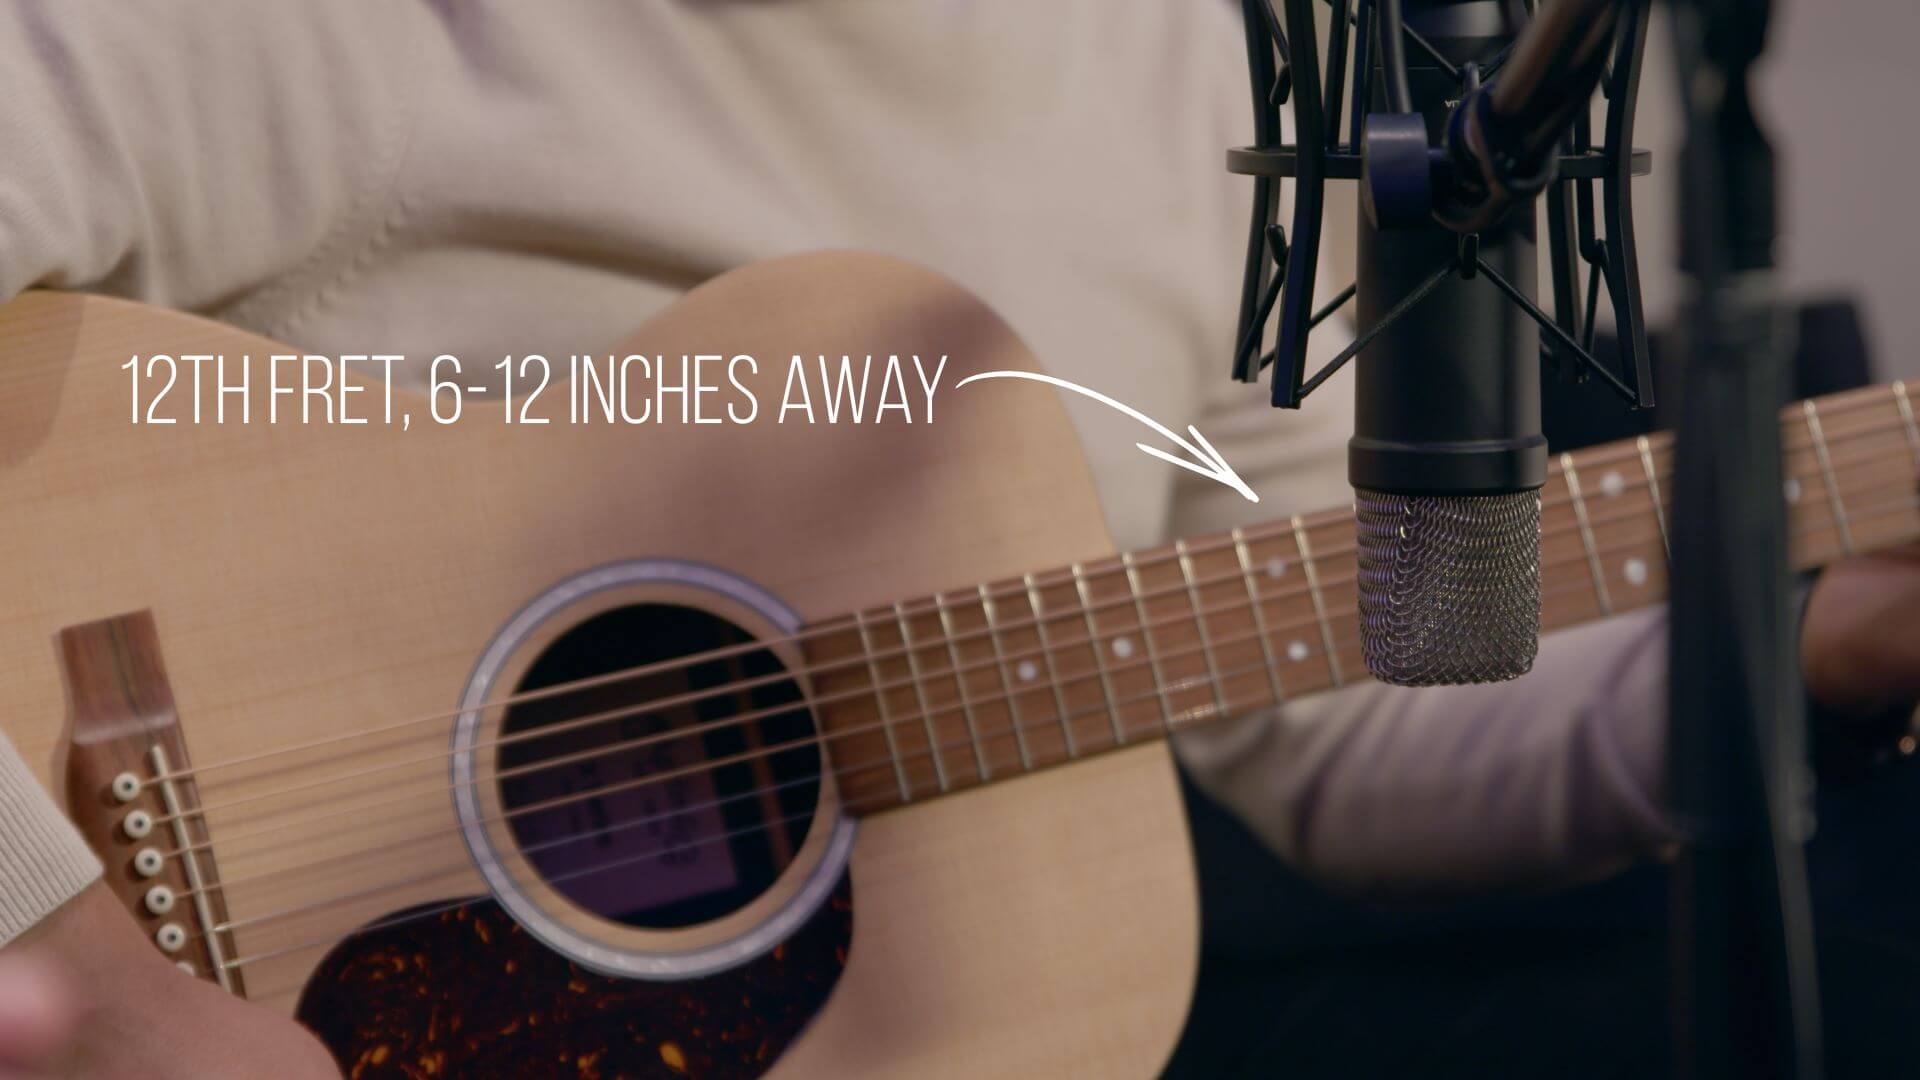
A large-diaphragm condenser microphone aimed at the 12th fret of an acoustic guitar, placed around 6-12 inches away, produces a detailed and balanced sound.
With your microphone mounted on a stand or boom arm, place it around 12 inches away from the strings aimed at the bridge. This technique provides a balanced tone as it doesn’t pick up too much direct sound from the sound hole, which produces a lot of low-end frequencies that can sound muddy and boomy.
Technique 2: Single Microphone on Bridge
The second technique is much the same as the first – recording with a single large-diaphragm condenser mic – but by changing where it’s pointing, we can get a significantly different result.
With your microphone mounted on a stand or boom arm, place it around 12 inches away from the strings aimed at the space between the bridge and the sound hole. This technique will give you a brighter tone than the 12th-fret technique, which can help your guitar stand out more in a mix (depending on the other instruments, of course).
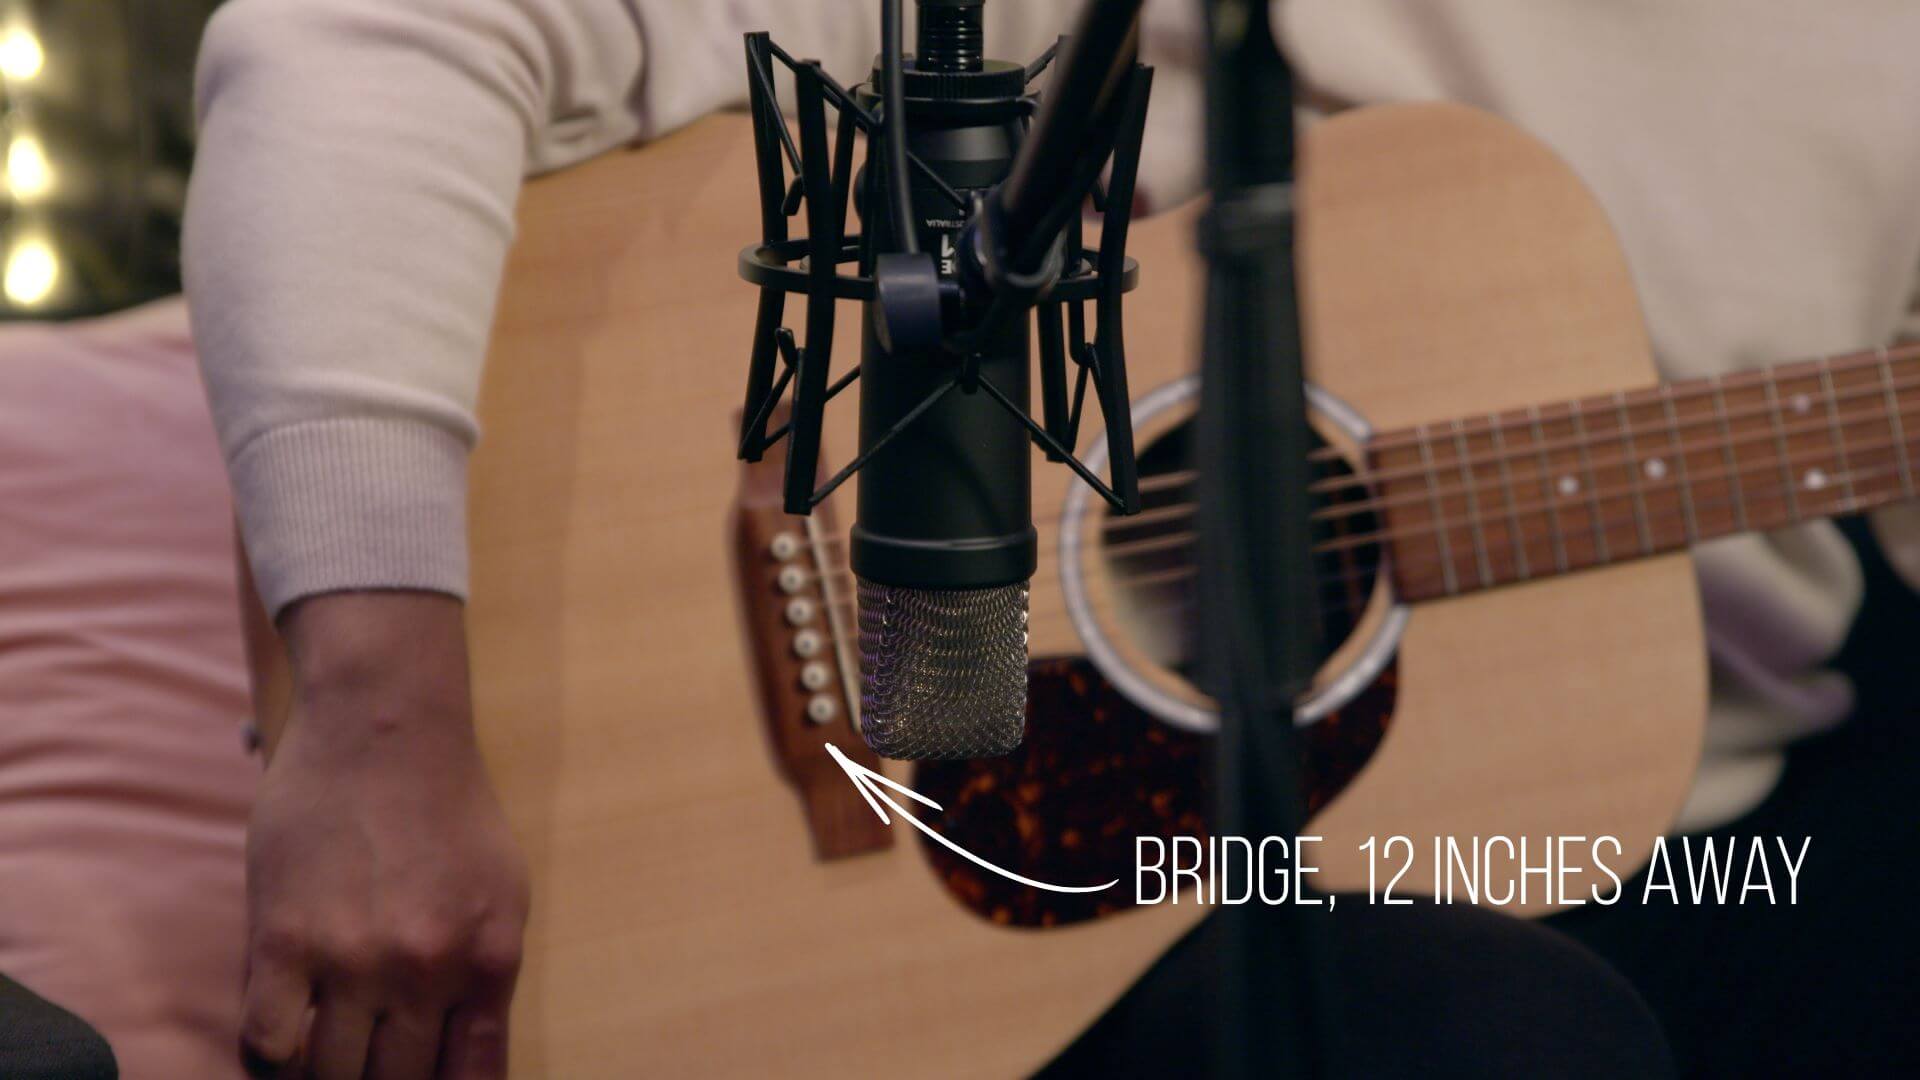
A large-diaphragm condenser microphone aimed towards the bridge of an acoustic guitar, placed around 6-12 inches away, produces a bright, percussive sound.
It's also perfect for when you want your acoustic guitar to play a more percussive role in your track, as the string noises (especially when using a pick) will stand out more with this technique. For the same reason, it’s great for fingerstyle (or fingerpicking), as the nuance of your picking hand will be more pronounced – move the mic a little closer to the strings when fingerpicking.
Just like the previous technique, you can try different microphone types to get a different character, but a large-diaphragm condenser will pick up all the detail you need, allowing you to equalise and process it to taste once you’ve recorded your performance.
Technique 3: Stereo X/Y Configuration
The last technique we’re looking at requires a little more setup, but it’s absolutely worth adding to your repertoire. The stereo X/Y configuration is a tried-and-true technique for recording wide, full and detailed recordings.
You’ll need two microphones for this, ideally small-diaphragm condensers such as the NT5 (which are available in a Matched Pair), but feel free to experiment by trying out other microphone types – just be sure you have a pair of them.
Because you need to record two microphones at once for this technique, you’ll need an interface such as the RØDECaster Duo that has at least two XLR inputs to record your microphones’ audio into your computer.
When using multiple microphones on a single sound source, it’s important that they are positioned the same distance away from your instrument to avoid phasing issues, which can result in unwanted artifacts in your audio.
You need to position both microphones so that their capsules are aligned with each other, but aimed 90-degrees apart. You can use the Stereo Bar, which is tailormade for this task, or a pair of stands or boom arms to achieve this spacing.
Then, similar to the first technique, position the microphones 6-12 inches from the 12th fret and aim them so that they’re both angled 45-degrees from the fretboard, with one mic pointing up the neck, and the other towards the sound hole.
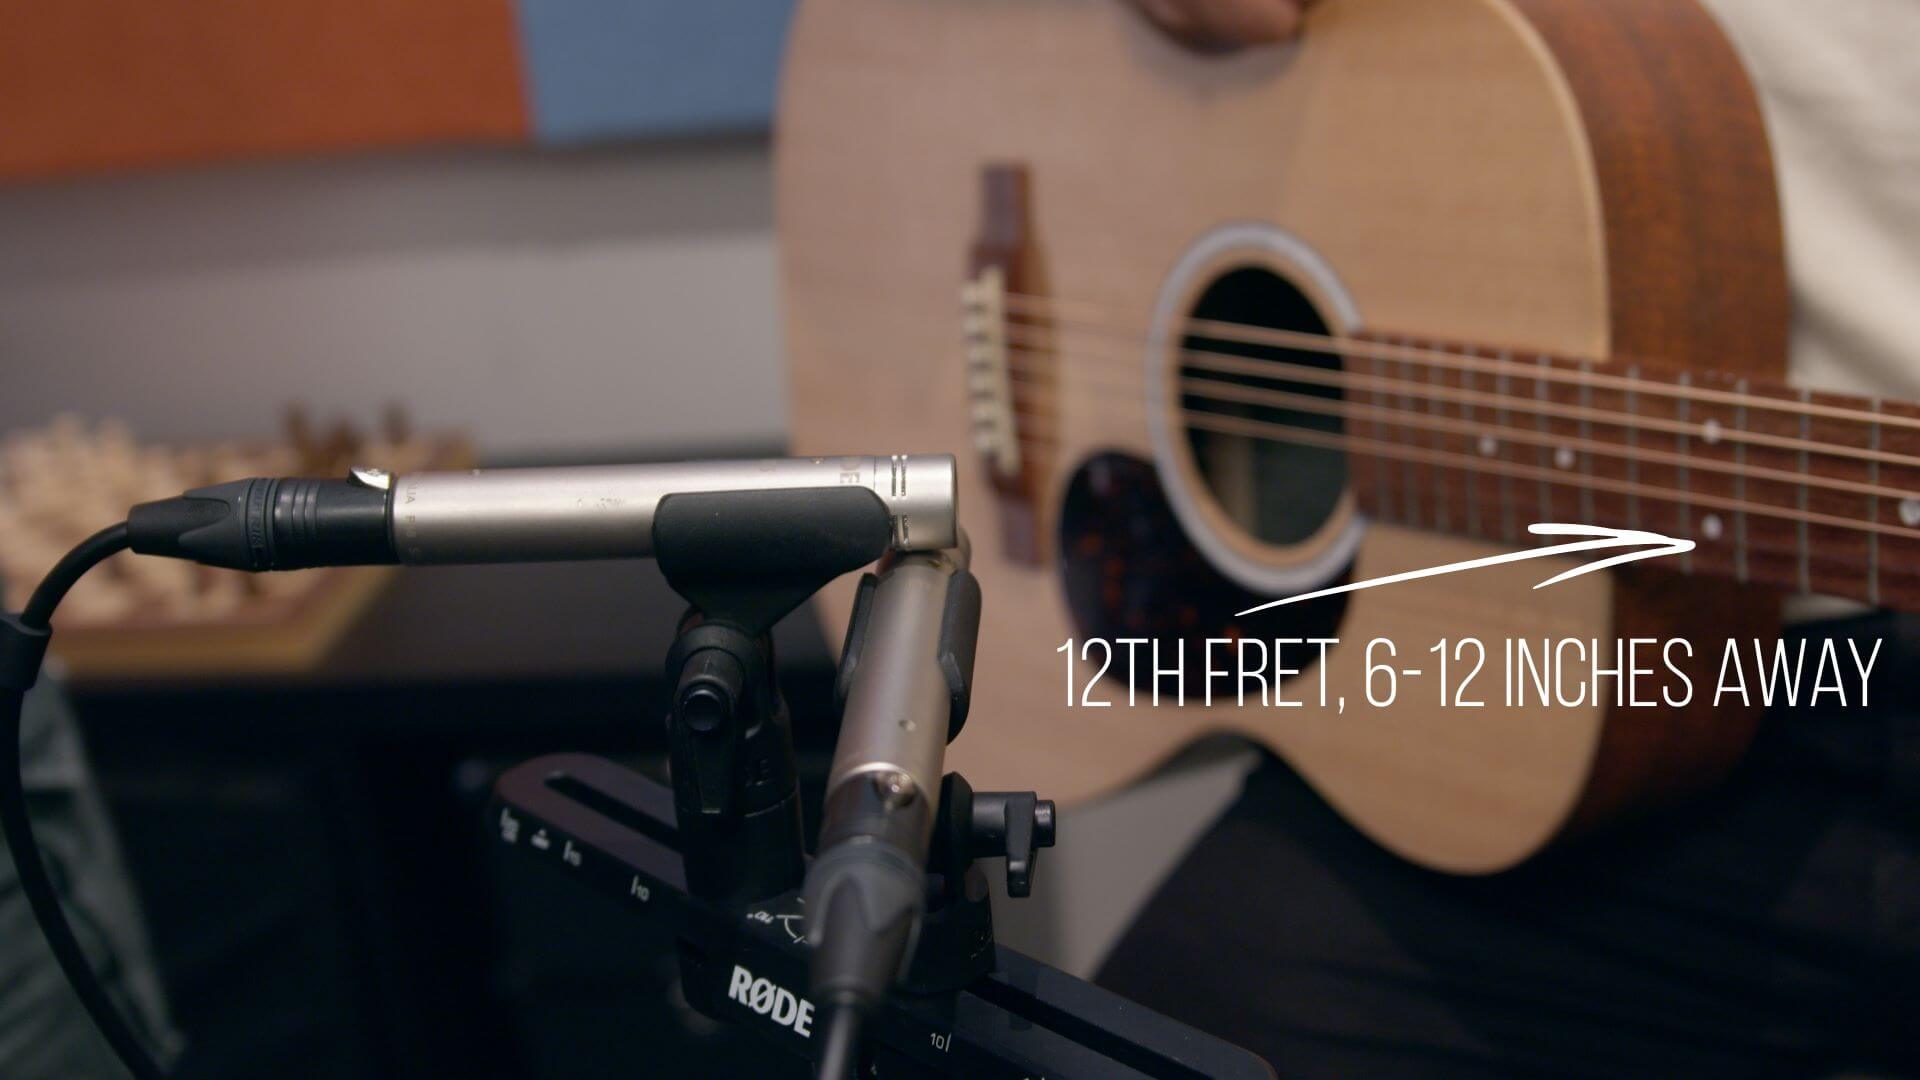
A matched pair of small-diaphragm condenser microphones can be placed in an X/Y configuration, about 6-12 inches from the 12th fret of an acoustic guitar to record a stereo image.
Record each microphone to a separate track in your DAW and pan one of them fully to the left and the other to the right in order to create a wide stereo image. This results in a lush, rich and full sound, especially when you add a touch of reverb, and is particularly useful when the guitar is the main element in a song.
This recording technique mimics the slight differences in what we hear with our left and right ears in everyday life, which allow us to perceive the direction in which a sound comes from. This is why stereo recordings can give us a more immersive experience of a sound and bring a recording to life.
And there you go! With these three simple recording techniques, you can capture quite a few different tones from your acoustic guitar – an excellent starting point for further experimentation.
Check out our range of studio condenser microphones, audio interfaces and mixers to start kitting out your home recording setup.