NT1 5th Generation
The NT1 5th Generation is a groundbreaking studio condenser microphone that fuses the classic sound signature of the iconic NT1 with cutting-edge, next-generation technology.
Discover everything you need to know about using your NT1 5th Generation here.
Features
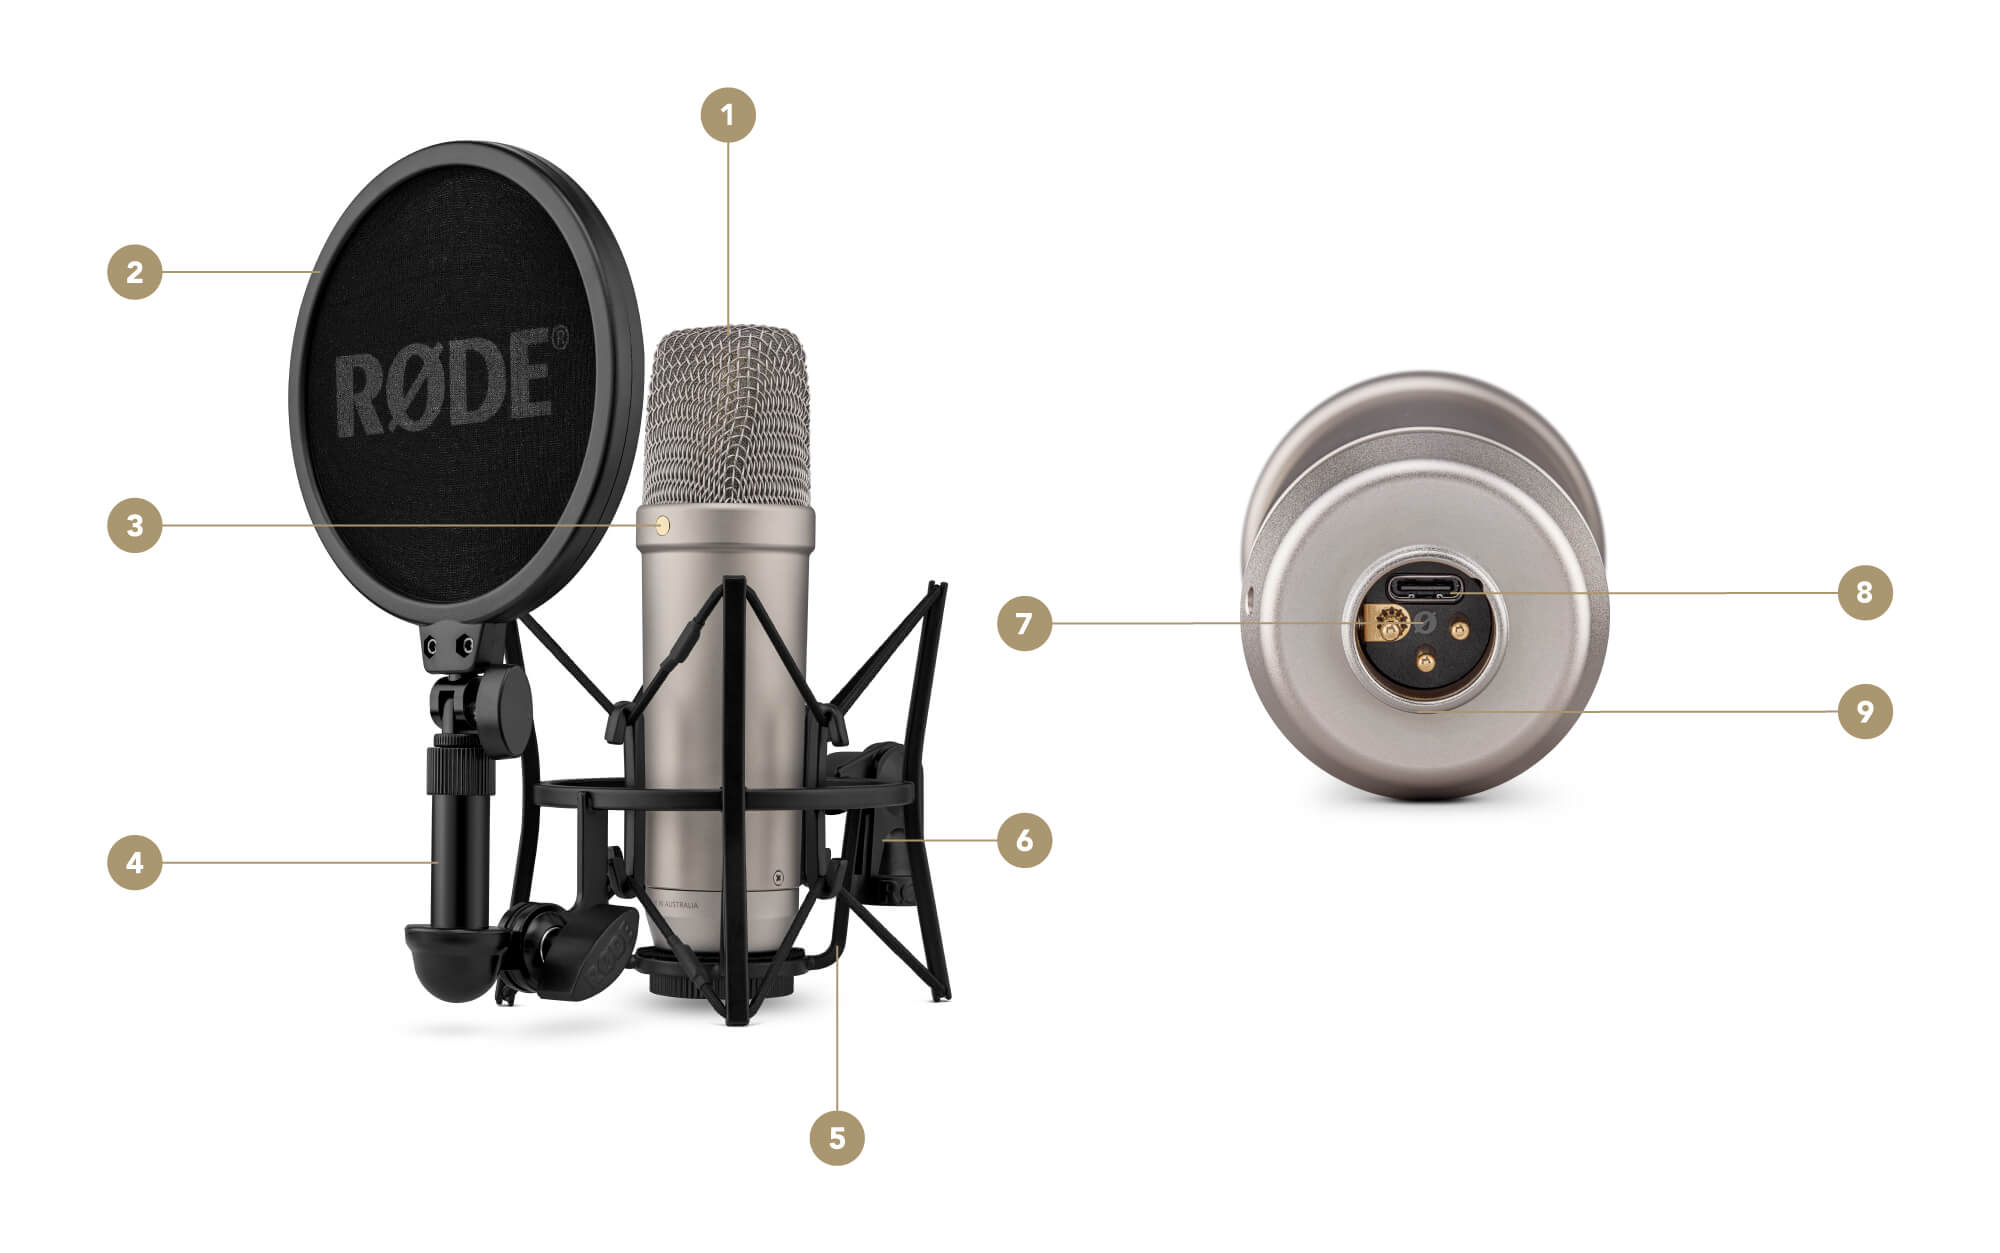
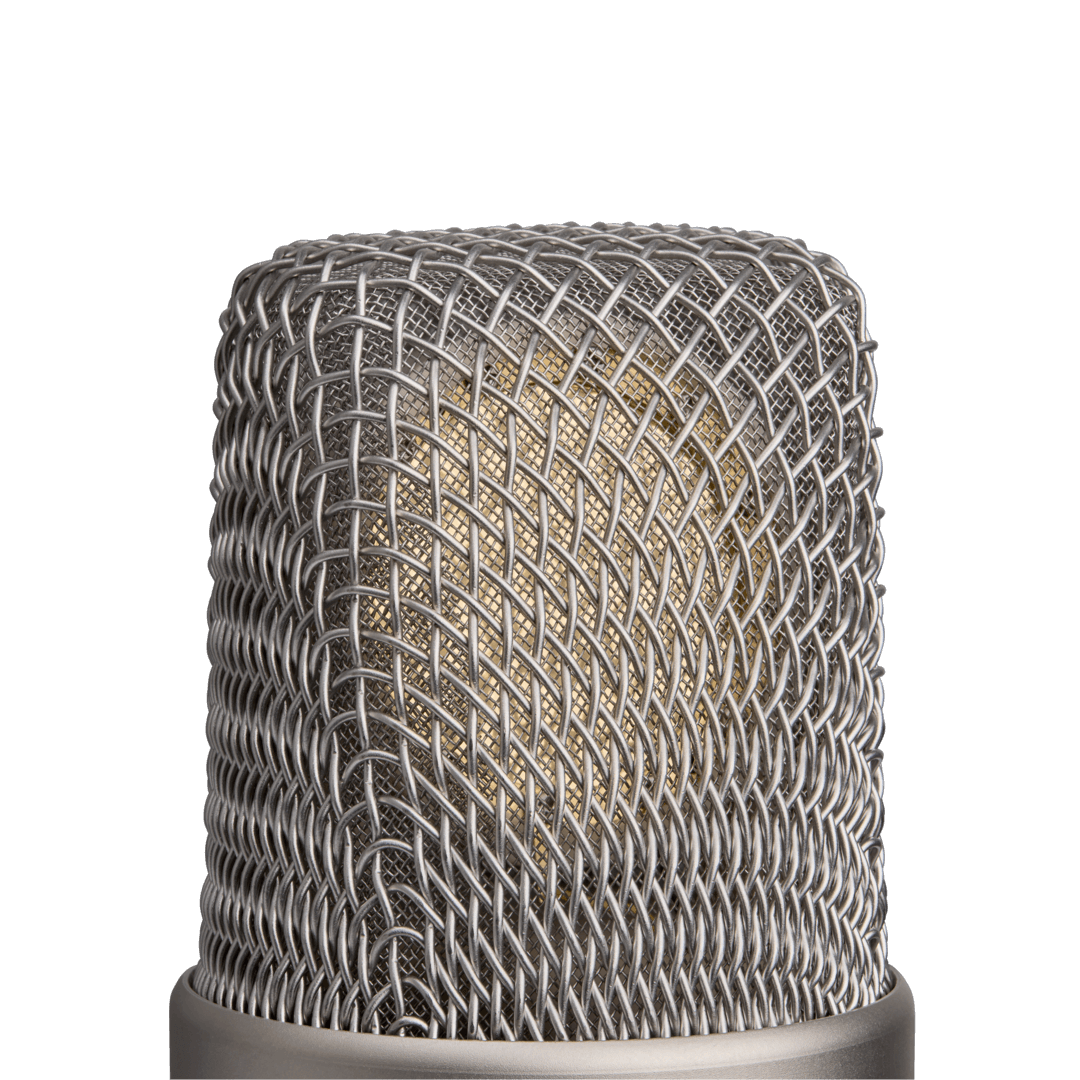
1Large-diaphragm Capsule
2Pop Filter
3Gold Dot (Front of Microphone)
4Pop Filter Mounting Arm
5SM6 Shock Mount
6Microphone Stand Mount
7XLR Connector
8USB-C Connector
9Screw Thread
Studio Workhorse
The NT1 5th Generation is an incredibly versatile microphone for studio recording and other applications. It features a wide frequency response with rich bass articulation and sparkling top end, high SPL (sound pressure level) handling capabilities, ultra-low self-noise (just 4dBA) and thanks to our patent-pending Dual Connect technology, you can capture this stunning sound via an analog (XLR) or digital (USB-C) connection.
Pickup Pattern and Placement
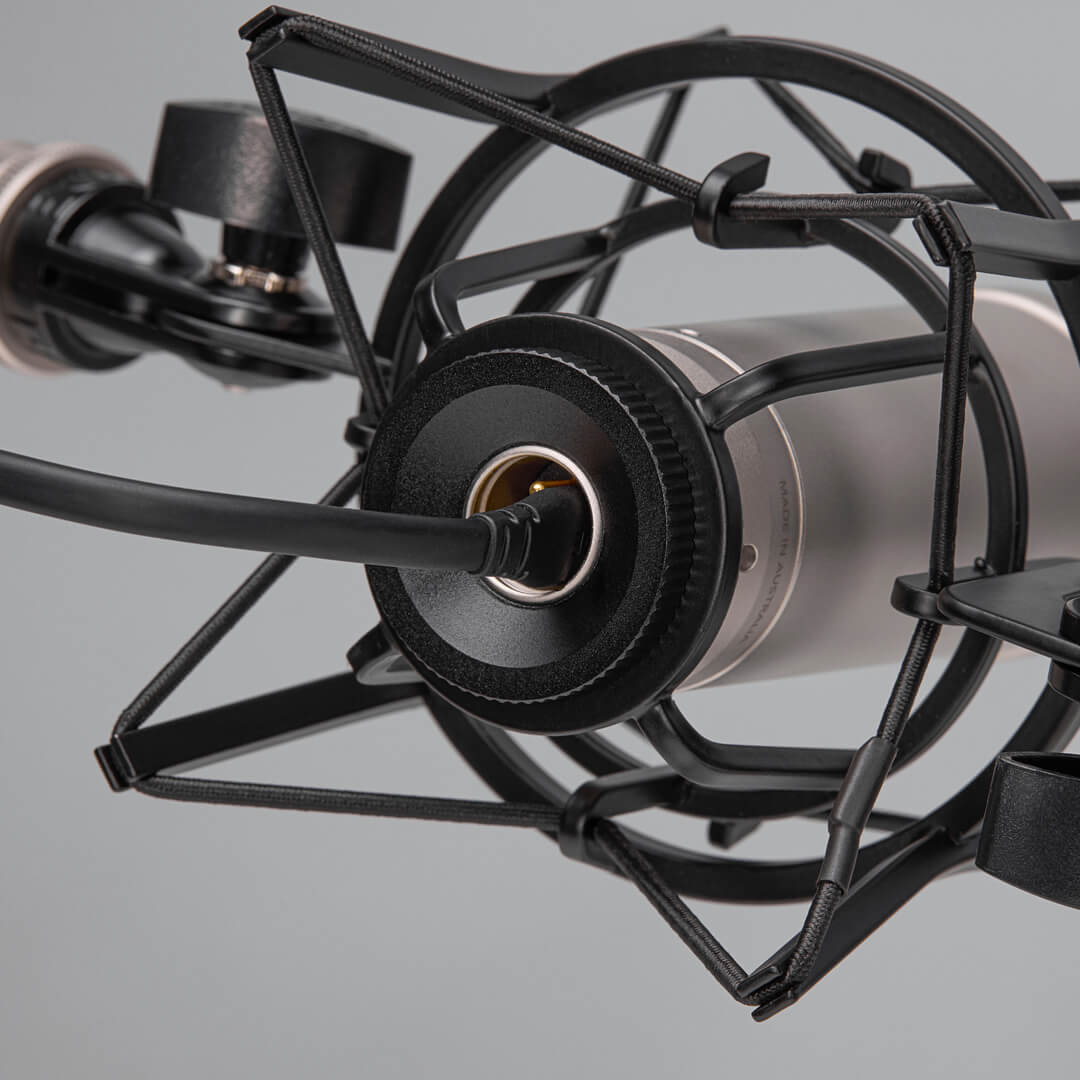
The NT1 5th Generation is a side-address microphone and features a tight cardioid polar pattern. This means it will pick up sound perpendicular to, and in front of, the body of the microphone, while rejecting sounds behind it. The gold dot on the body of the NT1 5th Generation indicates the front of the microphone, so make sure that this is pointed towards your sound source.
Getting Set Up
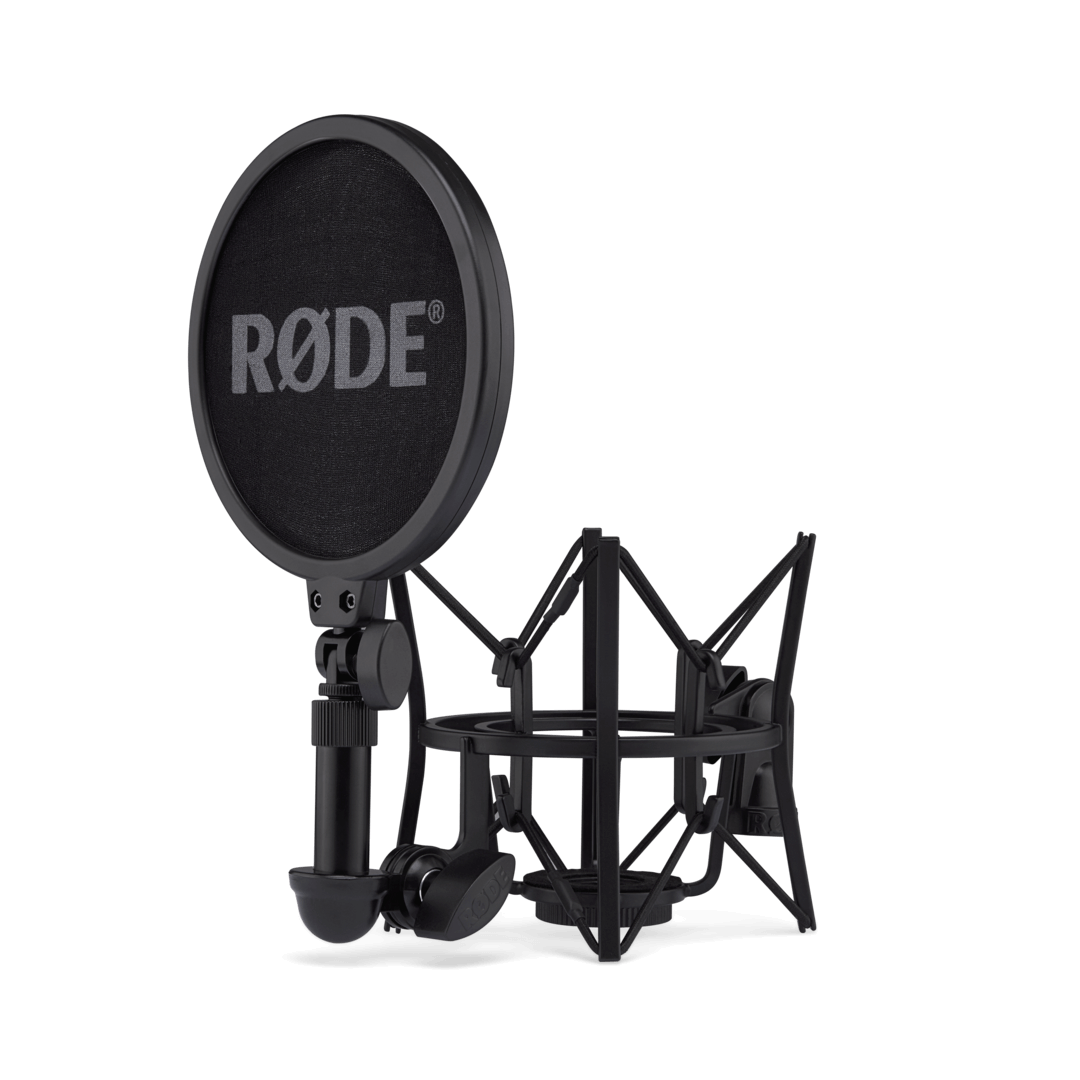
The NT1 5th Generation comes with all the accessories you need to get recording, including a studio-quality shock mount, pop filter, XLR cable, USB-C cable and dust cover.
Using the Shock Mount
The SM6 shock mount and pop filter provides excellent isolation from unwanted sounds produced by external bumps and other movement, as well as plosives (puffs of air from your mouth that can overload the capsule). It can be attached to any standard microphone stand or studio arm, either upright or upside down. The mount features both 5/8” and 3/8” thread sizes.
Attaching the Pop Filter
To place the pop filter on the shock mount, loosen the joint on the ‘L’-shaped bracket so that its threaded socket faces up. Screw the pop filter into this socket until firmly secured. Once in place, the height of the pop filter can be adjusted using the telescopic arm, as well as its left-to-right orientation and back-and-forth tilt.
Mounting the NT1 5th Generation
Place the NT1 5th Generation inside the SM6 shock mount and rotate the microphone clockwise to screw it loosely into the base of the mount. Adjust the orientation of the microphone so that the gold dot faces the pop filter, and then tighten the ring beneath the mount while holding the microphone to secure it in place.
Connecting Your NT1 5th Generation via XLR
Once you’ve mounted your NT1 5th Generation, you can connect it to your analog equipment (such as an audio interface, mixer or outboard gear) via its XLR output. To do so, plug the female end of your XLR cable (three holes) into the base of the microphone (three pins). Before connecting the other end of the cable to your mixer, audio interface or similar device, ensure the input volume is fully down to avoid unexpected feedback or loud sounds.
.jpg)
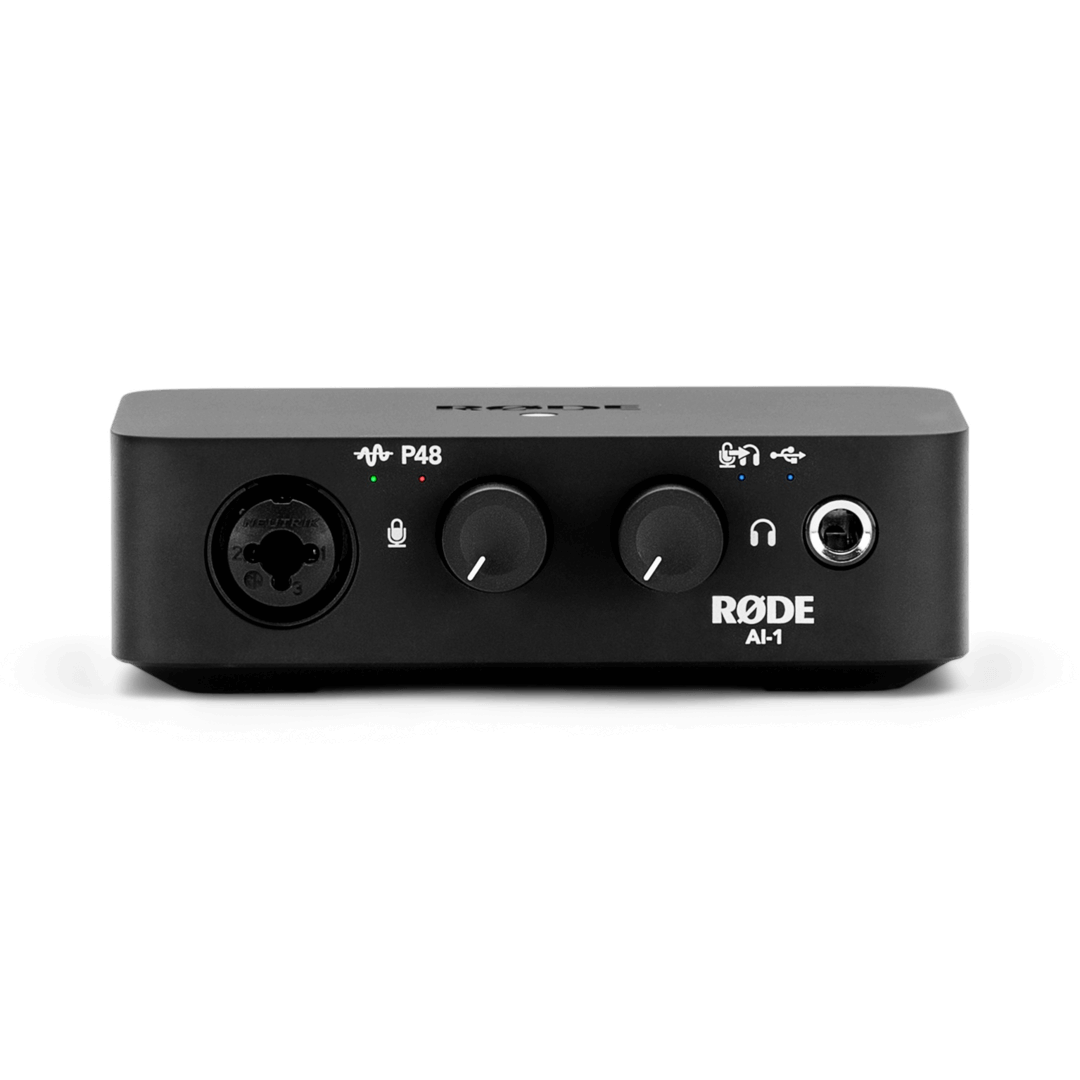
Powering Your NT1 5th Generation via XLR
For the NT1 5th Generation to function when plugged in via XLR, you’ll need to supply it with 48V phantom power. Most mixers, audio interfaces and other audio equipment with an XLR input are capable of providing phantom power, which is supplied to the mic via the XLR cable. In most cases, you will need to activate it via your device, as not all microphones require phantom power.
Connecting the NT1 5th Generation to a Computer via USB-C
As well as an analog XLR output, the NT1 5th Generation features a digital USB-C connection for recording directly into your computer or laptop without the need for an external audio interface. Simply plug one end of the supplied USB-C cable into the base of the NT1 5th Generation – you’ll see the port in the same opening that houses the XLR pins – and plug the other end into your computer. If your computer doesn’t feature a USB-C port, you’ll need to use a USB-A to USB-C cable such as the SC18 instead.
Note
The NT1 5th Generation is compatible with computers running Windows 10 or later and Mac OS 10.15 or later.
ASIO Driver for Windows
To get the most out of your NT1 5th Generation when using it with a Windows computer, including 32-bit float and multi-mic recording, download its custom ASIO driver.
-1080x1080-1412f7f.jpg)
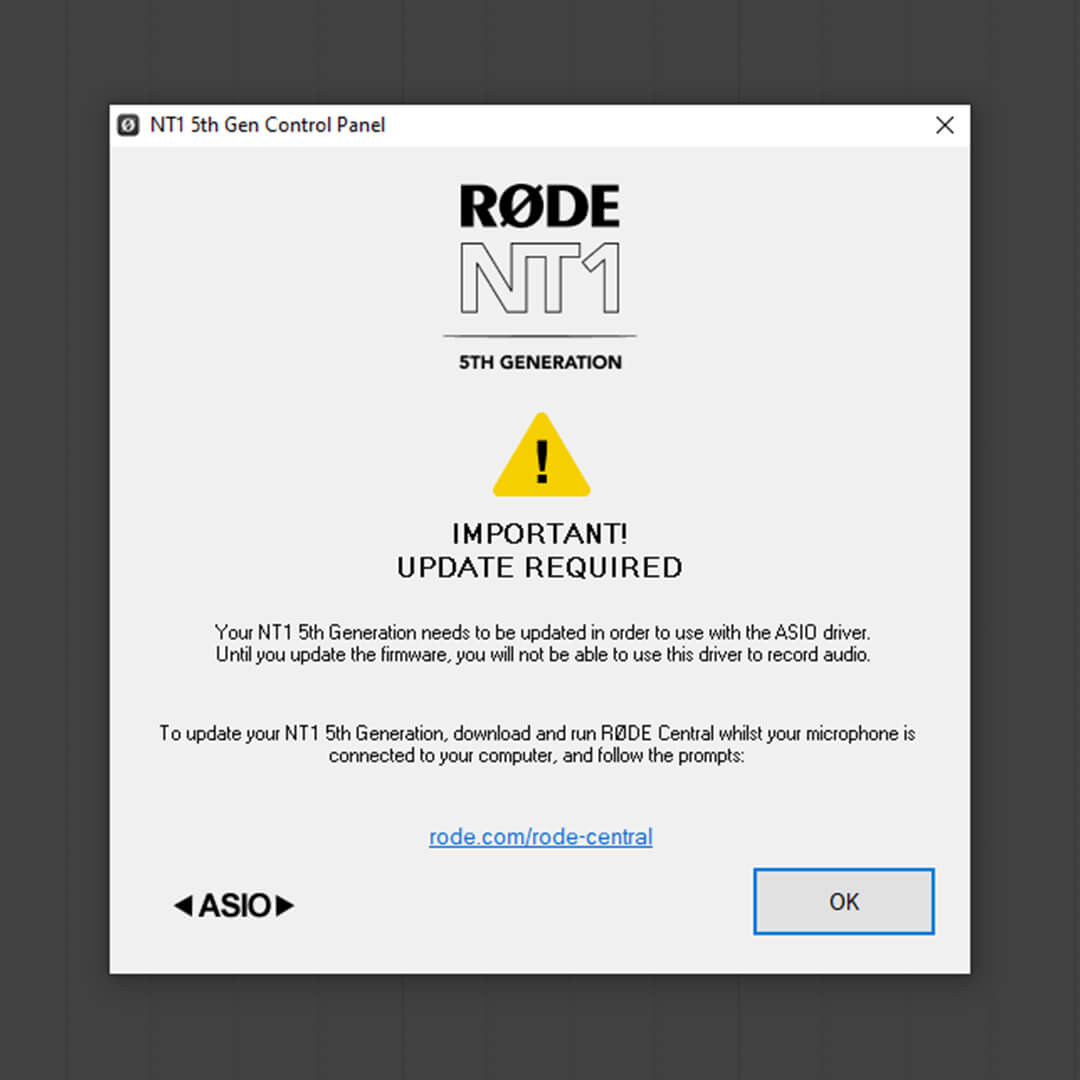
Updating Firmware to Use the ASIO Driver
To use the ASIO driver with your NT1 5th Generation, your microphone needs to be running firmware version 1.1.3 or above. If you have incompatible firmware, you will receive an error message telling you to update (pictured left).
To update your NT1 5th Generation to the latest firmware, download RØDE Central.
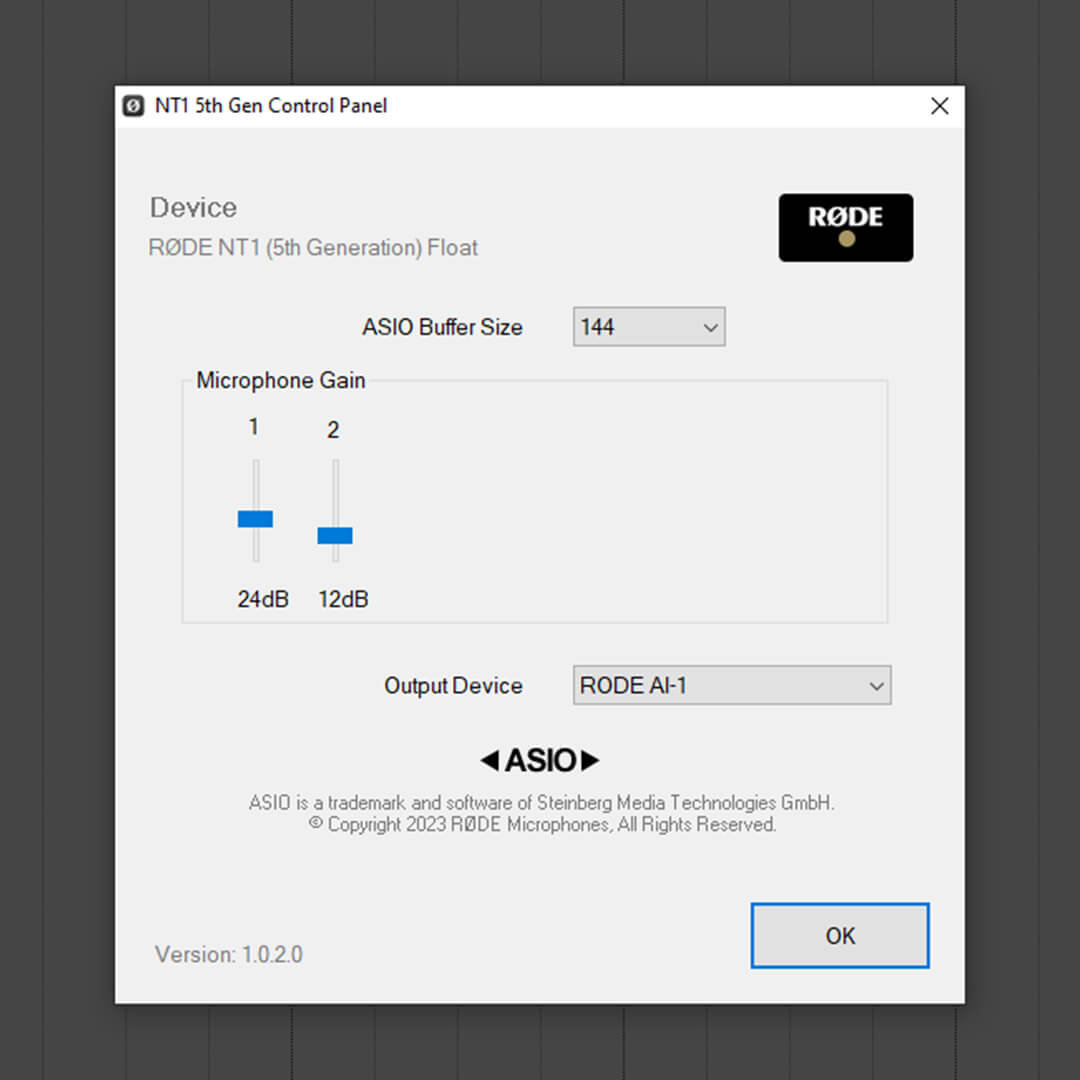
Using the ASIO Driver
To enable the ASIO driver, close all programs and apps, open your DAW of choice, and select the ASIO driver as your audio device in your DAW’s settings. You can find more detailed information on this process in the walkthrough guides found in the “Recording With the NT1 5th Generation in 32-bit Float” section below.
The custom ASIO driver unlocks some of the NT1 5th Generation’s powerful features when recording via USB on a Windows PC. It is required if you want to record in 32-fit float mode or connect multiple NT1 5th Generation microphones to a single computer for multitrack recording. It also allows you to control the input gain for connected microphones and select the device buffer size. The ASIO driver is not required for 24-bit recording.
The NT1 5th Generation has been tested with a range of computer soundcards and external audio devices to ensure compatibility.
To see a full list of tested devices, click here.
Note
The ASIO driver is only compatible with stereo output devices. Devices with multichannel outputs are not supported.
Using the NT1 5th Generation with Your Audio Software
Once connected to your computer, you’ll be able to select “RØDE NT1 5th Gen” as an audio input in both your computer’s device settings as well as within your audio software, just like you would with your built-in laptop microphone or a channel from an audio interface.
Monitoring Your Audio
To listen to what you’re recording with your NT1 5th Generation when connected via USB, you’ll need to plug a pair of headphones into your computer’s 3.5mm headphone output (or audio interface if you’re using one). Once connected, you can select these headphones as the ‘output’ device in both your computer’s device settings as well as within your audio software – if you’re using the ASIO driver, this is done in the ASIO configuration panel within your DAW (see the 32-bit float walkthrough guides below for more information). Within your DAW or audio software, you may need to enable monitoring and/or arm the track that your NT1 5th Generation is on.
The ASIO driver only supports monitoring with devices that have a stereo output. Devices with multichannel outputs are not supported.
A Note on Latency
All digital audio devices, the NT1 5th Generation included, are subject to some degree of latency, which means there may be a delay between your vocal or instrument performance and what you hear in your headphones. The amount of latency present will depend on a number of factors, including the computer and audio software you’re using, as well as how many programs you have open. In most cases, the latency will be low enough to be unnoticeable. If you’re experiencing issues with latency in your recording software, refer to the software’s user guide for latency management solutions such as reducing buffer size.
Setting Input Gain, Sample Rate and Bit Depth
The NT1 5th Generation is capable of recording audio with a sample rate of up to 192kHz and a bit depth of up to 32-bit floating point. If the software you are using is listed below in the “Recording the NT1 5th Generation in 32-bit Float” section, you can follow the process outlined in the linked guide to adjust your input level, sample rate and bit depth settings.
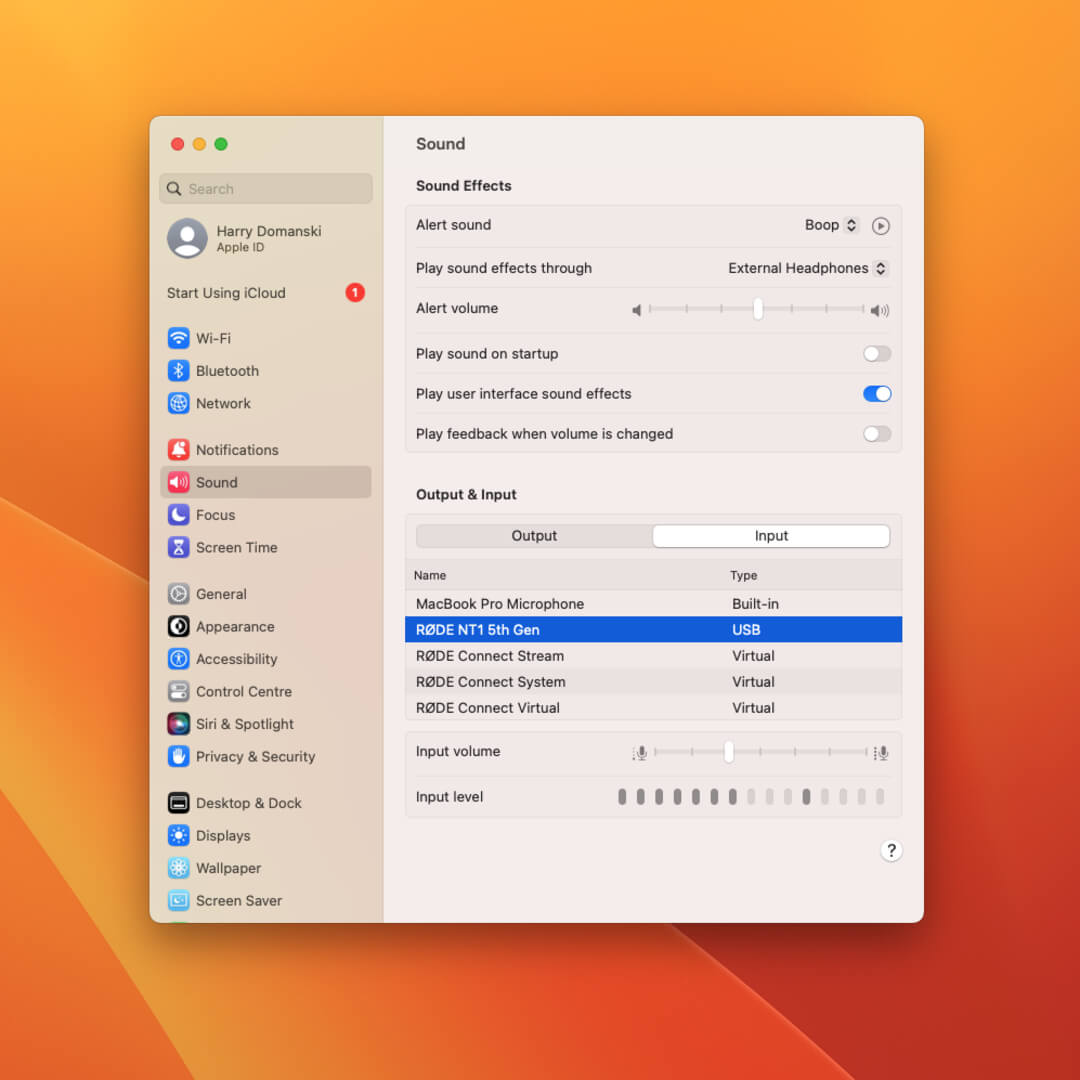
On Mac: Navigate to ‘System Settings’ > ‘Sound’ > ‘Input’ and select “RØDE NT1 5th Gen”. Adjust the ‘Input Volume’ slider until the loudest sound you will be recording pushes the ‘Input Level’ meter to around the 75% mark.
Navigate to ‘Applications’ > ‘Utilities’ > ‘Audio MIDI Setup’ and select “RØDE NT1 5th Gen” from the list on the left. Select the sample rate and bit depth you wish to use from the ‘Format’ dropdown menu.
On Windows: Navigate to ‘Control Panel’ > ‘Sound’ > ‘Recording’ and select the “RØDE NT1 5th Gen” from the list of devices. Click ‘Properties’ and go to the ‘Advanced’ tab to select the sample rate from the ‘Default Format’ dropdown. Click the ‘Levels’ tab and adjust the ‘Microphone’ slider to increase or decrease the input gain.
-1080x1080-6195cfa.jpg)
Note
To access the 32-bit float option for bit depth on Windows machines you’ll need to download and install the ASIO driver, close all other programs and apps, open your DAW, and then select the ‘NT1 5th Gen (Float)’ ASIO Driver from within your DAW settings. For more information on this process, see the following section on “Recording the NT1 5th Generation in 32-bit Float”.
Recording With the NT1 5th Generation in 32-bit Float
The NT1 5th Generation is capable of recording 32-bit float audio, meaning you can capture audio at any level without ever having to worry about your audio clipping or distortion. Recording in 32-bit float allows you to lower the level of ‘clipped’ audio to restore it or increase the level of quiet audio without increasing the noise floor after the audio has been captured.
On a Mac computer, you can set your sample rate and 32-bit float bit depth in the Audio MIDI Setup, then open your DAW and match the project and device settings to this bit depth and sample rate, and start recording. On a Windows computer, you will need to install the ASIO driver (see above for more information), close all other programs, open your DAW, and then select the ASIO driver as your audio device within your DAW of choice.
The process for recording in 32-bit float differs between DAWs. See below for step-by-step walkthrough guides for popular DAWs that support 32-bit float recording.
Note
Not all DAWs support 32-bit float recording, such as GarageBand, and some DAWs don’t support ASIO drivers at all, such as Audacity. If your DAW isn’t in this list and it does support 32-bit float, reach out to info@rode.com
Connecting Multiple NT1 5th Generation Microphones via USB
On Mac
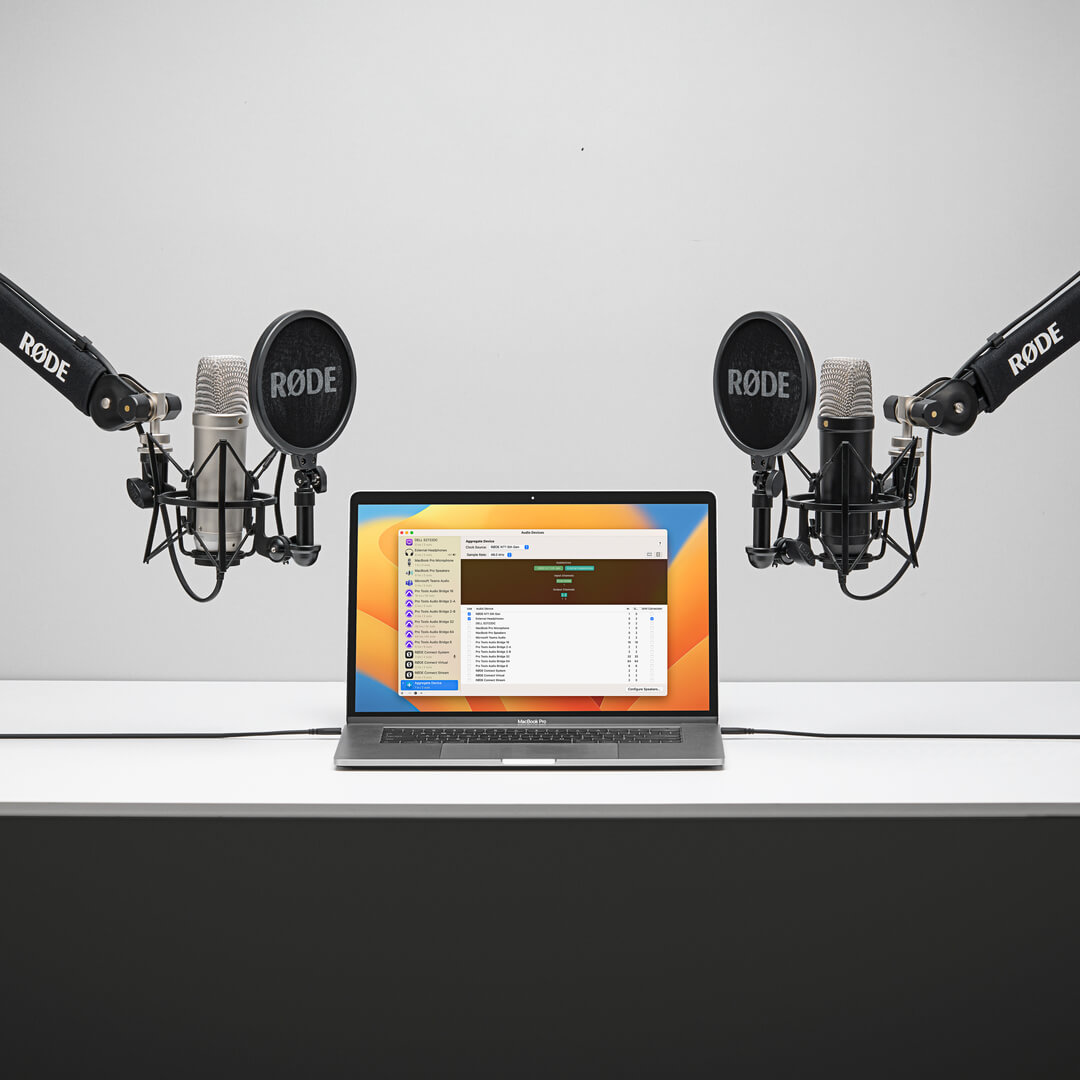
On macOS devices, it’s possible to create an aggregate device that can combine up to eight NT1 5th Generation microphones into a single, multi-channel virtual device. This can then be used in your DAW to capture and record audio from all microphones at once on separate tracks.
- Navigate to ‘Applications’ > ‘Utilities’ > ‘Audio MIDI Setup’
- Click the Add (‘+’) button at the bottom-left of the window and select ‘Create Aggregate Device’
- Select the new ‘Aggregate Device’ in the sidebar and select the USB devices you wish to include with the ‘Use’ tickboxes. In this case, it will be all of the “RØDE NT1 5th Gen” items you see. The order in which these devices are selected will determine the channel number they’re assigned (channel 1, 2, 3, etc)
- You can adjust the sample rate, bit depth and input gain of each microphone individually by selecting them in the sidebar and adjusting their settings
- In your DAW, select this aggregate device as the input device for all of your audio tracks, and for each track select a different channel (i.e. channels 1, 2, 3, etc will all be on different tracks)
On Windows
To use multiple NT1 5th Generation microphones via USB at once on Windows, you’ll need to first install the ASIO driver. Close all other programs, open your DAW of choice, and then select ‘ASIO’ as your audio device or driver type within your DAW settings, and then select either ‘NT1 5th Gen’ or ‘NT1 5th Gen (float)’ as your ASIO driver. From here, each of your connected NT1 5th Generation microphones will show up as separate inputs, and you can record them to separate channels just as you would with a multichannel audio interface.
Note
You can also use RØDE Connect to quickly and easily connect up to four NT1 5th Generation microphones to a single computer (see below).
Using with RØDE Connect
Download and install RØDE Connect to access extra features for your microphone, including advanced audio processing and the ability to connect up to four NT1 5th Generation or other RØDE USB microphones to a computer simultaneously.
- Ensure your microphone is connected to your computer via USB and open RØDE Connect
- Click and drag the NT1 5th Generation from the ‘Available Microphones’ section to one of the four microphone spaces in the top row (if it doesn’t show up there by default) and click ‘Next’
- Configure your virtual channels (if required) by dragging them to their desired spaces and click ‘Next’
- Click ‘Finish’ to exit the setup assistant (you can access the assistant again whenever you want by selecting the three-dot icon next to the RØDE logo)
- Click on the menu in the top-right of RØDE Connect and navigate to ‘Preferences’. From here, select the output you’re using under ‘Monitor Out’ (for instance, ‘External Headphones’) and also select ‘Microphones Included’ under ‘Monitor Mix’.
- Click the channel number for the NT1 5th Generation (e.g. the ‘1’ with the pink coloured tag) to view its configuration settings
Here, you can adjust the microphone’s input gain, adjust the VoxLab™ processing (including Depth Sparkle and Punch), and access granular control over advanced processing, including a noise gate, compressor, high-pass filter and the legendary APHEX® Aural Exciter™ and Big Bottom™ processors.
Check out the RØDE Connect user guide for more details on how to use the software for recording podcasts and streaming.
RØDE Connect will automatically prompt you to update your NT1 5th Generation firmware when you run the software with the microphone connected and an update is available.
-1080x1080-0f8b138.jpg)
Note
To make use of audio processing, you'll need to select a 48kHz sample rate and 24-bit bit depth for your NT1 5th Generation's digital (USB) output.
Using with RØDE Central
RØDE Central is a companion app for a range of RØDE products and can be used to update your NT1 5th Generation firmware as well as adjust the microphone’s input gain, adjust the VoxLab™ processing (including Depth, Sparkle and Punch), and access granular control over advanced processing, including a noise gate, compressor, high-pass filter and the legendary APHEX® Aural Exciter™ and Big Bottom™ processors.
When the processing settings are enabled via RØDE Central, these settings persist in the NT1 5th Generation, meaning you can close the app and use the microphone with your DAW or other recording applications with these effects enabled.
-1080x1080-313e3a9.jpg)
Note
To make use of audio processing, you'll need to select a 48kHz sample rate and 24-bit bit depth for your NT1 5th Generation's digital (USB) output.