Using Timecode on the C300 Mark III and C500 Mark II with Wireless PRO
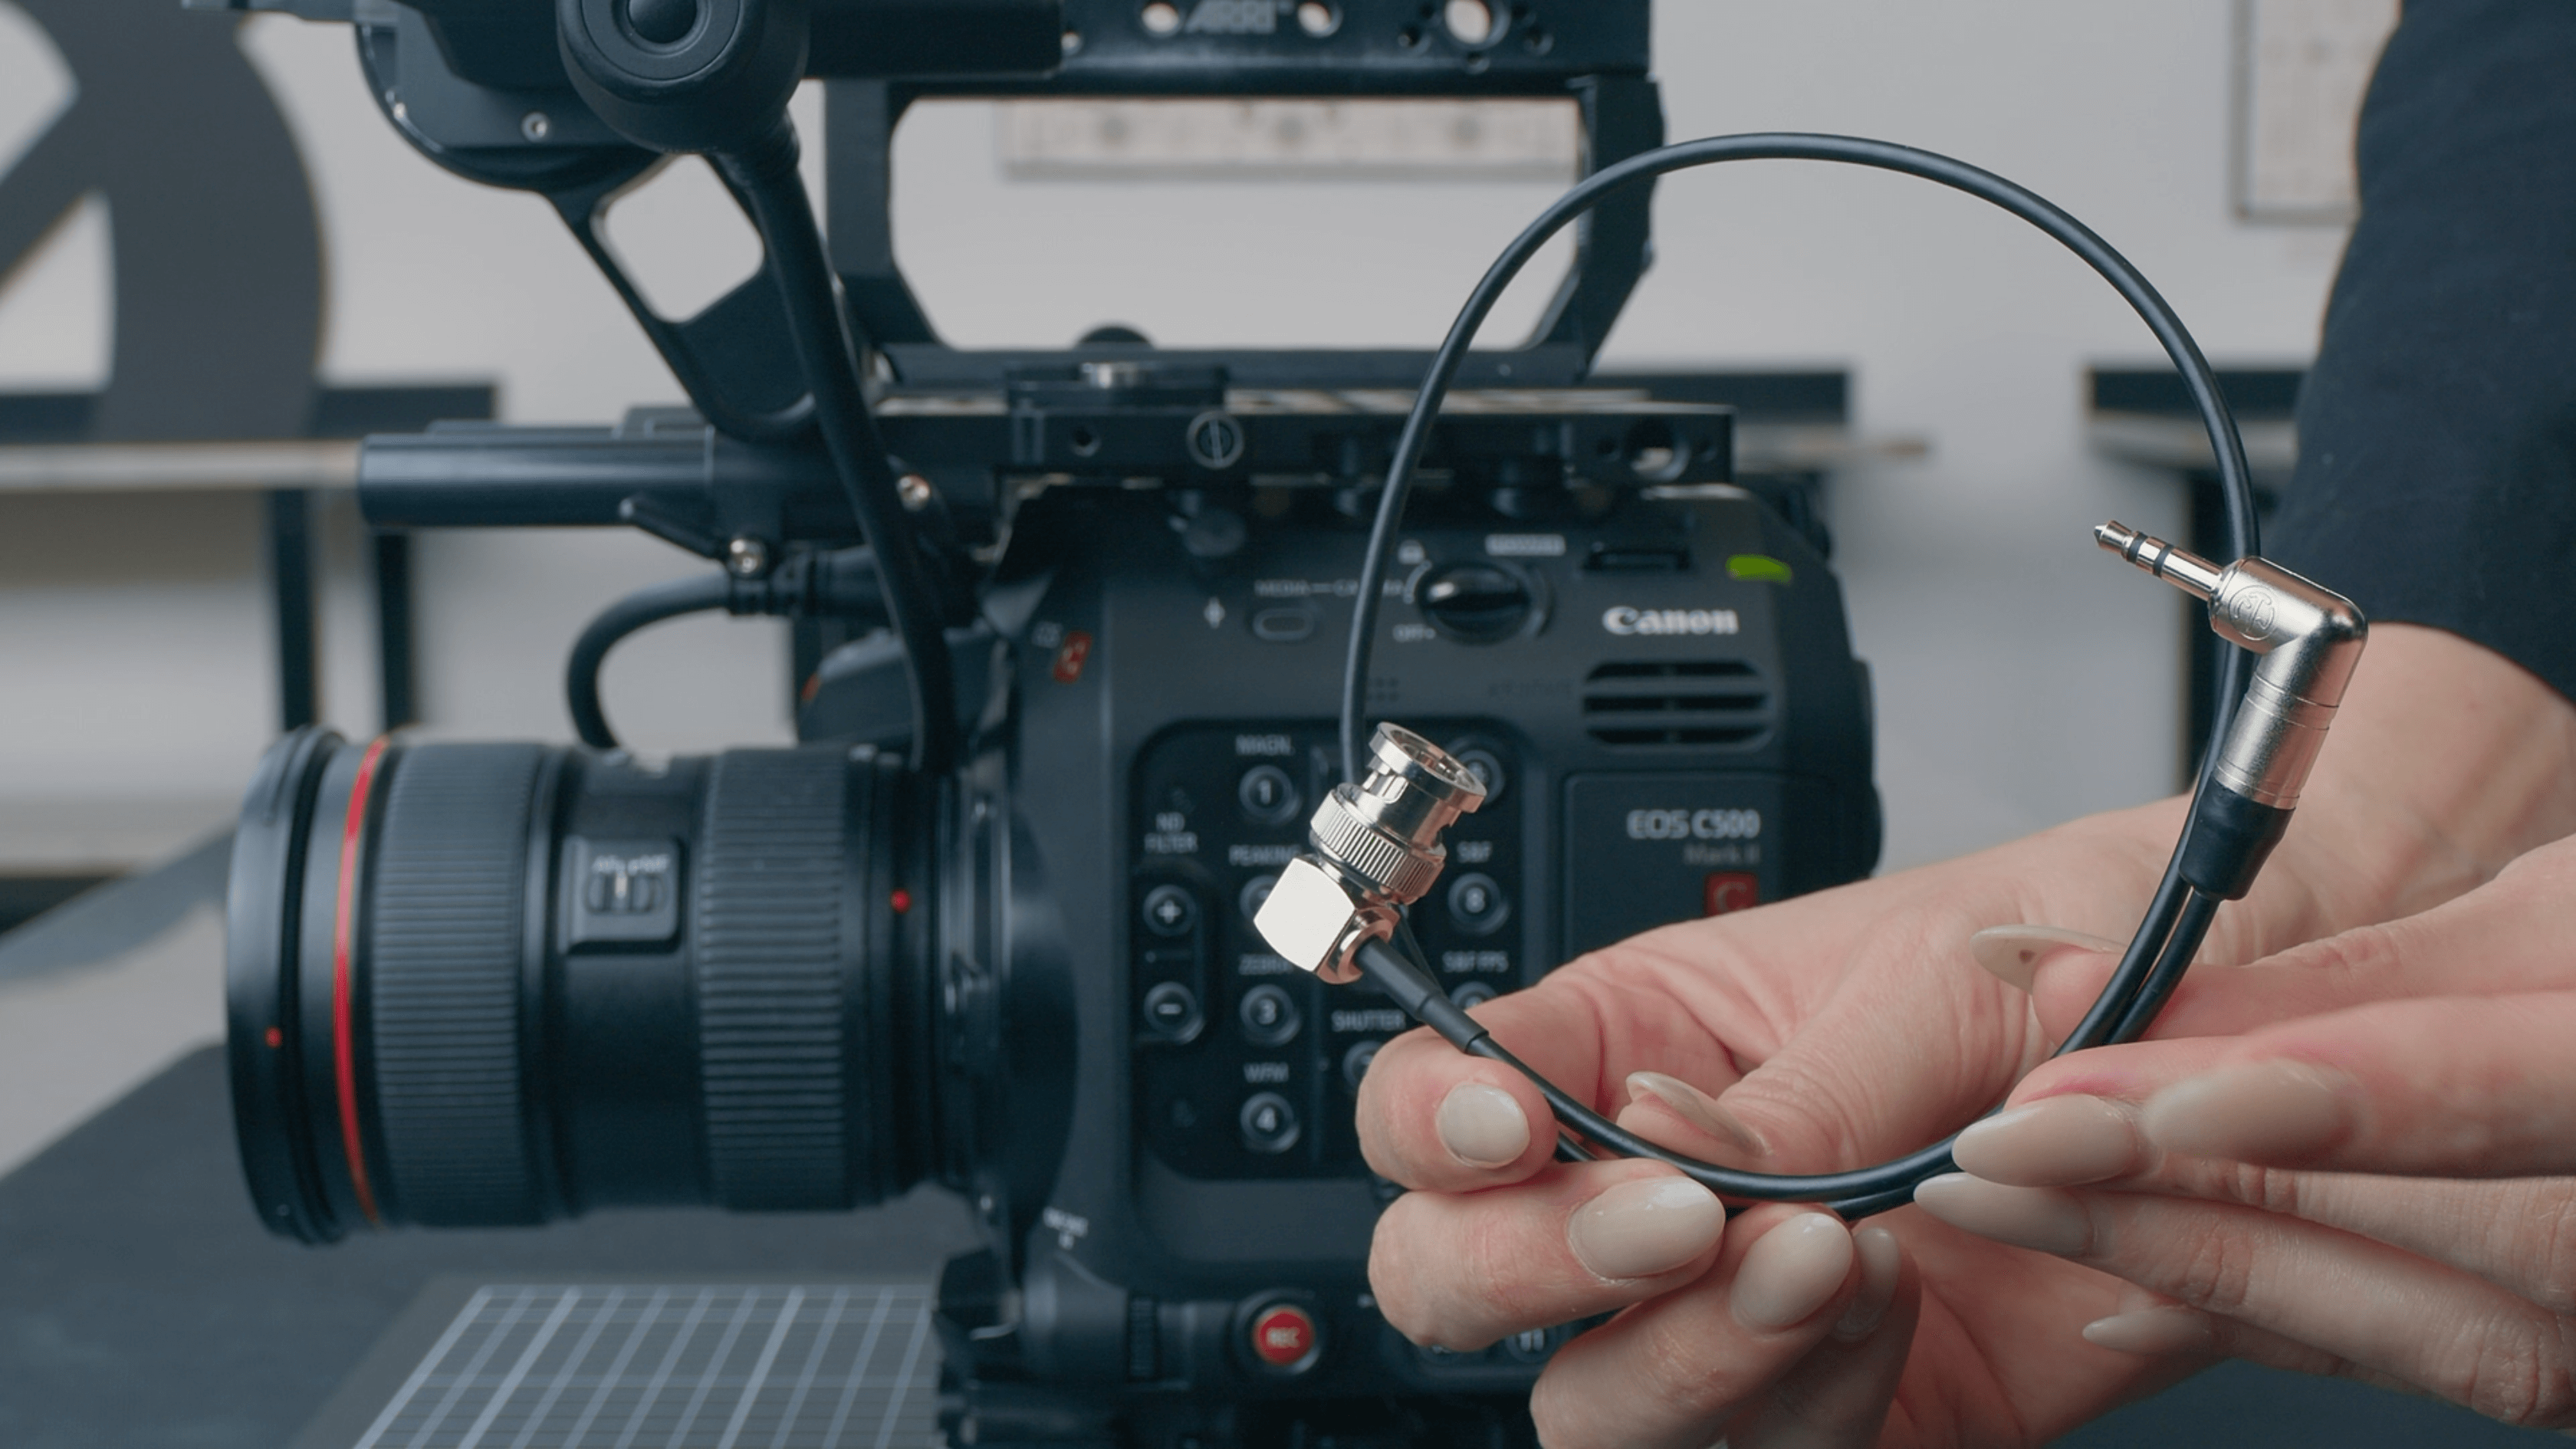
In this article, we’ll walk you through how to set up timecode on your C300 Mark III or C500 Mark II with the Wireless PRO. You will need a 3.5mm-to-BNC adaptor cable to record timecode to the C300 or C500.
Step 1
Connect your Wireless PRO receiver to a computer or phone running RØDE Central.
Step 2
Enable timecode and select the framerate you’re shooting in. Toggle ‘Real time’ on or off, depending on which format you’d like your timecode to appear in, then click ‘Timecode Modes’, choose ‘Timecode 5’ and click ‘Apply’. Check that the output gain is set to 0dB to ensure your camera detects the timecode signal.

Step 3
Ensure your camera’s framerate matches the one you just set for your timecode.
Step 4
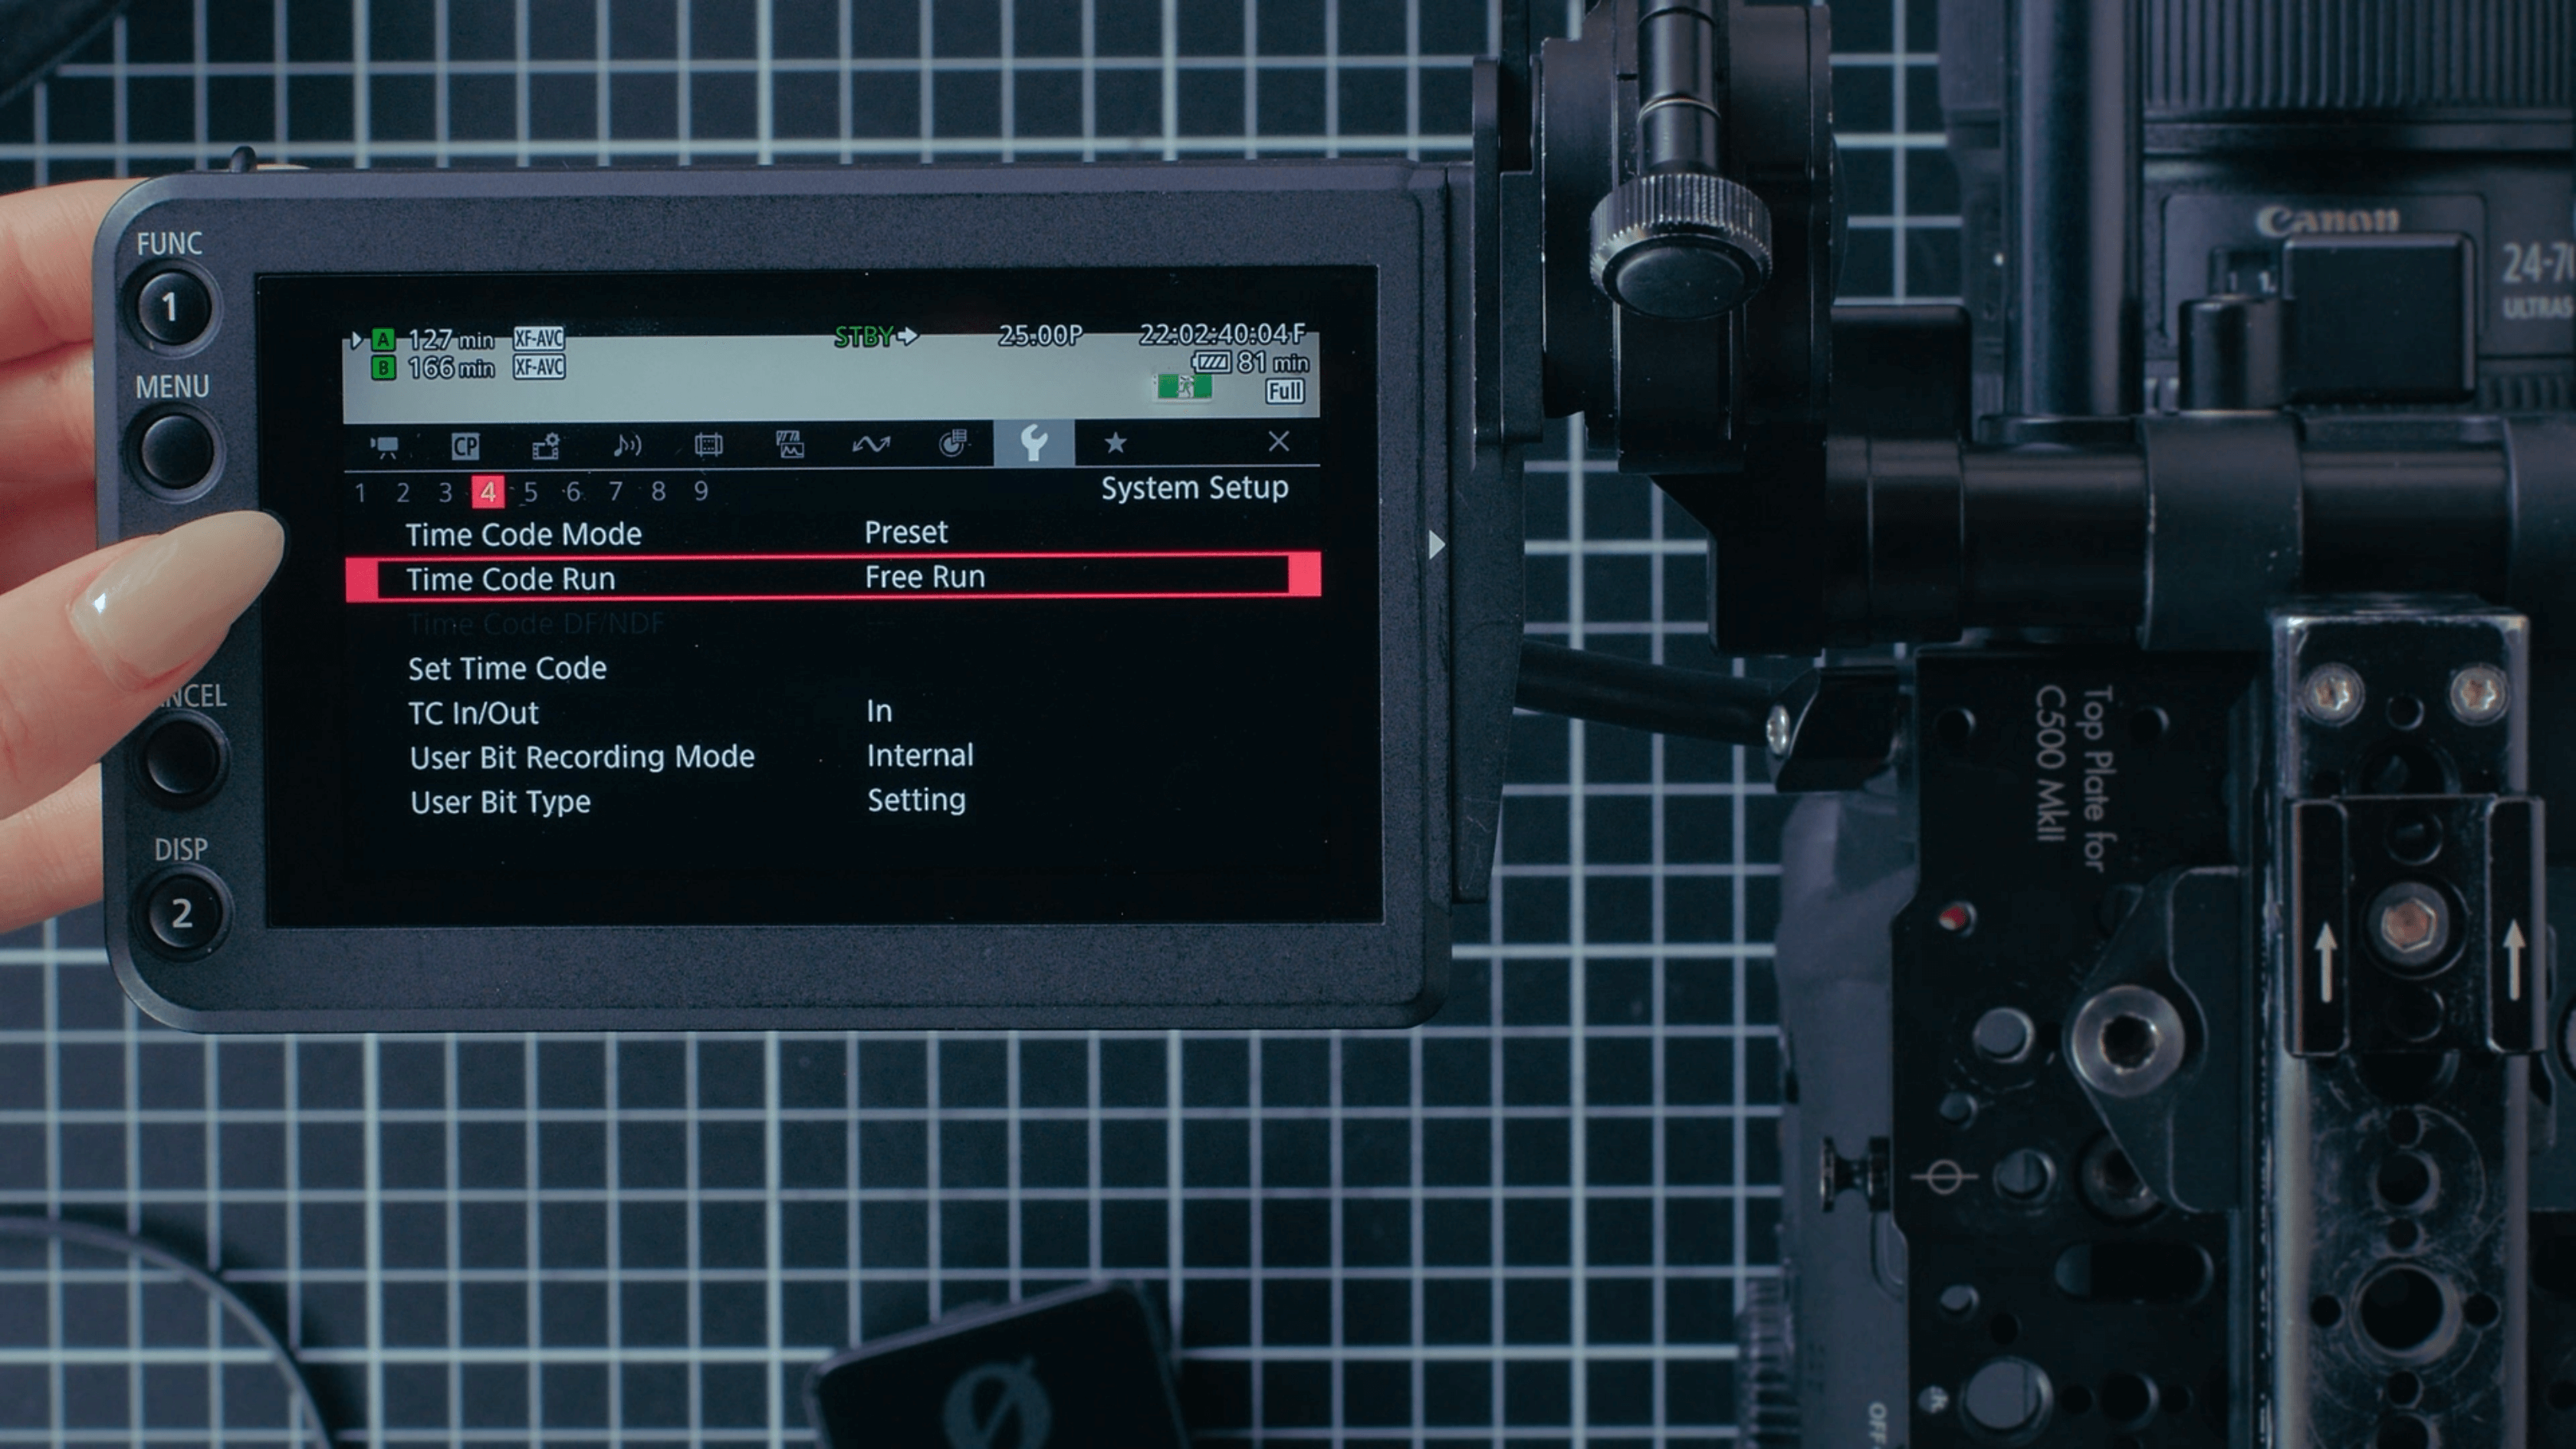
Go to page four of the ‘System Setup’ menu and, under ‘TC In Out’, select ‘In’.
Step 5
In the same page of the ‘System Setup’ menu, under ‘Time Code Run’, select ‘Free Run’.
Step 6
Return to the viewfinder screen and connect the Wireless PRO to the camera’s BNC port (labelled “TIMECODE”) using the 3.5mm-to-BNC adaptor cable.
As soon as it’s connected, you will see the timecode on your camera jump to match the timecode set by the Wireless PRO and your camera will now be recording timecode to the metadata of its video files. You can follow our guides linked in the description for how to use your editing software to synchronise your footage using timecode in post-production.
Check out our user guide for more information on Using Timecode with the Wireless PRO.