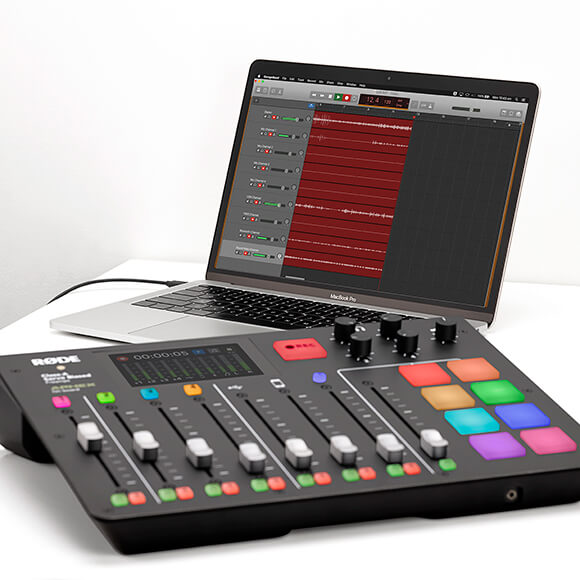
Recording to a Computer via USB
The RØDECaster Pro offers a variety of recording options to suit any podcaster. You can choose to record directly to the microSD card, but for even greater flexibility, you also have the option to record to a computer via USB. This can be especially handy if you need to mix your podcast, polish it with extra signal processing, or add in extra audio or entirely new segments in post-production.
Connecting to your Computer
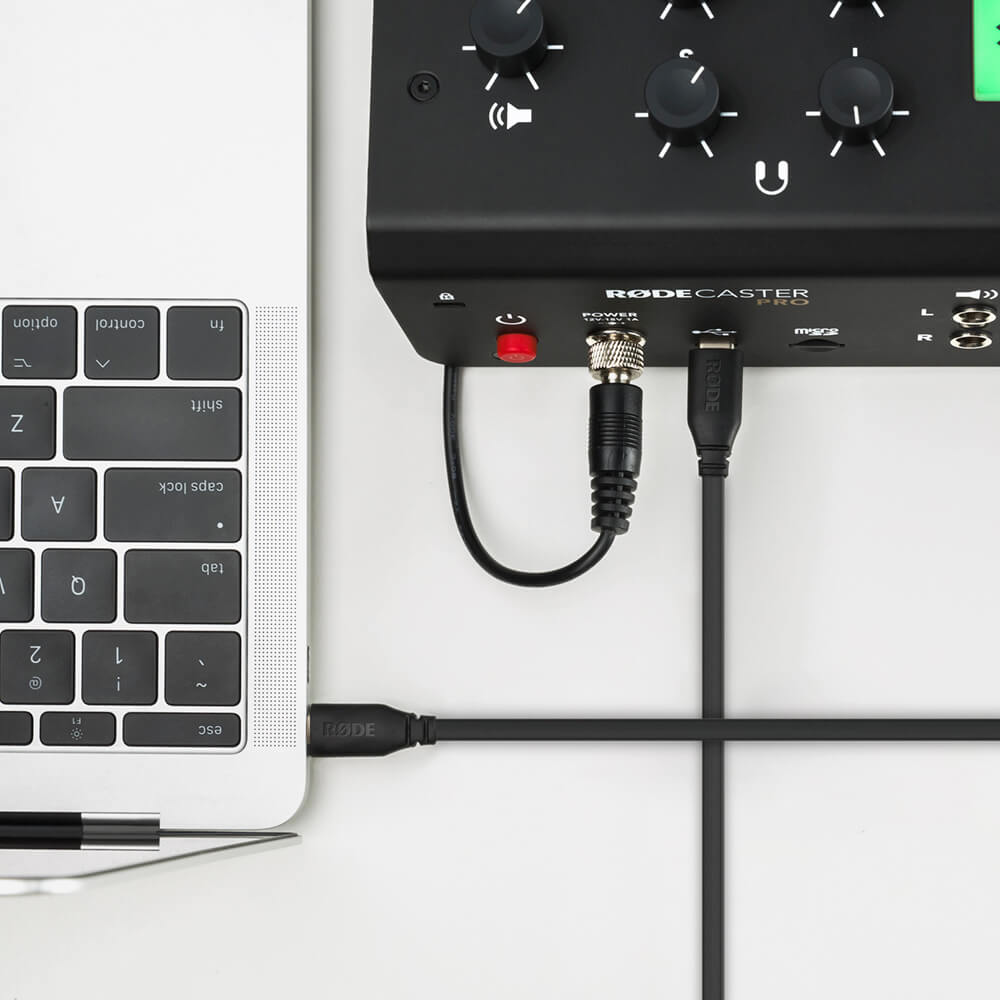
The RØDECaster Pro can be connected to either a Mac or Windows computer using the included USB-C to USB-A cable. First, plug the USB-C end into the back of the RØDECaster Pro, then plug the USB-A end into your computer.
Pro Tip
If your computer or laptop has a USB-C connector, the SC17 cable can be used to connect your RØDECaster Pro to the computer.
Recording in Stereo to Computer via USB
Once connected, the RØDECaster Pro will appear as an audio device in the sound settings on your computer. Selecting ‘RODECaster Pro Stereo’ as your input and output device will establish an audio connection between the RØDECaster Pro and your computer. Remember, you can use this set up to integrate online guests into your podcast via Zoom or any communications app. Learn more about connecting online guests and callers here.
In order to record the audio to your computer, you will need to download and use a digital audio workstation (DAW). You can use the RØDECaster Pro with any DAW – we have extensively tested it with Audition, GarageBand, Logic Pro X, ProTools and Reaper, so we recommend using one of these DAWs. Now that you have your DAW set up on your computer, you’ll need to route the incoming audio from the RØDECaster Pro to the correct place.
Note
Depending on the kind of DAW you are using, the set-up and recording process may differ slightly. For the sake of simplicity, we’ll be using GarageBand for this demonstration. See the downloads section below for step-by-step walkthroughs on some of the other popular DAWs.
1.
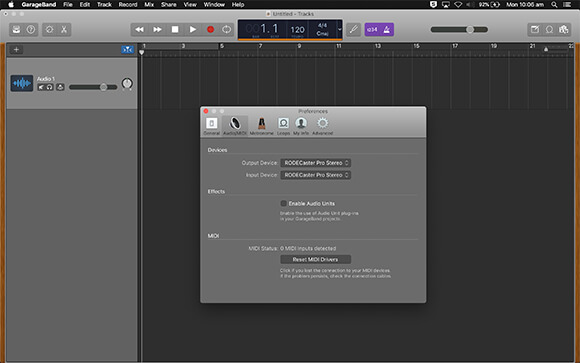
Open a new session in GarageBand, go to ‘Preferences’ or ‘Session Settings’ and set the input device to ‘RODECaster Pro Stereo’.
2.
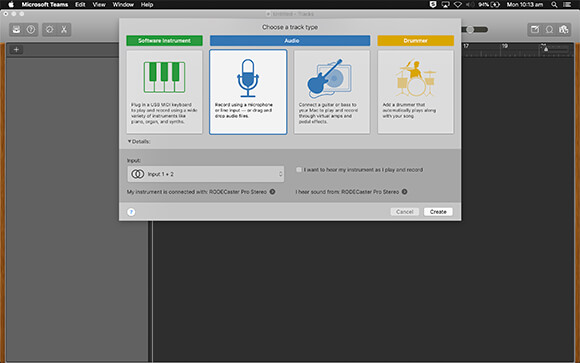
Create a new stereo track using inputs 1-2. These are the left and right channels of your RØDECaster Pro’s main stereo mix. You can rename this stereo track ‘RØDECaster Pro’.
Pro Tip
When recording into most DAWs, it’s good practice to mute the outputs of the tracks you’re recording into. This will avoid any chance of feedback loops while playing back audio through speakers or headphones.
3.
You can now turn on record enable in your track header by right clicking the track header, selecting ‘Configure Track Header’ and ‘Record Enable’. Now you can record enable your tracks and hit record. You are now recording in real-time to your DAW!
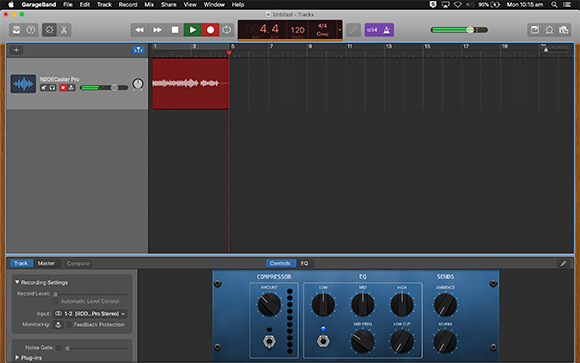
4.
If you would like to play back the recorded audio from GarageBand, simply slide up the USB channel fader, switch off record enable on each track and hit play. If you’re using other DAWs, you might also need to set the output of each tracks to ‘RODECaster Pro Stereo’ individually.
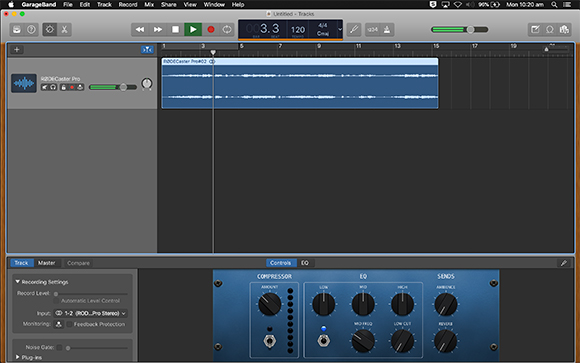
Recording to a DAW will not stop you from recording to a microSD card in your RØDECaster Pro. As a backup, your podcast can be recorded simultaneously on both microSD card and your DAW. To do this, simply tap the record button on your RØDECaster Pro at the same time as you begin recording in your DAW.
Keep in mind that when recording via USB to a computer in its default ‘Stereo’ mode, using communications apps on the USB channel like Skype or Zoom won't be ideal as the function that is used to avoid feedback and echo in comms app (USB mix-minus) will effectively cancel all audio on the USB channel when switched on. If you wanted to record all channels via USB including comms applications on the USB channel, the RØDECaster Pro has an extremely powerful multitrack mode that can allow for even more expansion and options.
Recording Multitrack to Computer via USB
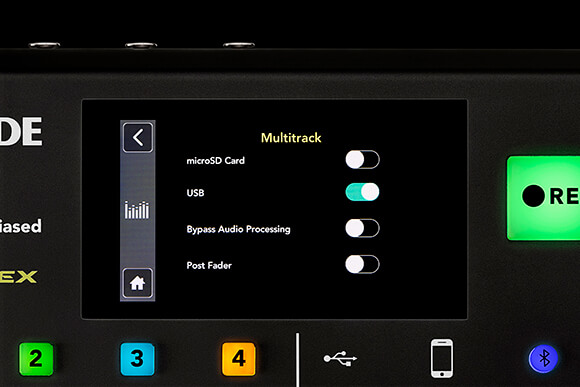
In its default mode, the RØDECaster Pro will output a stereo podcast to the connected USB device, but you also have the option to record in multitrack. When ‘Multitrack to USB’ is switched on, each channel on your RØDECaster Pro can be recorded onto its own track in your DAW, opening up infinite editing and mixing possibilities in post-production. First you will need to switch on multitrack recording via USB by going to 'Settings’ > ‘Advanced’ > ‘Audio’ > ‘Multitrack’ and tapping on ‘USB’.
Doing this will output the complete stereo mix of your podcast, plus every single channel on the RØDECaster Pro in individual tracks. This includes mono tracks for the microphone channels, plus stereo tracks for the main output, USB, smartphone, Bluetooth and sound pad channels – a maximum of 14 tracks in total.
Each track from the RØDECaster Pro can be assigned to a separate input in your DAW, starting with the complete stereo mix (Input 1 and 2) then going across the console from the microphone channels (Inputs 3-6) to the USB channel (Input 7 and 8), the smartphone channel (Input 9 and 10), the Bluetooth channel (Input 11 and 12) and the sound pads (Inputs 13 and 14). Use the chart below to keep track of your channels and their assigned input numbers.
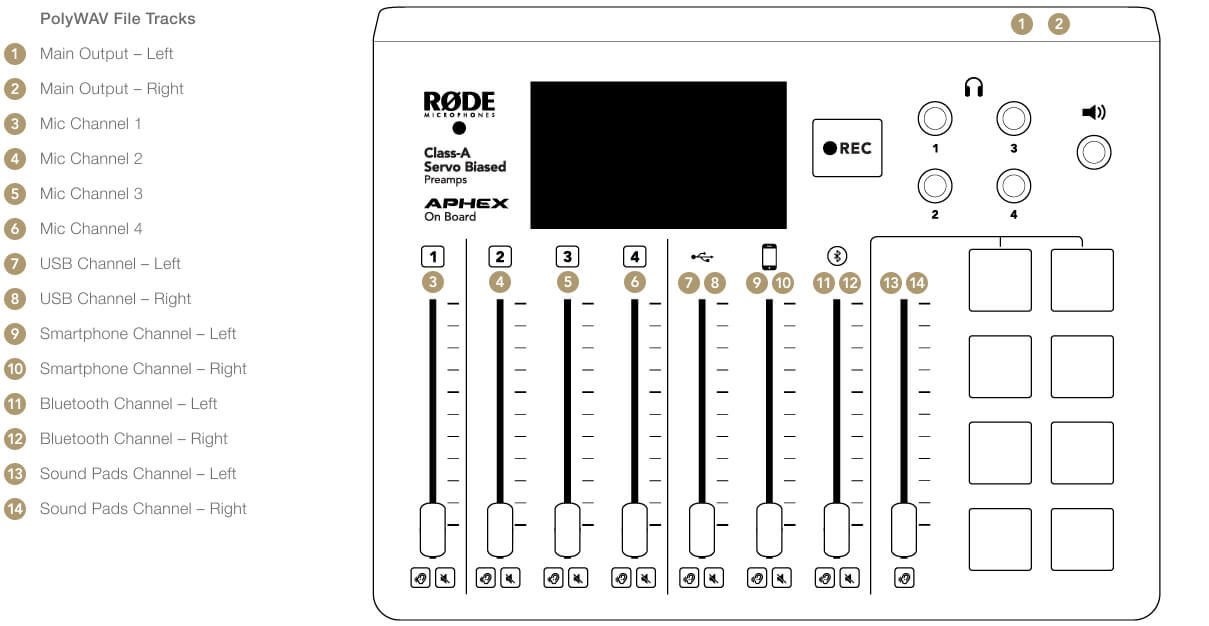
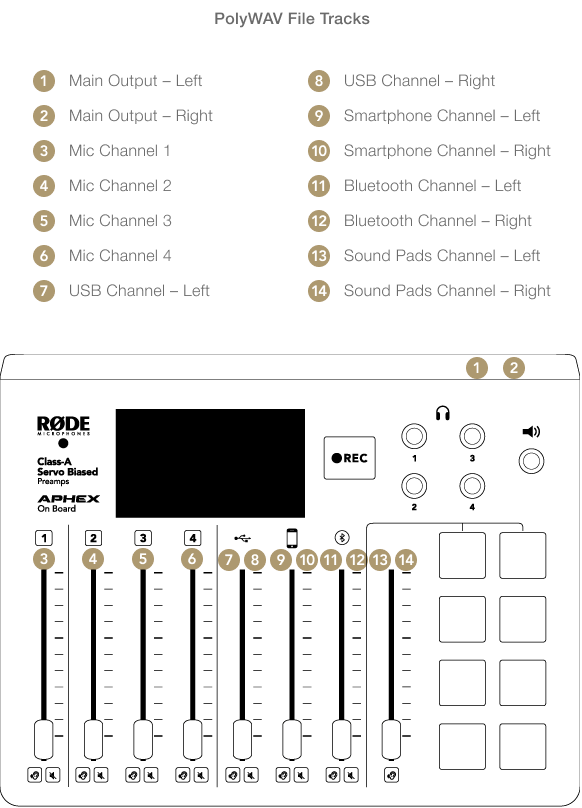
Setting up a multitrack session in your DAW will be slightly different depending on your operating system and the software you’re using. Most common DAWs are simple to set up and use, but others will be a bit more complex.
In your DAW, select ‘RODECaster Pro Multichannel’ as your input device. Note that this is a different input device to ‘RODECaster Pro Stereo’, which you may have used previously.
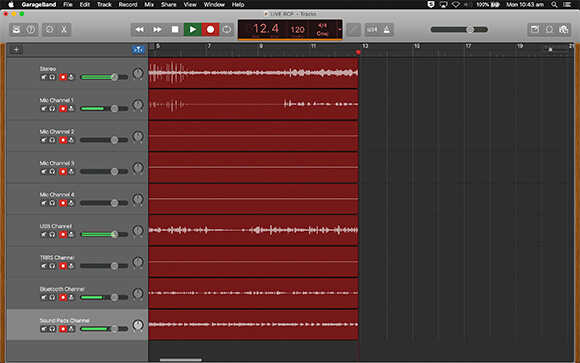
Next, create 14 new mono tracks in your DAW (alternatively, you can create five stereo tracks and four mono tracks if the DAW you are using supports stereo-linked tracks), then assign the inputs from each channel of the RØDECaster Pro to its corresponding track in your DAW and label them accordingly (for example: ‘stereo mix’, ‘mic channel 1’, ‘mic channel 2’ etc).
Pro Tip
Even if you aren’t using every channel on your RØDECaster Pro, it’s a good idea to set up your multitrack session with all 14 (or nine) tracks as a visual reference that corresponds to the layout of the console. You can also save this configuration in your DAW for a quick and easy set up in future.
Once each channel from the RØDECaster Pro has been routed to an individual track within your DAW, mute the outputs, record enable each track that you want to capture and hit record.
For a more in-depth walkthrough for setting up multitrack sessions in popular DAWs, including GarageBand, Reaper and ProTools, see the links below.
RØDECaster Pro ASIO Drivers
To download the new ASIO driver for Windows, click the link below:
RØDECaster Pro Windows ASIO Driver.zip
For help setting up and using the ASIO Driver for the RØDECaster Pro, see the walkthrough below:
Installing and Using the RØDECaster Pro Windows ASIO Driver.pdf
If you are having any other trouble with recording to a DAW, contact us and we’ll be happy to help.
Pro Tip
With the USB output set to multitrack, you can still use the USB channel to speak to remote callers on Skype or Zoom while simultaneously recording in multitrack via USB. You will just need to make sure you set the input and output on the communications app to ‘RODECaster Pro Stereo’. Setting it to ‘RODECaster Pro Multichannel’ will result in a distracting feedback loop for your guest.
Recording to Both MicroSD Card and a DAW
The RØDECaster Pro is capable of recording in multitrack to a microSD and a DAW via USB simultaneously. Simply select ‘microSD Card’ as well as ‘USB’ in the multitrack advanced settings. This is handy for ensuring you have a backup of your podcast in case your computer crashes. You could even record a stereo mix of your podcast to microSD card while recording in multitrack to a DAW (or vice versa).
If you want your multitrack recording to include all of the processing from your RØDECaster Pro, as well as the fader positions, make sure you have ‘Post-Fader Mode’ engaged. To do this, navigate to the ‘Multitrack’ menu by going to ‘Settings’ > ‘Advanced’ > ‘Audio’ > ‘Multitrack’, then switch on the ‘Post Fader’ option.
If you want your multitrack recording to be completely clean, with no effects, processing or level settings applied, turn off ‘Post Fader Mode’. This will give you a completely clean slate to work from in post-production.
To learn more about recording pre and post-fader, check out the section on recording to microSD card.
