비디오 전환 및 자동 전환
비디오 전환이란 무엇인가요?
비디오 전환은 여러 가지 방식으로 설명할 수 있지만, 핵심은 시청자에게 표시되는 내용을 정확하게 제어하기 위해 서로 다른 비디오 피드 간에 전환하는 프로세스입니다. 이 기능은 라이브 스트리밍 및 방송 시나리오에서 매우 유용하지만 강력한 '라이브' 편집 도구이기도 합니다.
프로덕션에서 다양한 카메라 앵글을 사용해 시청자에게 더욱 역동적이고 매력적인 경험을 제공할 수 있으며, 언제든지 시청자에게 가장 관련성 높은 비주얼을 보여주는 데 이상적입니다.
비디오 전환을 잘 이용하면 쇼에 그래픽, 이미지, 동영상 및 기타 미디어를 추가할 수도 있습니다. 화면 속 화면(PIP), 화면 분할 또는 기타 레이아웃을 사용해 여러 개의 동영상 피드를 한 번에 표시할 수도 있습니다.
RØDECaster Video를 사용해 비디오 입력, 씬, 미디어를 전환하려면 Input 버튼(1~6), Scene 버튼(A~G), Media 및 Overlay 기능 버튼을 사용할 수 있습니다.
프레임 레이트
RØDECaster Video의 글로벌 프레임 레이트는 스트림, 레코딩, HDMI A 및 HDMI B 출력의 프레임 레이트를 결정합니다. 최상의 결과를 위해서는 프로젝트 전체에 한 가지 프레임 속도만을 선택하고, 모든 카메라와 기타 비디오 장치가 이 프레임 속도로 출력하도록 설정하는 것이 중요합니다.
RØDECaster Video에서 글로벌 프레임 레이트를 설정하려면 설정 톱니바퀴를 탭하고 Video > Frame Rate로 이동한 다음, 인코더로 원하는 항목을 선택합니다.
프레임 레이트: 23.98, 24, 25, 29.97, 30, 50, 59.94, 60

인스턴트 및 스튜디오 전환 모드
디오 전환에는 RØDECaster Video와 상호 작용하는 방식을 변경하는 두 가지 전환 모드가 있습니다. 모드를 변경하려면 Settings > Video > Switching으로 이동해 Instant 또는 Studio를 선택하거나, RØDE Central에서 Device Configuration > Video > Switching 화면을 엽니다.
즉시 전환
Instant 모드에서 Input, Scene, Media 또는 Overlay 버튼을 누르면 라이브 프로그램 피드에 즉시 표시됩니다. 'Cut' 버튼을 선택하면 즉시 전환되며, 'Auto' 버튼을 선택하면 전환 설정에 따라 전환이 이루어집니다.
이 모드는 버튼을 한 번만 누르면 전환할 수 있어 두 가지 모드 중 더 즉각적인 모드입니다. 따라서 RØDECaster Video를 조작하면서 동시에 카메라에 출연하는 1인 크리에이터인 경우, 또는 보다 즉각적인 워크플로우를 원할 경우 이상적입니다.
스튜디오 전환
Studio 모드에서 Input, Scene 또는 Media 버튼을 누르면 실시간 프로그램 피드는 변경되지 않은 채 프리뷰 피드로 전송됩니다. 그런 다음 Cut 또는 Auto를 누르면 프리뷰 피드에 있는 모든 내용이 실시간 프로그램 피드로 전송됩니다(즉시 또는 전환 후).
Studio 모드는 방송사에서 가장 일반적으로 사용하는 모드로, 라이브 송출 전에 입력 또는 씬을 미리 볼 수 있어 전담 오퍼레이터가 RØDECaster Video를 제어하는 프로덕션에 더 적합합니다.
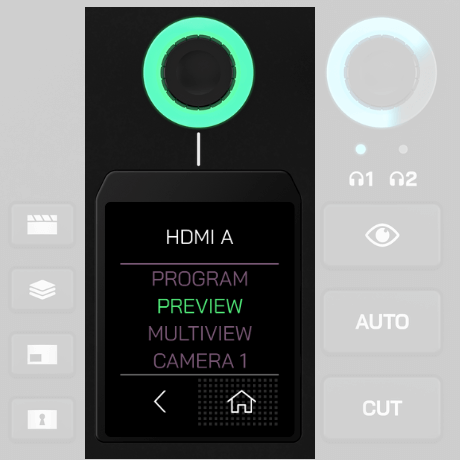
프로그램, 프리뷰 및 멀티뷰 출력
HDMI A 및 B로 전송할 수 있는 비디오 피드 출력에는 세 가지가 있습니다: 프로그램, 프리뷰 및 멀티뷰. Settings > Video에서 HDMI A 또는 HDMI B를 탭하면 이 설정을 조정할 수 있습니다. RØDE Central에서는 Device Configuration > HDMI Output 메뉴에서 이 설정을 찾을 수 있습니다.
프로그램
이것이 메인 프로덕션 또는 '라이브' 비디오 피드입니다. 스트리밍, 레코딩 및 USB 1 출력으로 전송되는 내용을 정확하게 표시합니다.
프리뷰
Studio 모드에서 프리뷰 피드를 사용하면 입력, 씬 또는 미디어가 프로그램 피드로 전송되기 전에 미리보기를 통해 생방송 전에 동영상 소스를 확인하고, 구성하고, 정렬할 수 있습니다. Instant 모드에서는 사용할 수 없는 기능입니다.
멀티뷰
멀티뷰 피드는 모든 동영상 소스, 씬, 미디어 및 그래픽을 한 화면에 배치하여 표시합니다. 또한 레코딩 및 스트리밍 상태, 오디오 믹서, 날짜 및 시간, 실행 시간 등 중요한 장치 정보도 표시합니다.
컷, 오토 및 전환
Cut 및 Auto 버튼은 동영상 피드 간을 전환하는 두 가지 방법을 제공하며, Instant 모드 또는 Studio 모드에 따라 다르게 작동합니다.
컷
Cut이 기본 모드이며, Instant 모드에서는 입력, 미디어 및 씬 간에, Studio 모드에서는 프리뷰 및 프로그램 비디오 피드 간에 즉시 전환할 수 있습니다.
오토
Instant 모드의 Auto는 전환 설정을 사용해 입력, 미디어 또는 씬 간을 전환하며, Studio 모드의 오토는 프리뷰와 프로그램 피드 간을 전환합니다.
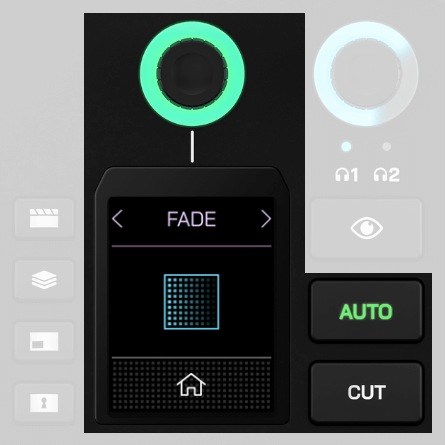
전환 설정
전환 타이밍을 조정하려면 화면의 스톱워치 아이콘을 탭하고 로터리 인코더를 조정한 다음 인코더를 클릭하여 확정합니다. 전환 유형을 변경하려면 스톱워치 왼쪽에 있는 화면 아이콘을 탭한 다음, 인코더로 Fade, Dip 또는 Wipe(후자에는 여러 하위 유형 있음)를 선택합니다.
참고
전환 타이밍은 Fade to Black 버튼을 누를 때 전환하는 데 걸리는 시간도 결정하게 됩니다.
Auto-Switching
The RØDECaster Video S features unique and innovative auto-switching technology that automatically switches between inputs and scenes to simulate an organic switching process, based on when it detects audio on a particular channel. For instance, it can be used to switch between shots of the interviewer and interviewee as each person talks in a video podcast.
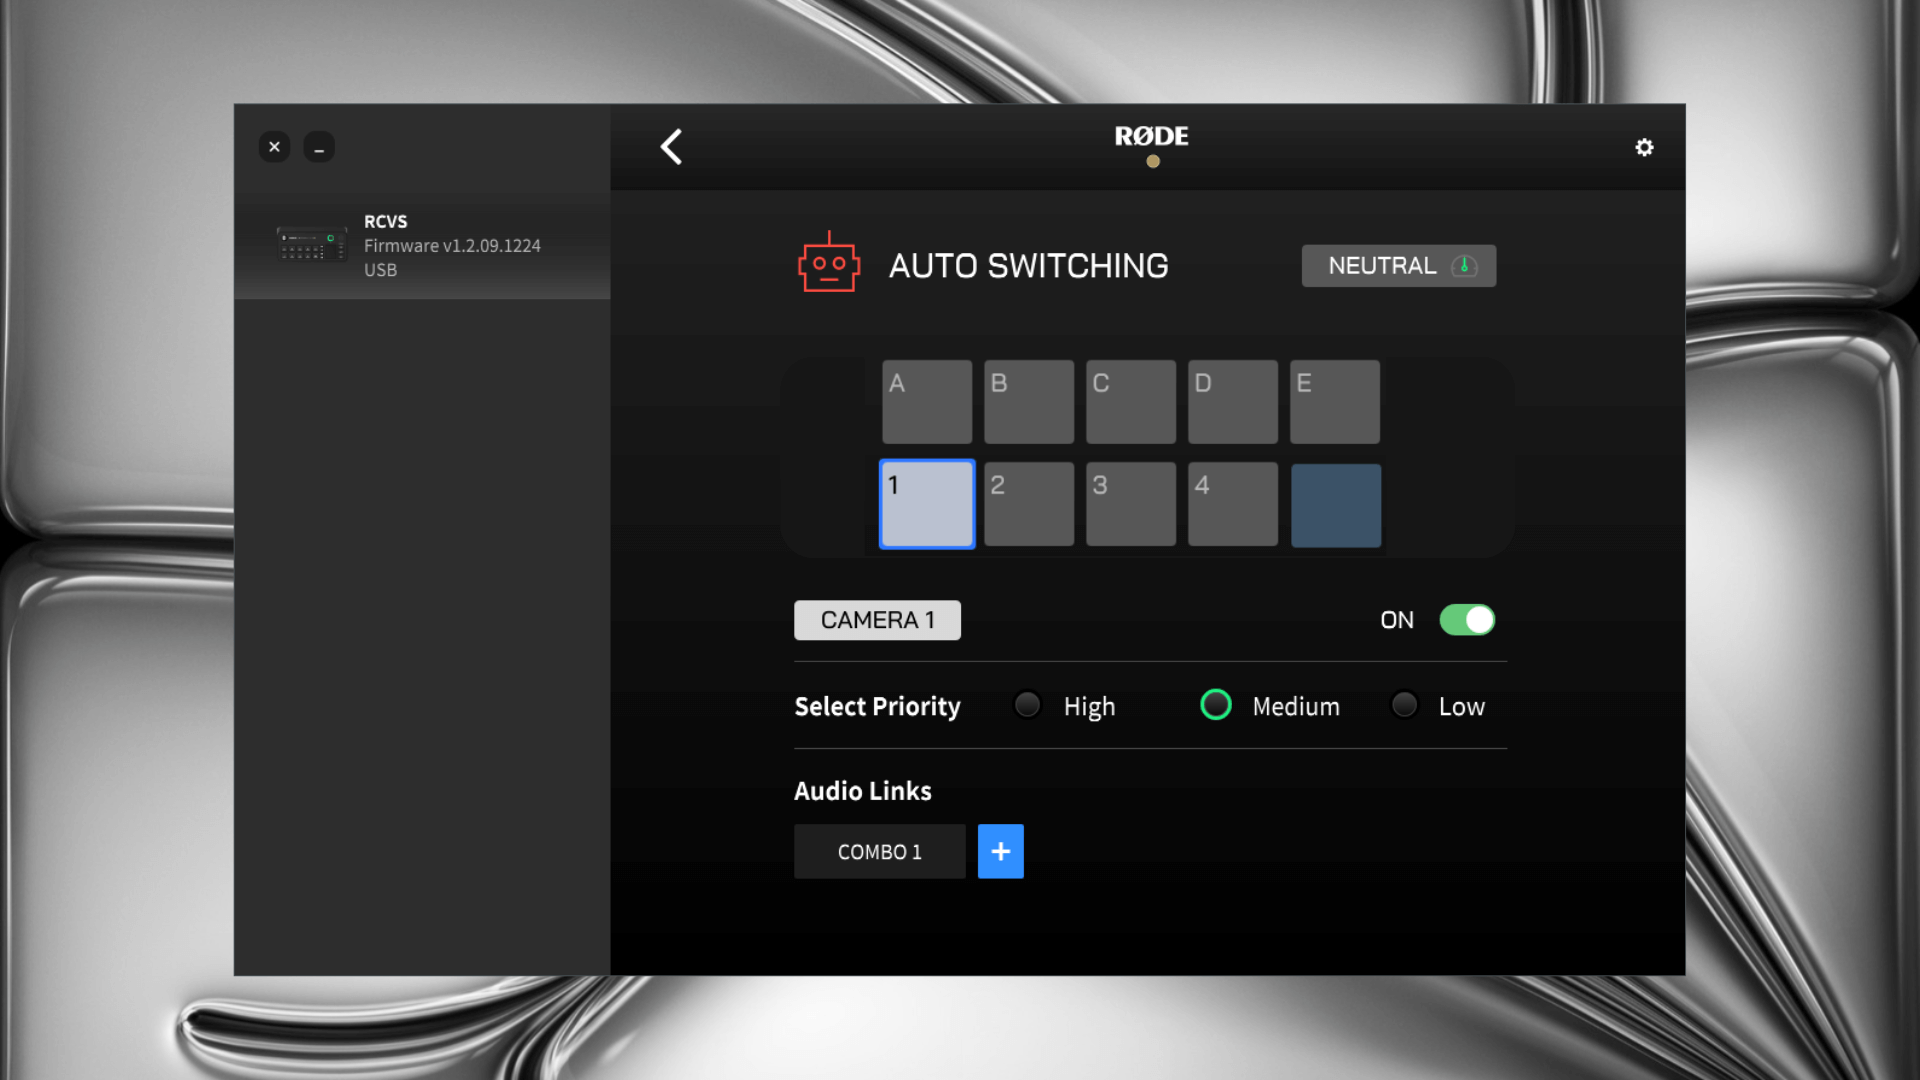
RØDECaster App
To set up auto-switching, make sure your RØDECaster Video S is connected to the same network as your computer (or directly to it via USB 1), open the RØDECaster App and open the auto switching menu.
Inputs and Scenes
With the auto-switching menu in the RØDECaster App, select one of the Input Buttons (1-4) or Scene Buttons (A-E) to link to an audio source and toggle the setting ‘On’.
Priorities
You can select a priority (low, medium or high) for each input or scene. The higher the priority, the more time an input or scene will be given in the overall production. For instance, with a video podcast or interview, you can set the close-up shots on each speaker as a higher priority than a wide-angle shot of the full conversation.
Audio Links
Click the ‘+’ button under the Audio Links section and you can assign one or more audio inputs to the currently selected input or scene button. Assigning more than one audio input is ideal for camera angles that include multiple microphones (and speakers) in a single shot, allowing your production to dynamically follow the conversation.
Linking a RØDECaster Pro II or Duo
The auto switching feature can be linked to audio channels on the RØDECaster Pro II or RØDECaster Duo. Connect your RØDECaster Pro II or Duo USB 2 port to the RØDECaster Video S USB 4 port. This is the same processes for passing audio between devices. Once connected, your RØDECaster Pro II or Duo audio channels will appear as options when linking audio.
Relaxed, Neutral or Fast
In the top-right of the Auto Switching menu, you can toggle between Relaxed, Neutral and Fast. These options allow you to tailor the feature to better suit the pacing of your show – if you find that it’s switching too frequently, or not frequently enough, this is how you can fine tune it.
Enabling Auto-Switching
Once you've set up your auto-switching using the RØDECaster App, press-and-hold the 'Auto' button on the RØDECaster Video S to enable auto-switching mode. Pressing any of the input or scene buttons will exit this mode and return you to manual operation – much like cruise control in a car.