

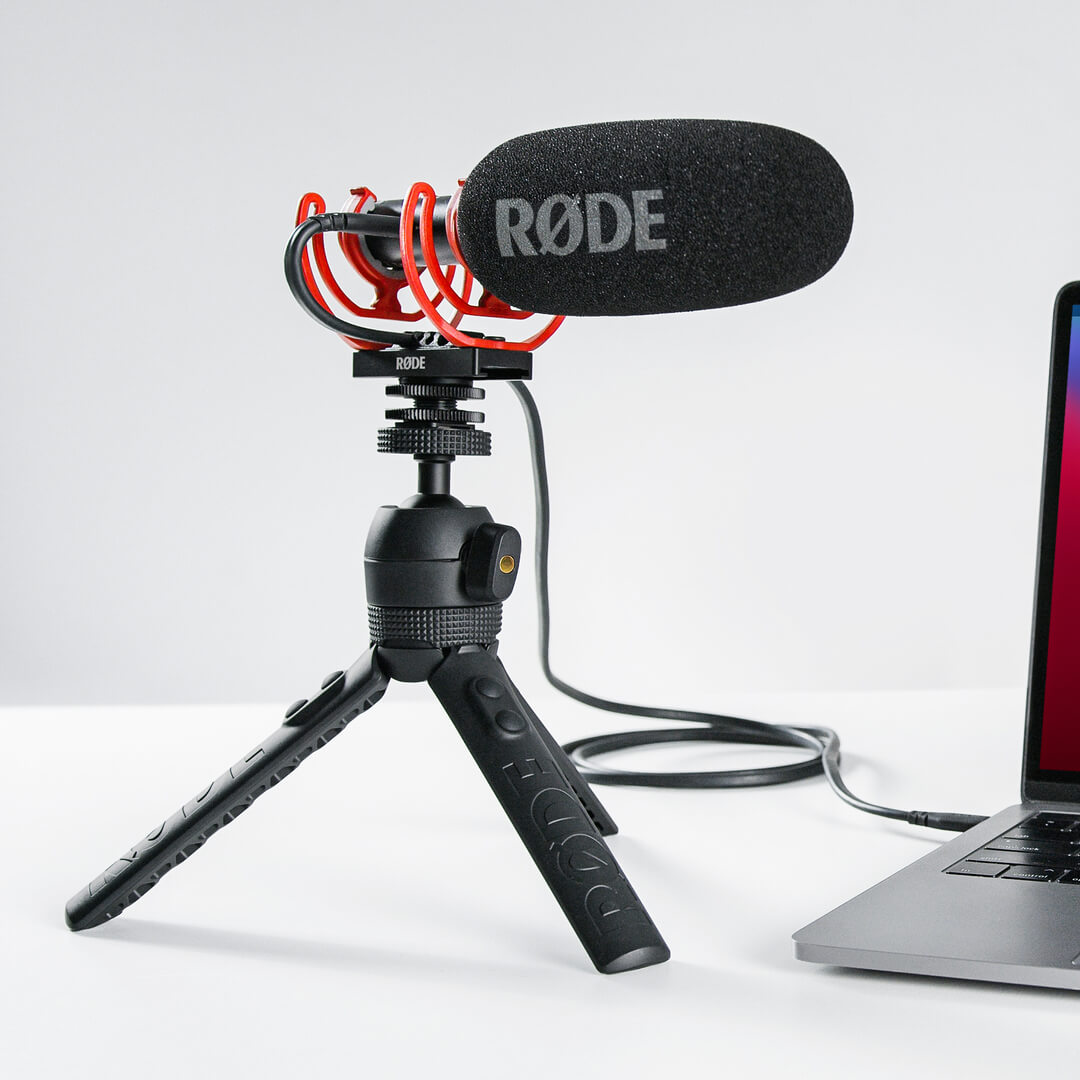
VideoMic NTG
On-Camera Shotgun Microphone
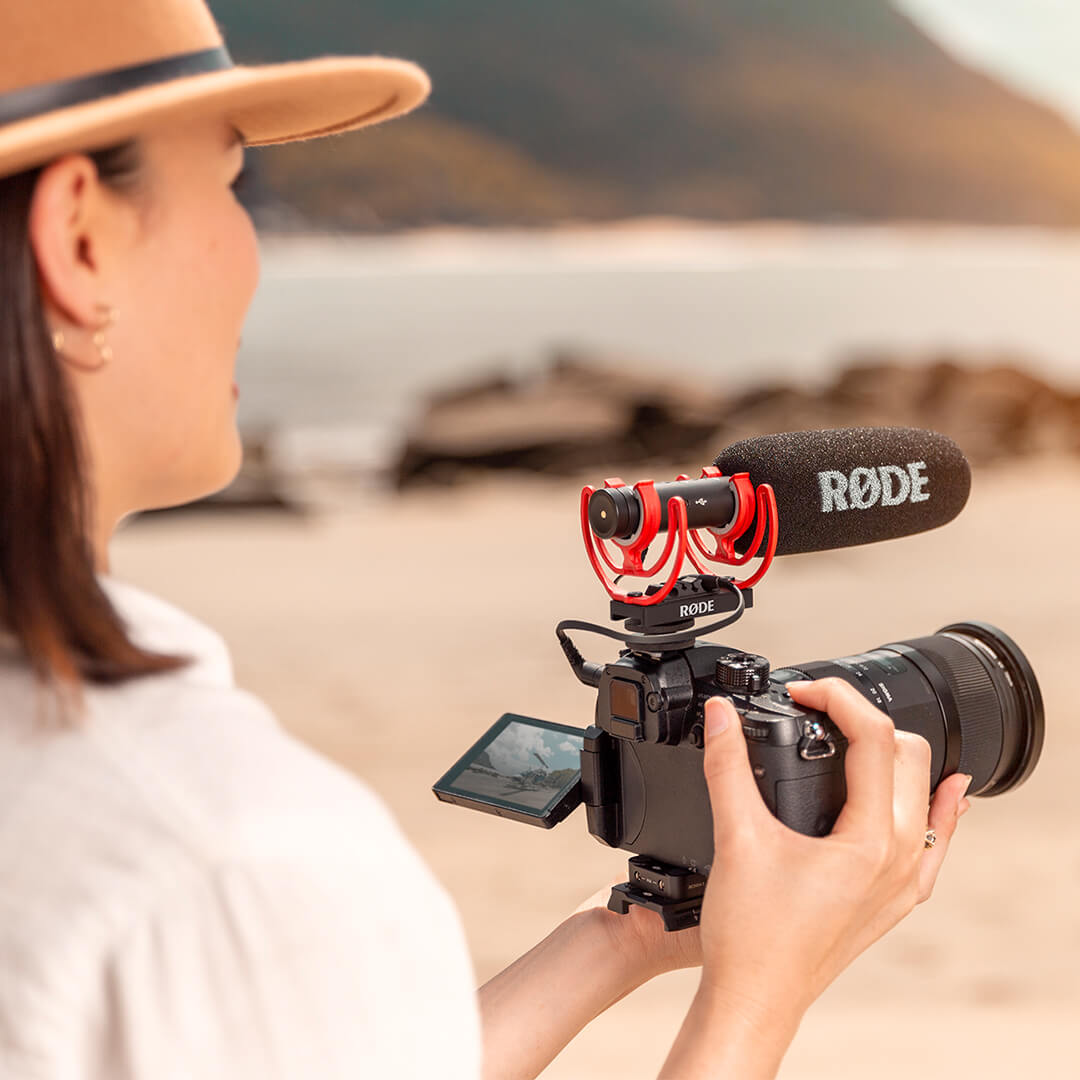
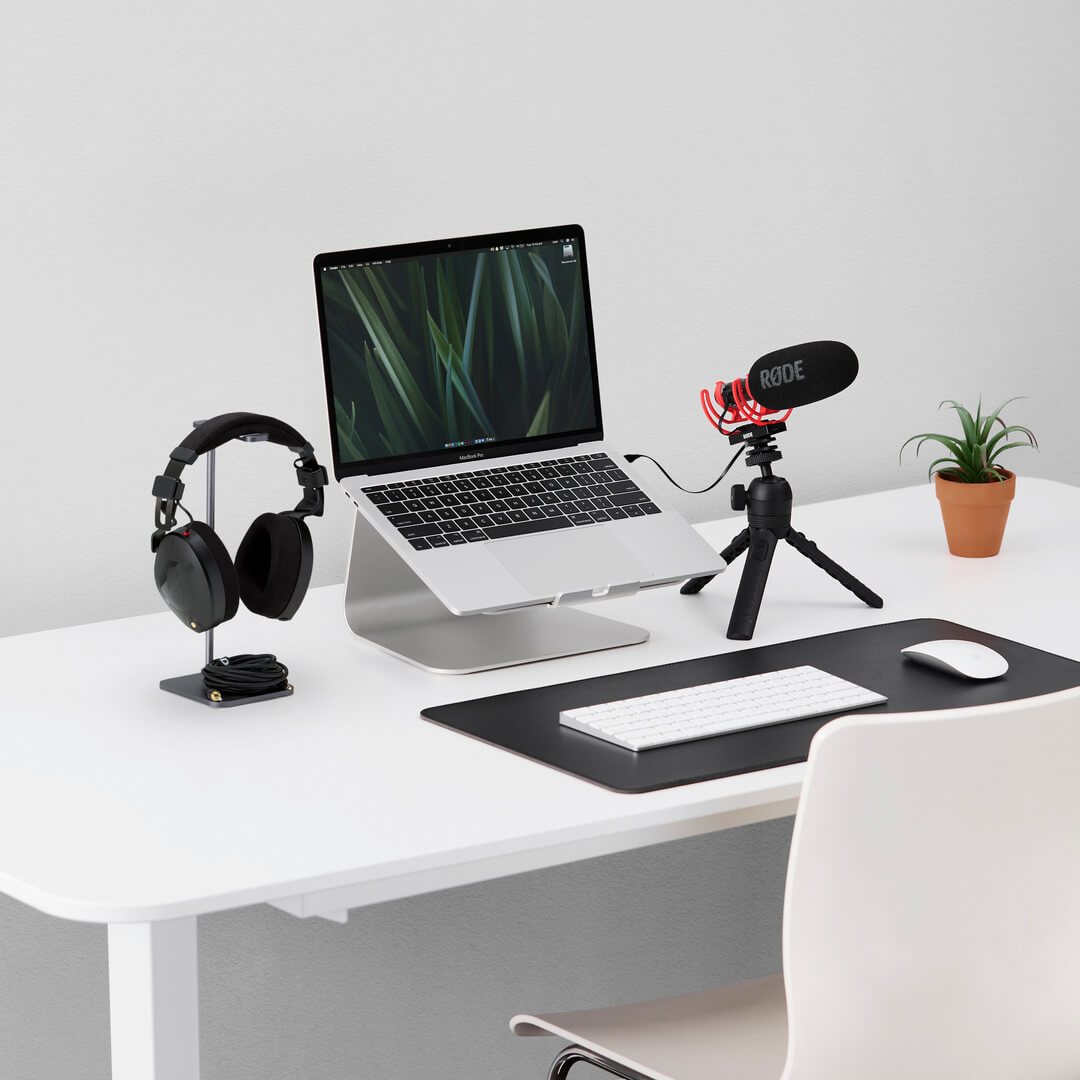
The VideoMic NTG is a supremely versatile microphone that delivers incredible audio anywhere you need it. Use it with your camera to record broadcast-grade sound in the field. Use it with your smartphone or tablet for crystal-clear audio on the go. Use it as a desktop USB mic for podcasting, gaming, voice calls and more. One microphone. Endless possibilities.
- Revolutionary acoustic design with unmatched acoustic transparency and a natural, uncoloured sound
- Highly directional supercardioid polar pattern and very flat frequency response
- Unique infinitely variable gain control
- Auto-sensing 3.5mm output for seamless connection to both cameras and mobile devices
- Digital USB output for recording to a computer or mobile device
- Digital switching – controls high-pass filter, pad, high-frequency boost, and safety channel
- Internal rechargeable lithium-ion battery provides 30+ hours of recording
- Ultra-lightweight (94g) and rugged aerospace-grade aluminium construction
The Most Feature-packed VideoMic Ever
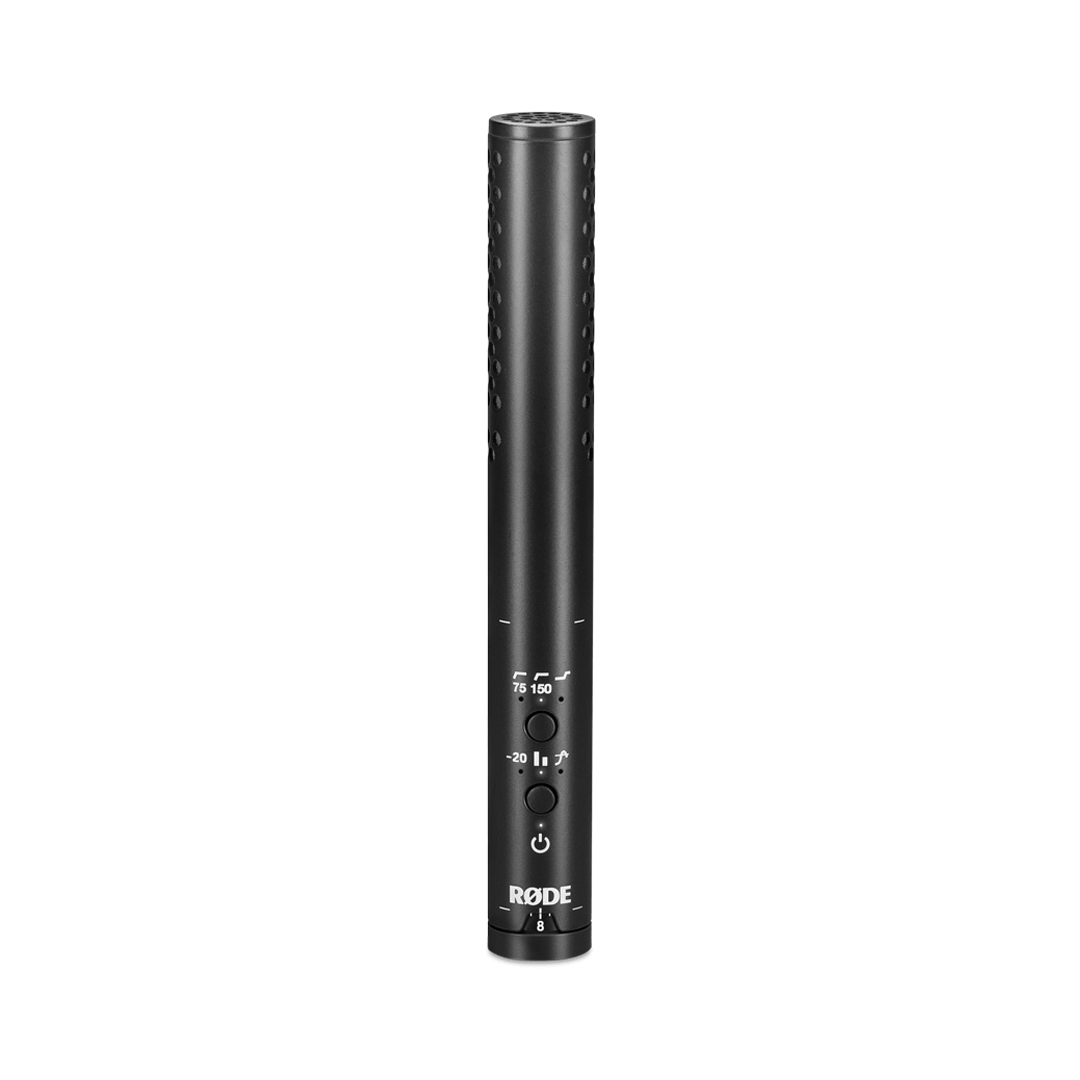
The VideoMic NTG is extremely flexible, with an array of features to help you take on any recording situation. Digital switching gives you access to a high-pass filter (flat/75Hz/150Hz), a high-frequency boost for enhancing clarity and detail, a pad (with a -20dB cut), and a safety channel. It also features a unique infinitely variable gain control for precisely tailoring your output to your recording device, an auto-sensing 3.5mm output that accommodates connection to both cameras and mobile devices (no more messing around with adaptor cables), and a handy peak warning light so you can ensure your audio never clips.
Unmatched Versatility
In addition to being a incredible on-camera microphone, the VideoMic NTG is a fully-featured USB microphone that can be plugged into a computer, perfect for recording voice-overs, podcasts, gaming or livestreaming. When in USB mode, the 3.5mm jack doubles as a headphone output for seamless audio monitoring. The VideoMic NTG also pairs perfectly with tablets and smartphones, turning your mobile device into a pro-quality content creation machine.
Revolutionary Acoustic Design
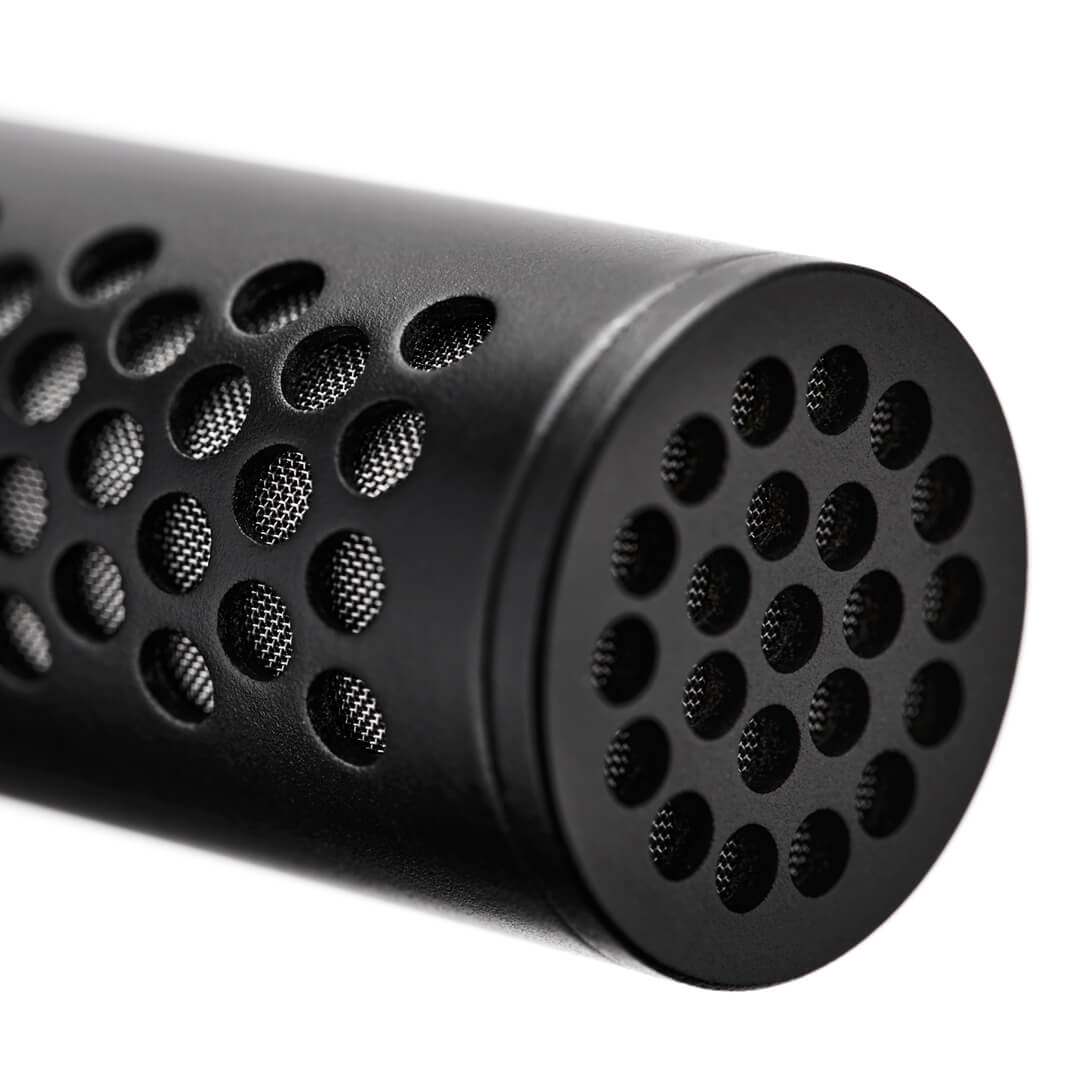
The VideoMic NTG features the same revolutionary line tube technology as the RØDE NTG5, which employs acoustic perforations along the length of the microphone in place of the linear slots found in other shotguns and on-camera microphones. This innovative design delivers unmatched transparency, and a natural, uncoloured sound. Add to this an incredibly flat frequency response, highly directional supercardioid polar pattern, and very low self-noise, and what you have is a compact on-camera microphone that contends with the world’s best shotgun mics.
VideoMic NTG User Guide
Discover everything you need to know about using your VideoMic NTG here. This comprehensive user guide covers everything you need to know from getting started, including an overview of all controls and functionality, to accessing advanced features and ensuring you can get the most out of your microphone.
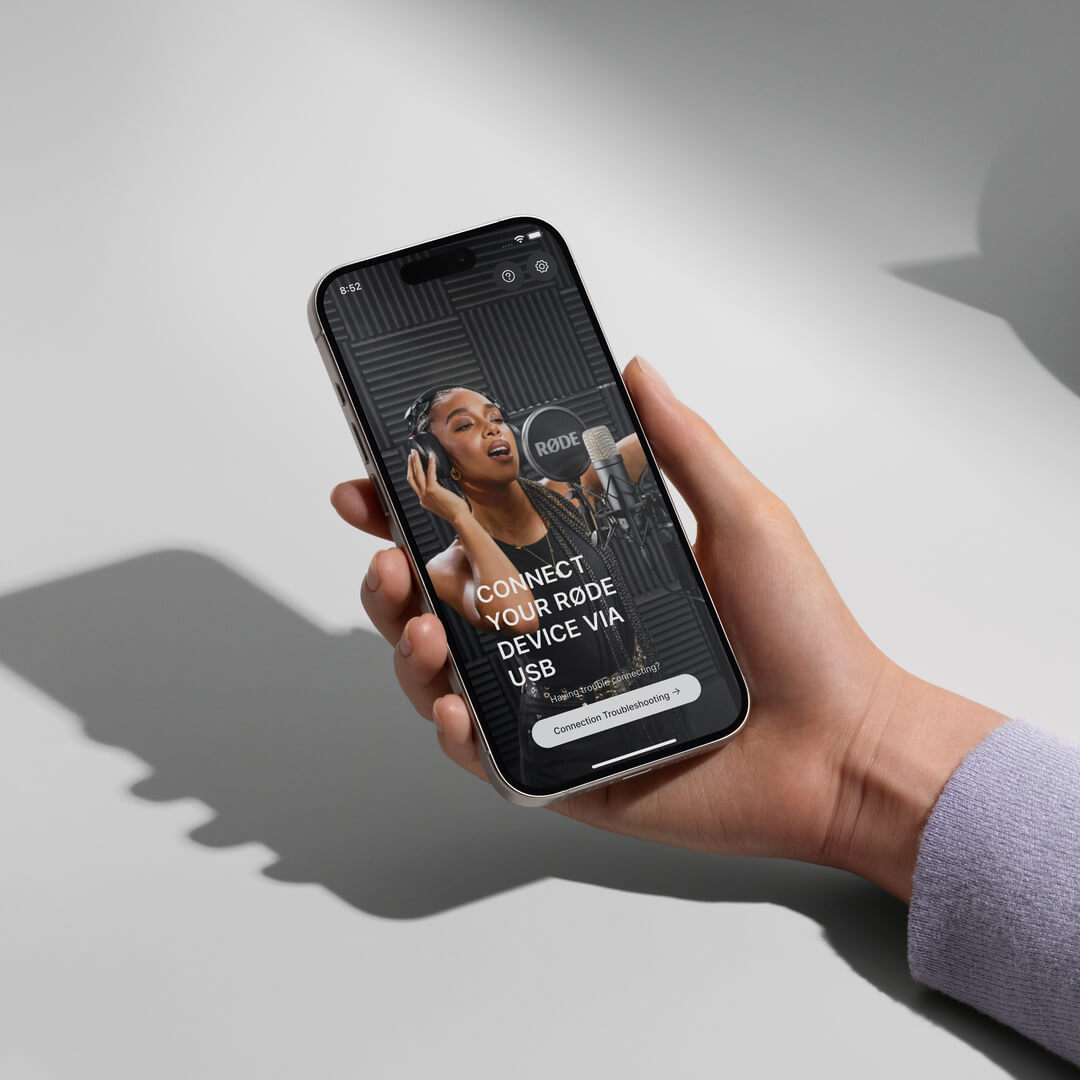
.png ) Download RØDE Central
Download RØDE Central
RØDE Central is the essential companion app for compatible devices across the RØDE wireless and classic microphone ranges, allowing you to configure your device settings, unlock advanced features, optimise and export recordings, access device information, and update to the latest firmware. Download it for free to unleash your device’s full potential.
Mobile
OS Requirements: iOS 14 or later; Android 9.0 or later.
Desktop
OS Requirements: macOS 11 or later; Windows 10 Version 1803 or later.
Specifications
FAQs
The auto-power feature was first introduced to the VideoMic range with the VideoMic Pro+. It is a handy function that automatically turns the microphone off when it detects that the camera is switched off, helping conserve battery life, and turns it on when the camera is turned on, so that you never have to worry about missing a take. The auto-power function only works if your camera delivers plug-in power (most do), as this is what tells the microphone if it is on or off, or if you are using the microphone in USB audio mode. The VideoMic NTG also features a power button, so that it can be manually powered on and off. Check out our list of cameras that deliver plug-in power here.
The auto-sensing output is an intelligent feature that seamlessly detects whether your microphone is plugged into a TRS input (like those on most cameras) or a TRRS input (what most smartphones and tablets have) and switches the output to accommodate. This means you don’t have to worry about using TRS to TRRS adaptor cables – the SC10 cable that accompanies the VideoMic NTG will work seamlessly with any device. However, if your device has a Lightning® connector or anything other than a 3.5mm input, you will need to use an adaptor.
The infinitely variable gain control is a knob on the rear of the microphone that allows you to precisely tailor the output level to your recording device. This is an active control that has a greater output range than any other microphone on the market – it can deliver anything from mic level signal all the way to a headphone level output, which is particularly useful when using the 3.5mm jack as a headphone output. Where other microphones simply employ a pad to adjust the output, the VideoMic NTG’s control also actively amplifies the signal at various gain stages, resulting in a cleaner audio with a vastly improved signal-to-noise ratio (it essentially does all the hard work so your camera’s lower-quality internal preamp doesn’t have to, lowering the noise floor of your signal).
2 hours from empty to full.
When connected to a camera or smartphone, we recommend you turn down the gain of your camera to (or close to) its lowest setting, and turn off any automatic gain controls that may be activated. Then, starting from the lowest setting, turn up the infinitely variable gain control on the VideoMic NTG until your meters are showing a good level (usually just starting to touch the yellow, or about halfway) when recording your expected sound source. Where possible, monitor your audio using headphones, to ensure your sound is clean and clear.
The first is the infinitely variable gain control on the rear of the mic, which delivers a wide output range (numbered 1–15). You can use this to precisely tailor the output level to best match for your device.
The next button is the power/function control. By default, the mic will auto-power on when connected to a device and power off when disconnected from a device, but you can also turn the mic on/off manually by holding this button for three seconds. A single press on this button will engage the -20dB pad (left LED illuminates), another press will engage the safety channel (left LED off, middle LED illuminates), and third press will engage both functions (left and middle LEDs illuminate). A final press will disengage both functions. The right LED is the dB peak warning light, which will illuminate red when the mic’s internal preamp is clipping, at which point the pad should be engaged.
The final button is the filter control. Pressing this once will engage the 75Hz high-pass filter (left Led illuminates). Pressing it again will select the 150Hz filter (middle LED illuminates). A third press will disengage the high-pass filters (left and middle LEDs off). A long press (3 seconds) will engage the high frequency boost (right LED illuminates). This can be used in conjunction with the high-pass filters. Another long press will disengage the high boost.
There is also battery power status indicator. Green indicates the battery is fully charged, amber indicates medium charge, red indicates low charge, and blinking red indicates very low charge.
This LED also indicates charging status when the mic is connected to a power source. When connected to a computer, green indicates it is fully charged; blue indicates it is charging. When connected to a power bank or USB power adapter, the LED maintains the red/amber/green behaviour above. If the power LED triple blinks red, this means that mic has detected it is outside its operating temperature range.
The VideoMic NTG has extremely low self-noise for a microphone of this type (15dBA). All the RØDE VideoMics have extremely low self-noise. In fact, the VideoMic Pro and VideoMic Pro+ are actually slightly quieter than the VideoMic NTG. It’s worth comparing the VideoMic NTG to other on-camera microphones for reference as to how quiet all RØDE microphones are.
Yes, this is the same for the VideoMic NTG. We’ve designed the output level to be similar to the VideoMic Pro+ when the gain knob is set to 10. This is the best place to start with any device, then adjust the level up or down from there. With any VideoMic, the best results are generally achieved when the camera preamp is being driven as little as possible.
There isn’t a standby mode on the VideoMic NTG. It's either off and not drawing any power, or it’s completely on. When the microphone is off, it will last months without the need to charge.
There is no difference in the sonic characteristics of the safety channel, it is just 20dB lower than the main channel. However, when you boost the safety channel in post-production, you may notice some preamp noise from your camera which may affect the perceived audio quality. The safety channel should ideally be used to replace the small piece of audio that has clipped, and it’s best to blend the audio in and out quickly to reduce any noticeable quality change.
All RØDE microphones are tested extensively for interference from a wide range of devices. We make sure that the bodies are extremely well shielded and that the electronics aren’t susceptible to interference. Our state of the art RF test facilities allow us to put microphones through a wide range of RF simulations, which ensures our designs are robust and highly resistant to RF interference.
The internal battery is not user-replaceable. However, the VideoMic NTG has a 10-year warranty once it has been registered. If there are any issues with the battery within this time frame, simply contact the RØDE support team and we'll happily help out.
To connect your VideoMic NTG to a Lightning-equipped iOS devices, such as an iPhone, iPad or iPod, you need to use the RØDE SC15 cable. Use this to connect the USB-C output of the microphone to the input of your device (please ensure you've updated your VideoMic NTG to the latest firmware to allow for this connection – you can download this here). You can also plug your VideoMic NTG into an iOS device using the 3.5mm output, however, using the USB-C output with the SC15 gives you access to a host of features including headphone monitoring, the safety channel, and two-way audio transmission for making video calls. We highly recommend this option.
The VideoMic NTG is a class-compliant device and will work directly with your computer or tablet PC. As a class-compliant USB device, you don’t need drivers or software for it to work. Simply plug it into your device, set it as your input source in your system preferences or recording software settings, and hit record.
The VideoMic NTG is compatible with most Android smartphones that have USB-C. Compatibility depends on your smartphone manufacturer.