什么是视频切换
What is Video Switching
视频切换描述了几种不同的事情,但其核心是切换不同视频源的过程,以精确控制观众看到的内容。这在直播和广播场景中非常有用,但它也是一个强大的“实时”编辑工具。
它允许您通过在制作中使用多个摄像机角度来为观众创造更动态和引人入胜的体验,并且它非常适合在任何给定时间向观众展示最相关的视觉效果。
你也可以使用视频切换功能,将图形、图片、视频和其他媒体内容添加到你的展示中。你甚至可以同时显示多个视频源,使用画中画、分屏或其他布局方式。
要使用RØDECaster Video在视频输入、场景和媒体之间切换,您可以使用其输入按钮(1-6)、场景按钮(A-G)以及媒体和覆盖功能按钮。
帧率
RØDECaster Video的全局帧率决定了流数据、录制、HDMI A和HDMI B输出的帧率。为获得最佳效果,重要的是为您的项目选择一个帧率,并设置所有摄像机和其他视频设备以该帧率输出。
要在您的RØDECaster Video上设置全局帧率,请轻触设置齿轮图标,然后导航至视频(Video) > 帧率(Frame Rate),并使用旋转编码器进行选择。
帧率: 23.98, 24, 25, 29.97, 30, 50, 59.94, 60
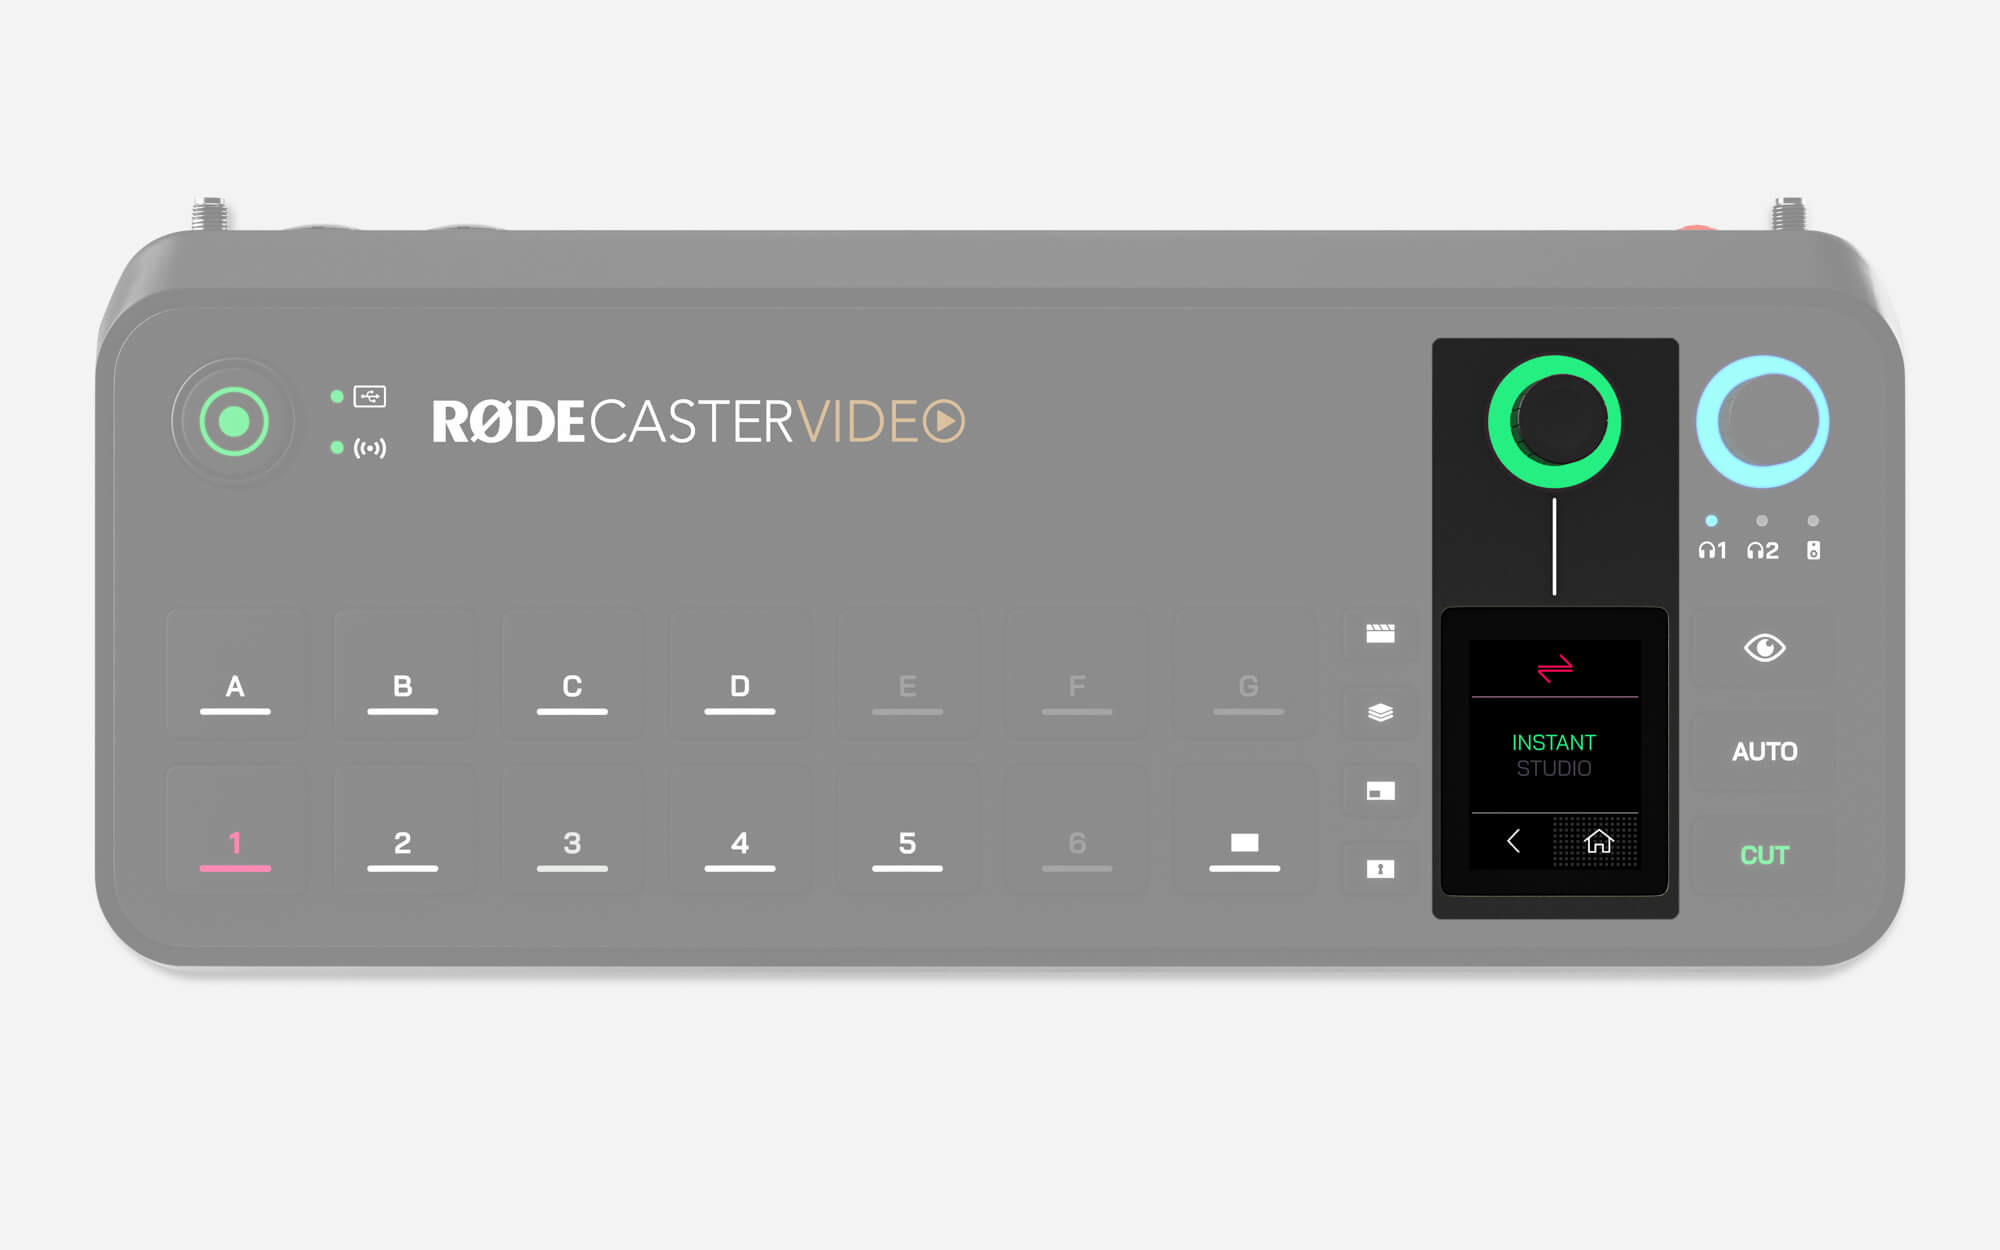
即时和工作室切换模式
当切换视频时,有两种切换模式可以改变你与RØDECaster Video的互动方式。要更改模式,请导航至设置 > 视频 > 切换,并选择即时或工作室模式,或者在RØDE Central中,前往设备配置(Configuration) > 视频(Video) > 切换(Switching)。
即时切换模式
在即时模式下,当你按下输入、场景、媒体或覆盖按钮时,它将立即出现在直播中。如果你选择了“剪切”按钮,它将立即切换,而“过渡”按钮则根据你的过渡设置启用切换。
这是两种模式中更为即时的一种,因为你可以通过单个按钮的按压来完成切换。如果你是一个独立创作者,同时操作RØDECaster Video并出现在镜头前,或者你只是想要一个更即时的体验,这会非常适合你。
演播室切换模式
在演播室模式下,当你按下输入、场景或媒体按钮时,它将被发送到预览源,而直播保持不变。然后,按下剪切或自动按钮,将把你的预览源中的内容发送到你的直播(无论是即时还是带有过渡效果)。
Studio模式是导播员最常用的模式,更适合那些有专门操作员控制RØDECaster Video的制作场景,因为它允许操作员在将输入或场景直播之前进行预览。

节目、预览、多视图和摄像头信号输出
RØDECaster Video 提供九个不同的视频输出信号——节目、预览、多视图和摄像头 1-6。您可以选择其中任何一个信号发送到输出端口:HDMI A、HDMI B 和 USB 1。导航至“设置(Settings) > 视频(Video)”,然后选择 HDMI A、HDMI B 或 USB 1 来配置相应的视频输出信号。在 RØDE Central 中,您可以导航至“设备配置(Device Configuration) > HDMI 输出”找到此设置。
节目输出信号
这是整个制作输出或“实时”视频输出信号。它将准确显示发送到推流信号或录制的内容。
预览输出信号
当你处于演播室模式时,预览输出信号可以让你在将输入、场景或媒体发送到节目输出信号之前查看它们——这允许你在直播前检查、配置和安排视频源。在即时模式下这是不可用的。
多视图输出信号
多视图输出信号显示将所有视频源、场景、媒体和图形布局在一个屏幕上。它还显示关键设备信息,如录制和推流状态、音频混音器、日期和时间以及运行时间。
摄像头信号(1-6)
这六个摄像头信号代表分配给您六个输入按钮的摄像头,允许您将任何一个摄像头的信号直接发送到您的三个输出端口中的一个。例如,如果连接到 HDMI 1 的摄像头分配给了输入按钮 1,您可以选择“摄像头 1”,将该摄像头的信号直接发送到 HDMI B 输出。
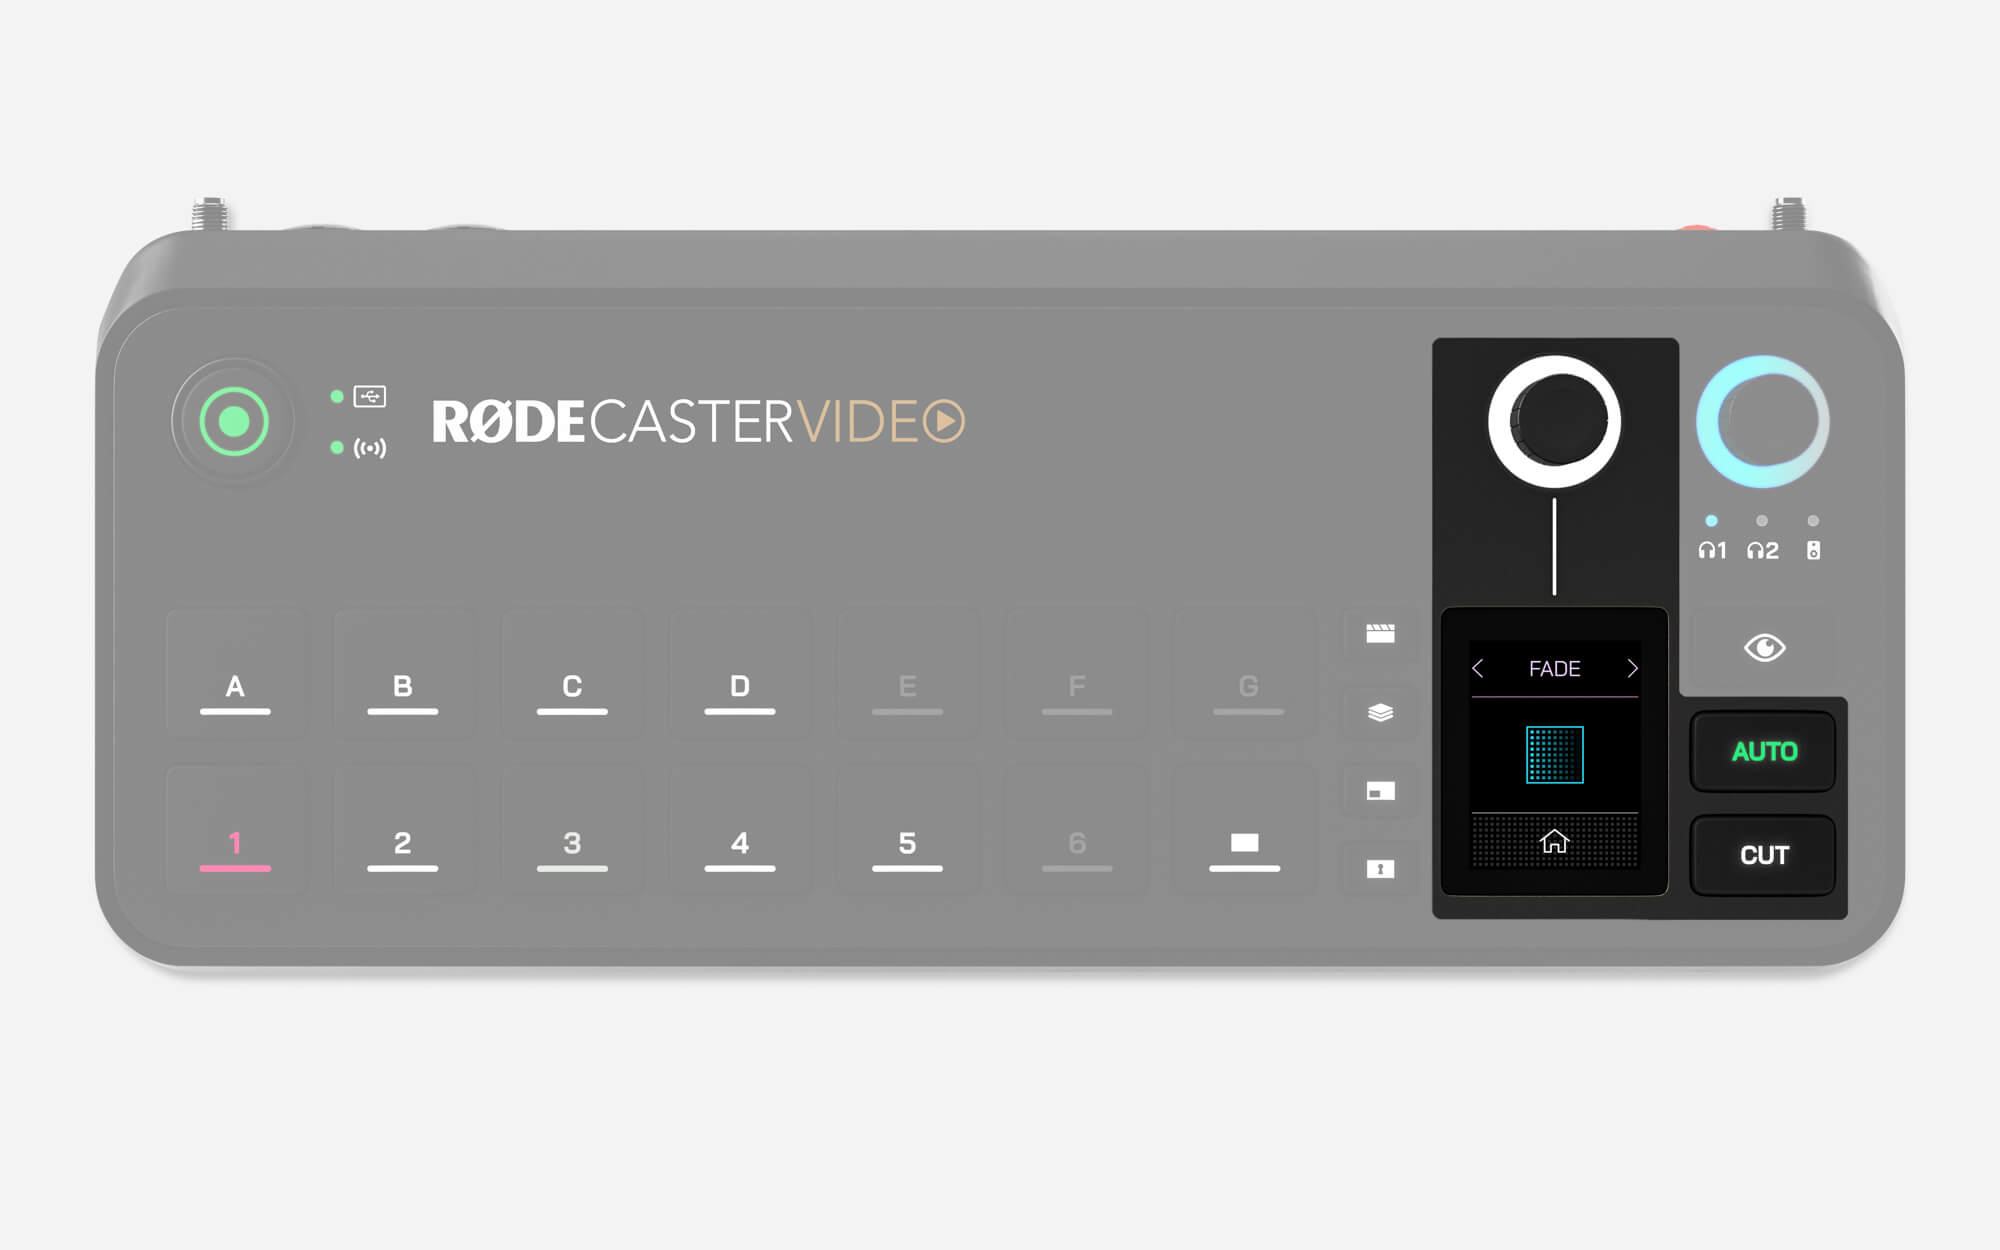
切换、过渡和转场
切换和过渡按钮提供了两种不同的方式在视频源之间切换,它们的行为将根据您是在即时模式还是工作室模式下而有所不同。
切换
切换是默认模式,允许您在即时模式下即时切换输入、媒体和场景,在工作室模式下切换预览和节目视频源。
过渡
在即时模式下,自动将根据您的过渡设置在您的输入、媒体或场景之间切换,或者在工作室模式下在预览和节目输出之间切换。
转场设置
要调整转场过渡时间,只需轻触屏幕上的计时器图标,调整旋转编码器,并点击编码器以确认。要更改过渡类型,轻触计时器左侧的屏幕图标,并使用编码器选择淡入、淡出或溶解(后者有多种子类型)。
注意
过渡时间也决定了按下渐变到黑色按钮时过渡所需的时间。
-2395x1429-ec9dd10.jpg)
Auto-Switching
The RØDECaster Video features unique and innovative auto-switching technology that automatically switches between inputs and scenes to simulate an organic switching process, based on when it detects audio on a particular channel. For instance, it can be used to switch between shots of the interviewer and interviewee as each person talks in a video podcast.
RØDECaster App
To set up auto-switching, make sure your RØDECaster Video is connected to the same network as your computer (or directly to it via USB 2), open the RØDECaster App and open the auto switching menu.
Inputs and Scenes
With the auto-switching menu in the RØDECaster App, select one of the Input Buttons (1-6) or Scene Buttons (A-G) to link to an audio source and toggle the setting ‘On’.
Priorities
You can select a priority (low, medium or high) for each input or scene. The higher the priority, the more time an input or scene will be given in the overall production. For instance, with a video podcast or interview, you can set the close-up shots on each speaker as a higher priority than a wide-angle shot of the full conversation.
Audio Links
Click the ‘+’ button under the Audio Links section and you can assign one or more audio inputs to the currently selected input or scene button. Assigning more than one audio input is ideal for camera angles that include multiple microphones (and speakers) in a single shot, allowing your production to dynamically follow the conversation.
Linking a RØDECaster Pro II or Duo
The auto switching feature can be linked to audio channels on the RØDECaster Pro II or RØDECaster Duo. Connect your RØDECaster Pro II or Duo USB 2 port to the RØDECaster Video USB 4 or 5 ports. This is the same processes for passing audio between devices. Once connected, your RØDECaster Pro II or Duo audio channels will appear as options when linking audio.
Relaxed, Neutral or Fast
In the top-right of the Auto Switching menu, you can toggle between Relaxed, Neutral and Fast. These options allow you to tailor the feature to better suit the pacing of your show – if you find that it’s switching too frequently, or not frequently enough, this is how you can fine tune it.
Enabling Auto-Switching
Once you've set up your auto-switching using the RØDECaster App, press-and-hold the 'Auto' button on the RØDECaster Video to enable auto-switching mode. Pressing any of the input or scene buttons will exit this mode and return you to manual operation – much like cruise control in a car.