RØDECaster Sync
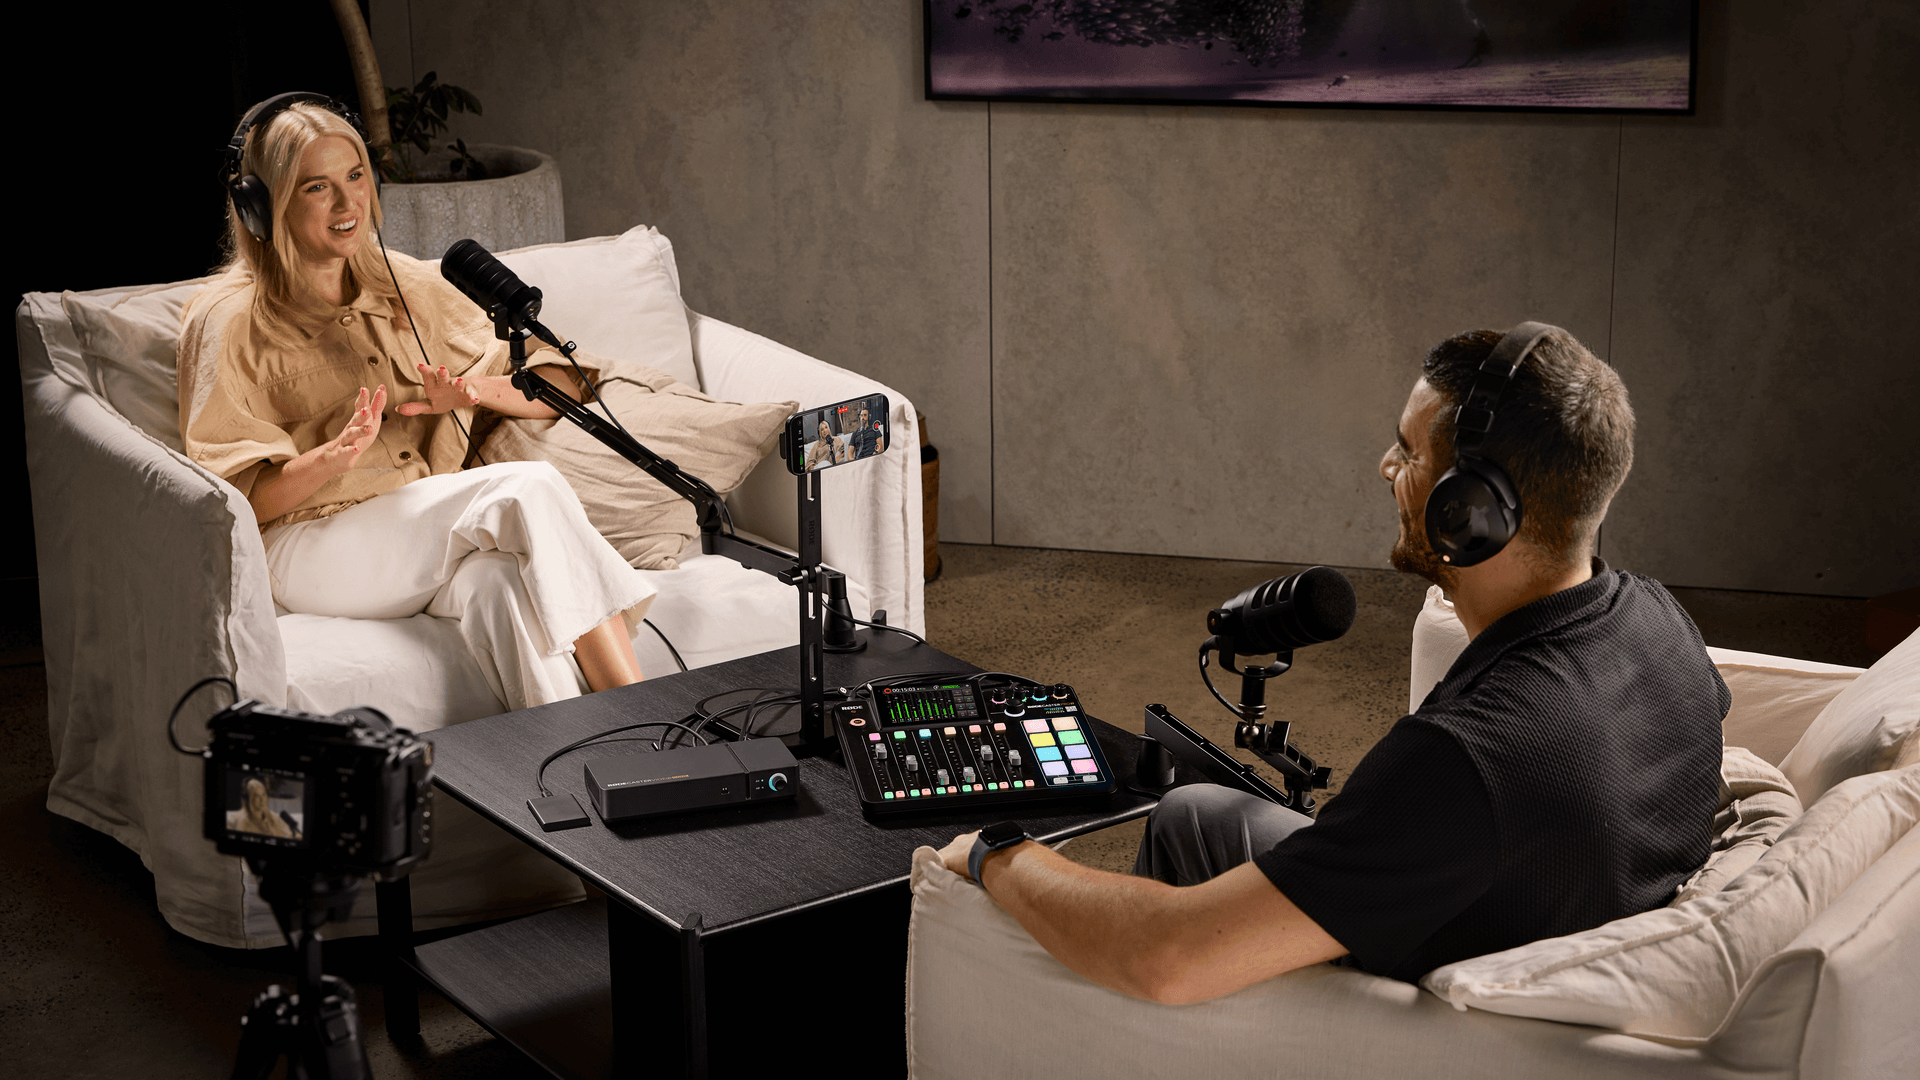
RØDECaster Sync is a new feature that massively expands the joint capabilities of the RØDECaster Video Core when paired with either a RØDECaster Pro II or Duo, creating a comprehensive AV production studio in which the whole is much greater than the sum of its parts. With a single USB-C cable, you can connect these devices to gain enhanced hands-on control and an expanded array of inputs and outputs.
Enhanced interface: The RØDECaster Pro II or Duo’s interface can be used to control video and audio across both devices, including its physical and virtual faders, mute and listen buttons, SMART pads, and touchscreen display.
Expanded Inputs and Outputs: Every audio input and output on both connected devices is available to the combined mixer, giving you access to more I/O than has ever been available to a RØDECaster.
Connection and Disconnection
With both powered on, you can connect your two devices with a USB-C cable, using USB 4 or 5 on the RØDECaster Video Core, and USB 1 on your RØDECaster Pro II or Duo.
When connected, you will be prompted to enter Sync Mode on your RØDECaster Pro II or Duo display. You can enter or exit this mode manually by navigating to Settings > Operation Mode on your RØDECaster Pro II or Duo.
Joint Audio Mixer
When in Sync Mode, the two devices share a single nine-channel mixer that can be compiled from any input on either device – this mixer arrangement is populated from whatever arrangement is currently on your RØDECaster Video Core when first connecting. Any changes made to the mixer will persist on your RØDECaster Video Core, even when you exit this mode on your RØDECaster Pro II or Duo.
Adding, Moving, and Removing Audio Channels
There are two main methods for adding, removing and rearranging each of the nine channels:
- Using the touch display on the RØDECaster Pro II or Duo: Tap on a channel icon or press a channel button, tap the settings cog, make your selection and then confirm with the green tick, or tap the ‘faders’ icon to rearrange its location. Tap the ‘+’ icon in an empty channel to jump straight to the channel select page.
- Using the RØDECaster App: With your RØDECaster Video Core connected to your computer, (either directly via USB 1 or on the same network via Ethernet), open the RØDECaster App and select your device from the list on the left. Open the Audio Mixer, and here you can add new tracks with the ‘+’ icon, rearrange them by clicking-and-dragging the top-left corner of the track, or remove them by clicking the top-right.
When viewing the mixer on the RØDECaster Pro II or Duo display, an icon with two green arrows will indicate any channels that are controlling inputs from the RØDECaster Video Core. Similarly, when in the RØDECaster App’s Audio Mixer, an asterisk before a channel’s name and a fader icon above it will indicate inputs coming from the RØDECaster Pro II or Duo. This is important as some inputs appear the same on both devices at a glance (for instance ‘Combo 1’ and ‘USB 2’).
SMART Pad Video Controls
Your RØDECaster Pro II or Duo now has an additional SMART Pad type (Video) available, which gives you access to all the hands-on video switching controls.
Add or customise SMART Pads by tapping on the right-hand side of the RØDECaster Pro II / Duo display. In this menu, you can tap on an occupied pad to edit it, or tap an empty pad to select its function. New video SMART Pads include:
- Input (1-4)
- Scene (A-E)
- Media (A-E)
- Overlay (A-E)
- Auto
- Cut
- FTB
Note: When entering Sync Mode, if your 8th bank of SMART Pads is blank, it will automatically be populated with a few critical switching controls to get you started.
Shared Controls
While in Sync Mode, you can access a number of shared controls via the RØDECaster Pro II or Duo interface, including:
- Recording: Pressing the REC button on the RØDECaster Pro II or Duo will start/stop recording for your production. This can also be triggered in the RØDECaster App’s Scene Builder.
- Processing: Tapping on a channel icon or pressing a channel button on your RØDECaster Pro II or Duo will grant access to the granular DSP controls for that channel, no matter which device it’s on. This can also be modified in the RØDECaster App’s Audio Mixer.
- Custom Output Mixes: On your RØDECaster Pro II or Duo, navigate to Settings > Outputs > Routing to create fully custom mixes for either device. This can also be modified in the RØDECaster App’s Audio Mixer.
Recordings and Files
All files will be recorded to the RØDECaster Video Core’s attached external hard drive, allowing you to access your video and audio in a single location. To adjust ISO, multitrack and other recording settings, use the RØDECaster App.
Exiting Sync Mode
To exit Sync Mode, navigate to Settings > Operation Mode on your RØDECaster Pro II or Duo, or simply disconnect the USB cable and you will be prompted to change modes. When returning to Podcast Mode, your RØDECaster Pro II or Duo will remember any fader, track and channel settings you had before entering Sync Mode, however adjustments to system settings and SMART Pads will remain.