Using Timecode on the Sony FX3 and FX30 With Wireless PRO
In this article, we’ll walk you through how to set up timecode on your Sony FX3 or FX30 with the Wireless PRO.
There are two methods for this – recording timecode as audio via the mic input with the included RØDE SC2 3.5mm cable, or using Sony’s ‘Multi’ port connection with a 3.5mm-to-BNC cable and a proprietary Sony adaptor cable.
Method 1: Recording Timecode as Audio
Step 1
Connect your Wireless PRO receiver to a computer or phone running RØDE Central.
Step 2
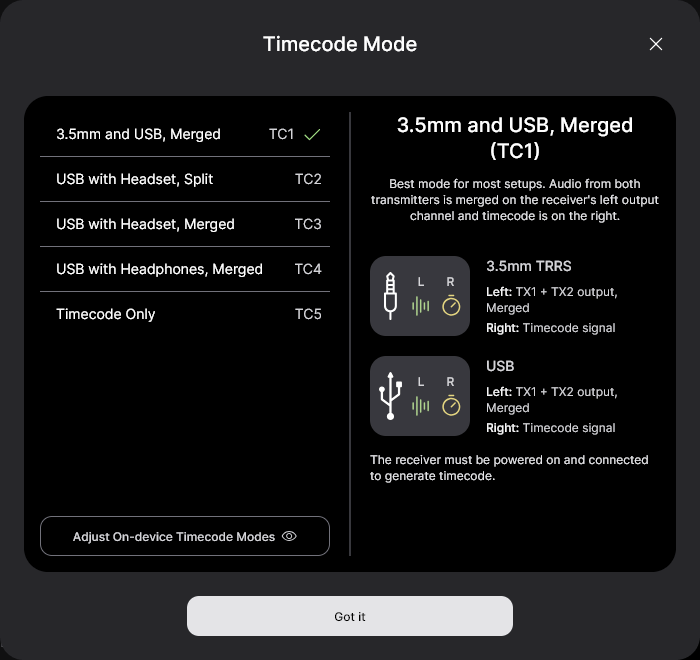
Enable timecode and select the framerate you’re shooting in. Toggle ‘Real Time’ on or off, depending on which format you’d like your timecode to appear in, then click ‘Timecode Modes’, choose ‘Timecode 1’ and click ‘Apply’.
Step 3
Ensure your camera’s framerate matches the one you just set for your timecode and adjust any other video and audio settings as per usual.
Step 4
Connect the included SC2 3.5mm cable from the Wireless PRO receiver to your Sony FX3 or FX30’s microphone port.
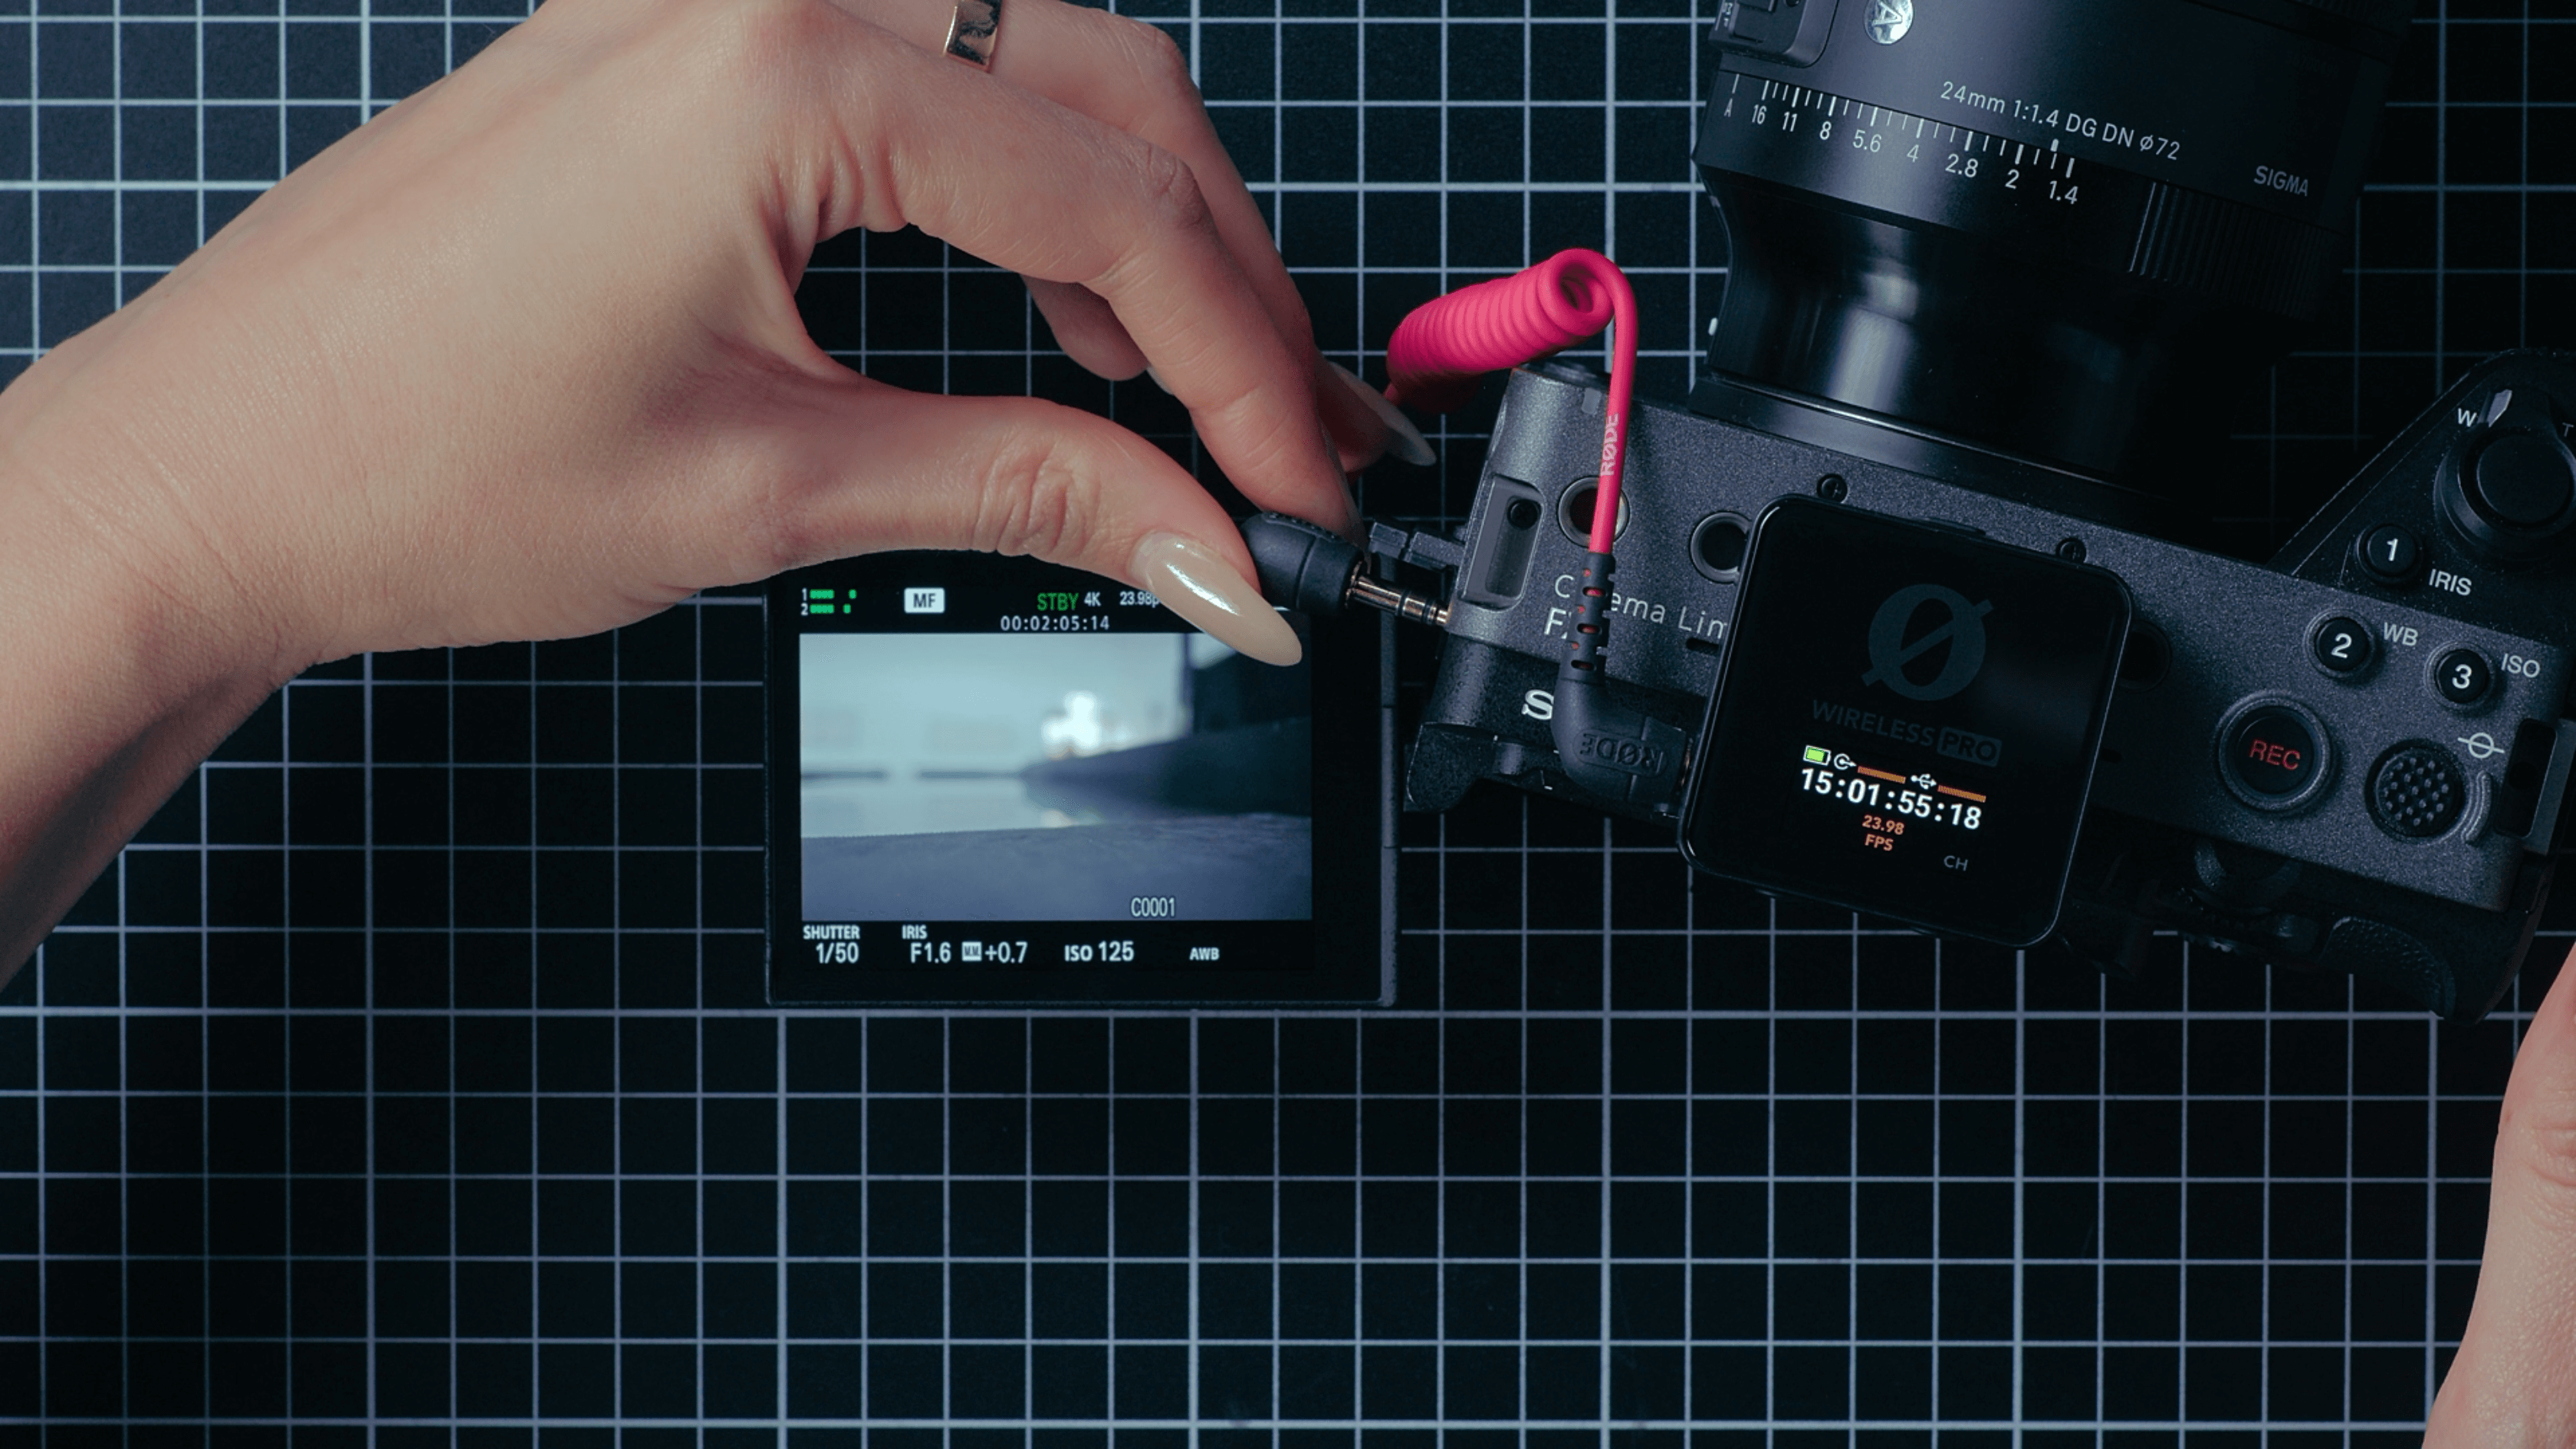
Because we’re recording timecode as an audio signal, the camera’s timecode display won't match the one on your Wireless PRO, but you can still use the timecode audio signal to synchronise your footage in post-production, just follow one of our guides below.
Method 2: Recording Timecode Metadata Directly to Your Video Files
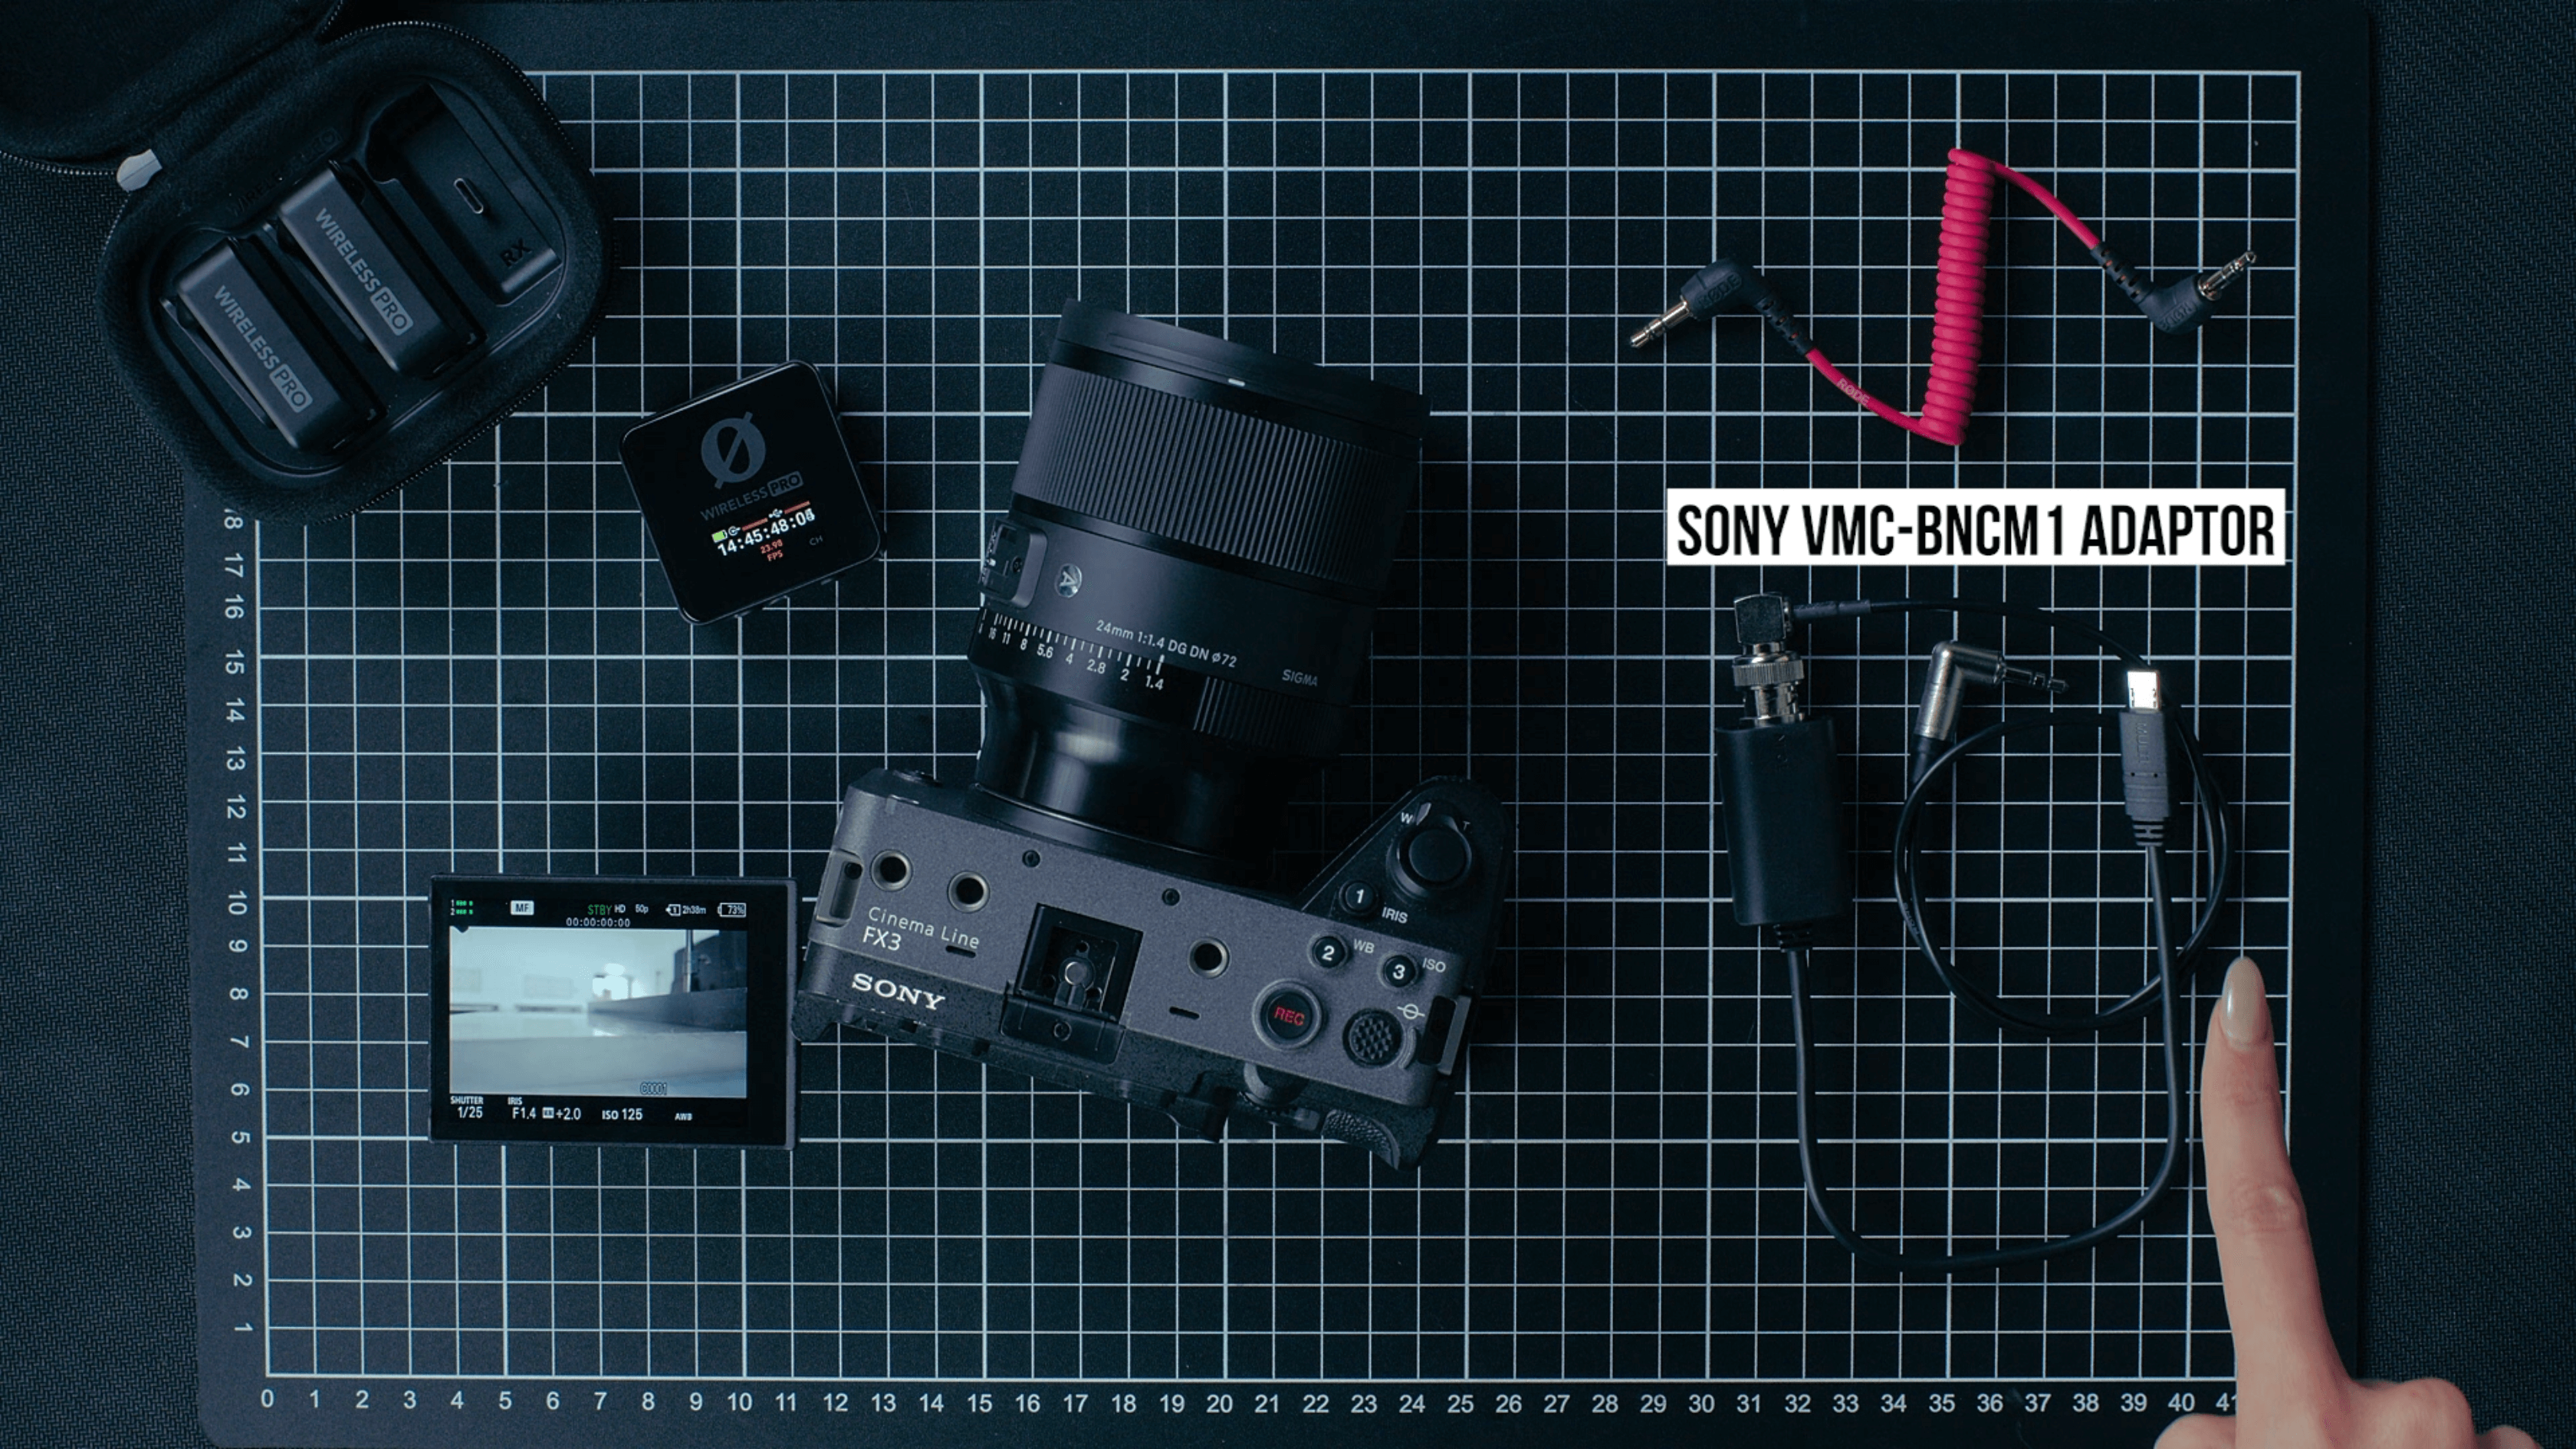
For this method, you’ll need a 3.5mm-to-BNC adaptor, as well as Sony’s BNC-to-‘Multi’ port adaptor (the VMC-BNCM1) in order to record timecode metadata into your video files.
Step 1
Connect your Wireless PRO receiver to a computer or phone running RØDE Central.
Step 2
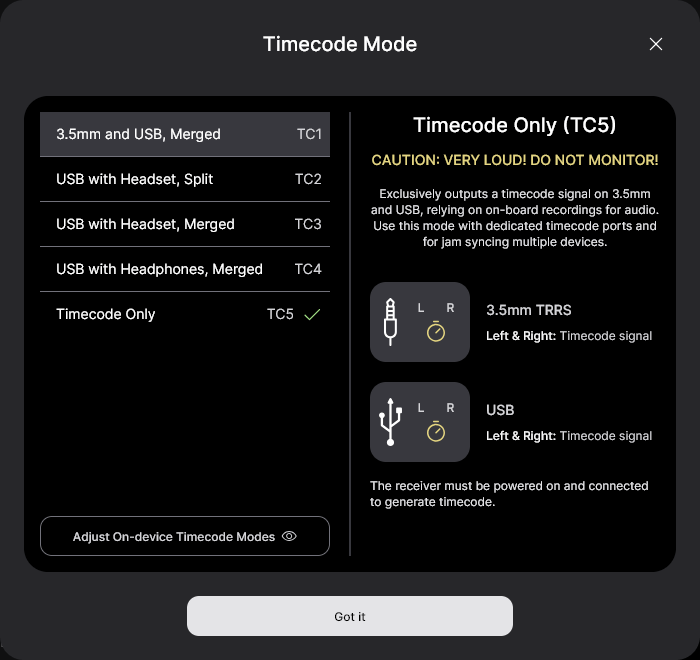
Enable timecode and select the framerate you’re shooting in. Toggle ‘Real time’ on or off, depending on which format you’d like your timecode to appear in, then click ‘Timecode Modes’, choose ‘Timecode 5’ and click ‘Apply’. Check that the output gain is set to 0dB to ensure your camera detects the timecode signal.
Step 3
Ensure your camera’s framerate matches the one you just set for your timecode.
Step 4
Go to the 'Shooting' menu, then ‘TC/UB’, and under ‘Time Code Make’, select ‘Preset’.
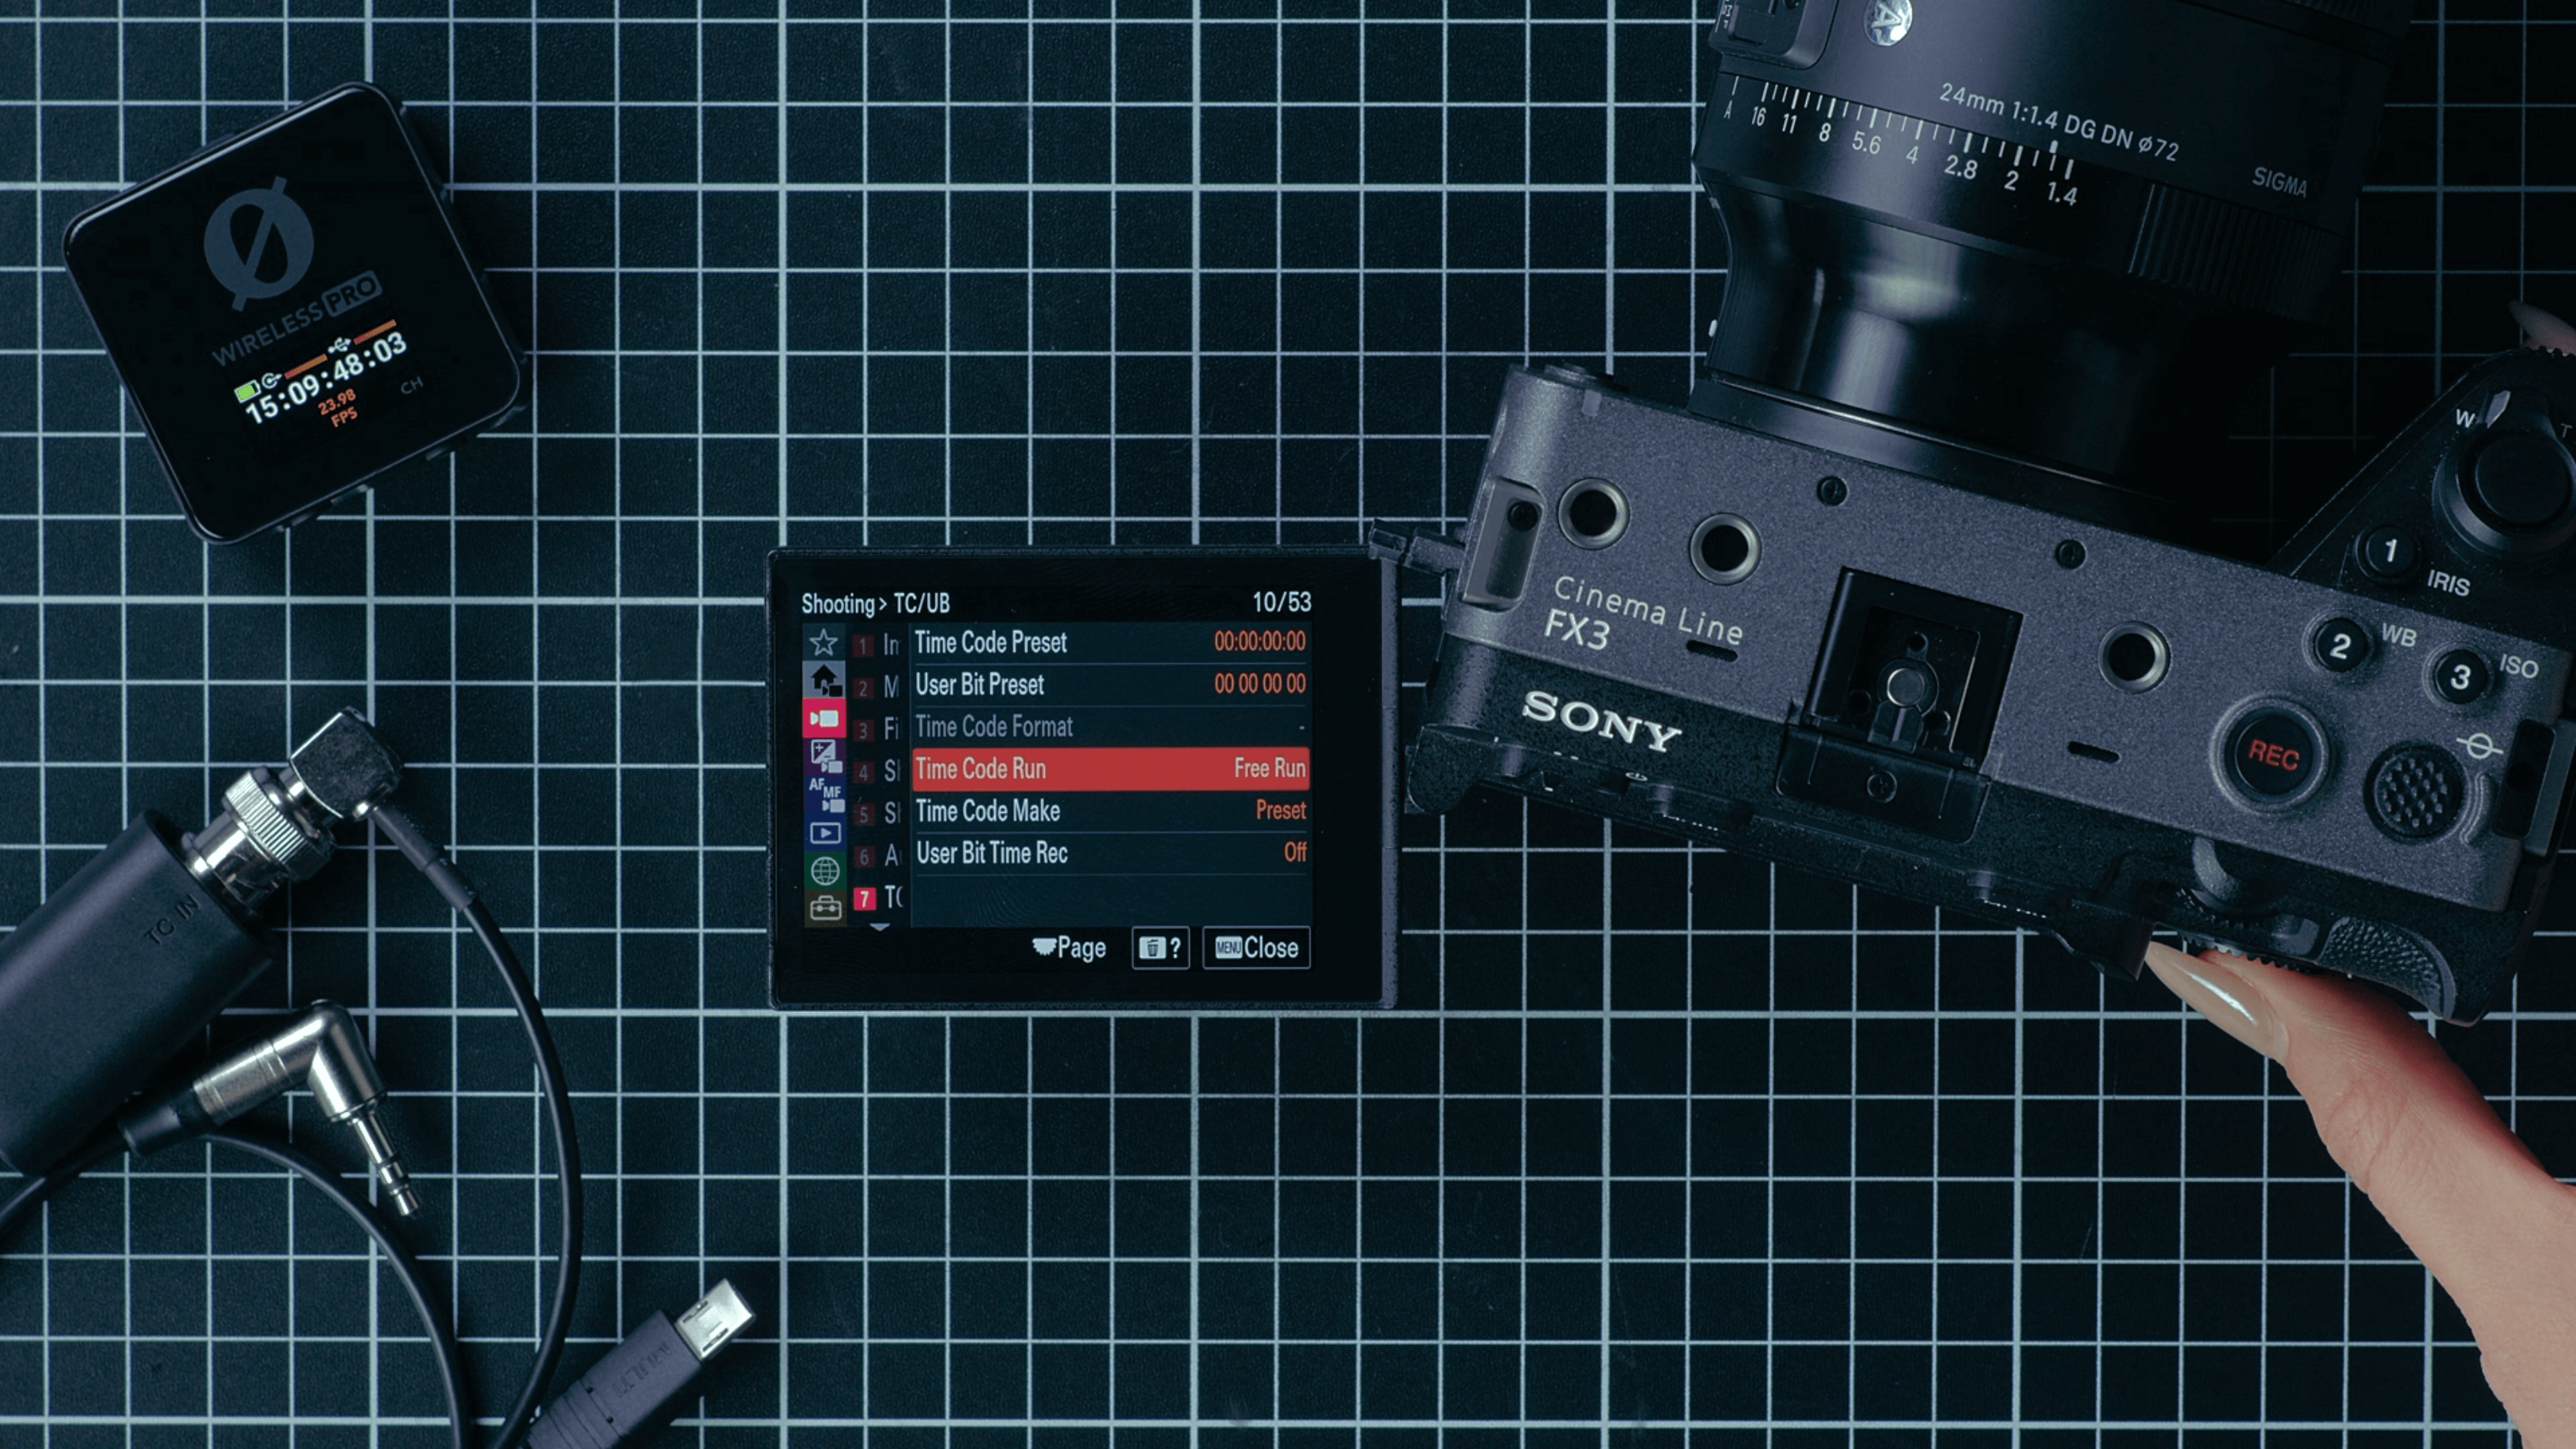
Step 5
In the same ‘TC/UB’ menu, under ‘Time Code Run’, select ‘Free Run’.
Step 6
Return to the viewfinder screen and connect the Wireless PRO to the Sony FX3 or FX30’s Multi port using the two adaptor cables we mentioned earlier.
As soon as it’s connected, you will see the timecode on your camera jump to match the timecode set by the Wireless PRO and your camera will now be recording timecode to the metadata of its video files. You can follow our guides linked in the description for how to use your editing software to synchronise your footage using timecode in post-production.
Check out our user guide for more information on Using Timecode with the Wireless PRO.