Getting Started
UNIFY is an incredibly powerful virtual mixing software for streaming that gives you advanced control over your audio, including different sub-mixes for headphones, recording, streaming and communications.
Assigning Audio Sources
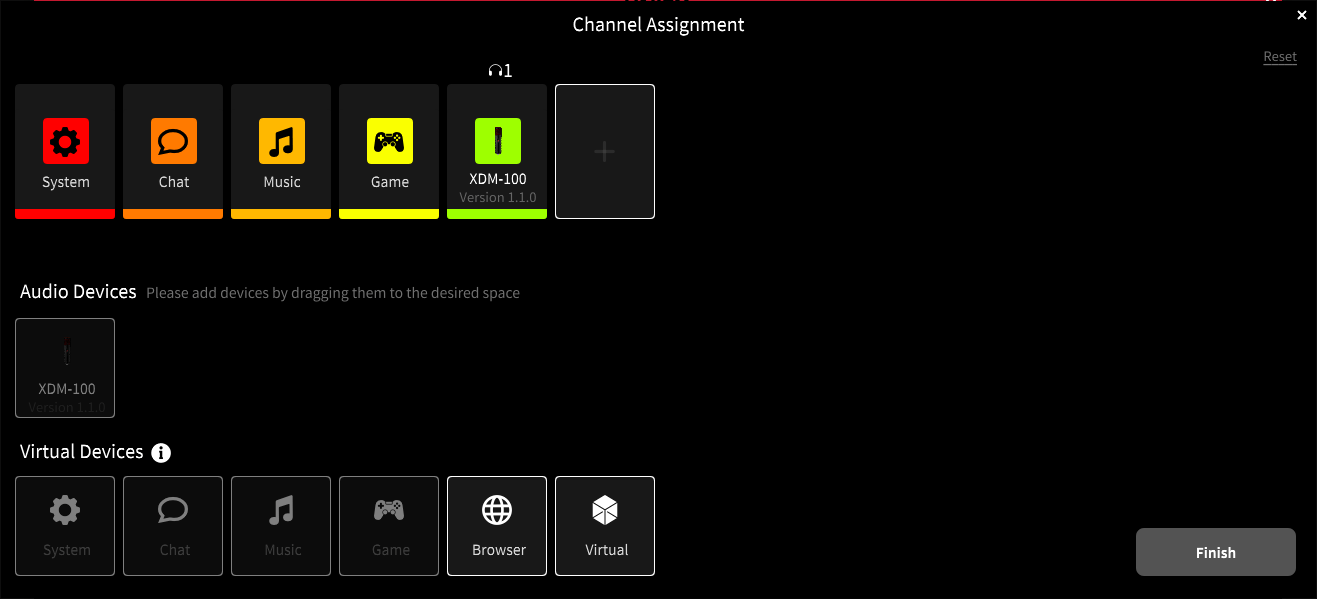
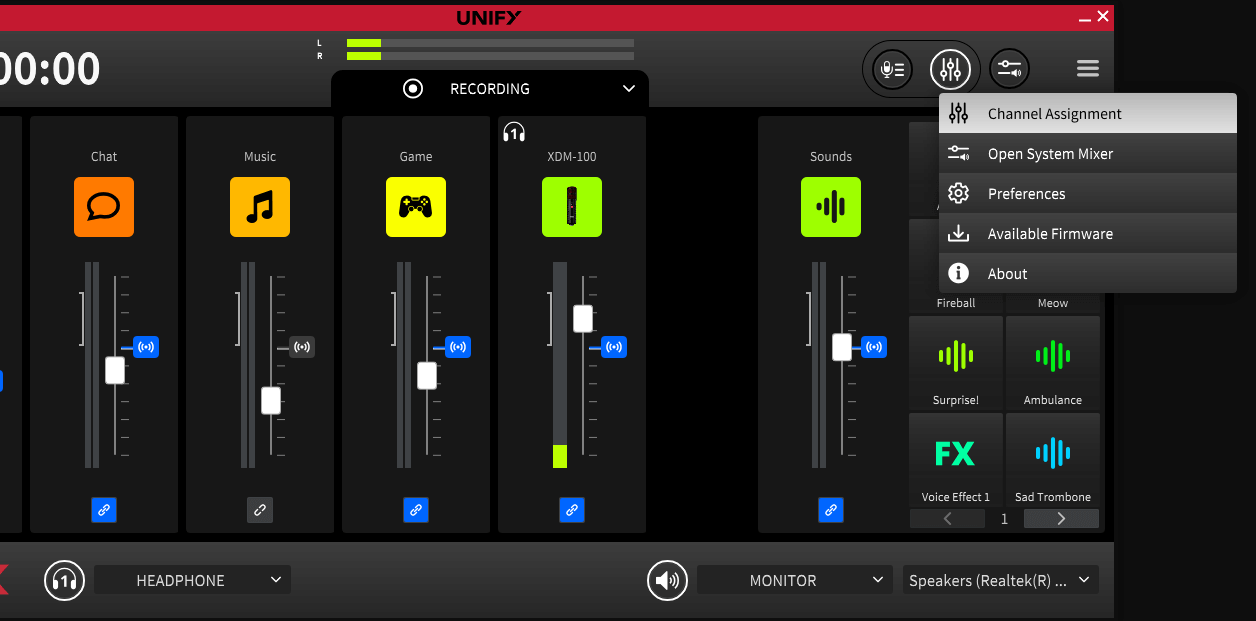
Channel Assignment Screen
The first thing to do is bring each audio source into UNIFY – just like you would plug them into a hardware mixer. To do this, you use the channel assignment screen. If it’s the first time you have used UNIFY, you will see the channel assignment screen when you start UNIFY. If you’ve opened it before, you will see the mixer window, but you can get back to the assignment screen by selecting it from the menu on the right.
The Different Device Types
The channel assignment screen is where you choose what audio sources you need. All the available sources are shown at the bottom. There are two types.
Audio devices are RØDE hardware devices. They include microphones, and sources from interfaces such as the Streamer X.
Virtual devices are the connectors for your computer applications. These connect the audio from your game, Discord chat, browser etc with UNIFY, so that UNIFY can mix them and send them on to your stream.
Adding Audio Sources/Microphones
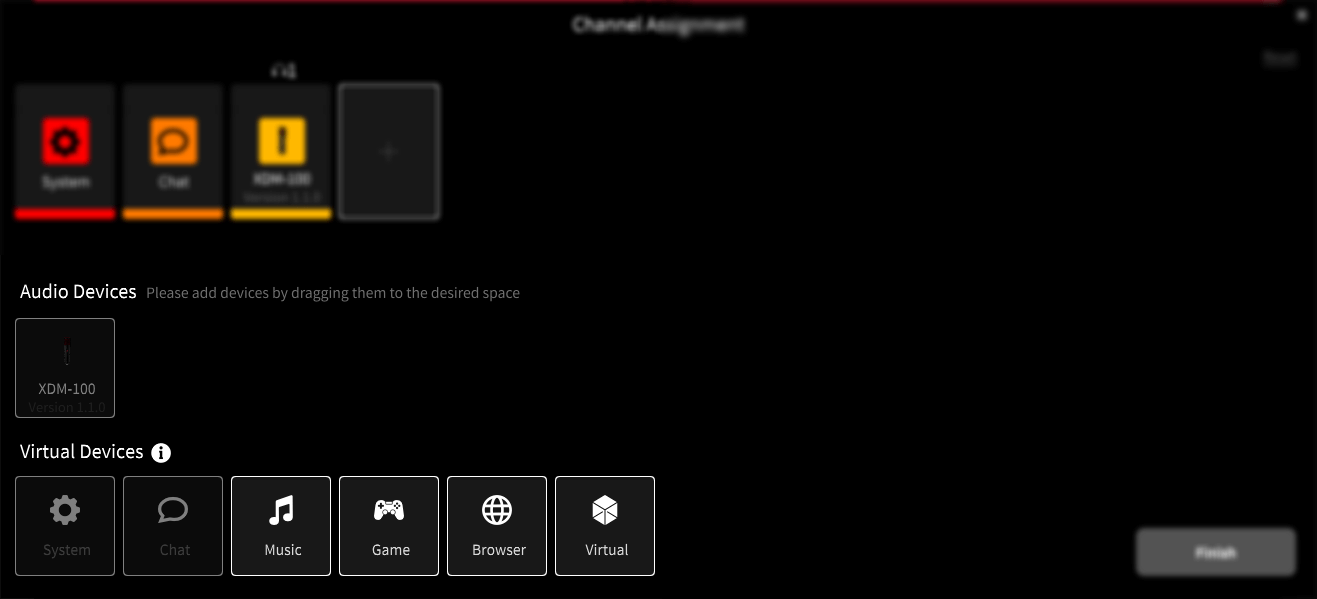
You can add up to four audio sources to your stream, meaning you can have multiple people on your stream or podcast.
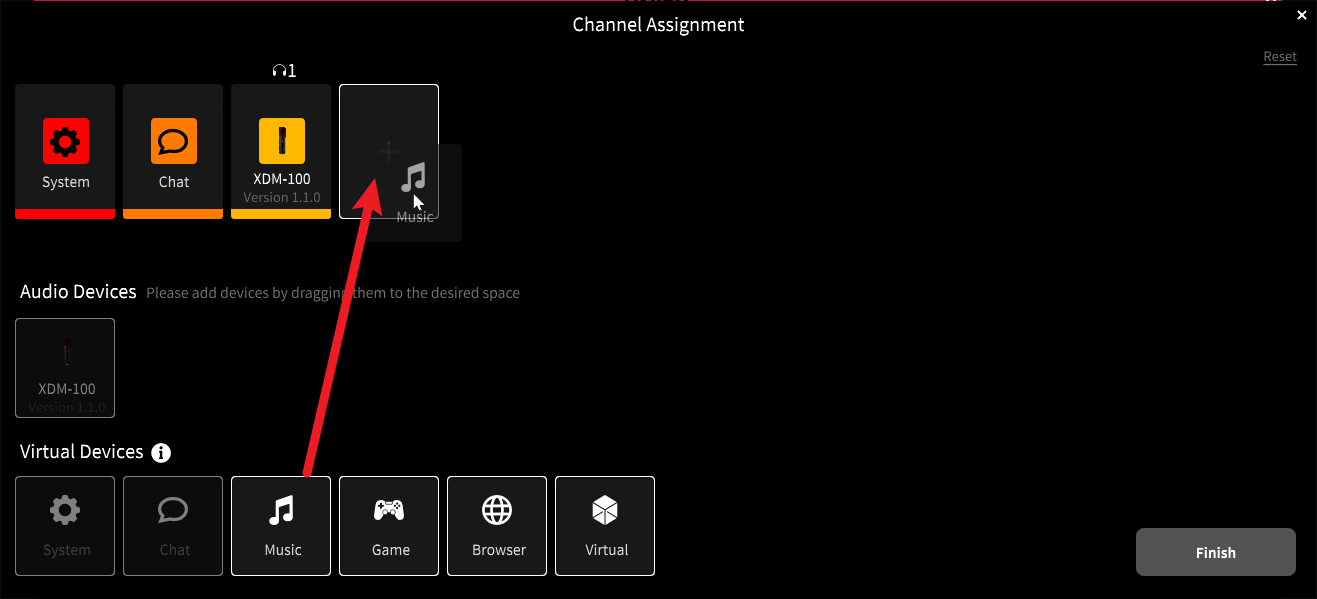
You can add the audio devices you need for your stream by dragging them from the available devices up to the mixer configuration.
You can also drag your sources that are already assigned around to put them in the order you prefer.
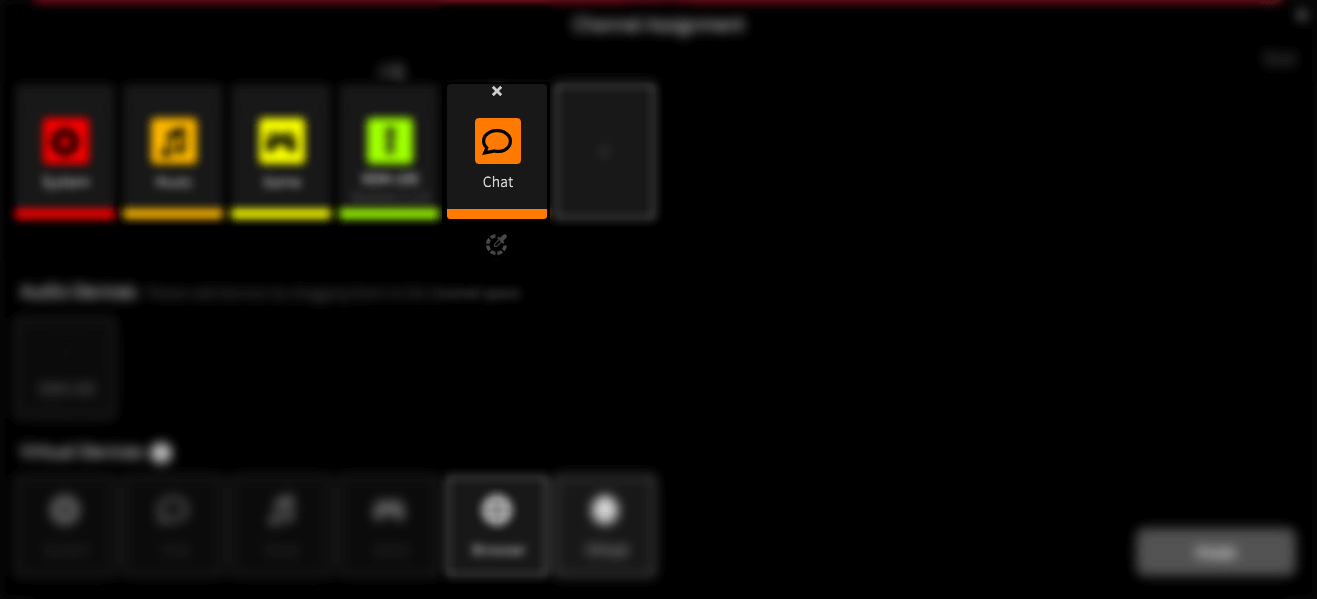
Any devices that you do not need, you can remove from the mixer by clicking on the ‘x’ that appears when you click on them.
Adding Virtual Devices
You can add up to 6 virtual devices, meaning that you can bring in 6 independent audio sources from other programs on your computer. This can include your browser, your game, a music playback app, communications apps such as Discord or Zoom and so on.
Count up how many sources you need, and ensure you add enough virtual channels to support them all by dragging those virtual channels up to the mixer configuration.
Adding Microphones
For example you can connect two XDM-100 microphones, or even a mix of different RØDE mics. They will appear as sources, and can be dragged up to the mixer configuration.
Each person them plugs their headphones into their own microphone. This will allow them to hear both their own voice, and all the other audio sources connected to UNIFY.
While most RØDE USB microphones are supported, older devices without inbuild DSP are not supported.Pro Tip
It can sometimes be easier to clear all the defaults and start from scratch. To do this, simply click the ‘x’ that appears on any assigned channel when you move the mouse over it.
The Chat Device vs Other Devices
Most of the virtual channels work in the same way, and allow audio to come unto UNIFY from other applications.
The Chat virtual device is a little different, as it also allows you to send audio back to the application, which means you can have a caller on the line, and they can also hear you.
So you need to reserve the Chat virtual channel for your comms channels, and use the other devices for other sources such as music and gameplay.
Pro Tip
The names of the virtual devices are there for convenience, to help you identify your sources. Apart from Chat, they all work in the same way, so you can use any of them for any source. If you have several different browsers, for example, you can bring audio from your second and third browsers into any of the virtual channels that are available.
Finishing Your Mixer Setup
Clicking ‘finish’ will close the channel assignment window and return you to the mixer main screen. You can return to the channel configuration window at any time if you need to adjust your configuration – you can access it from the main menu, found to the right of the UNIFY display.
Setting Up Your Microphones and Devices
UNIFY Compatible Microphones and their Processing Capabilities
Setting Up Audio Devices
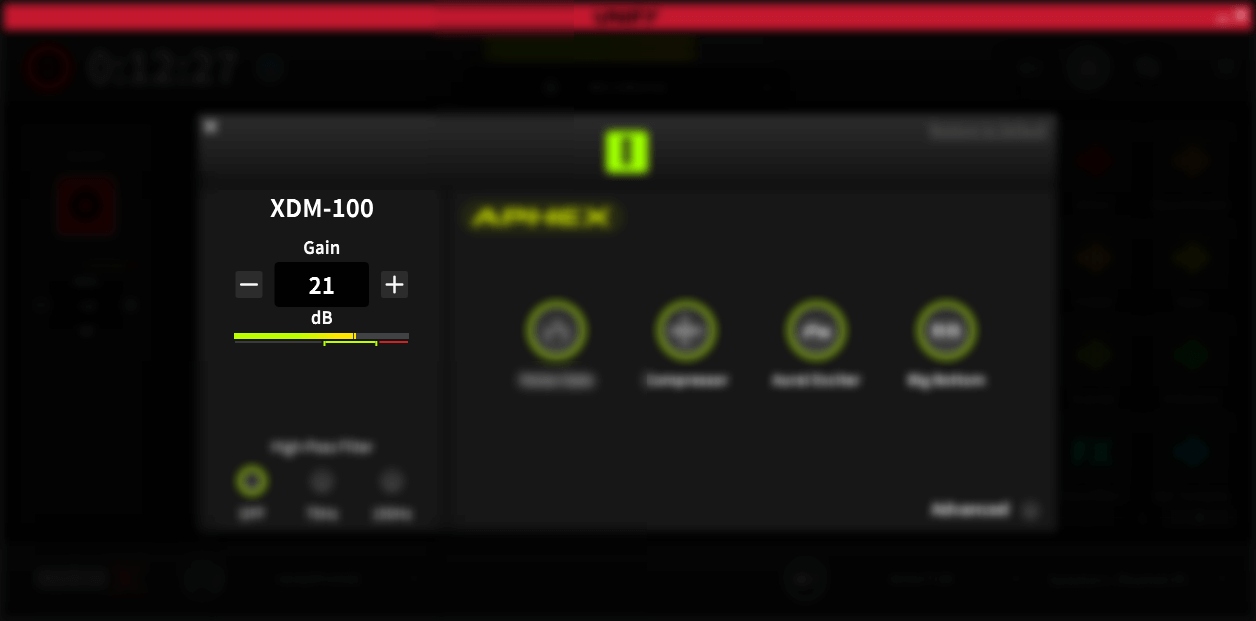
To finalise the setup of your audio devices, you need to set the gain, and also any audio processing you need. To do this, click the icon above the slider for the microphone or device you want to set up. The most important setting is the gain, which sets the overall level of the microphone. The process for setting this is slightly different for USB microphones compared to the Streamer X.
For USB microphones such as the XDM-100 and NT-USB Mini:
- Turn off the processing by ensuring none of the ‘processing’ buttons are illuminated green (click on them to toggle processing on and off)
- Speak into the microphone at the volume you will use for your stream
- Adjust the ‘+’ and ‘-‘ buttons until the meter is peaking well into the green target section, without going into the red
For the Streamer X:
- Turn off the processing by ensuring the ‘processing’ button is not illuminated green (click on it to toggle processing on and off)
- Ensure that on the Streamer X, the microphone type you are using (XLR, Headset or wireless) is selected by pressing the microphone knob until the indicator on the unit matches the device you are using
- Speak into the microphone at the volume you will use for your stream
- Adjust the microphone knob on the device until the meter is peaking well into the green target section, without going into the red
Once you have set the gain, you can turn the processing back on by clicking the ‘processing’ button so it is illuminated green.
Setting Up Virtual Devices
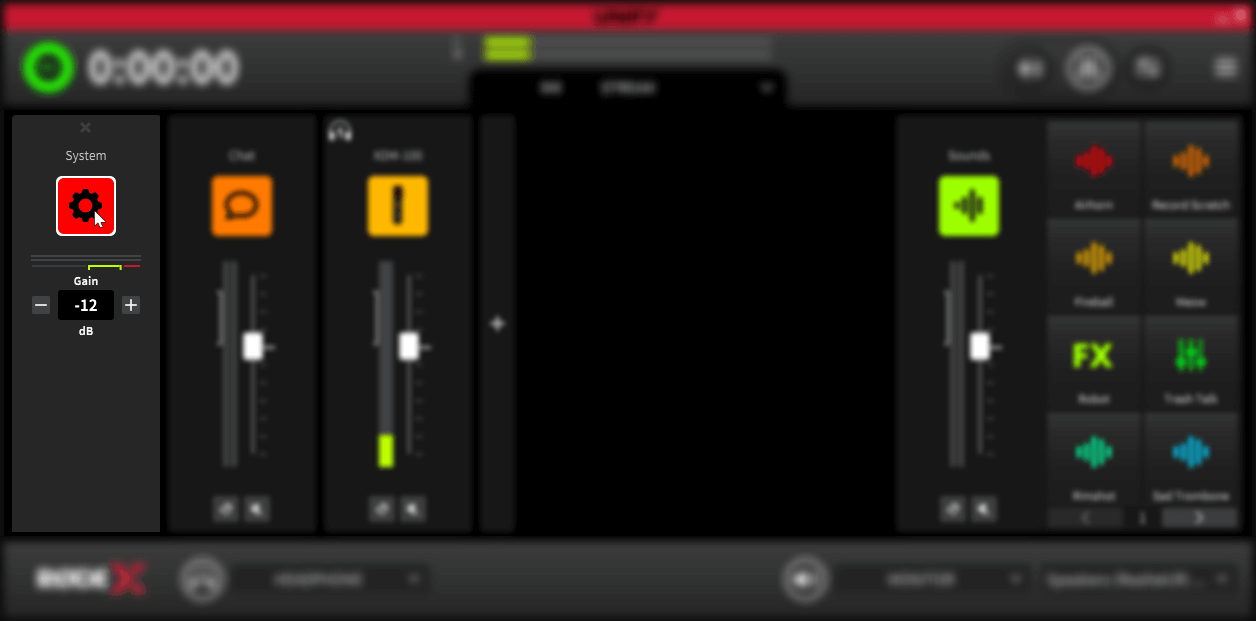
Virtual devices usually do not need further setup, but you can adjust the gain (overall level) of each source if you need to. To do this, click on the icon above the slider. You can then adjust the gain up or down as needed, using the meter as a guide. Remember that when you mix lots of sources together, the overall level will be higher than any individual source.
Connecting Your Virtual Devices
It’s important to realise that your browser audio will not automatically be assigned to the ‘Browser’ virtual device. You have to manually assign each program to its virtual device in order for the audio to appear in UNIFY.
There are two ways to do this – you can either use the device configuration settings in the program (if it has them), or you can assign them via the Windows control panel. Each method is outlined below.
Checking Your Configuration
If you have followed all the steps to this point, you should be good to check your configuration. Connect your headphones to your microphone (or Streamer X) headphone output. Try playing audio from each app – you should see it appear in UNIFY, hear it in your headphones and be able to adjust the volume of each source using the sliders. You should also be able to hear your own voice when speaking into the microphone. If you have other hosts with microphones connected, they too should be able to hear everything through headphones connected to their microphone.
Troubleshooting Tip
If audio is not showing up in some (or all) of the virtual channels in UNIFY, it could be because those devices are muted by your operating system. To check this on Windows, right click on the sound settings (the speaker icon in the taskbar), and open the volume mixer. Select each of the UNIFY virtual devices in the ‘Device’ dropdown list (System, Chat, Music etc), and check each device is not muted or faded right down.
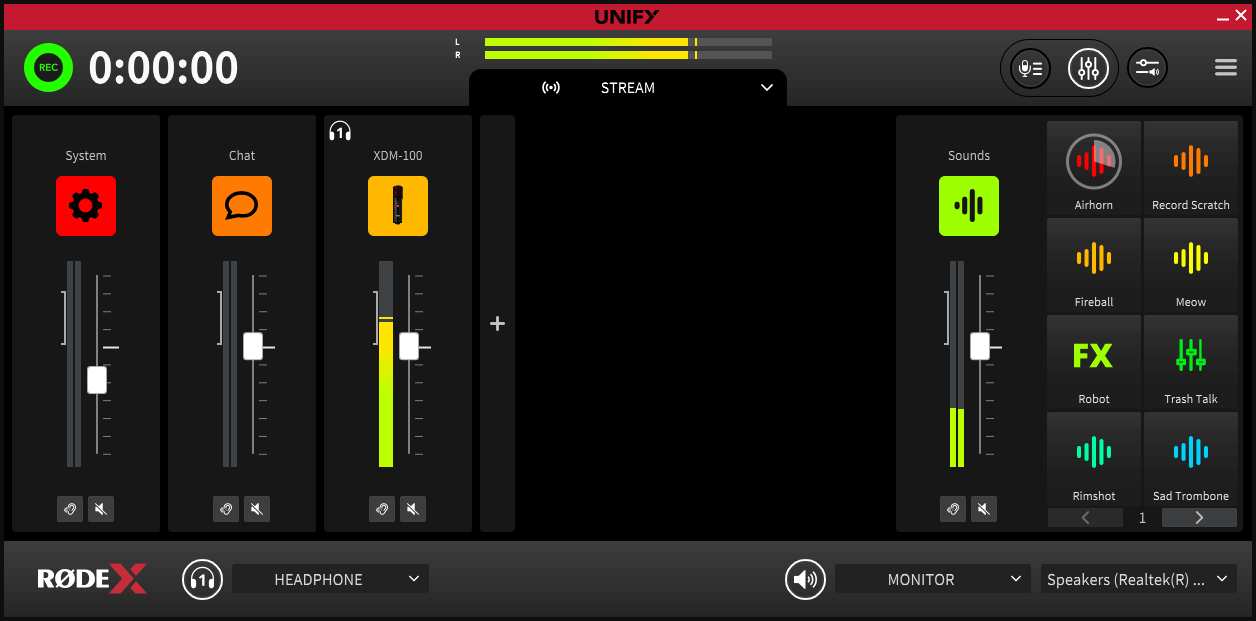
Recording
Recording with UNIFY
You can record the output of UNIFY directly to your computer. This makes it great not just for capturing your stream, but also for recording podcasts and other content.
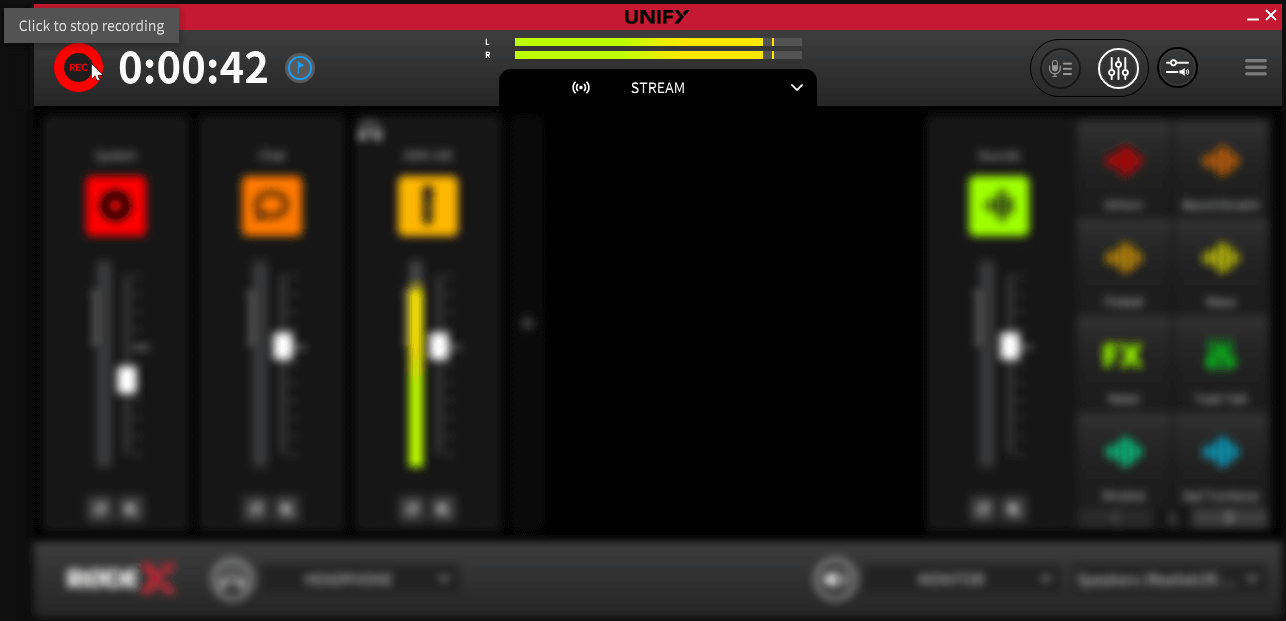
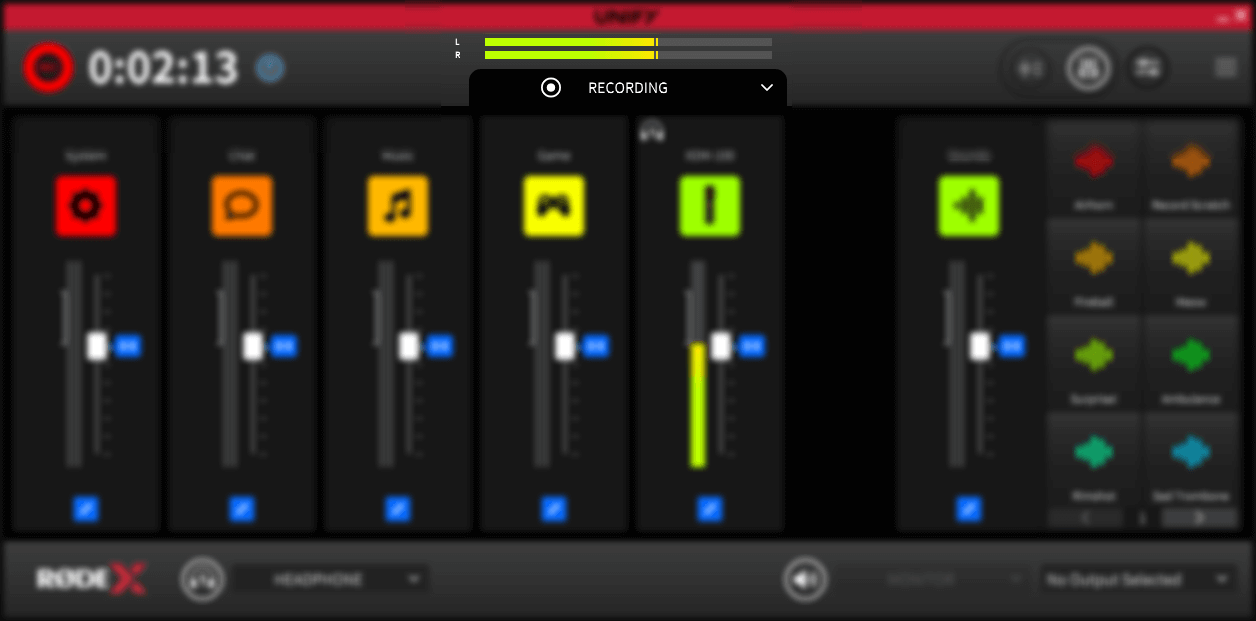
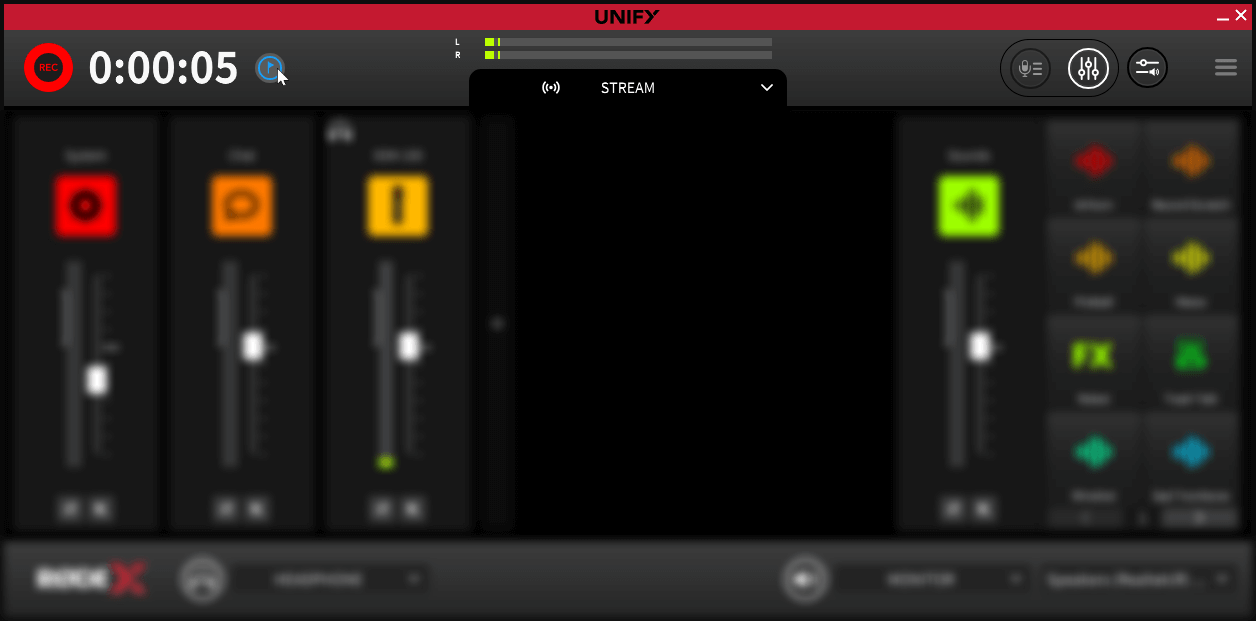
To start recording, simply click the red ‘record’ icon at the top left of the main UNIFY screen. The timer will show the elapsed recording time. To stop recording, simply click on the record icon again.
The Recording Submix
There is a separate submix for the recording. This is accessed in the same way as the other submixes – see the Audio Routing page for more details.
This means you can set a different mix for your recordings compared to your stream. Some options for this include:
- Leaving the recording mix linked to the stream mix, to capture exactly what you broadcast
- Unlink all the sources in the recording mix, and set the sliders to the unity point. This will deliver a ‘pre fader’ recording of your show. Combined with multi-channel recording, it allows for maximum flexibility in post-production
- Remove just the music from your recorded mix, so you can upload it later to your channel without introducing copyright issues
Adding Markers When Recording
You can add a marker to your recording by clicking the flag icon that will appear next to the timer when you are recording. This will drop a marker into the recorded file that can be used when exporting, and which can be read by many DAWs when using the files for post-production.
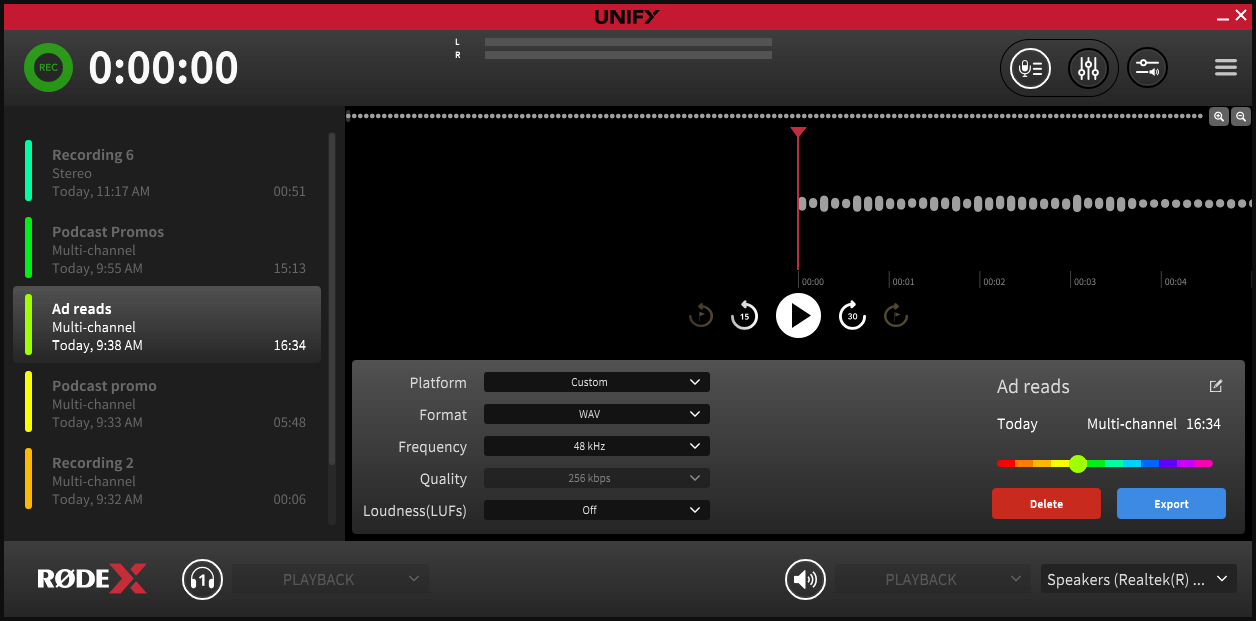
Accessing and Previewing Your Recordings
You can access your recordings by clicking on the ‘recordings’ icon at the top right of the main UNIFY display. Recordings are played back both through the ‘monitor’ output (if active) and headphone 1.
On the left of this window you will see all your recordings, the time they were made, and their duration.
To listen to a recording, select it and click the play icon. You can then use the time jump and marker jump controls to shuttle through the recording. You can zoom in and out on the waveform using the magnifying glass icons.
Note
Accessing the recordings window will cut all audio to your stream and other submixes, so do not access this function when you are streaming. You will not be able to access the recordings window if you are recording.
Exporting Recordings
To export a recording, you can select it, and then click the ‘export’ button on the bottom right of the screen. This allows you to set the location and filename for the export.
You can also select various export options using the dropdowns as follows:
1. Platform
This allows you to select the platform you intent to upload the content to, and optimises the file format and loudness for that platform. Many of the most popular platforms are included. When selecting this option, the other options will grey out, showing the settings relevant for that platform. To manually select your export settings, select ‘custom’ in this dropdown.
2. Format
You can export recordings in either MP3 or WAV format using this control
3. Frequency
This is the sample rate of the recording, and can be set to either 48Khz or 44.1KHz
4. Quality
When exporting in MP3 this sets the quality of the MP3 file. Higher bitrates will sound better, but create larger file sizes.
5. Loudness
This allows you to normalise your audio to a specific loudness (LuFs) setting. This ensures that your audio is neither too quiet or too loud overall.
Deleting and Renaming Recordings
Deleting Recordings
To delete a recording, you can select it, and then click the ‘delete’ button on the bottom right of the screen.
Colour Coding and Renaming Recordings
You can assign a colour and a name to a recording, to make it easier to keep track of your recordings.
To change the name of a recording, select the recording and then click the ‘edit’ button next to the name (to the right of the window). Retype the name you wish to give the recording. This name will also be used if the recording is exported.
To change the colour, use the colour picker above the ‘delete’ and ‘export’ buttons.
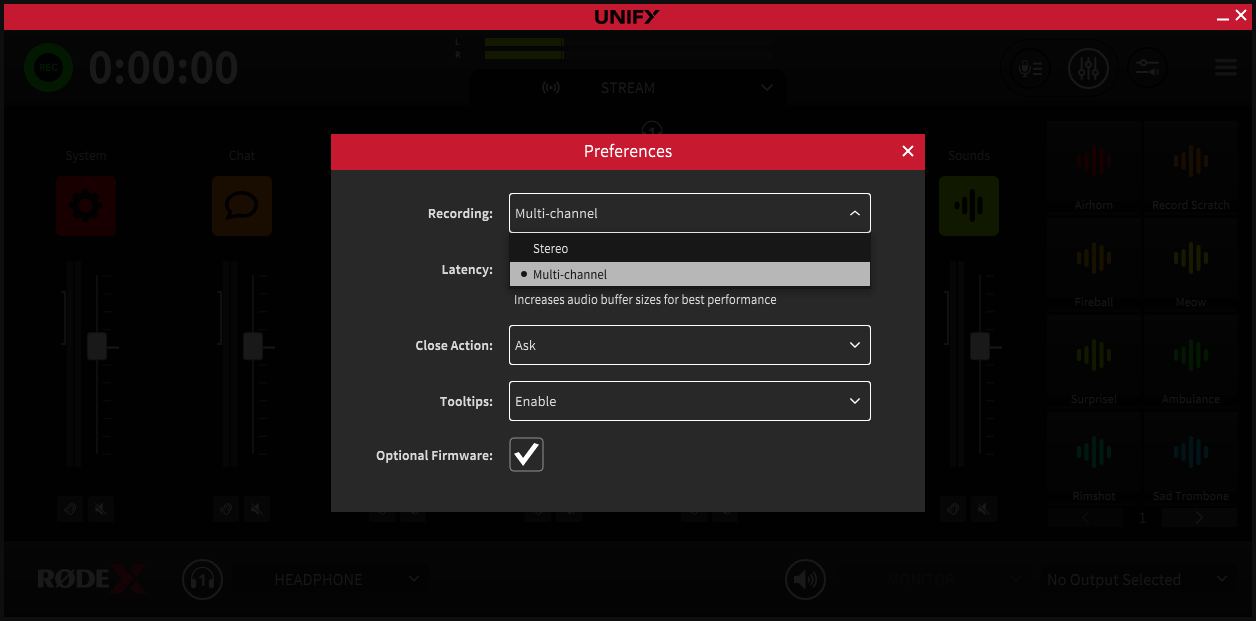
Multitrack Recordings
You can also record a full multitrack mix of your UNIFY inputs, for later post production. To do this, go to the ‘preferences’ settings, found in the main menu. Select ‘multi-channel’ in the recording section.
When you export a multi-channel recording, you will get separate files for each audio source (both audio devices and virtual devices), as well as the stereo mix.
Accessing Recordings Directly
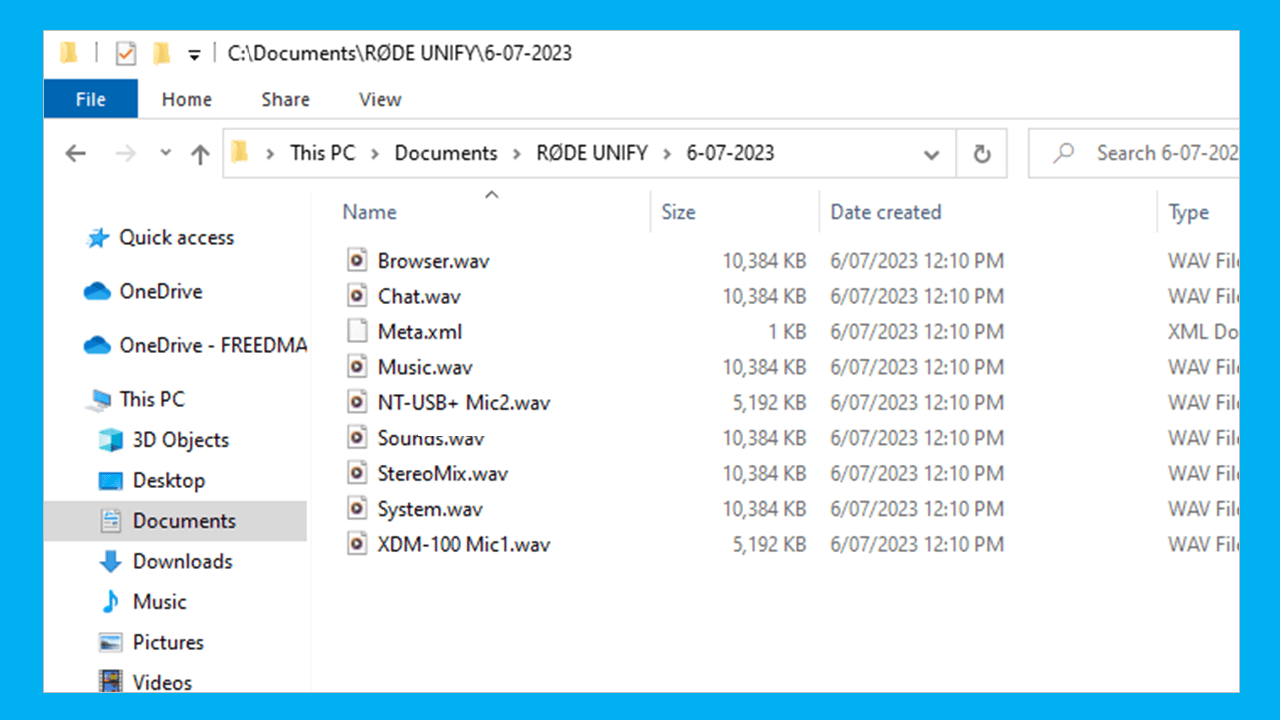
To access the actual files recorded by UNIFY without needing to export them, navigate to the ‘RØDE UNIFY’ folder in your default ‘Documents’ folder. The UNIFY recordings are there. Each recording is in a different folder, labelled with the date of the recording. The default recording format is WAV, 48kHz.
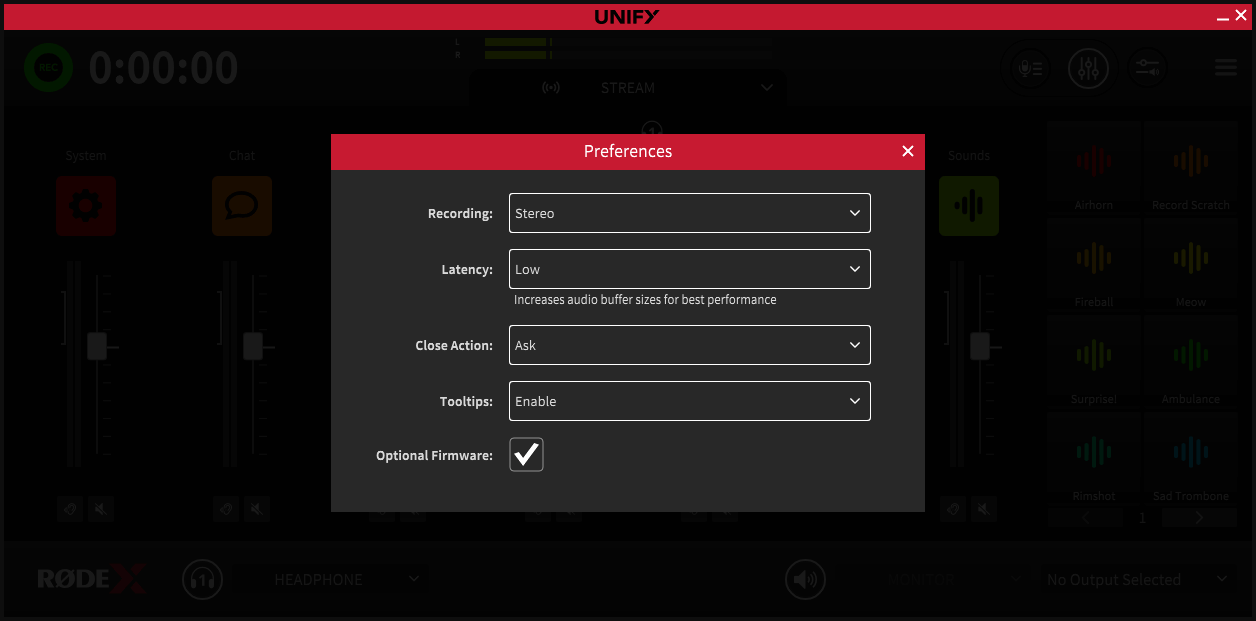
Preferences
There are a few preferences you can set in UNIFY that control how the program operates. The preferences are accessed via the main menu.
They are as follows:
1. Recording
This allows you to select either stereo or multi-channel recording modes (see above)
2. Latency
This determines how large the internal audio buffer size is. The ultra-low setting can help reduce delays, especially if using the monitor out as a headphone output for devices such as the NT1 5th generation. However, it uses more computing power, and may cause glitches on some systems.
3. Close action
This selects what happens when you click the ‘x’ in the top corner of the UNIFY window. It can either immediately close the program, give a dialog asking if you want to close, or minimise the application
4. Tooltips
This turns on and off the notes that appear when you hover over a control with the mouse.
Updating UNIFY and Your Devices
UNIFY Updates
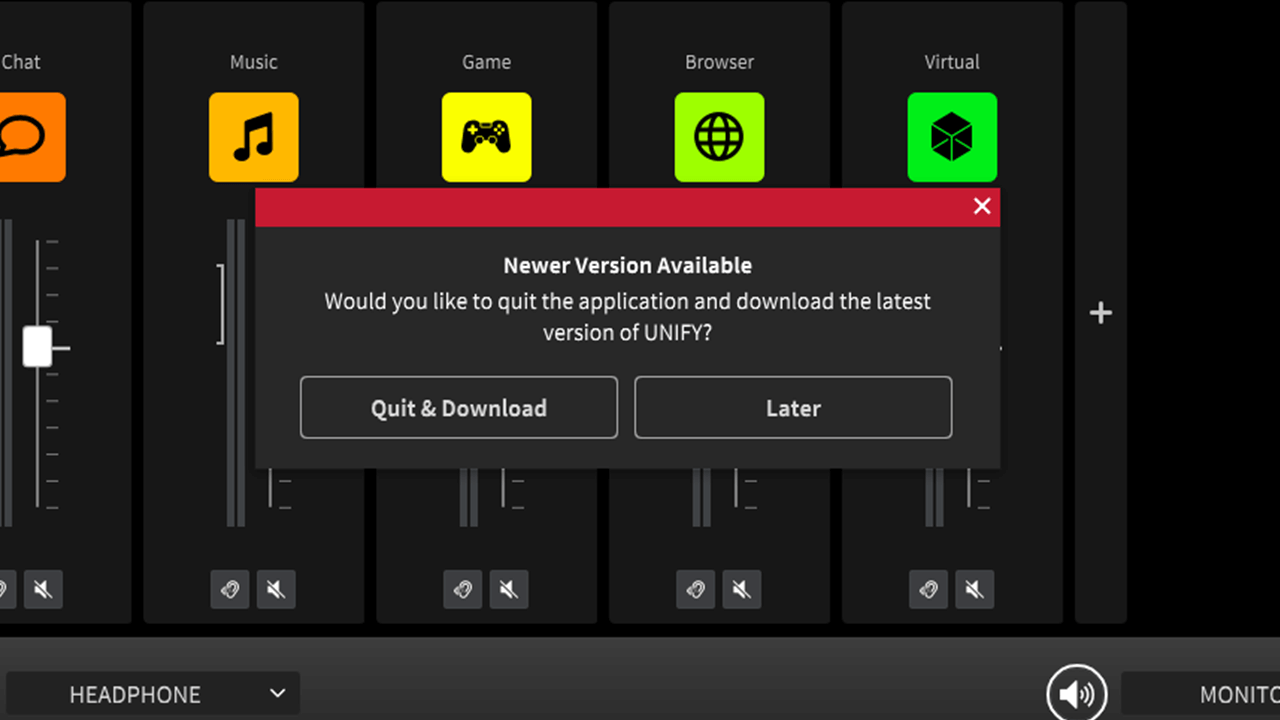
When you start UNIFY, it will check to see if there are any updates available. Updates are made regularly, and include bug fixes, support for additional microphones and new features.
If an update is available, UNIFY will ask if you want to download the update. UNIFY will also close, so you can run the downloaded installer to update your version of UNIFY. Note you cannot update UNIFY whilst the software is running.
There is no requirement to update UNIFY, but we recommend that you regularly update to the latest version, in order to ensure continued support and compatibility with computers and audio devices.
Microphone Updates
UNIFY will also tell you if there is a firmware update available for your microphones or other RØDE audio devices. These updates must be done in order to ensure compatibility between your microphone and UNIFY.
Simply click to update your microphone or other device – typically the update only takes a few seconds. It is important not to unplug your device from your computer whilst an update is in progress.
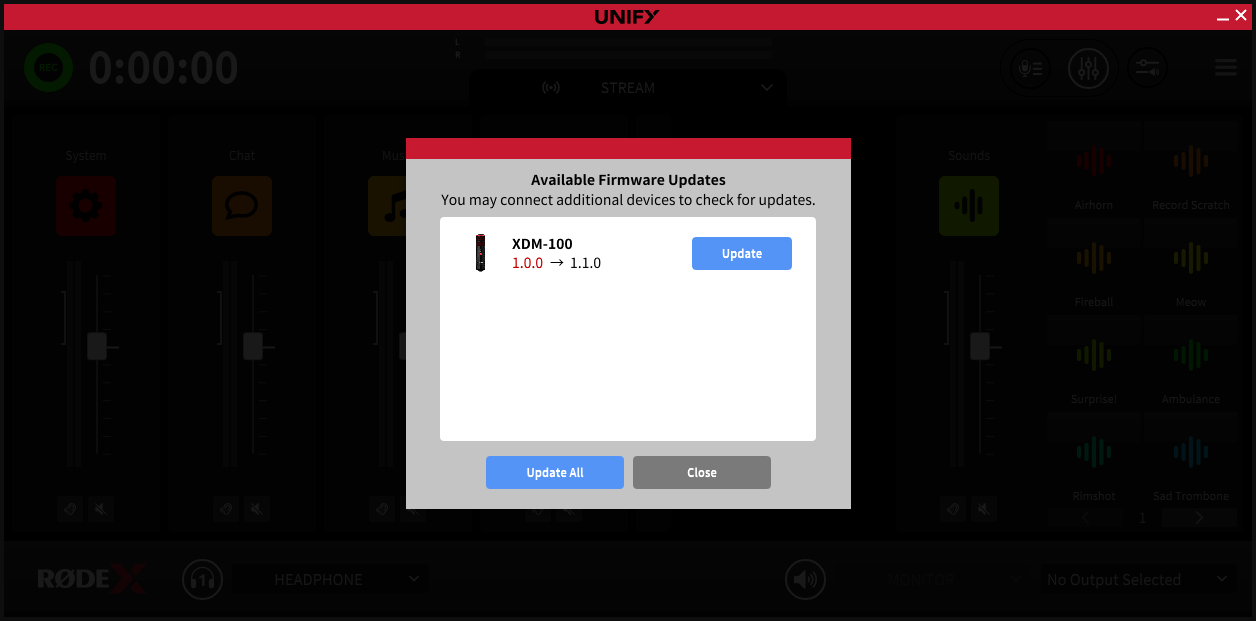
Pro Tip
Whilst most devices will update very quickly, due to the added complexity of the Streamer X it can sometimes take several minutes for the Streamer X to update, and the device may reboot several times during the update. Just be patient until the update is completed, and the Streamer X is available to select in UNIFY.