Setting Up USB Connections
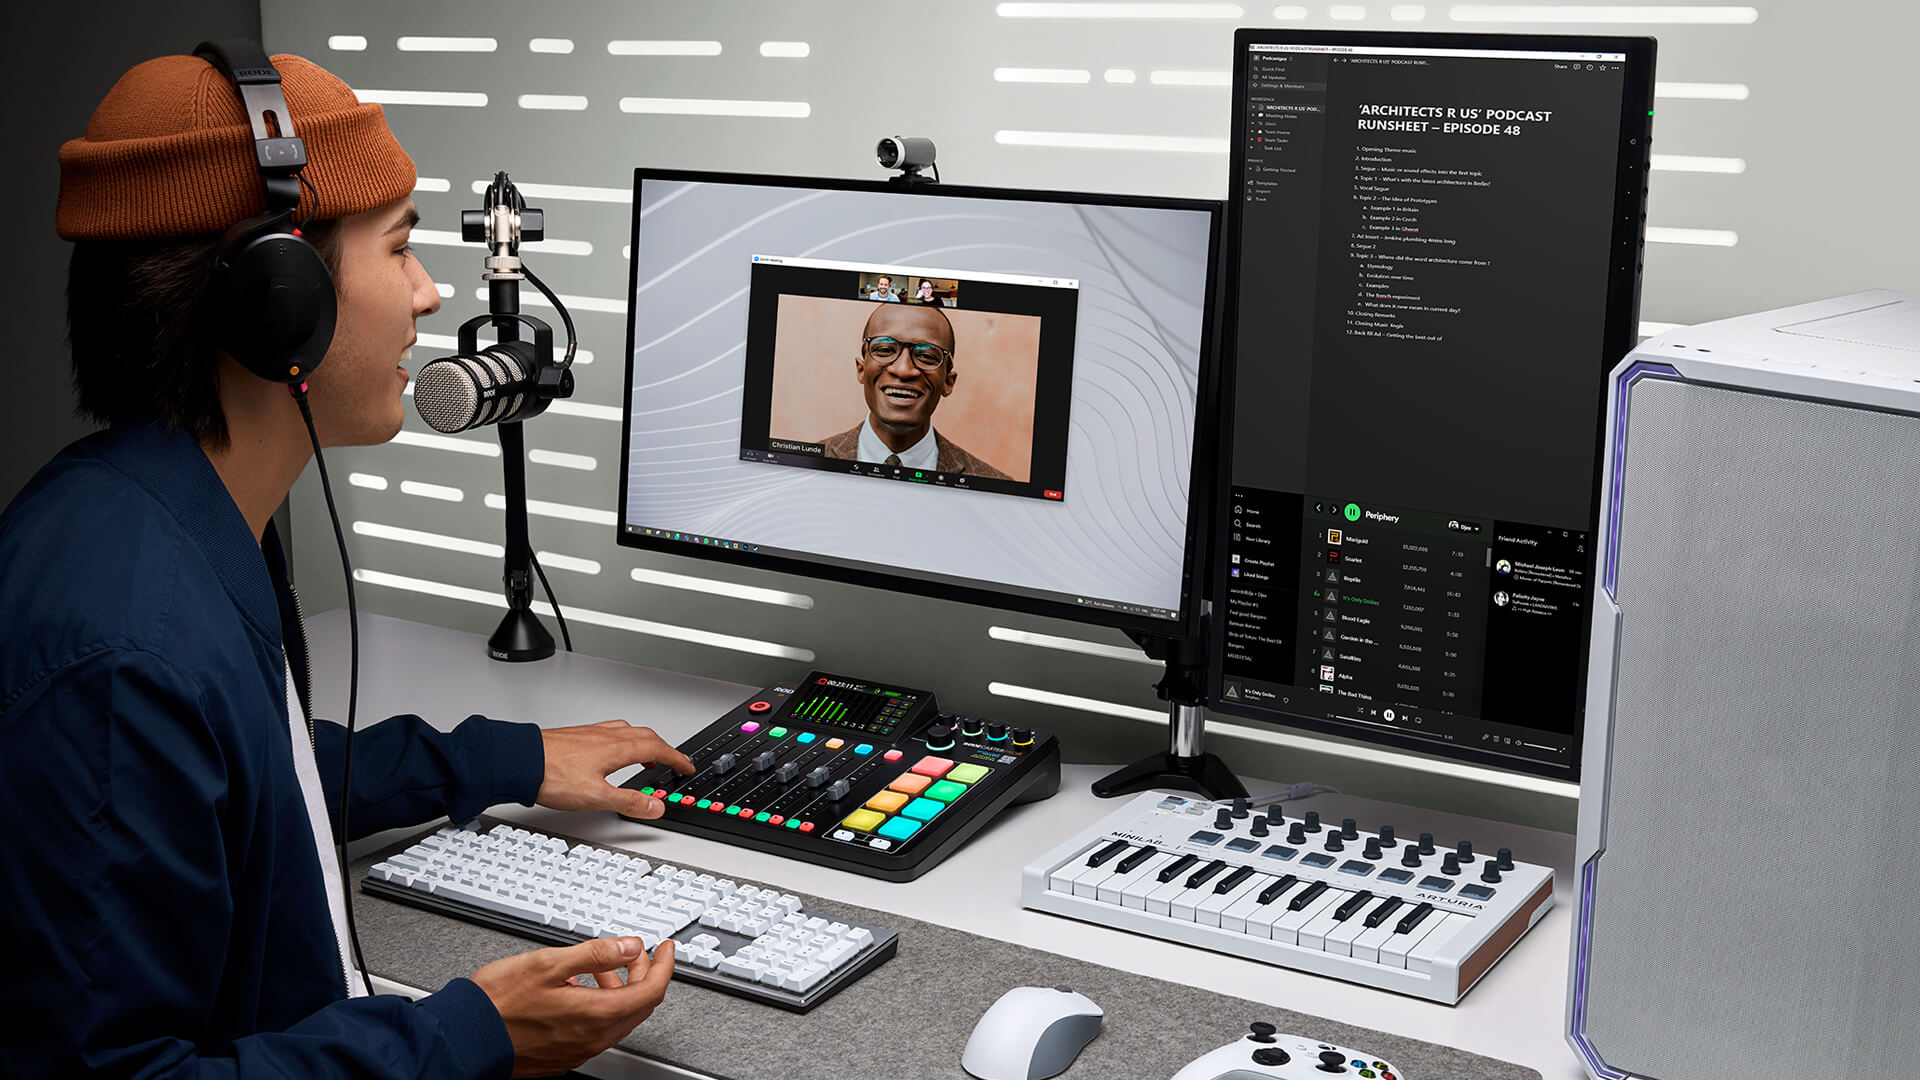
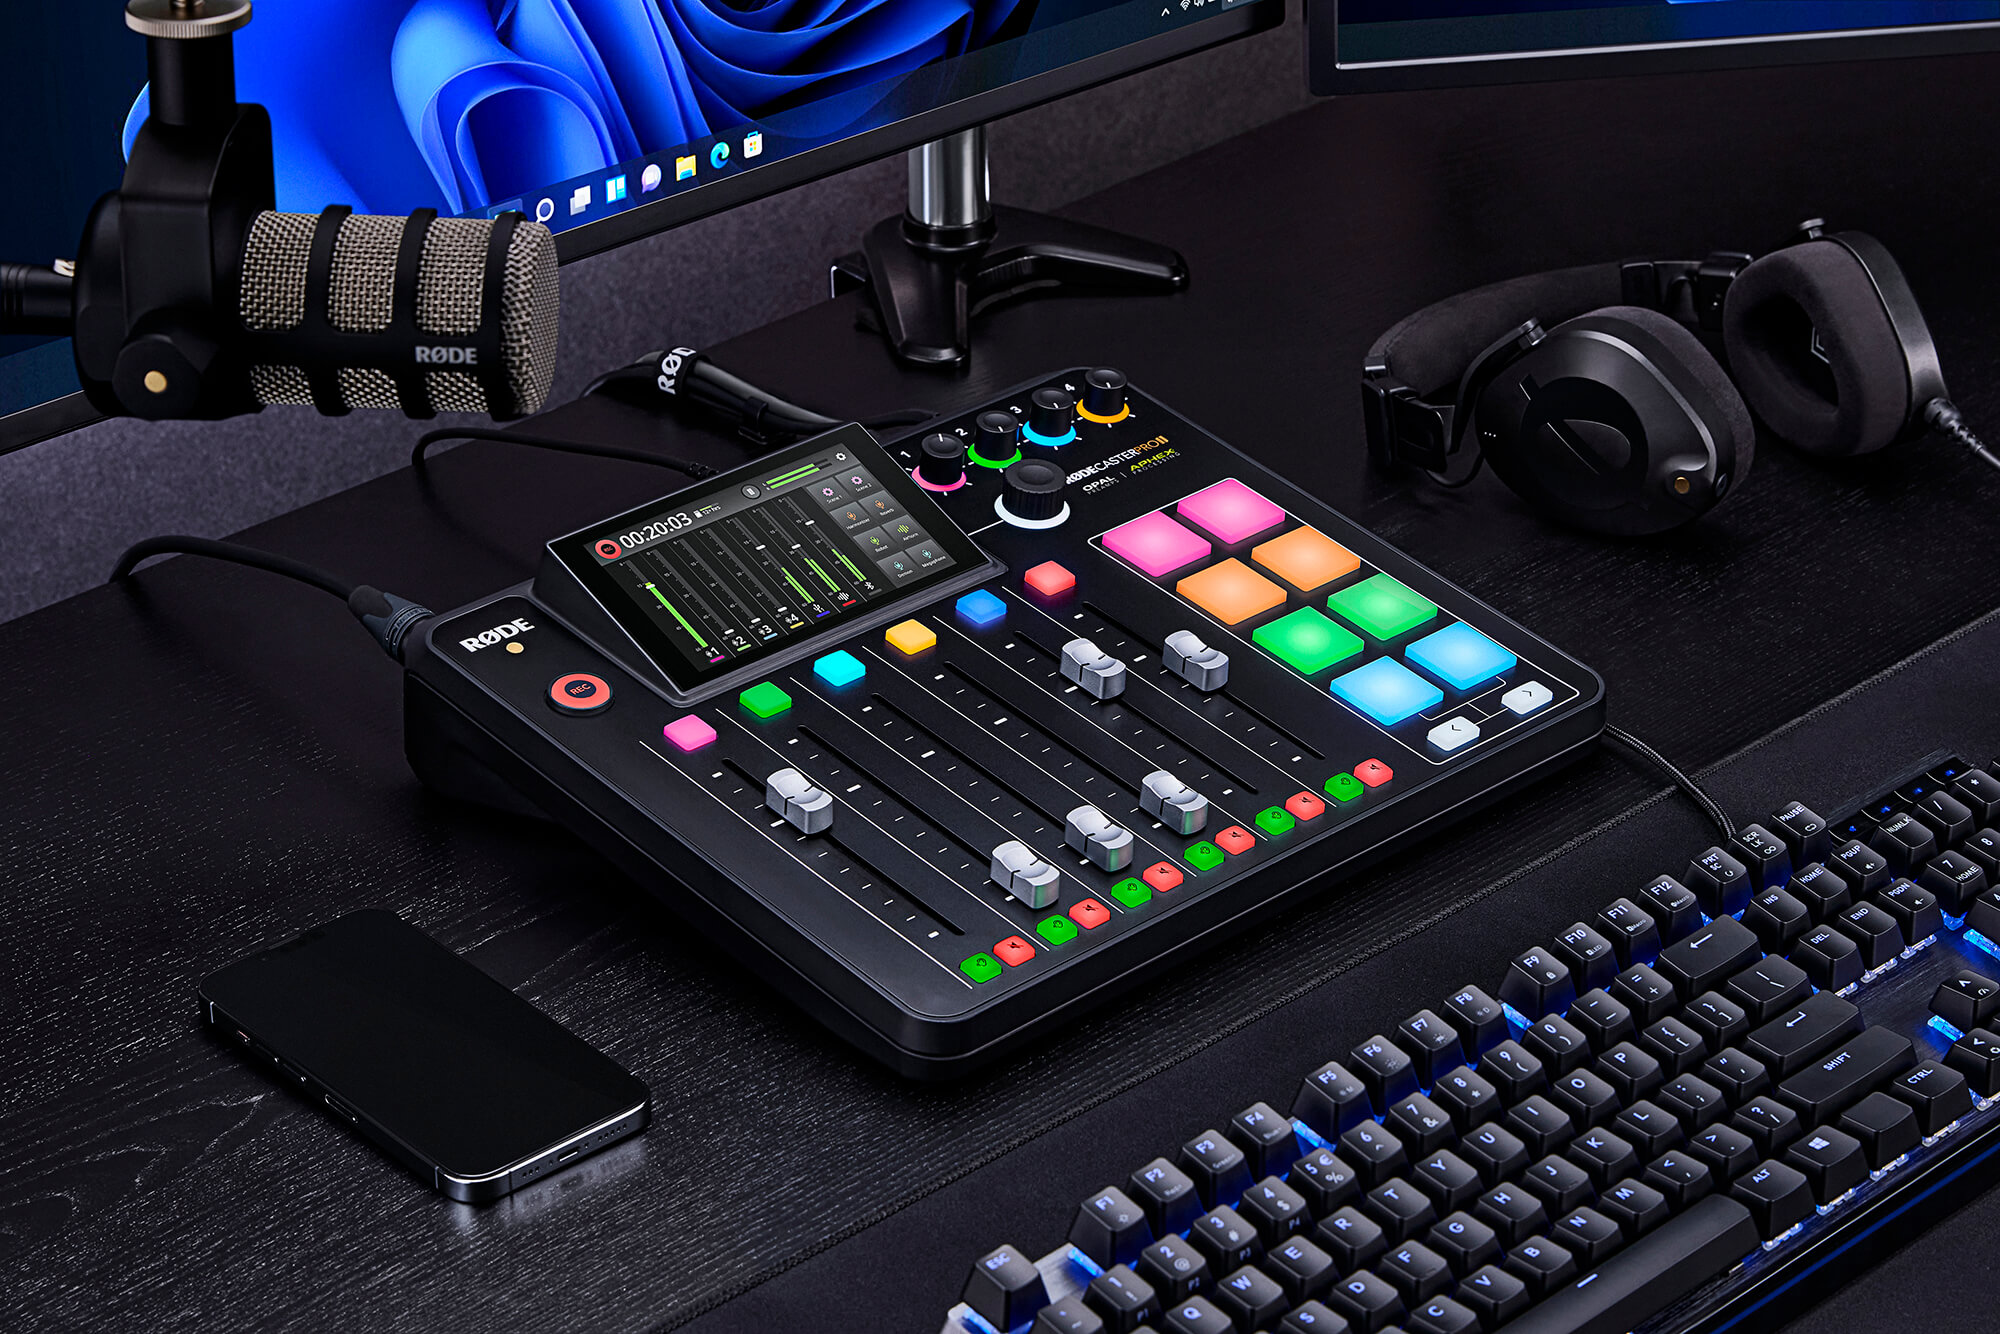
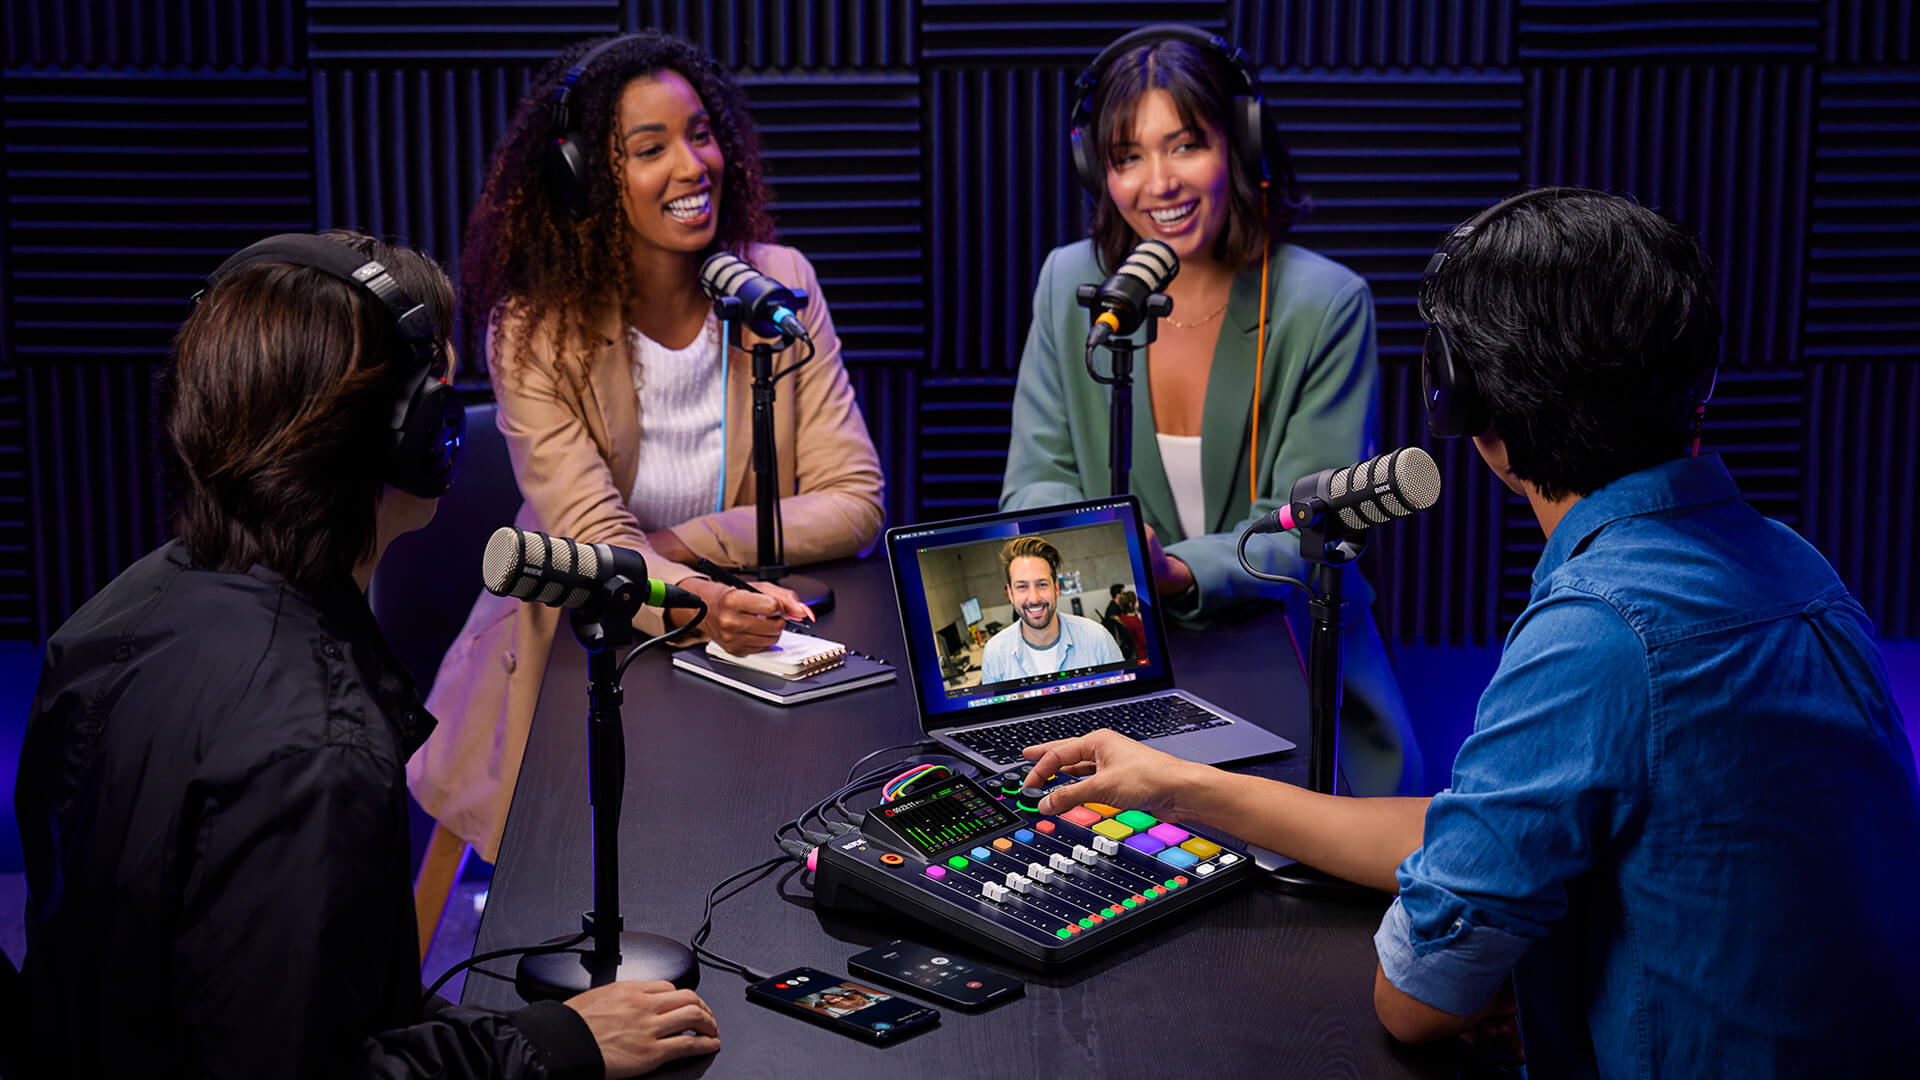
The RØDECaster Pro II is an incredibly versatile audio production tool with a plethora of powerful features for improving workflows for podcasting, livestreaming, and music production. This includes two USB interfaces with three available USB audio devices, and a host of configurable options for mix-minus, sub-mixes and multitrack recording.
Whilst these features offer a lot of flexibility, they are quite unique. In this guide, we’ll explain how the RØDECaster Pro II mixer and USB architecture works, the different features and uses for each USB interface, how multitrack recording works, routing audio for remote calls, sub-mixes, mix-minus, and more.
Understanding the RØDECaster Pro II Mixer Architecture
The RØDECaster Pro II is a powerful audio console for mixing multiple audio sources with complete control over levels, processing, and more. There are nine audio inputs in total: four XLR/TRS connections for connecting microphones, instrument and other devices, Bluetooth for connecting smartphones and other devices wirelessly, SMART pads for triggering audio, and three USB audio input devices. Each of these inputs will send audio to the fader it is assigned to on the RØDECaster Pro II mixer, allowing you to control each audio source individually to create the perfect mix for your content.
The RØDECaster Pro II also features a number of different audio outputs, including the headphone and speaker outputs, and the USB audio interfaces. However, it’s important to note that, by default, the main audio mix (meaning all of your audio inputs blended together) is sent to all of these audio outputs. This means that what you hear in your headphones, on speakers, and what is sent to each of the USB audio interfaces will be exactly the same.
You can, however, customise how the different audio inputs are routed to each of the ten possible outputs, including the USB outputs, as well as adjust the individual input levels and mutes for each using sub-mixes. You can learn more about sub-mixes on the Setting Up Channels and Outputs page, but we’ll cover the USB channels specifically below.
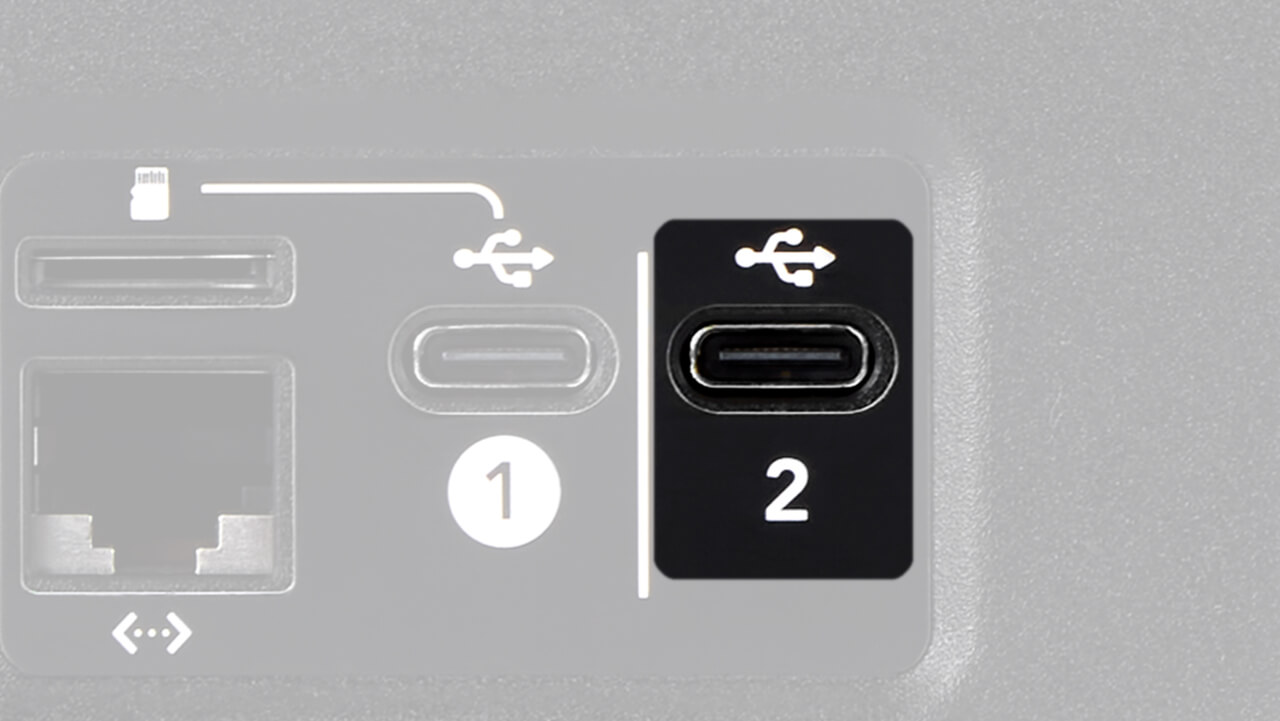
Understanding the Physical USB Interfaces
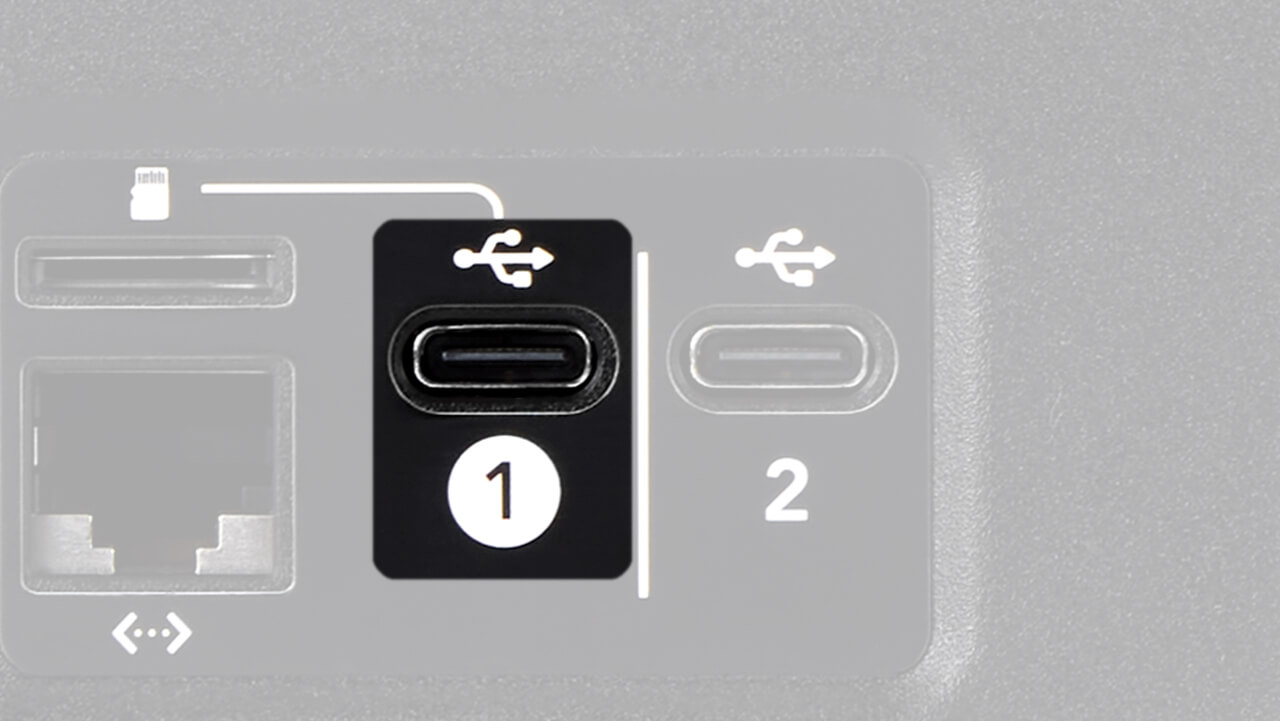
The RØDECaster Pro II has two USB interfaces, labelled 1 and 2. Whilst they both offer audio connectivity, they have slightly different functionality as follows:
| USB 1 | USB 2 | |
|---|---|---|
| USB Audio Device(s) | RØDECaster Pro II Main RØDECaster Pro II Chat |
RØDECaster Pro II Secondary |
| Data Transfer From microSD Card | Yes | No |
| iOS Connectivity (with RØDE SC15 or SC19 cable) | No | Yes |
| Android Connectivity | Yes | Yes |
| Multitrack Output | Yes (Main device only) | No |
| Mix-minus | Yes | Yes |
| Custom Routing | Yes | Yes |
| RØDECaster App Connectivity | Yes | No |
| Connect USB storage device | Yes | Yes |
Understanding the capabilities of each interface can help determine the best setup for you. In general, USB 1 should be connected to your primary computer. USB 2 can then be connected to a secondary device (such as a smartphone, another computer, or the same computer).
In a dual-PC setup, you can use the appropriate USB port for each computer’s role in your setup, depending on which computer runs your stream, which runs your chat, and which runs your content or gameplay.
Pro Tip
If you are using the RØDECaster Pro II with a single computer, connecting both the USB 1 and USB 2 interfaces simultaneously will give you access to all the above features without the need to disconnect and reconnect while creating content.
USB Main
The main output of the RØDECaster Pro II is the device called ‘RØDECaster Pro II Main’. To access this device on your computer, connect your computer to the USB 1 port on the back of the RØDECaster Pro II.
You should then see an audio device labelled ‘RØDECaster Pro II Main’ appear in the list of audio devices available.
Note
You will also see ‘RØDECaster Pro II Chat’ appear, as this is also available via the USB 1 port (see below for more info on how to use USB Chat).
Pro Tip
If you use a Mac computer, sometimes the list of devices you can see when you click on the speaker icon in the Menu Bar does not update straight away when new devices are plugged in. If you have connected your RØDECaster Pro II but can’t select it from the Menu Bar, go to your Audio Preferences, where all available devices will be listed.
If you set ‘RØDECaster Pro II Main’ as the default audio device for your computer, audio from your computer will be sent to the RØDECaster Pro II via the USB 1 audio input, which you can allocate to any fader you choose.
Your entire audio mix (unless otherwise specified using custom routing; see below) will also be sent from the RØDECaster Pro II to your computer via the same audio interface and will be available on any software that you are using – for example, a digital audio workstation (DAW), streaming software, or a communications app.
By default, ‘RØDECaster Pro II Main’ is a stereo USB output, but it can be set to multitrack by going to settings > ‘Outputs’ > ‘Multitrack’ > ‘USB’ and deselecting ‘Off’. When in multitrack mode, you will be able to record each track you have set up on your RØDECaster Pro II individually in recording software such as a DAW.
There are 16 different audio channels available on the ‘RØDECaster Pro II Main Multitrack’ audio device, which are organised as follows.
Note
When Multitrack mode is off, the ‘RØDECaster Pro II Main’ audio device will appear as ‘RØDECaster Pro II Main Stereo’; when it is on, it will appear as ‘RØDECaster Pro II Main Multitrack’ (Mac) or just ‘RØDECaster Pro II Main’ (Windows).
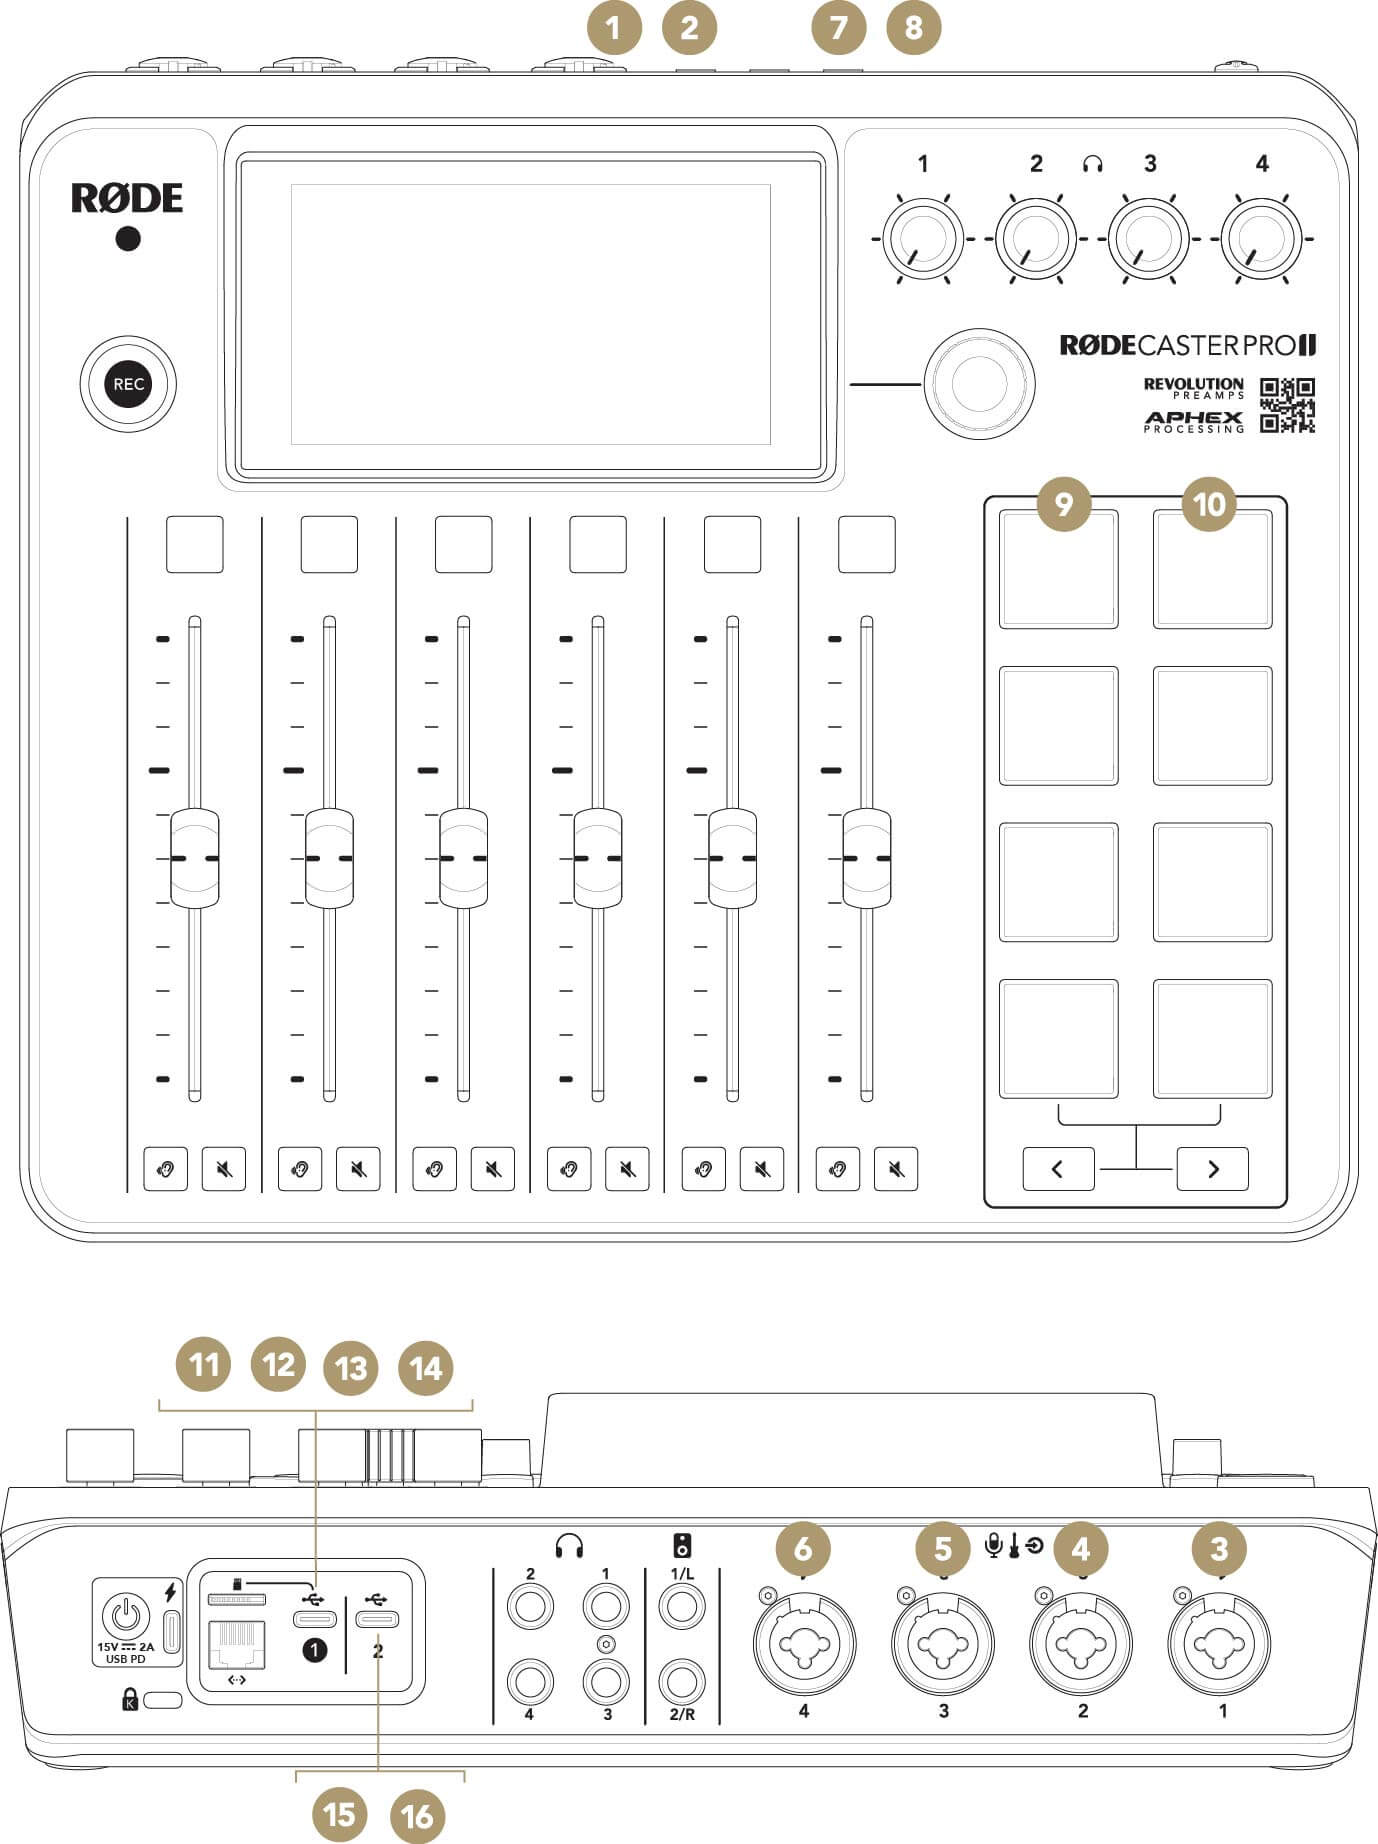
1Mix L
2Mix R
3XLR/TRS 1
4XLR/TRS 2
5XLR/TRS 3
6XLR/TRS 4
7Bluetooth L
8Bluetooth R
9SMART Pads L
10SMART Pads R
11USB Main L
12USB Main R
13USB Chat L
14USB Chat R
15USB Secondary L
16USB Secondary R
If you are using software or an application that does not allow you to select which channel(s) you want to use, we recommend turning off multitrack mode. This is because some software (such as Ecamm Live) automatically mixes all 16 channels together if it detects a multitrack audio device, which can cause unexpected results when muting or fading, or using voice effects.
We also recommend switching off multitrack mode when using a browser-based streaming platform (such as restream.io) on a Windows PC, as the streaming platform may not accept ‘RØDECaster Pro Main Multitrack’ as an audio source. This is a limitation of browser-based software due to multitrack audio devices not being properly recognised.
Check out the RØDECaster Pro II User Guide to find out more about setting up multitrack recording.
Pro Tip
If you are using a browser-based streaming platform (such as restream.io) on a Windows PC, the streaming platform will not accept ‘RØDECaster Pro Main’ as an audio source. This is a limitation of browser-based software due to multitrack audio devices not being properly recognised. If you are using an online streaming platform, connect your RØDECaster Pro II to your computer using the USB 2 port instead of USB 1 and use the ‘RØDECaster Pro Secondary’ audio device as your input and output device (see below for more info).
USB Chat
When using USB 1 to connect the RØDECaster Pro II to a computer, another audio device called ‘RØDECaster Pro II Chat’ will be available alongside the ‘RØDECaster Pro II Main’ device described above.
This is a completely independent audio device that can be allocated to its own fader on the RØDECaster Pro II’s mixer and is optimised to be used with communications applications such as Skype and Discord. To set this up, simply select ‘RØDECaster Pro II Chat’ as both the input (microphone) and output (speaker) device in your communications app’s audio preferences and allocate ‘USB 1 Chat’ to a fader on the RØDECaster Pro II.
USB Secondary
The RØDECaster Pro II has an additional USB audio device called ‘RØDECaster Pro II Secondary’. This is accessed using the USB 2 port on the back of the RØDECaster Pro II. You can use USB 1 and USB 2 with two different computers or connect them both to a single computer simultaneously (you will just need an additional cable and an extra USB port on your computer).
Pro Tip
If you are running out of USB ports on your computer, you can use a USB hub. We recommend using a high-quality USB3.0 hub for best results.
‘RØDECaster Pro II Secondary’ is useful in a range of applications. For example, if you are using ‘RØDECaster Pro II Chat’ for your communications application, you can route additional audio from an app such as Spotify to ‘RØDECaster Pro II Secondary’ (simply select ‘RØDECaster Pro II Secondary’ as the output device in the app settings), which will then be sent to the fader that USB 2 is allocated to.
Remember, if you are using the ‘RØDECaster Pro II Secondary’ device to connect to a communications app, your caller will hear the main output mix – including any audio sources connected to the ‘RØDECaster Pro II Main’ and ‘RØDECaster Pro II Chat’ devices via the USB 1 port – unless you create a custom output mix (see below).
It is also important to note that the ‘RØDECaster Pro II Secondary’ output device is not a multitrack output – only the full output mix will be sent to your computer. The USB 2 port should also be used for connecting smartphones and tablets to the RØDECaster Pro II as it is MFi-certified, meaning it will interact seamlessly with iOS devices (you will need to connect iOS devices with a Lightning Accessory Cable such as the SC19; a standard charging cable will not work), and it has mix-minus available, which is important when making calls.
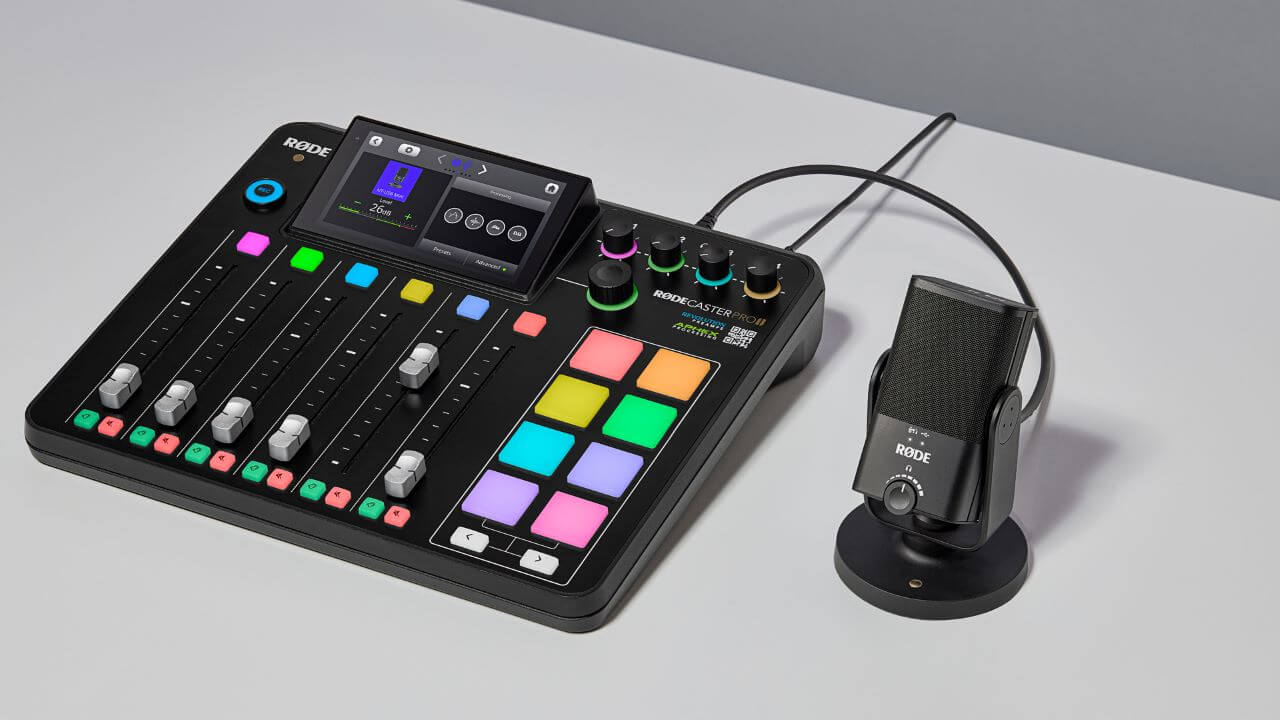
Connecting a RØDE USB Microphone
You can connect a RØDE USB microphone to the RØDECaster Pro II's USB 2 port using a USB-C-to-C cable, allowing for an additional microphone input.
Once connected, simply assign the USB 2 channel to a fader and treat it as if it were any other microphone input channel. You can control the USB microphone's on-board processing in the channel setup screen, although the RØDECaster's own channel processing and effects will not apply. In the case of the PodMic USB, NT-USB Mini, XCM-50 and XDM-100, you can mute or un-mute the USB 2 channel by pressing the physical button on the microphone.
Compatible devices include:
- PodMic USB
- NT-USB+
- NT-USB Mini
- VideoMic NTG
- VideoMic GO II
- XCM-50
- XDM-100
- Wireless ME
- Wireless GO II
- Wireless GO (Gen 3)
- Wireless PRO
Note
In order to achieve zero-latency monitoring with the USB microphone, you will need to connect headphones directly to the microphone. You can then adjust headphone monitoring levels with the microphone's on-board controls.
Mix-minus for the USB Outputs
If you are using a USB channel for making a remote call via either a mobile device or a communications app on a computer, we recommend activating mix-minus on that channel. This is a handy feature that means that the communications app will receive all of the audio that is coming into the RØDECaster Pro II except its own. This prevents echo on your calls, as your caller will hear everything but their own voice being piped back to them, which is very distracting (especially as it will be somewhat delayed).
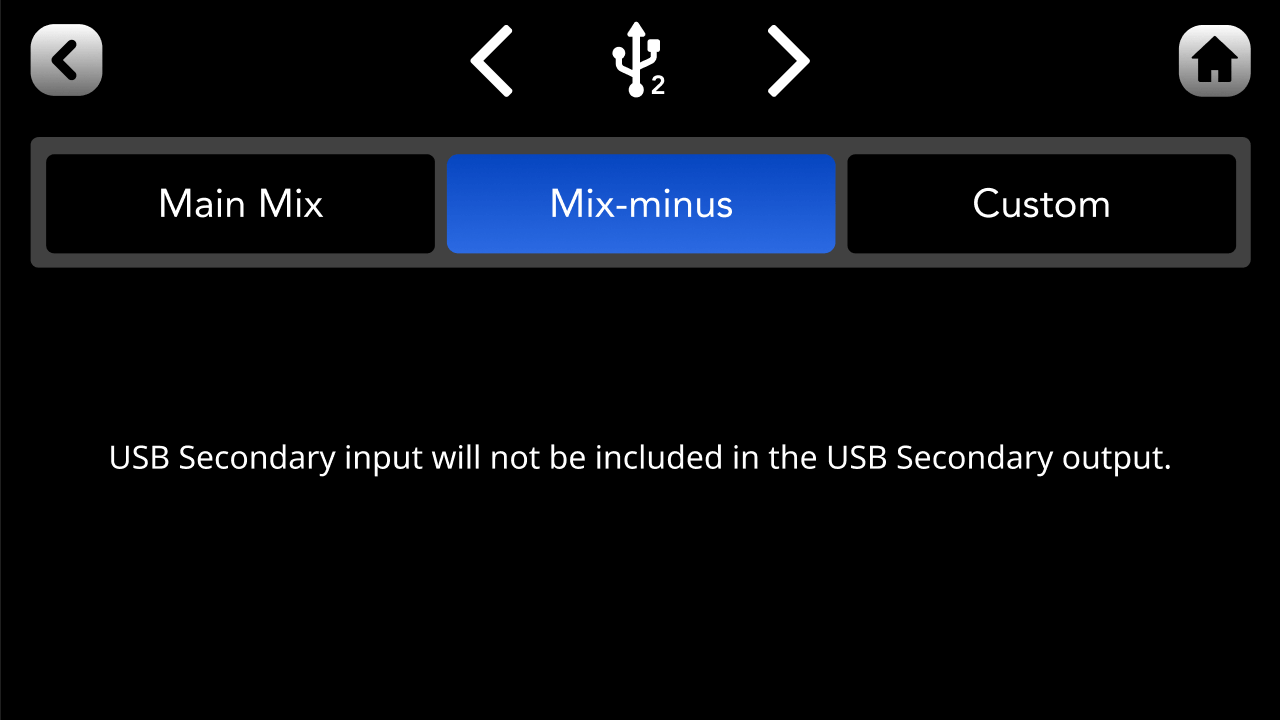
To activate this, either go to the channel set-up screen for the USB channel you want to configure and tap ‘Routing’ > ‘Mix-minus’, or go to settings then ‘Outputs’ > ‘Routing’ > ‘Mix-minus’.
Note: Mix-minus is activated by default on USB Chat and USB 2.
Custom Routing for the USB Outputs
As mentioned, by default, the main audio mix will be sent to all USB outputs on the RØDECaster Pro II (with mix-minus applied for USB Chat and USB 2). However, this can be problematic in recording or streaming scenarios where you don’t want a particular audio input being sent to one of the USB outputs, or you want it sent at a different volume level – for example, if you don’t want your game sounds that are being sent to USB 1 being heard on your chat application on USB 2, or you just want them to be heard at a lower volume. To solve this, you can set up a custom sub-mix for USB 1, USB Chat and USB 2, giving you full control over what audio inputs are being sent to each USB outputs and at what levels.
To access this, either go to the channel set-up screen for the USB channel you want to configure and tap ‘Routing’ > ‘Custom’, or go to settings then ‘Outputs’ > ‘Routing’ > ‘Custom’. From the custom routing set-up screen, you can adjust levels, mutes and links for each input track – for more detail on this feature, read the Setting Up Channels and Outputs section of the user guide.
.png)