Streamer X
The Streamer X is a professional audio interface, video capture card and control surface integrated into one compact, easy-to-use device. The ultimate all-in-one streaming solution. It allows you to capture a number of different audio inputs alongside a high-resolution video feed into your computer via the included USB-C cable, which you can then stream live or record.
Discover everything you need to know about using your Streamer X here.
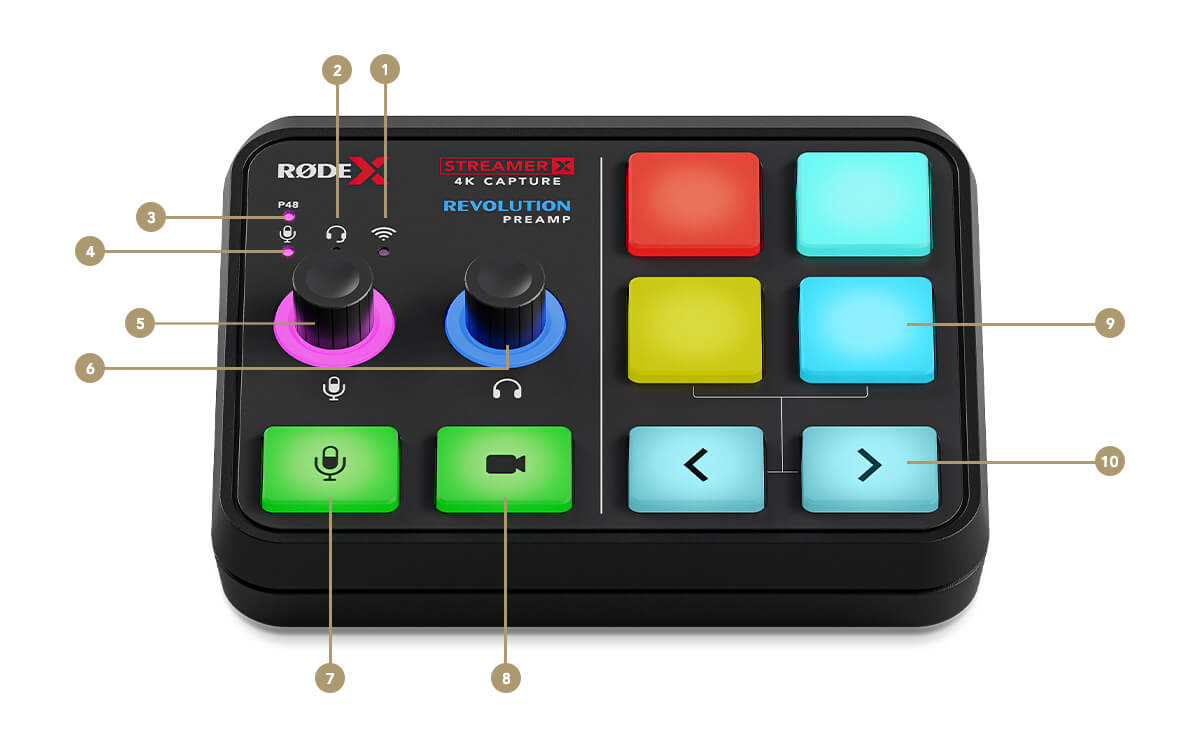
Top View
1Wireless Input Indicator
2Headset Input Indicator
3Phantom Power Indicator
4Combo Jack Input Indicator
5Input Rotary Encoder
6Headphone Rotary Encoder
7Microphone Mute Switch
8Video Feed Cut Switch
9SMART Pads
10Bank Switching Buttons
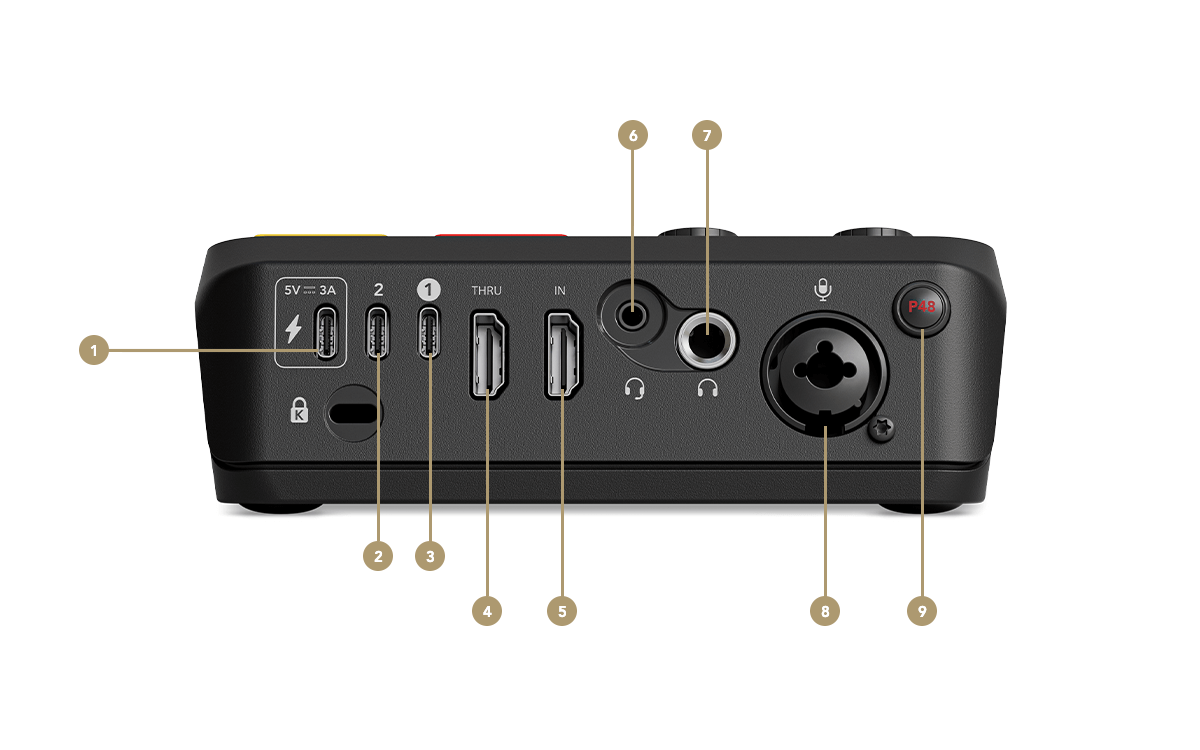
Rear View
1USB Power Input
2USB 2
3USB 1
4HDMI Thru
5HDMI In
6Headset Input/Output (TRRS)
7Headphone Output (TRS)
8XLR/TRS Combo Input
9Phantom Power Switch