XCM-50
The XCM-50 is a professional condenser USB microphone for streaming and gaming.
Learn how to set up, use and get the most out of your XCM-50 with the included UNIFY software here.
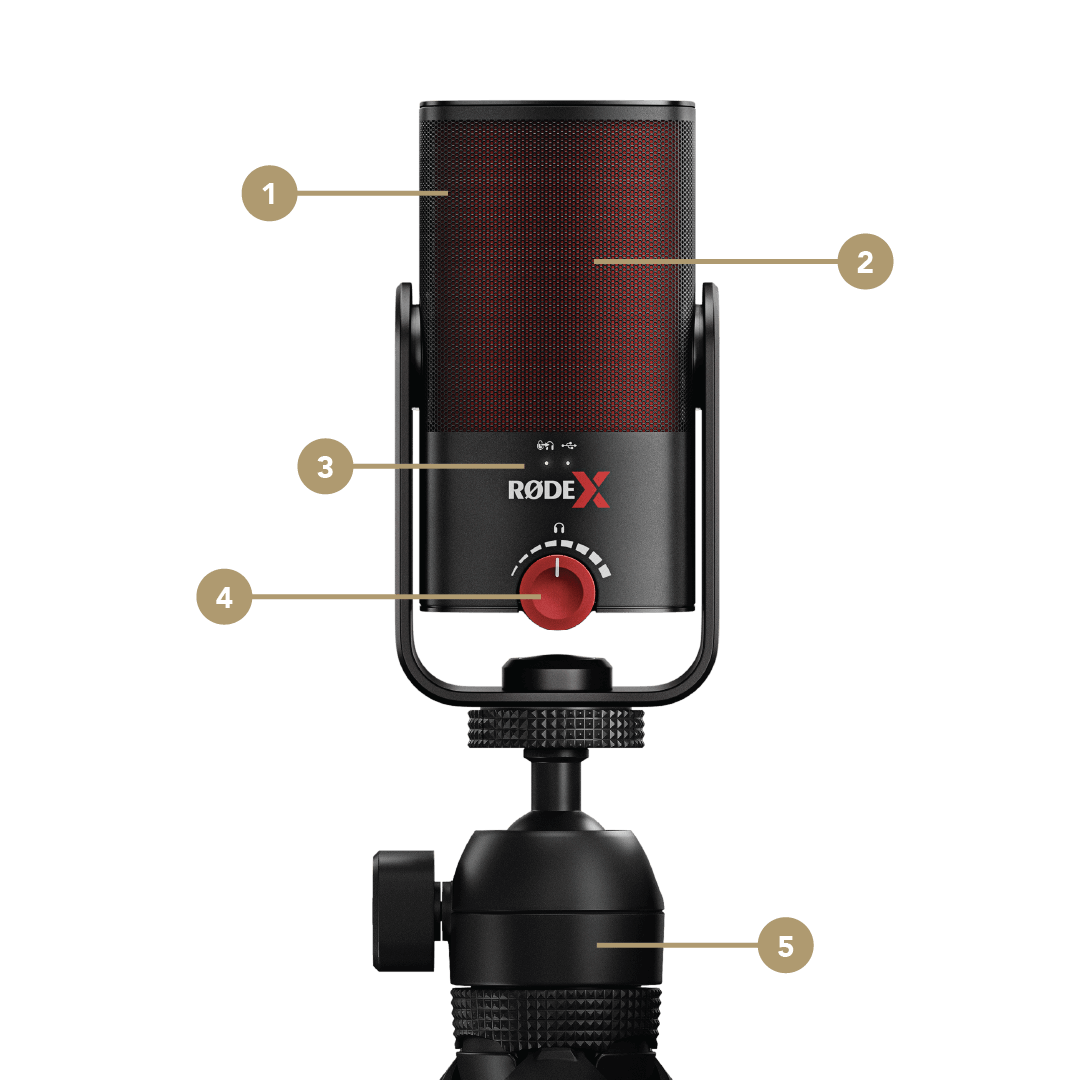
XCM-50 Front Overview
1Internal Pop Shield
2Front of Microphone (Talk Here)
3Mute/Power Status LEDs
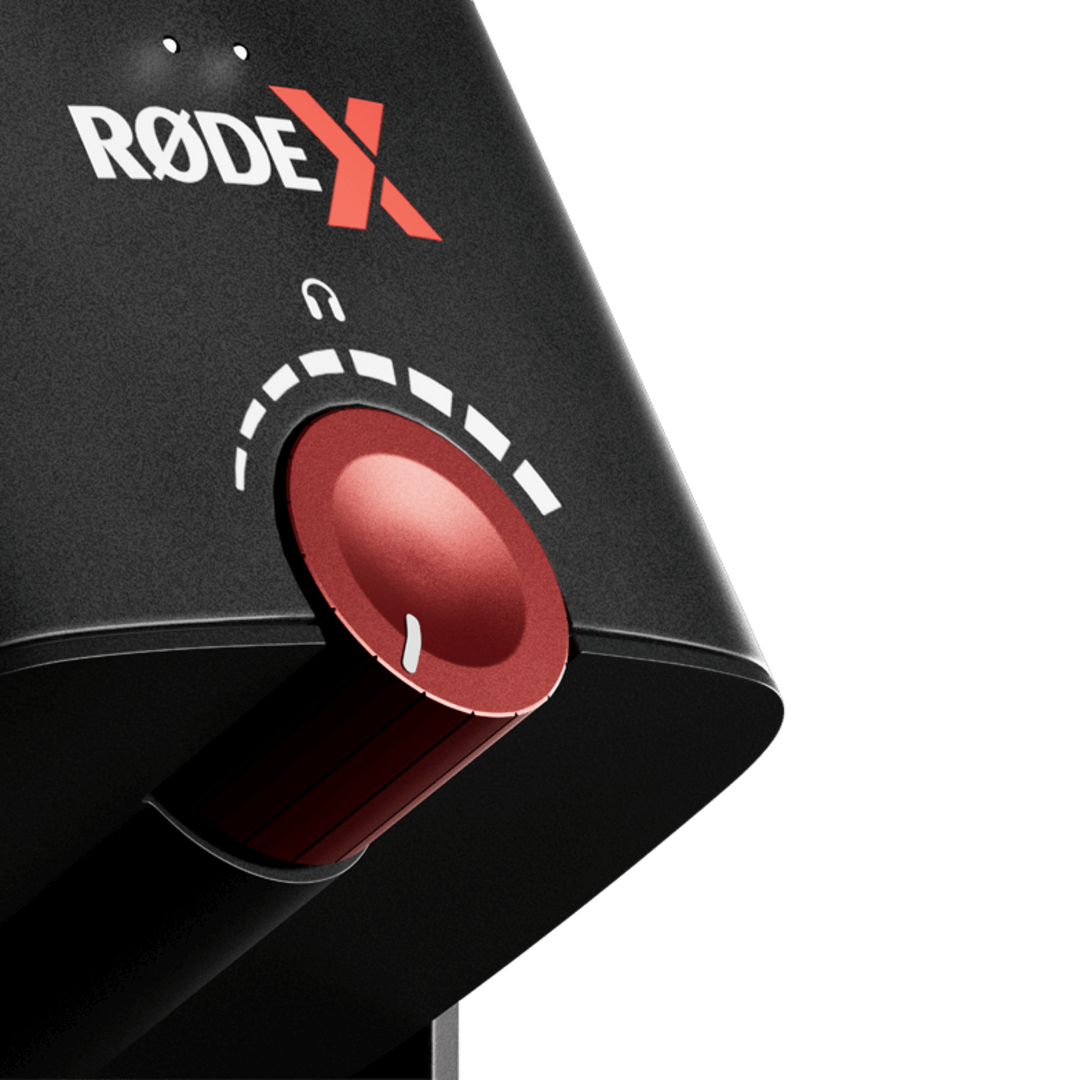
4Mute Button/Level Control
5Tripod

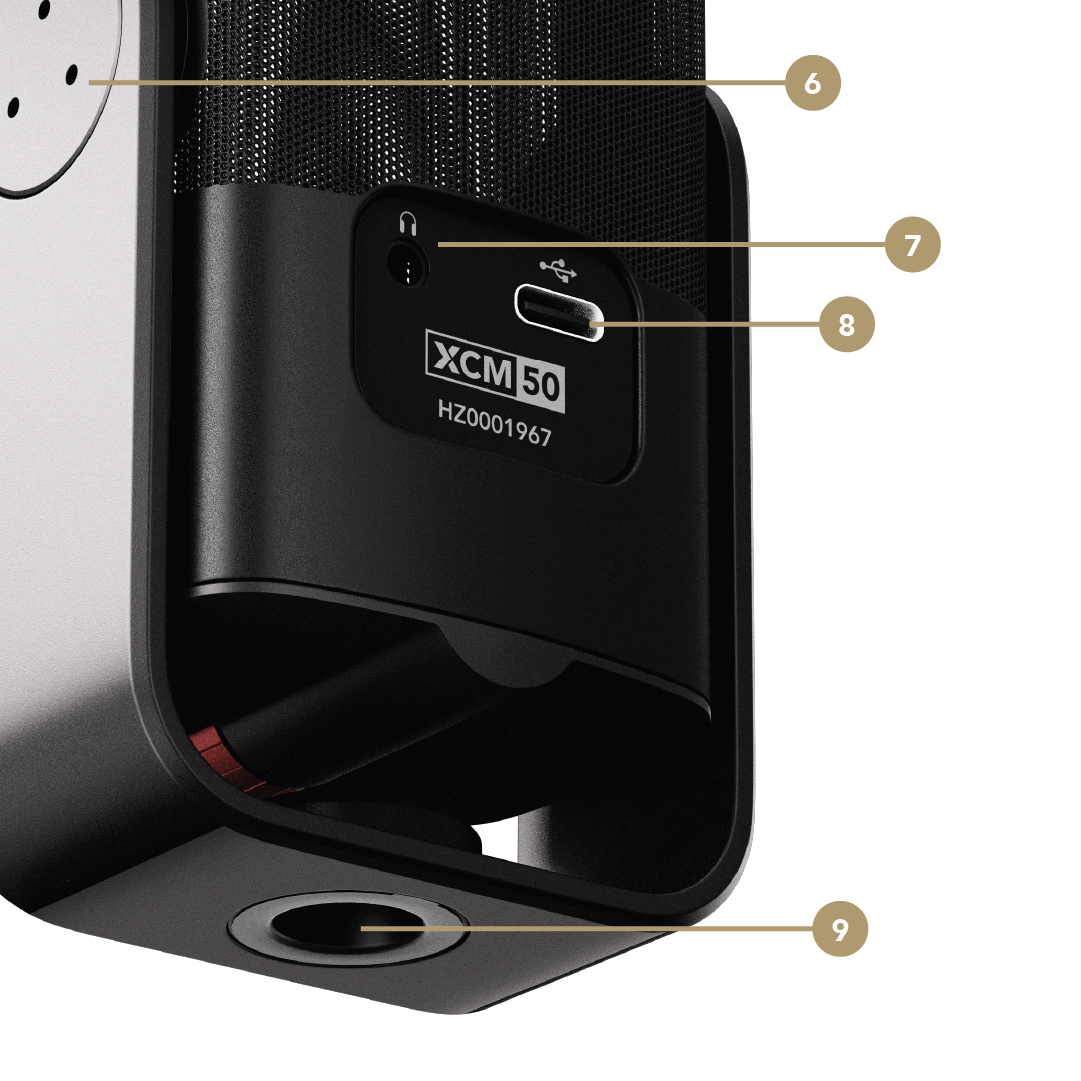
XCM-50 Back Overview
6Swing Mount
7Headphone Output
8USB-C Connector
9Thread Adapter

Microphone Technique Basics
The XCM-50 is a side-address microphone, meaning you should aim your voice directly at the front of the grille. Being a condenser microphone, it is sensitive and highly detailed. This means you can place it a little further away from your mouth than other microphone types, such as a dynamic, without losing clarity and presence. Roughly a handspan (4-8 inches) is a good distance to aim for. This will ensure you are heard clearly without the risk of capturing plosives (loud puffs of air caused by hard syllables starting with ‘p’, ‘b’ and other consonants hitting the microphone capsule). There is an internal pop shield for plosive protection, so you should not experience any issues at this distance.

Using the Tripod and Swing Mount
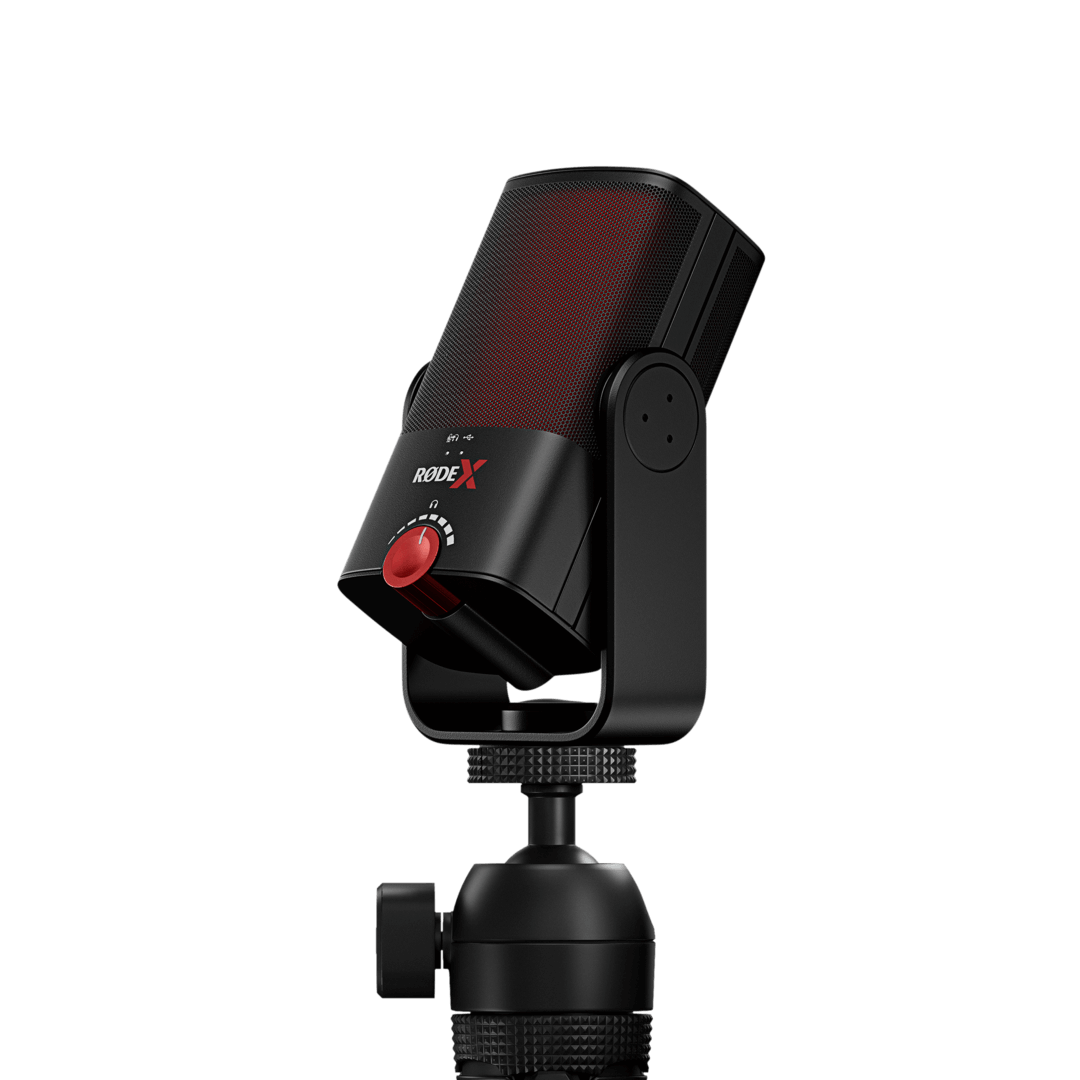
The XCM-50 comes with a versatile tripod for mounting the microphone on a desktop. This includes an adjustable ball head for positioning the microphone and sturdy legs with rubber feet and two different height settings. Secure the ball head in an upright position, then screw the base of the microphone swing mount onto the head clockwise. You can then use the swing mount to angle the microphone towards your mouth for optimal positioning.
.png)
Note
The XCM-50 comes with a 1/4" to 3/8” thread adaptor. This is required to attach the swing mount to the tripod. The 1/4” thread component can also be removed using a screwdriver to attach the microphone to mounts with a 3/8” thread size, such as a studio arm like the PSA1+.
Connecting to a Computer
The XCM-50 features a USB-C output and comes with a 3m USB-C to USB-C cable for plugging into a computer. Simply plug one end of the cable into the output on the microphone, then connect the other end to a USB port on your computer. If your computer only has a USB-A input, you can use a USB-C to USB-A cable like the RØDE SC18.
The XCM-50 runs off USB power supplied by your computer. Plugging it in will turn the microphone on, indicated by the right status LED. Unplugging it will turn the microphone off.
-1080x1080-b21296f.png)
Connecting Headphones
The XCM-50 features a 3.5mm output for connecting a pair of headphones, allowing you to monitor your audio directly from the microphone with no latency (i.e, echo or delay). If you are using the XCM-50 with UNIFY and have audio processing activated, you will be able to hear this directly in your headphones, as all the processing is handled internally by the microphone. See the ‘Using with UNIFY’ section for more information. It also comes with a 3m headphone extension cable for keeping your setup tidy and organised.
.png)
Using the Level Control and Mute Button
The XCM-50 features a single knob, which controls the level for the headphone output. This is a high-power output with plenty of volume available.
When using the XCM-50 with UNIFY, this also functions as a mute button. Pressing it will mute the microphone. When not using with UNIFY, pressing the button will turn the microphone's zero-latency monitoring on and off. When this is activated, you will hear your microphone signal directly in your headphones; when deactivated, you will only hear audio coming from your computer.

Note
Zero-latency monitoring is activated by default when using the XCM-50 with UNIFY and cannot deactivated.
Setting as Your Audio Input and Output Device
Once connected to your computer, the XCM-50 will be recognised as an audio input/output (IO) device. You can use it with any app or software by selecting it as the input (microphone) and output (speaker/headphones) device in the audio preferences.
-1080x1080-6d8a940.jpg)
Using with UNIFY
The XCM-50 is optimised for use with UNIFY. Together they are a complete audio solution for gaming and streaming, with the microphone functioning as your audio input and output and the software offering complete control of your microphone audio (including the ability to add processing to your voice), as well as other sources like game, chat, music, system and browser audio. You can also create independent sub-mixes for each of your audio outputs, trigger voice FX like reverb, echo and pitch-shifting on the fly, record, edit and export your audio internally, and more.
UNIFY is free to download and use with any RØDE X microphone and is available for Windows.
-1080x1080-5fc6a78.jpg)