How to use the Streamer X with OBS
The Streamer X has redefined what we expect from USB streaming interfaces, offering unmatched power, quality, and versatility. If you're new to streaming or have just picked up a Streamer X, you might be wondering how to harness its full potential.
In this guide, we’ll show you how to integrate your Streamer X with OBS (Open Broadcaster Software) and optimise the settings for your desktop setup so you can get streaming right away.
How UNIFY Works
Regardless of your specific needs when it comes to audio sources and outputs, the setup process with Streamer X and OBS will remain the same. Here’s a summary of the four main steps in the process, but we’ll go into much greater detail on each step later in the article:
1. Download UNIFY and set up the channels you need
2. Send your inputs to the UNIFY fader you’d like to mix them on
4. Set your output programs (like OBS and Discord) to use your UNIFY mixes.
5. Creating a VOD Mix (Optional)
Let’s take a look at an example streaming setup to get started.
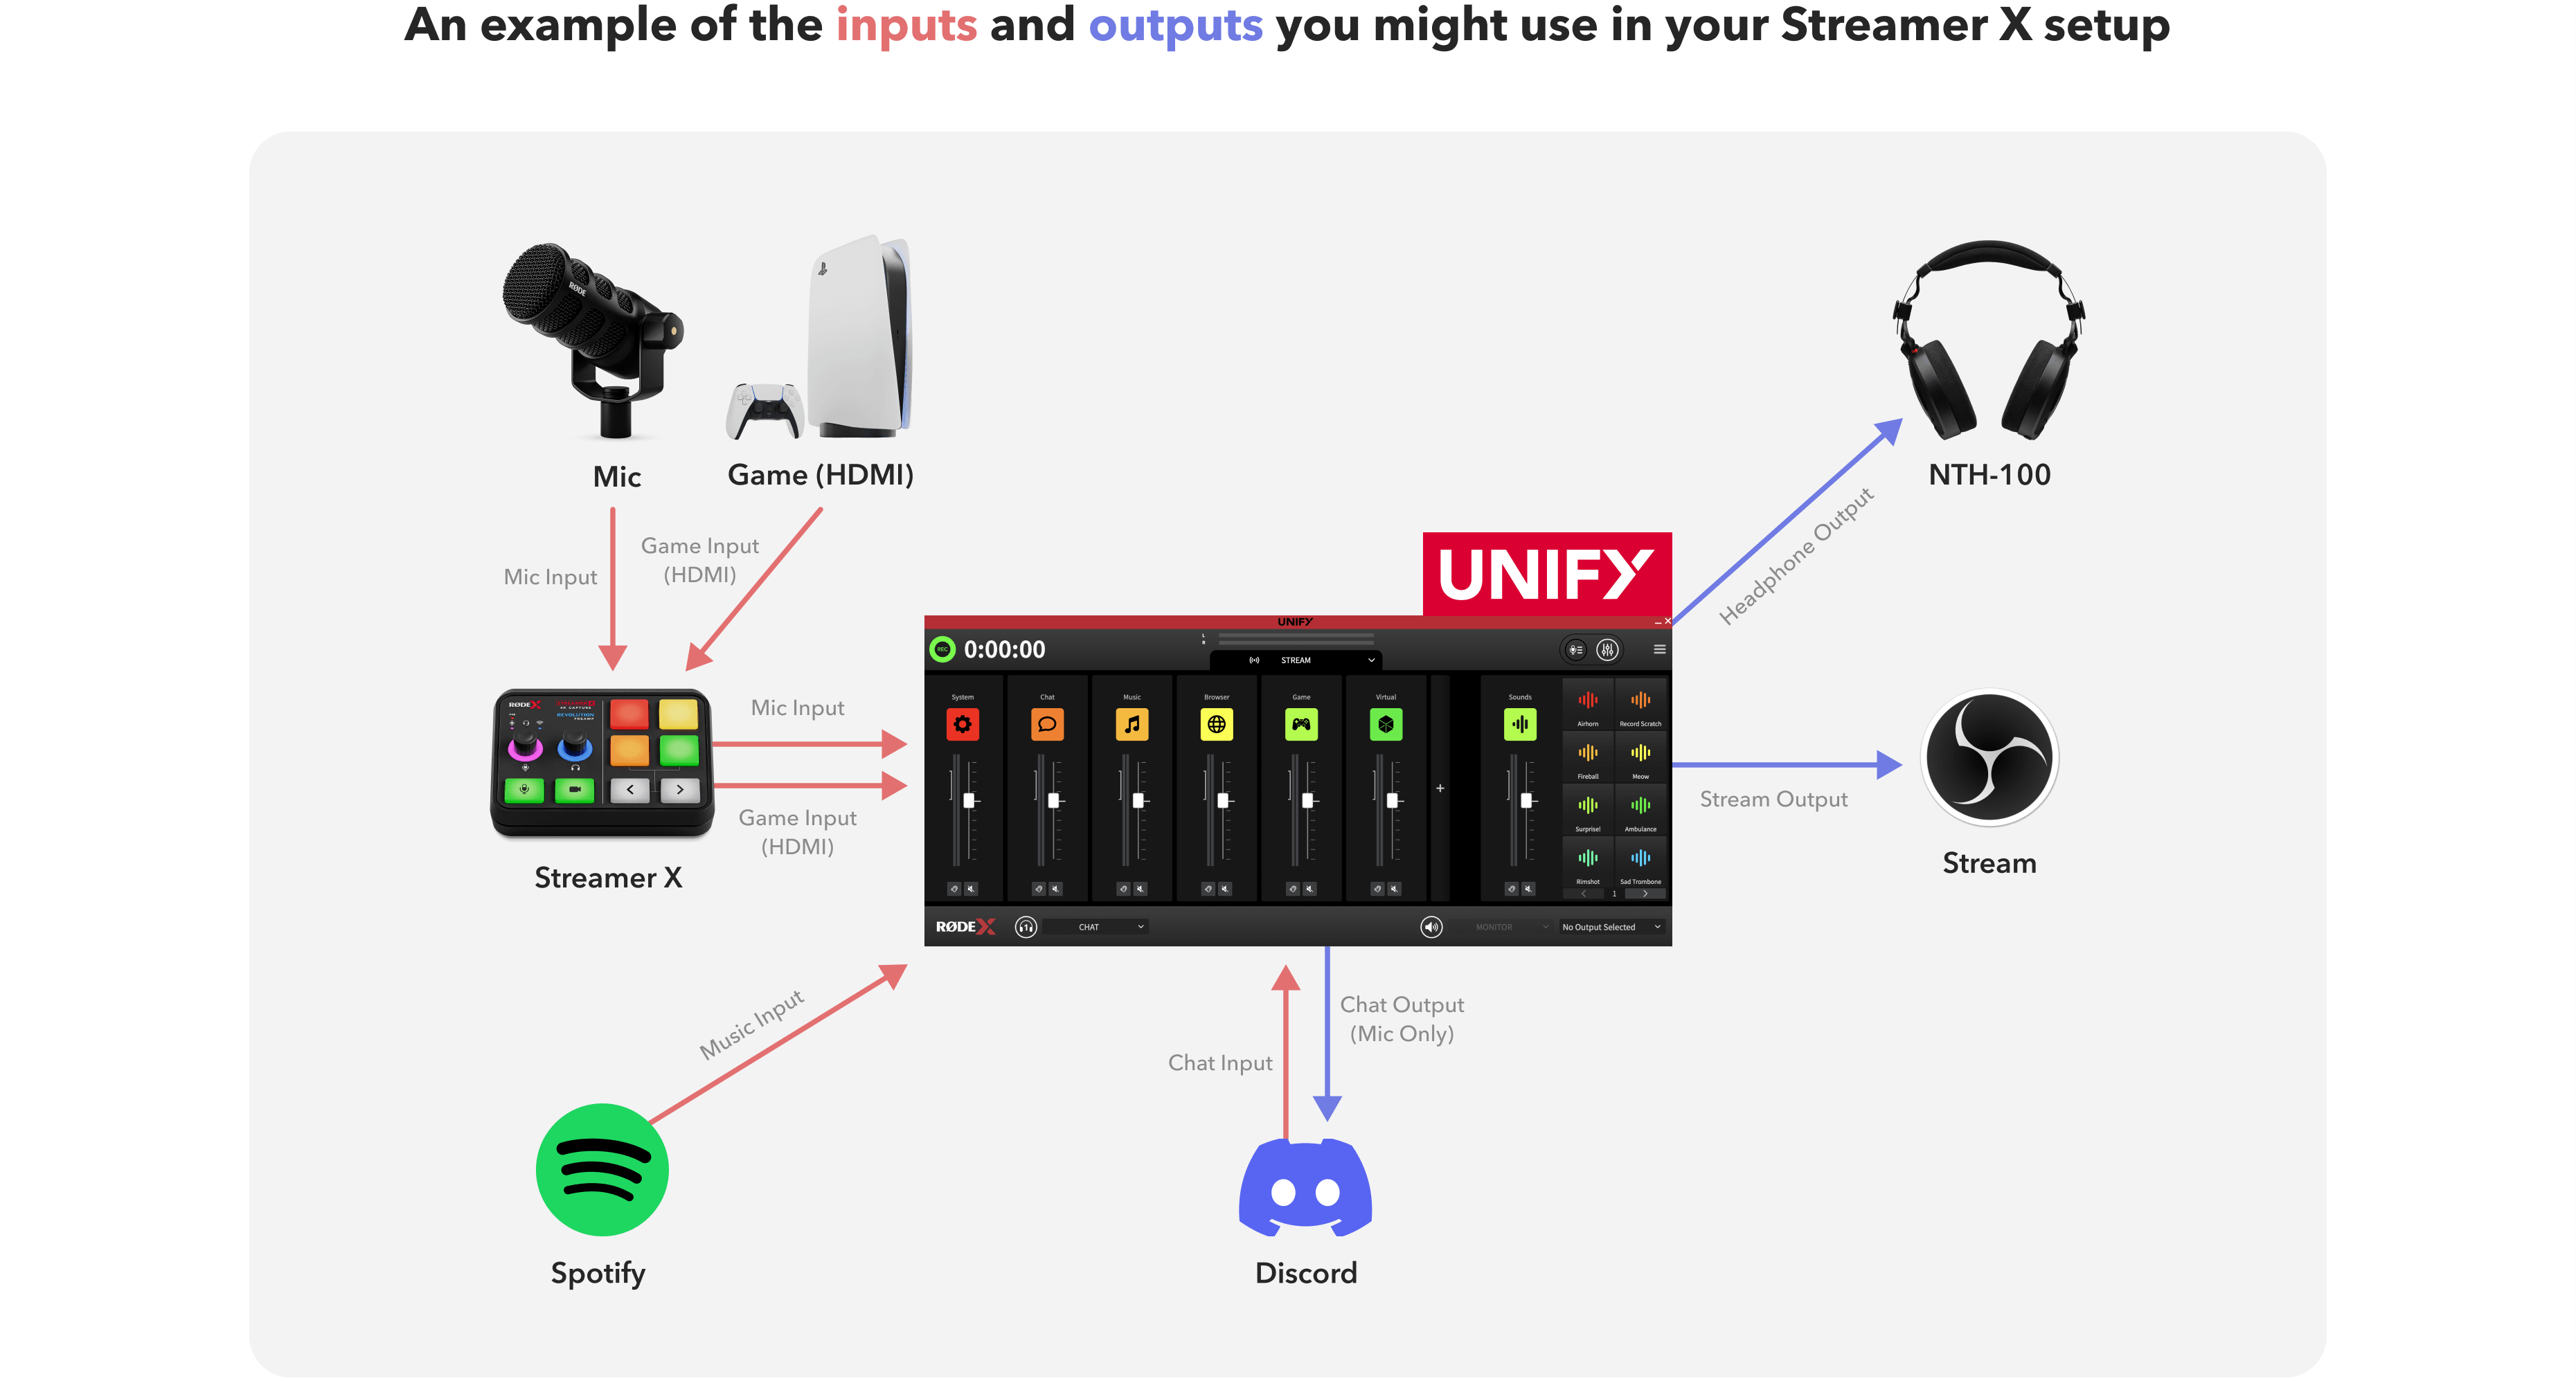
Here, you can see UNIFY as the center of our audio streaming setup. Some applications, like Discord, might be both inputs and outputs.
Inputs
As you can see, our example setup has the following inputs
- PlayStation 5 video
- PlayStation 5 game audio
- Chat input (from a chat application like Discord or from a console)
- An XLR microphone
- Music
Outputs
Our example setup also has the following outputs:
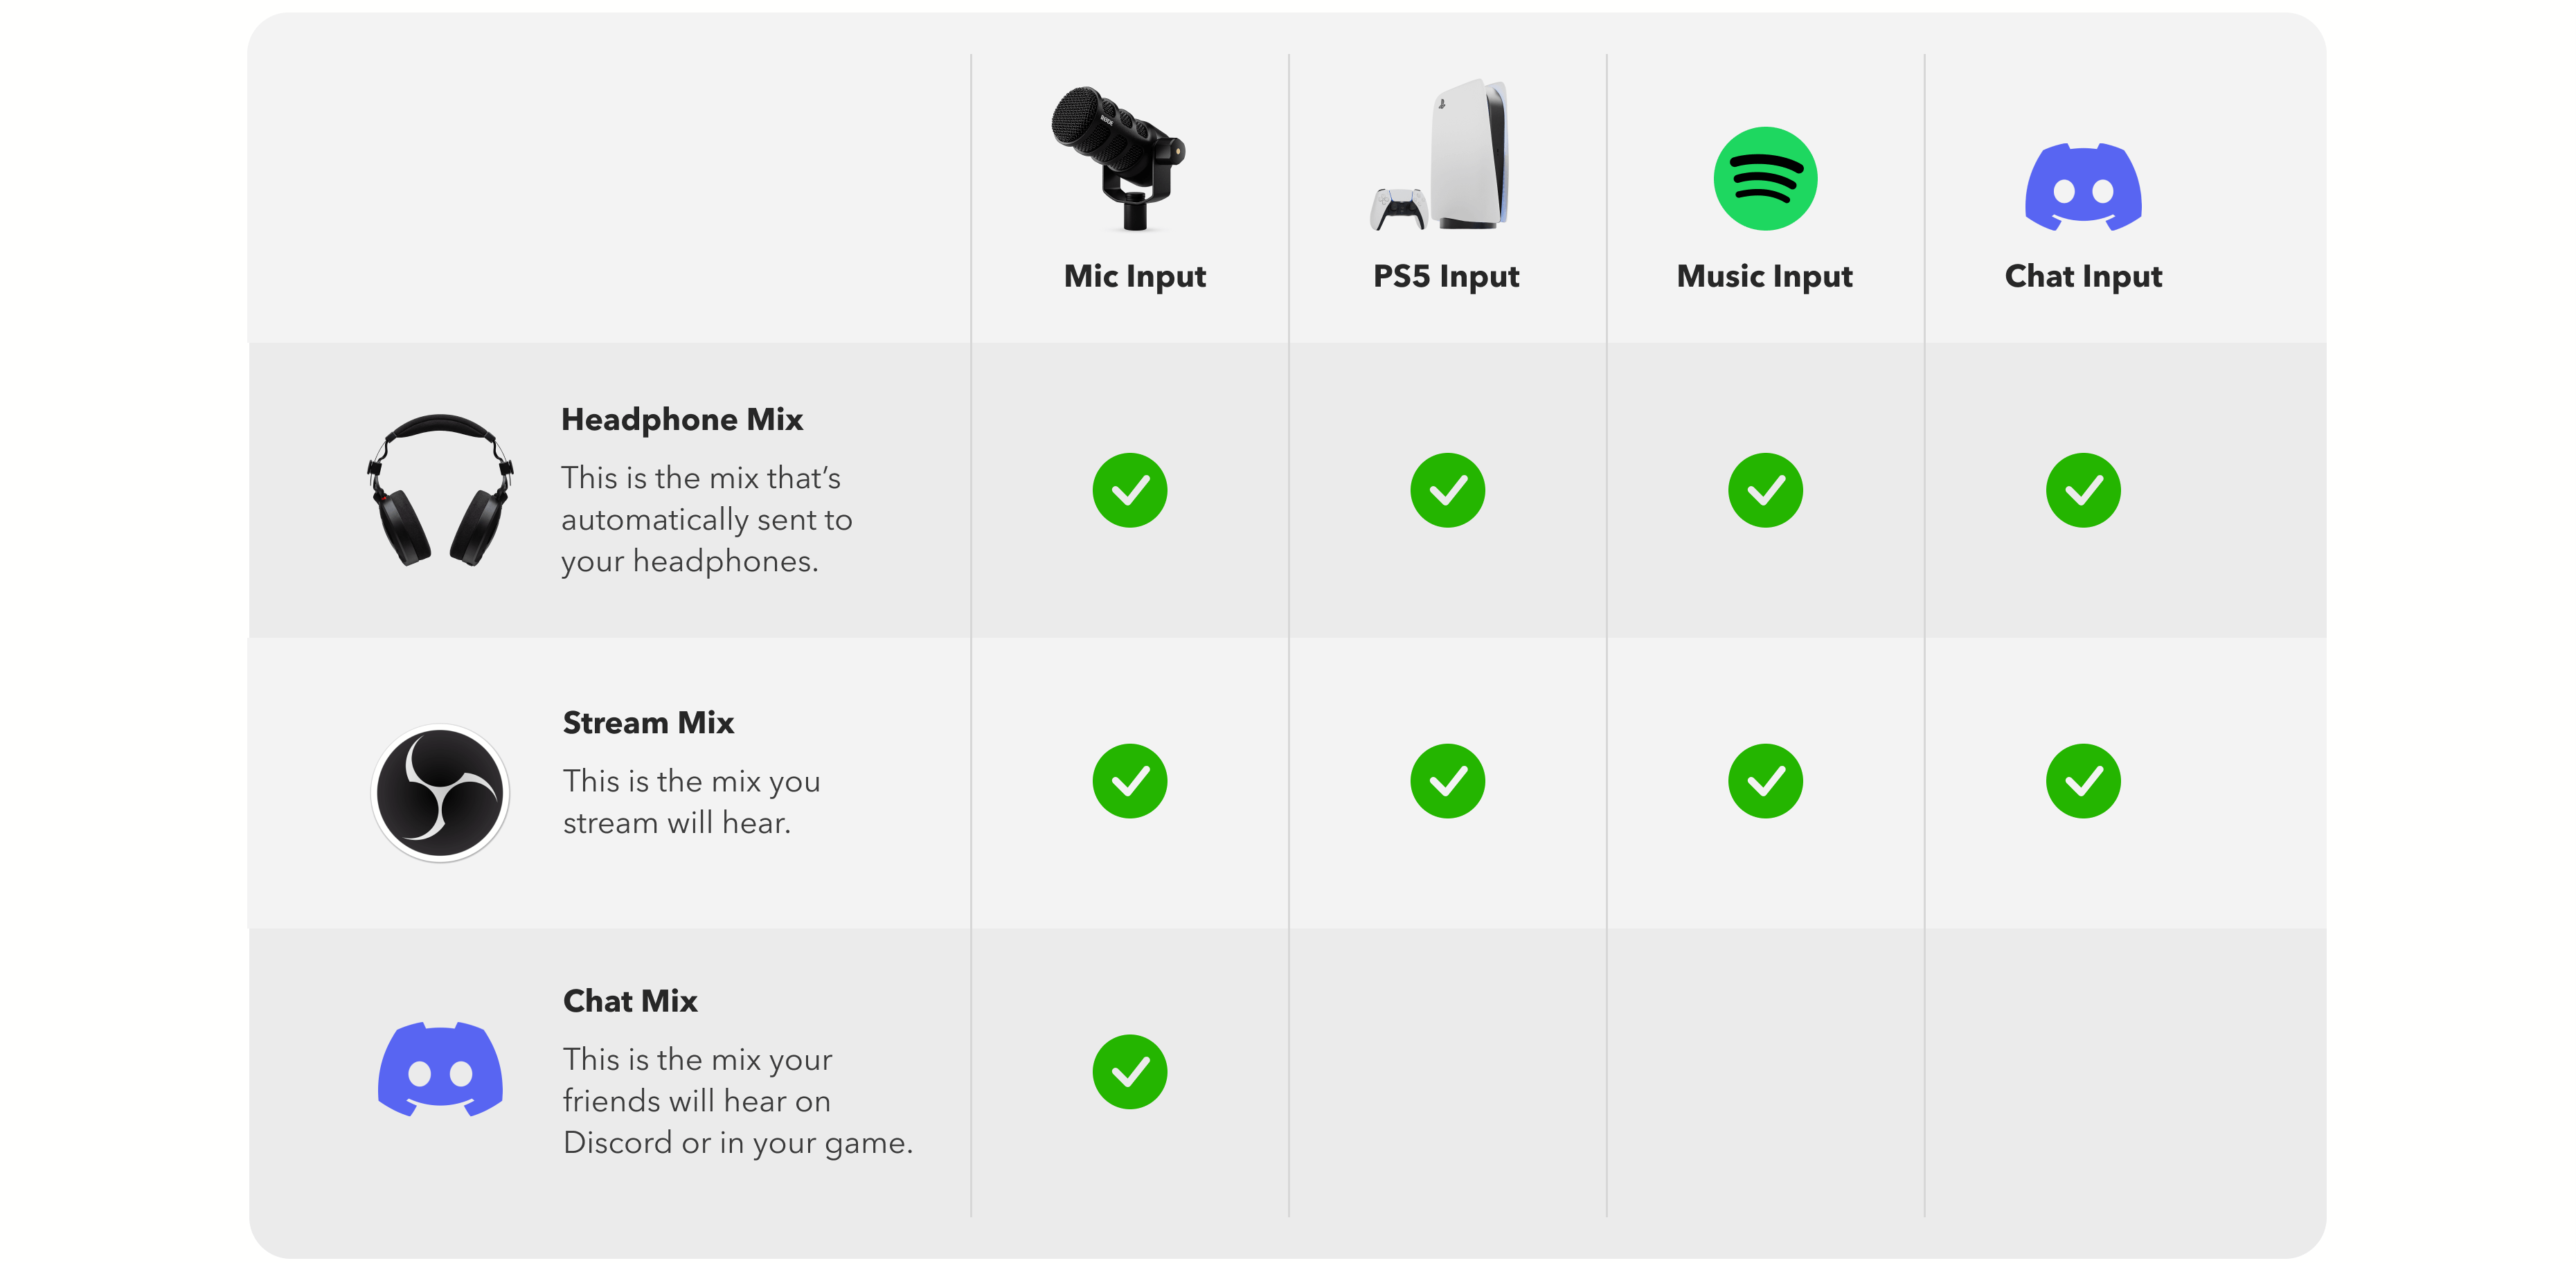
- Stream mix: this is what the stream will hear. It will have all of our inputs, mixed how we’d like our audience to hear them.
- Headphone mix: for most streamers, this is the same as their Stream mix. However, you may want to change this based on personal preference. For example, if you want to lower the sound of your voice or if you want the music to be quieter in your headphones only.
- Chat mix: this is what your friends will hear. Most Streamers will just include their microphone, and their SMART pads in this mix.
- (Optional) VOD mix: using OBS, streamers can send a separate audio mix to Twitch just to be used for Twitch recordings. Read more about doing this here.
Every streamer's setup is unique, reflecting their individual style and requirements. While this guide uses a specific setup as an example, yours might differ. But don't worry, the fundamental process remains the same: getting your audio inputs into UNIFY, mixing them appropriately, and then sending these mixes to your chosen outputs.
Creating a Routing Table: A Visual Guide to Your Setup
To make things even clearer, consider creating a routing table. This is a simple diagram or chart that shows the path from each input to its corresponding output through UNIFY. Think of it as a map or guide that helps you connect everything.
Routing tables can make it much easier to understand the ins and outs of your setup – this is an example we’ve made for the setup we're using in this guide.
Now, let’s take a look at the setup process in a a little more detail.
1. Downloading and Setting Up UNIFY
For this tutorial, UNIFY will be our virtual mixer. It functions similarly to a physical mixer, with channels for each audio source.
You can download UNIFY here. Once downloaded, follow the installation instructions to get it set up on your computer.
Let's begin by ensuring UNIFY is ready to handle all the inputs we've identified.
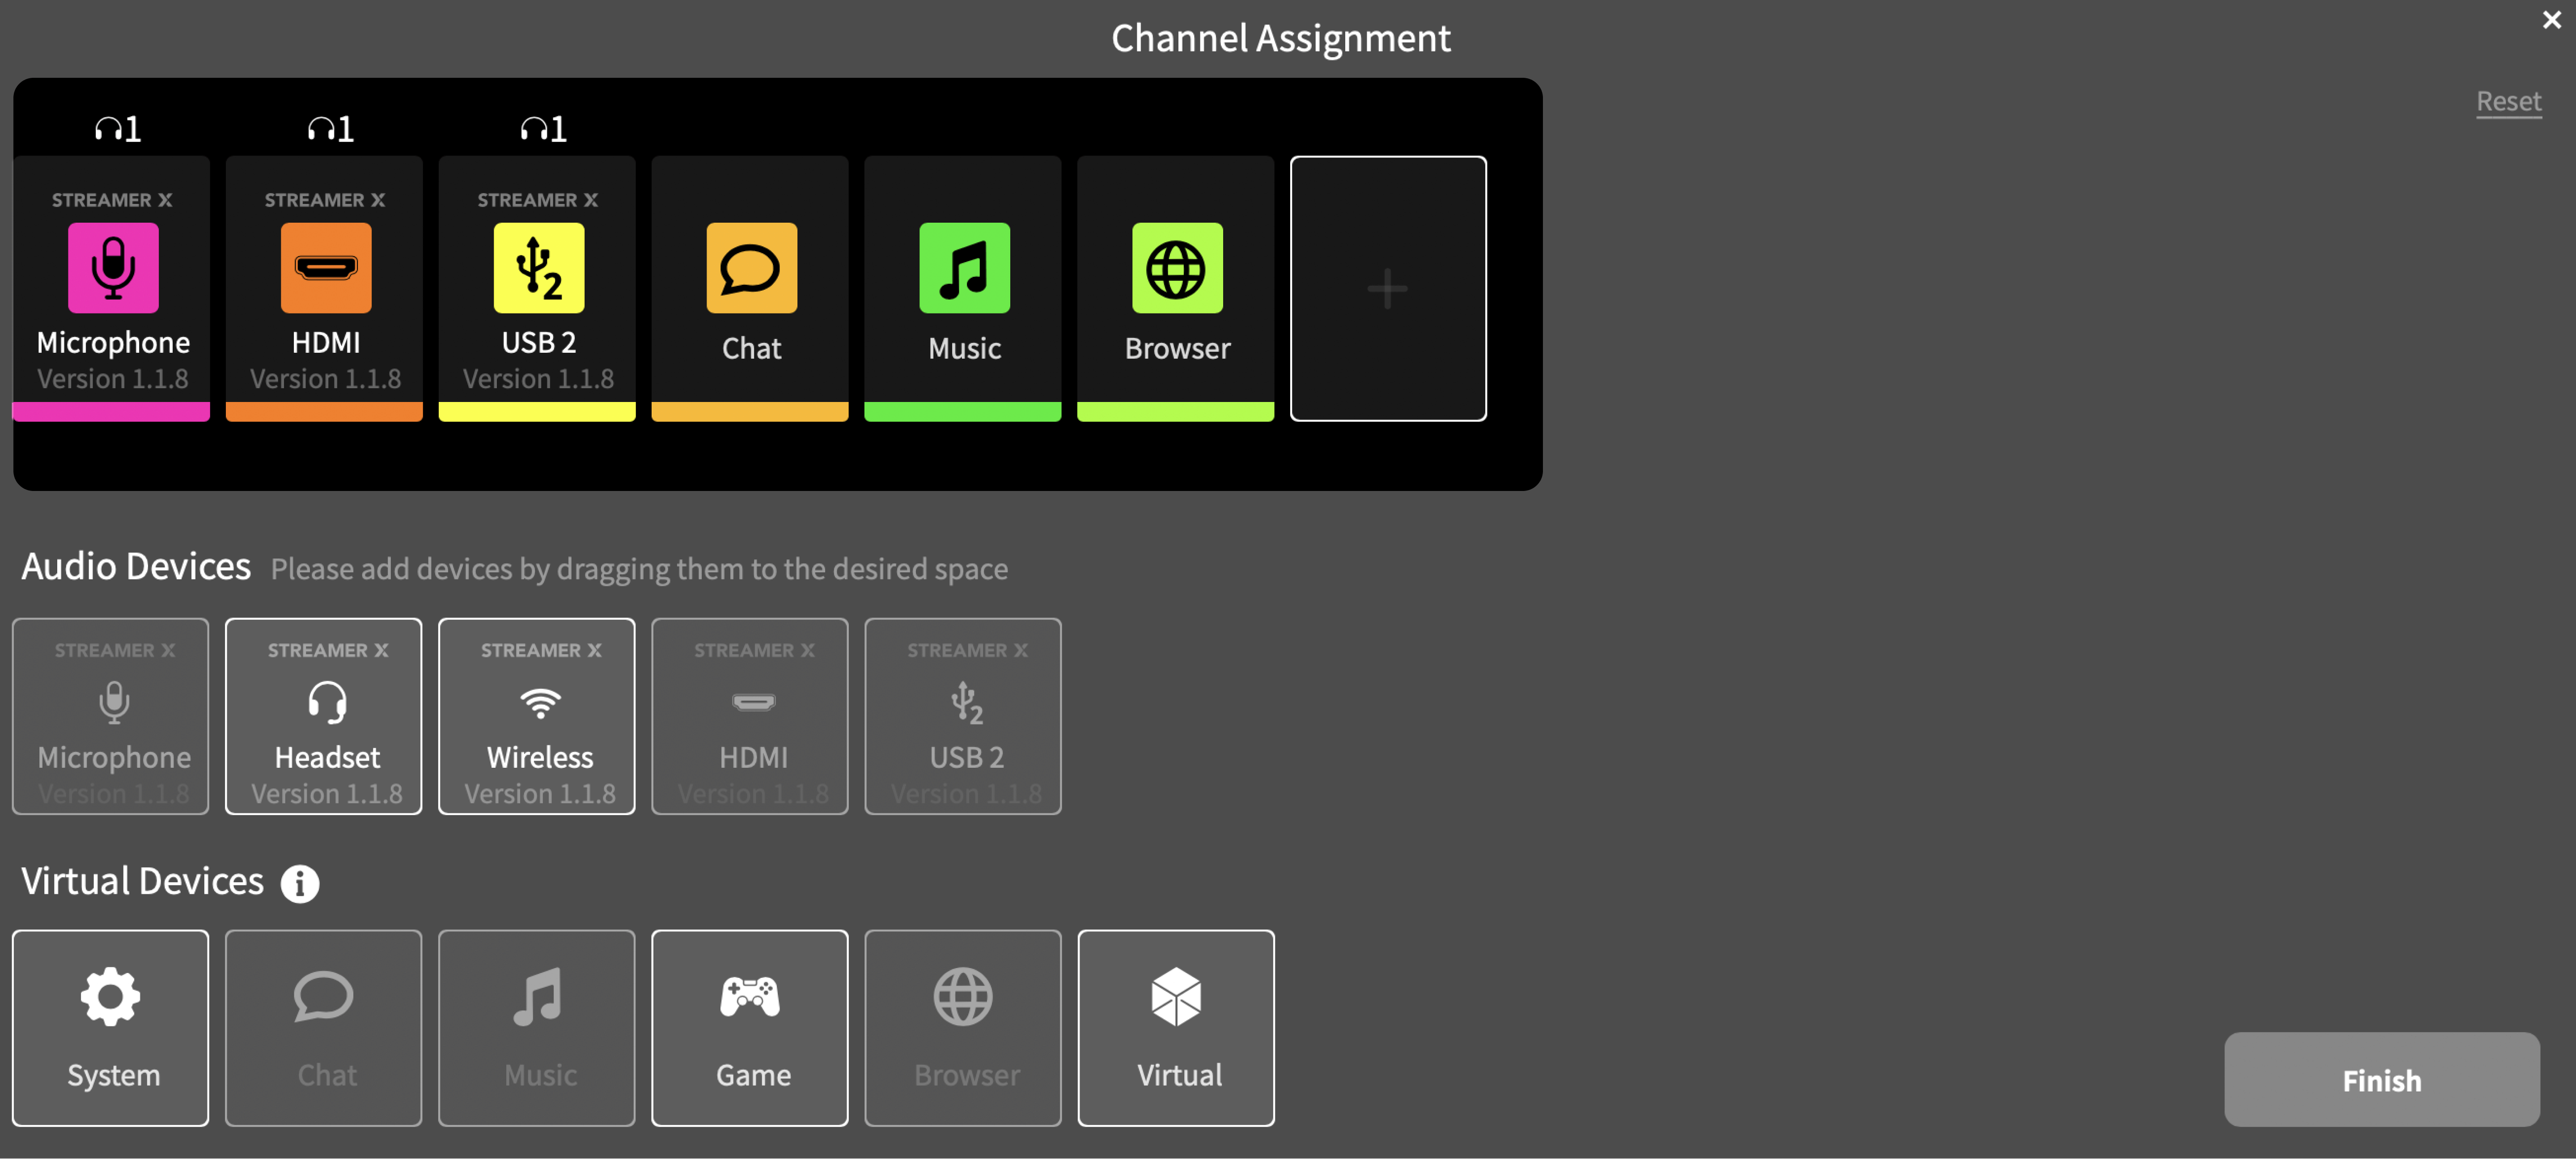
Understanding UNIFY’s “Channel Assignment” Menu
When you open UNIFY for the first time, you'll be greeted with the "Channel Assignment" menu. This menu is where you'll manage your audio sources.
If you need to access this menu again later, just click on the “” button and select “Channel Assignment”.
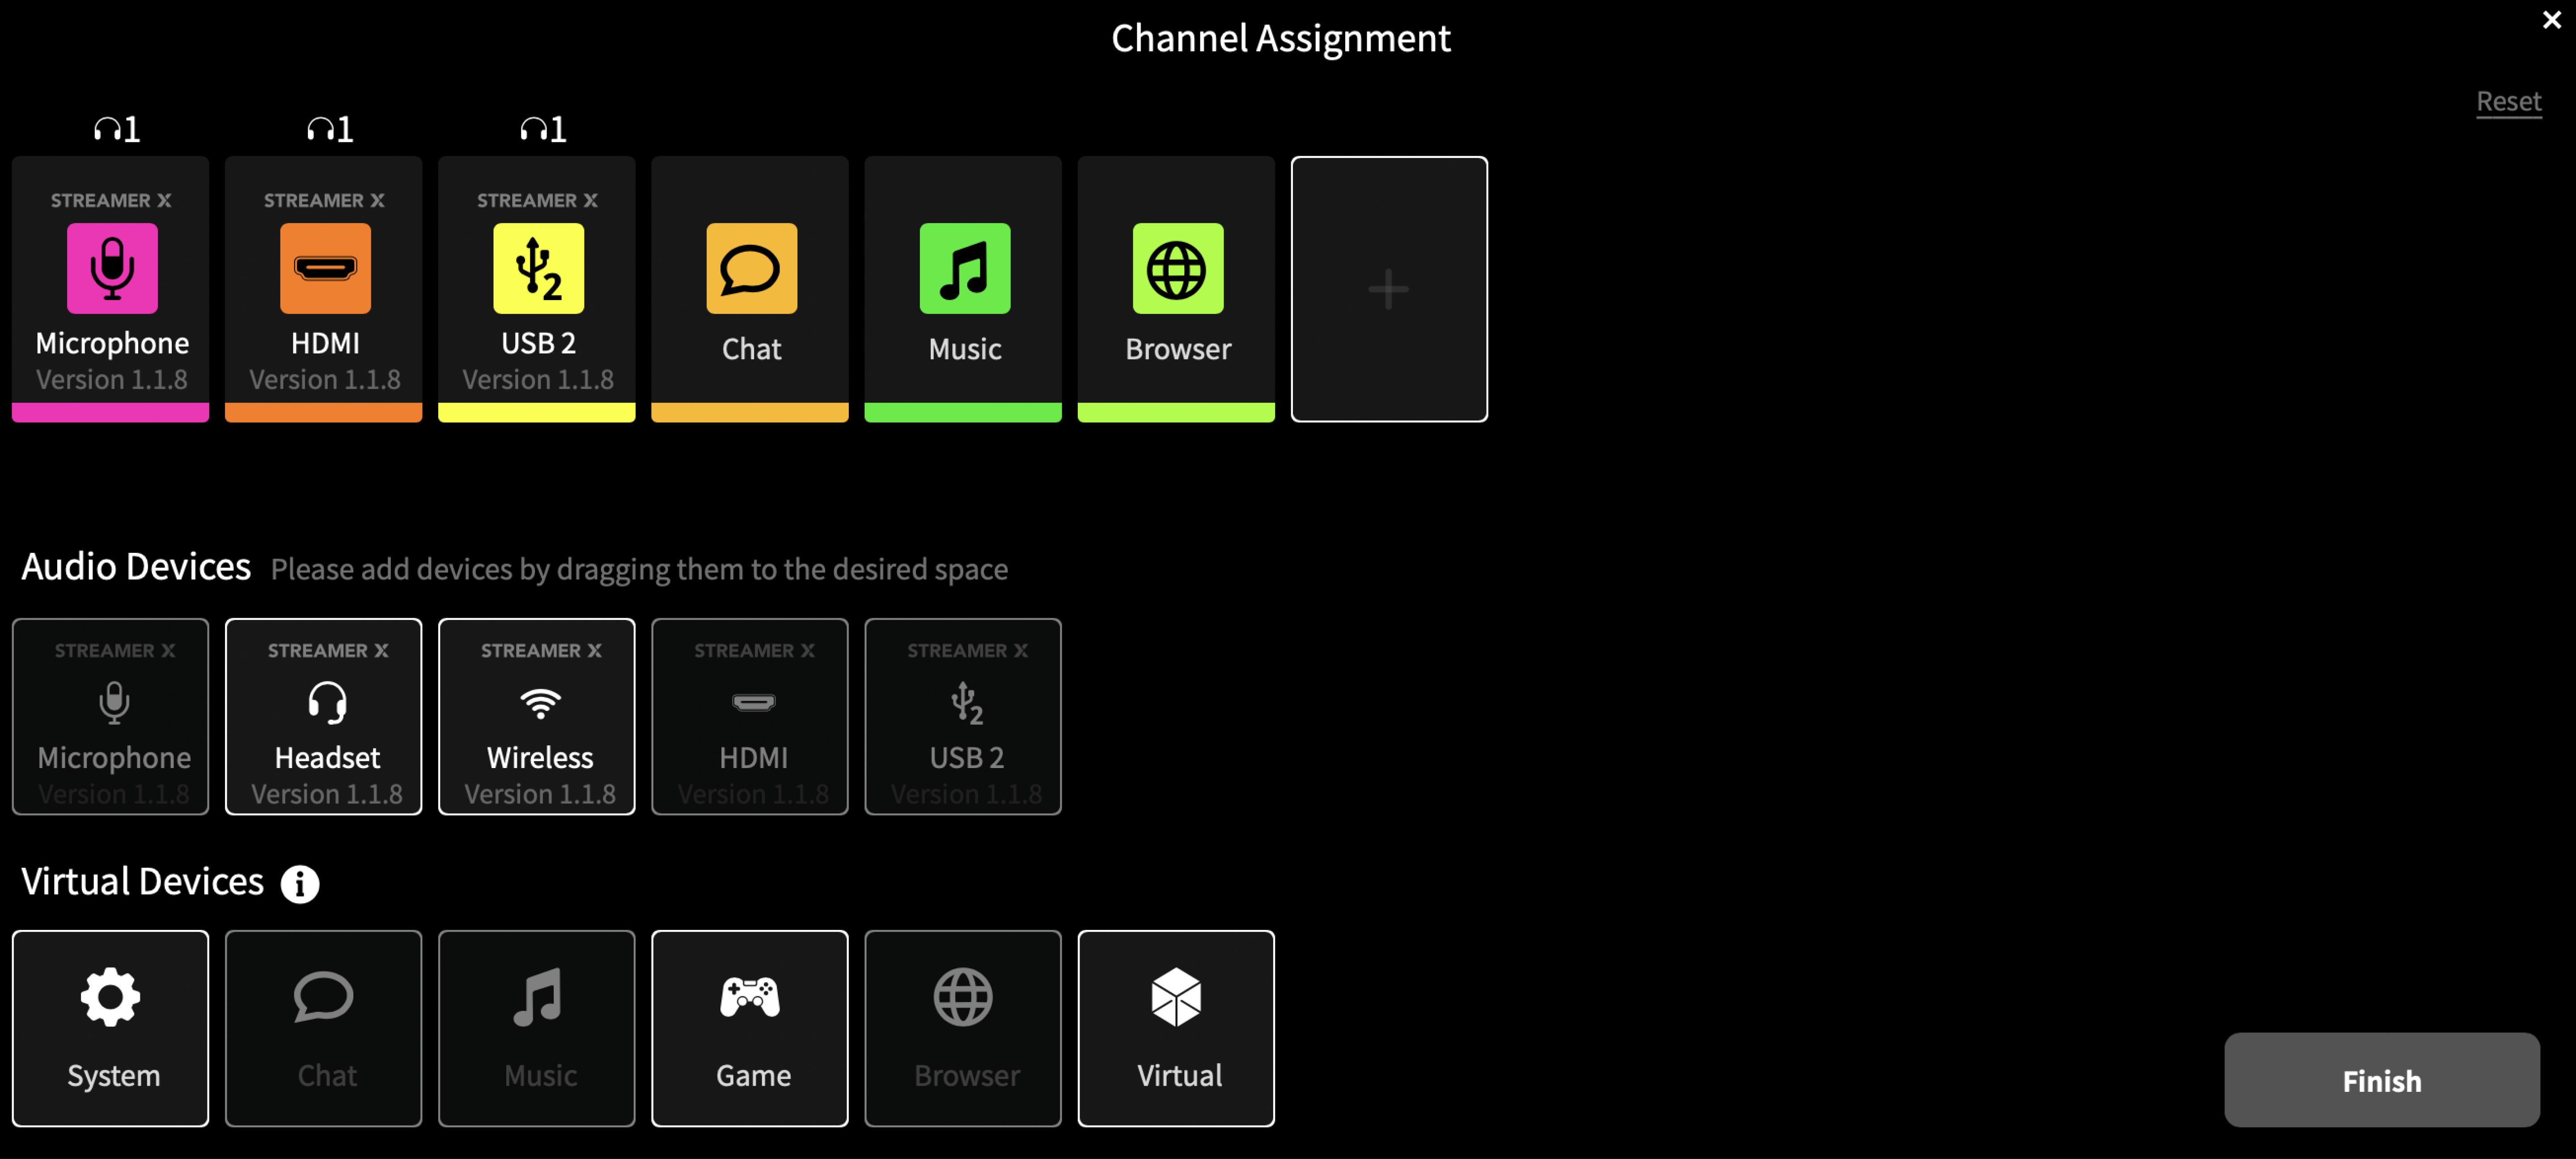
Initial Channel Assignment interface in UNIFY, showing available audio devices and virtual devices for streaming.
The Channel Assignment menu is divided into two main parts:
Top Section: This area shows the channels currently active in your mix. Think of these as your primary audio lanes, where you'll manage different sounds for your stream.
The top section shows the channels that you’ll use in your stream.
Bottom Section: Here, you'll find all the potential channels that can be added to UNIFY. Channels you're not using will be highlighted. If you want to add any of these to your stream, simply drag them up to the "+" button in the top section next to the active channels.
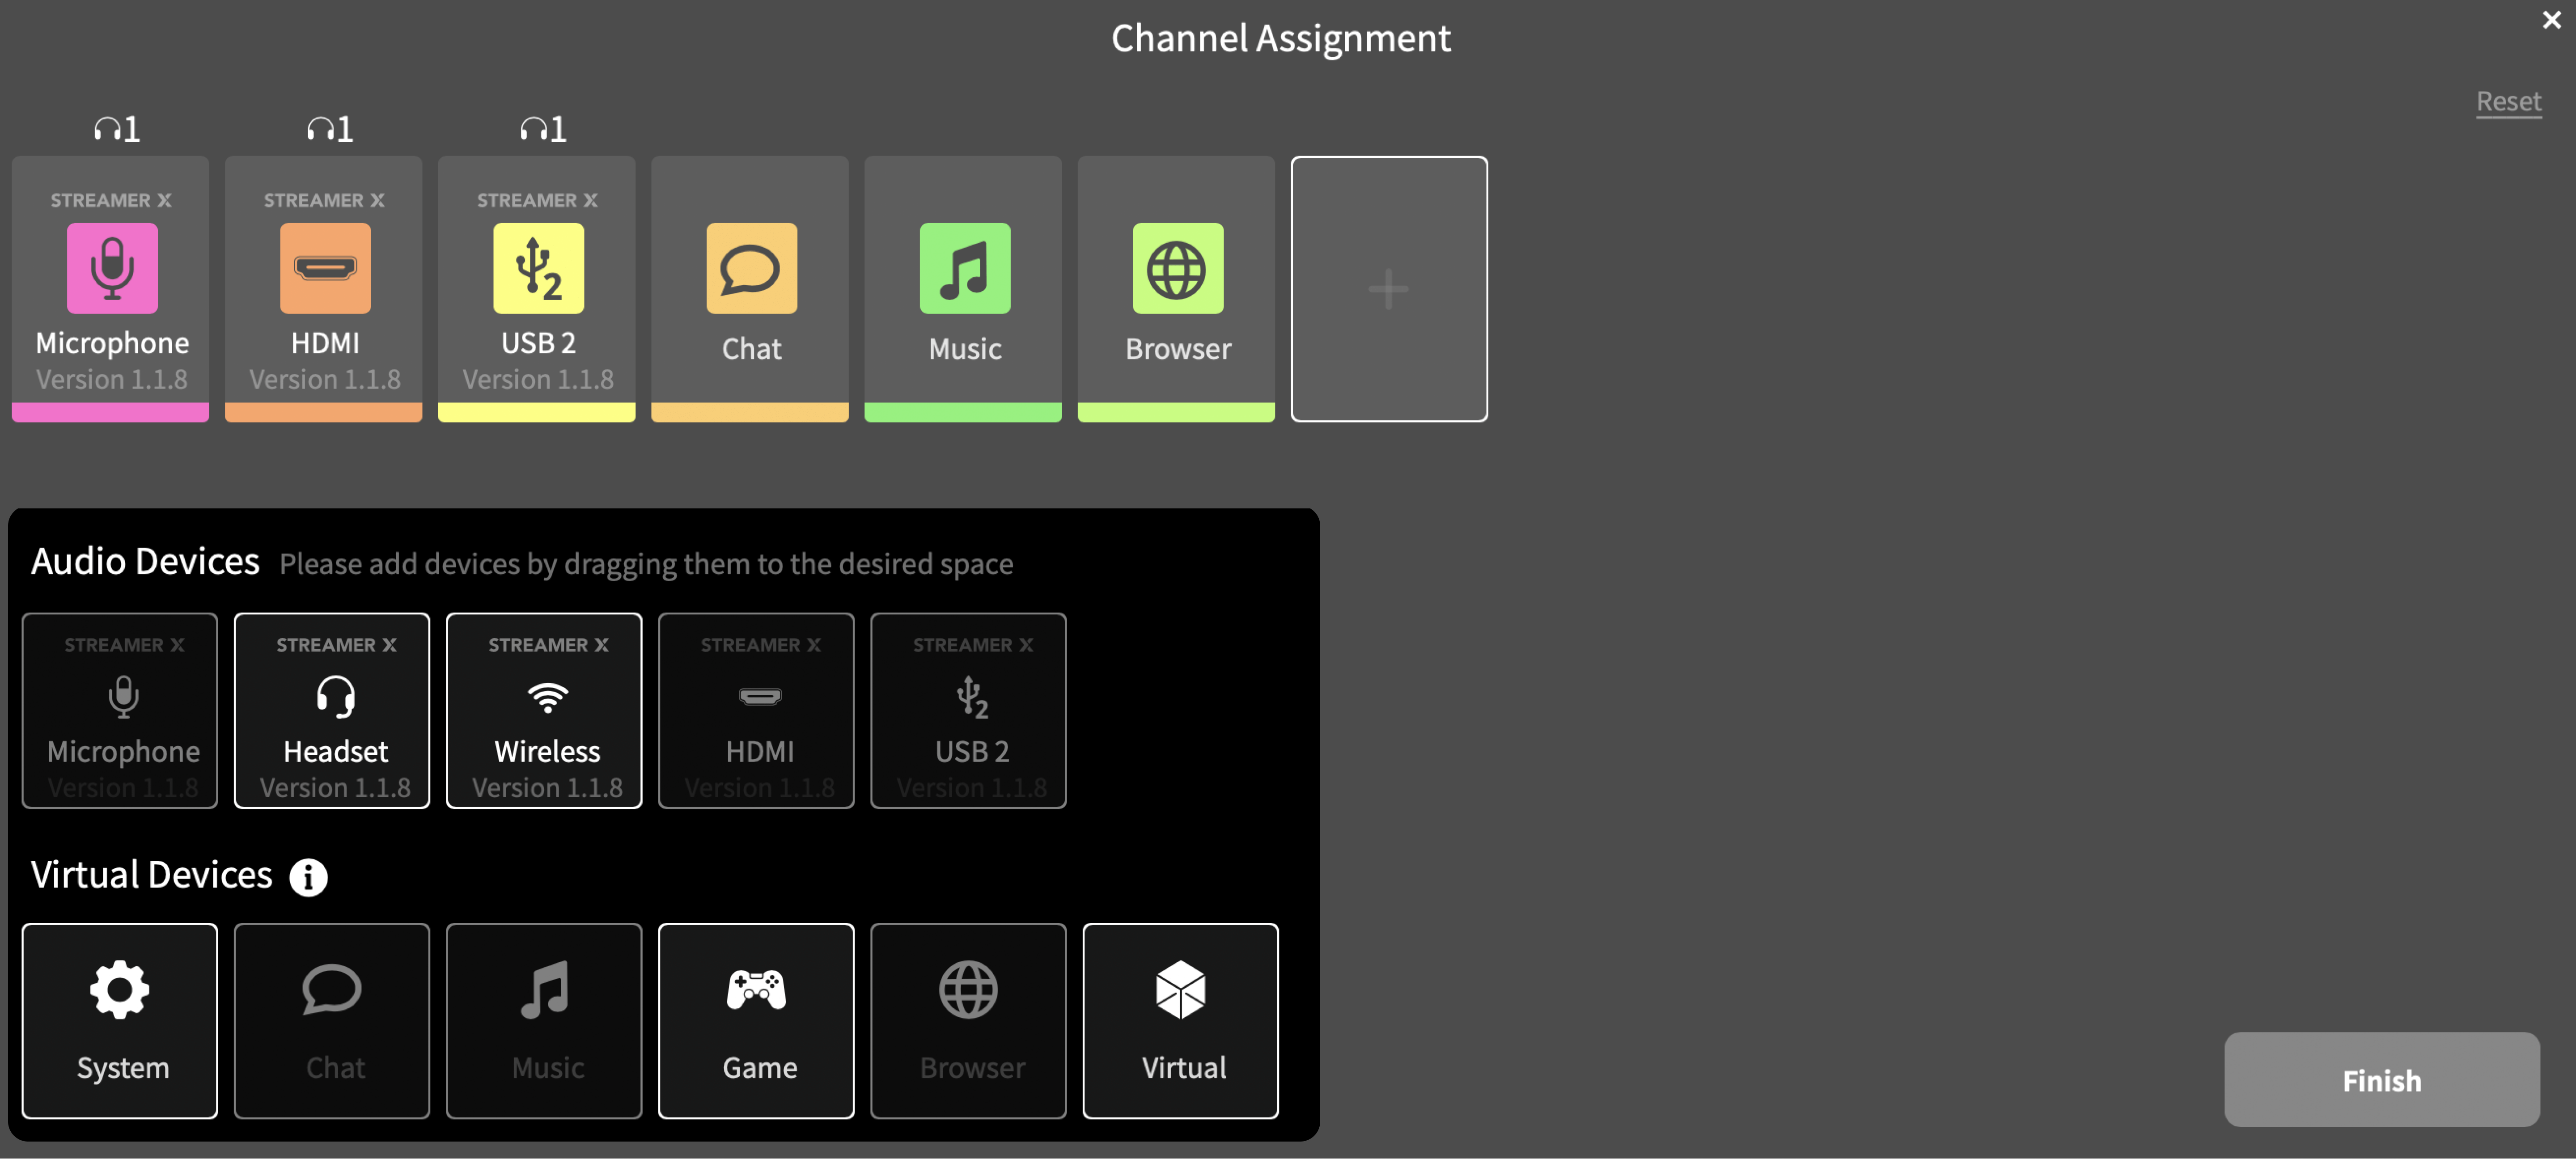
The bottom section shows all the potential channels you could use, with the ones you aren’t using highlighted. If you’d like to use them, simply drag these channels up to the top section.
Customising Your Channel Lineup
You might find that you need to adjust which channels are active in UNIFY:
- To Add a Channel: Drag a highlighted channel from the bottom section to the "+" button in the top section.
- To Remove a Channel: If you need to make room for different channels, you can remove an existing one. Just press the "x" button above the channel icon you wish to remove.
2. Assigning Your Streamer X Inputs to UNIFY Faders
When using UNIFY, your inputs from the Streamer X (i.e. your HDMI audio input, microphone input, wireless microphone input and headset mic) should all show up automatically in UNIFY. If you can’t see them, you can put them there again using the Channel Assignment menu.

The Channel Assignment menu contains all the channels you can use in UNIFY.
Setting Up Virtual Inputs with UNIFY Faders (Windows)
A crucial step in your streaming setup is ensuring that your input sources (like your microphone, game audio, or apps like Discord) are correctly routed to the UNIFY faders.
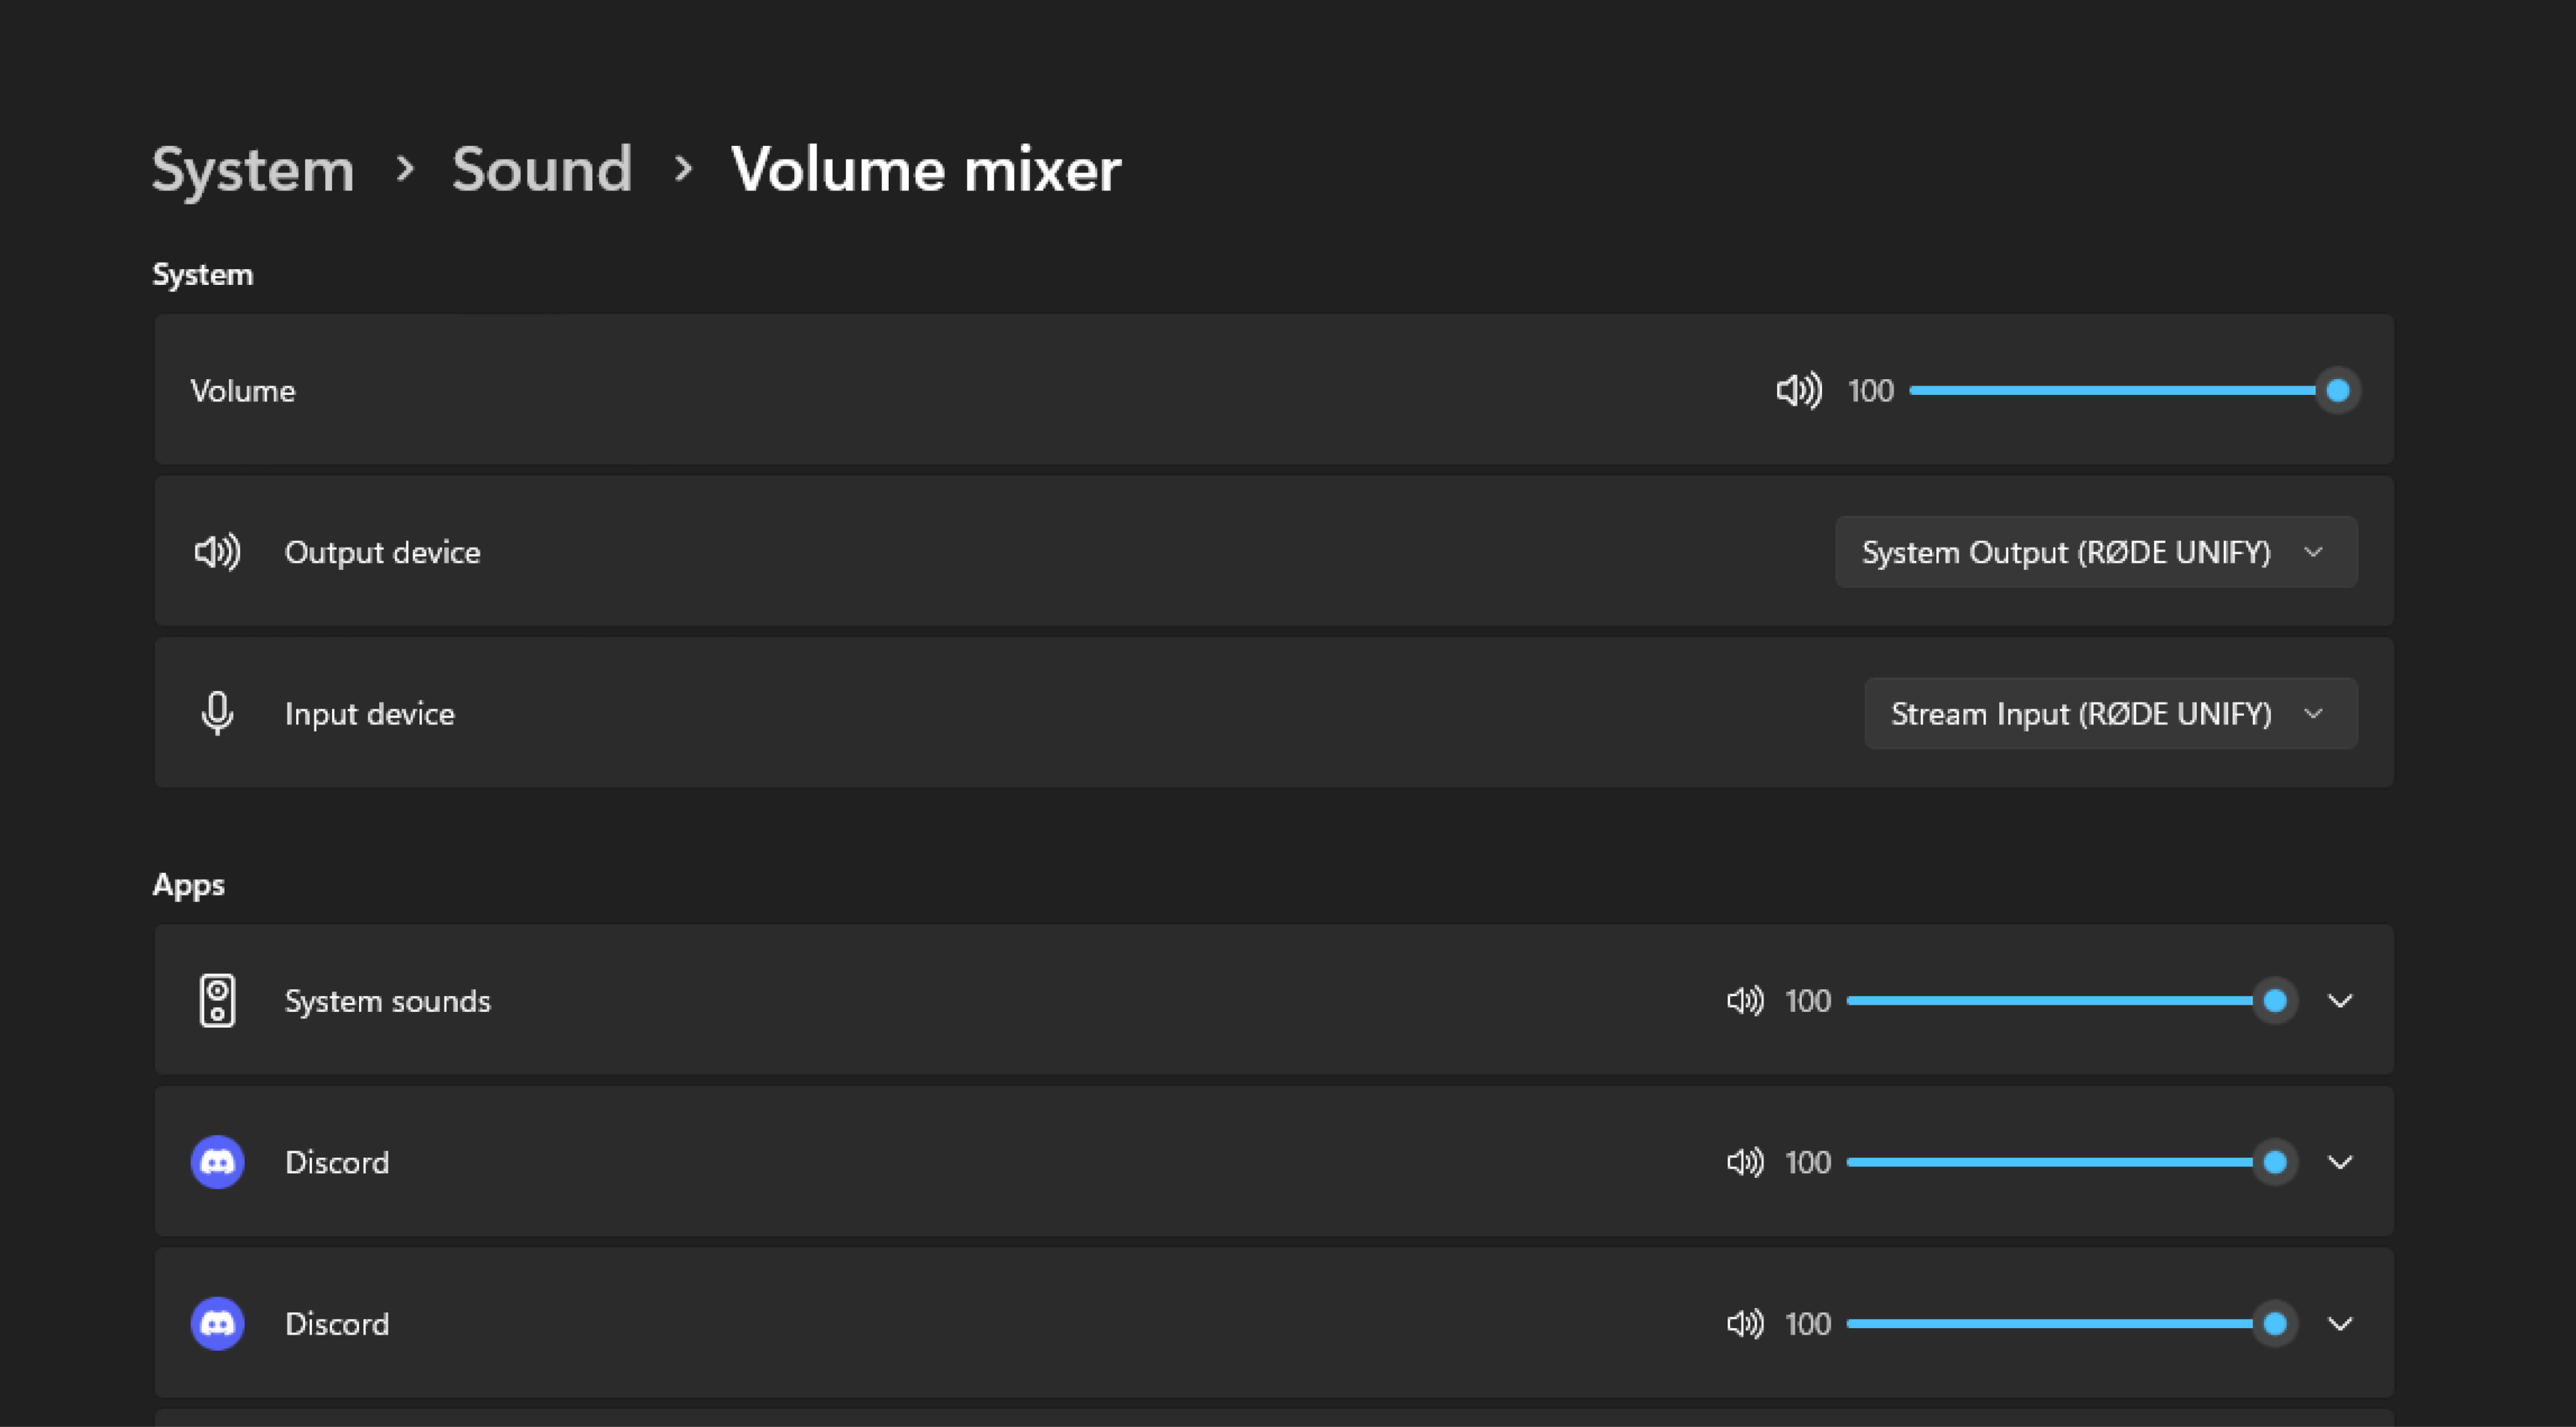
1. Click on the “Windows settings” button in UNIFY to open the “Volume mixer”
Press this button to open the Windows sound mixer.
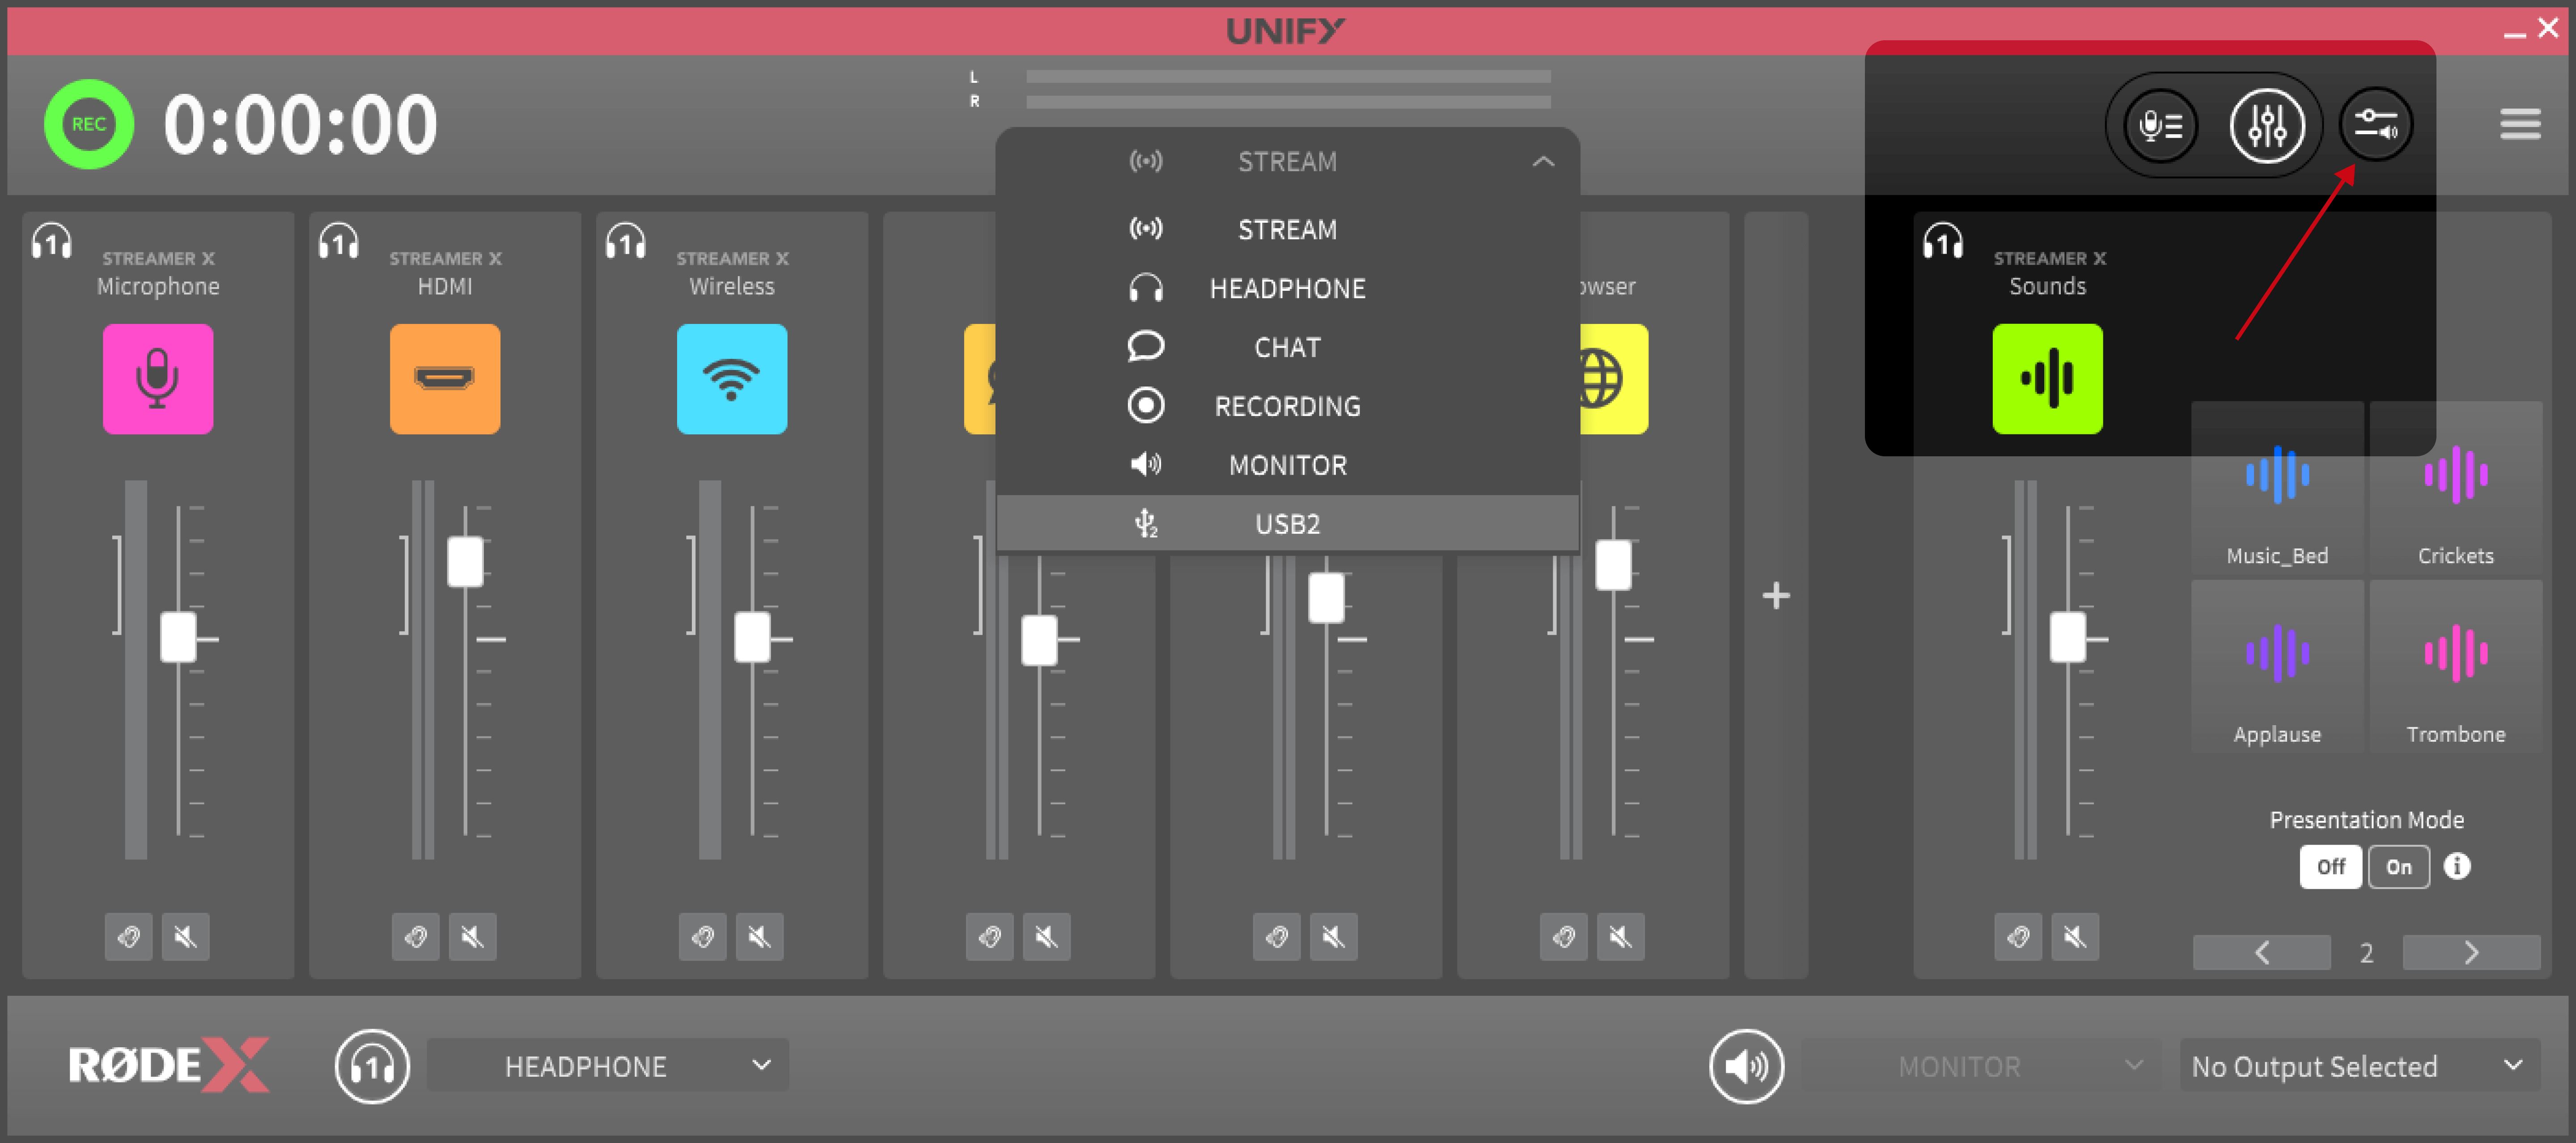
2. Configure App Settings in the Volume Mixer: Here, for each application, you can specify two things:
- Output Device: Decide which UNIFY fader channel an app will send its sounds to. For example, in Discord, set the output device to “Chat Output (RØDE UNIFY)”. This means the voices from Discord will be directed to the Chat fader in UNIFY.
- Input Device: Select what the app should hear. In Discord’s case, set the input device to “Chat Input (RØDE UNIFY)”. This ensures that people on Discord only hear your Chat mix, which, by default, just includes your microphone and SMART pads. Avoid selecting “Stream Mix” as the input, as it would include game sounds and music, causing an echo for your friends on Discord.
Discord's voice settings adjusted in the Windows Volume Mixer to use the RØDE UNIFY Chat as both the input and the output device.
Setting Up Virtual Inputs with UNIFY Faders (Mac)
Unlike Windows, macOS doesn’t have a system panel for changing the audio settings of individual apps, but instead, you can change the audio inputs and outputs of your apps manually. Here’s how:
- Locate Sound Settings in Your App: First, open the application you want to configure (like a game or chat software). In most applications, you can find the sound settings under the preferences menu. This is typically accessed by clicking on the app name in the menu bar and selecting 'Preferences'.
- Set the Application’s Output: In the app's sound settings, choose the appropriate UNIFY channel for the app's output. For instance, if you're setting up a game, select “Game Output (RØDE UNIFY)” as the output channel. This directs the game audio to the specified fader in UNIFY.
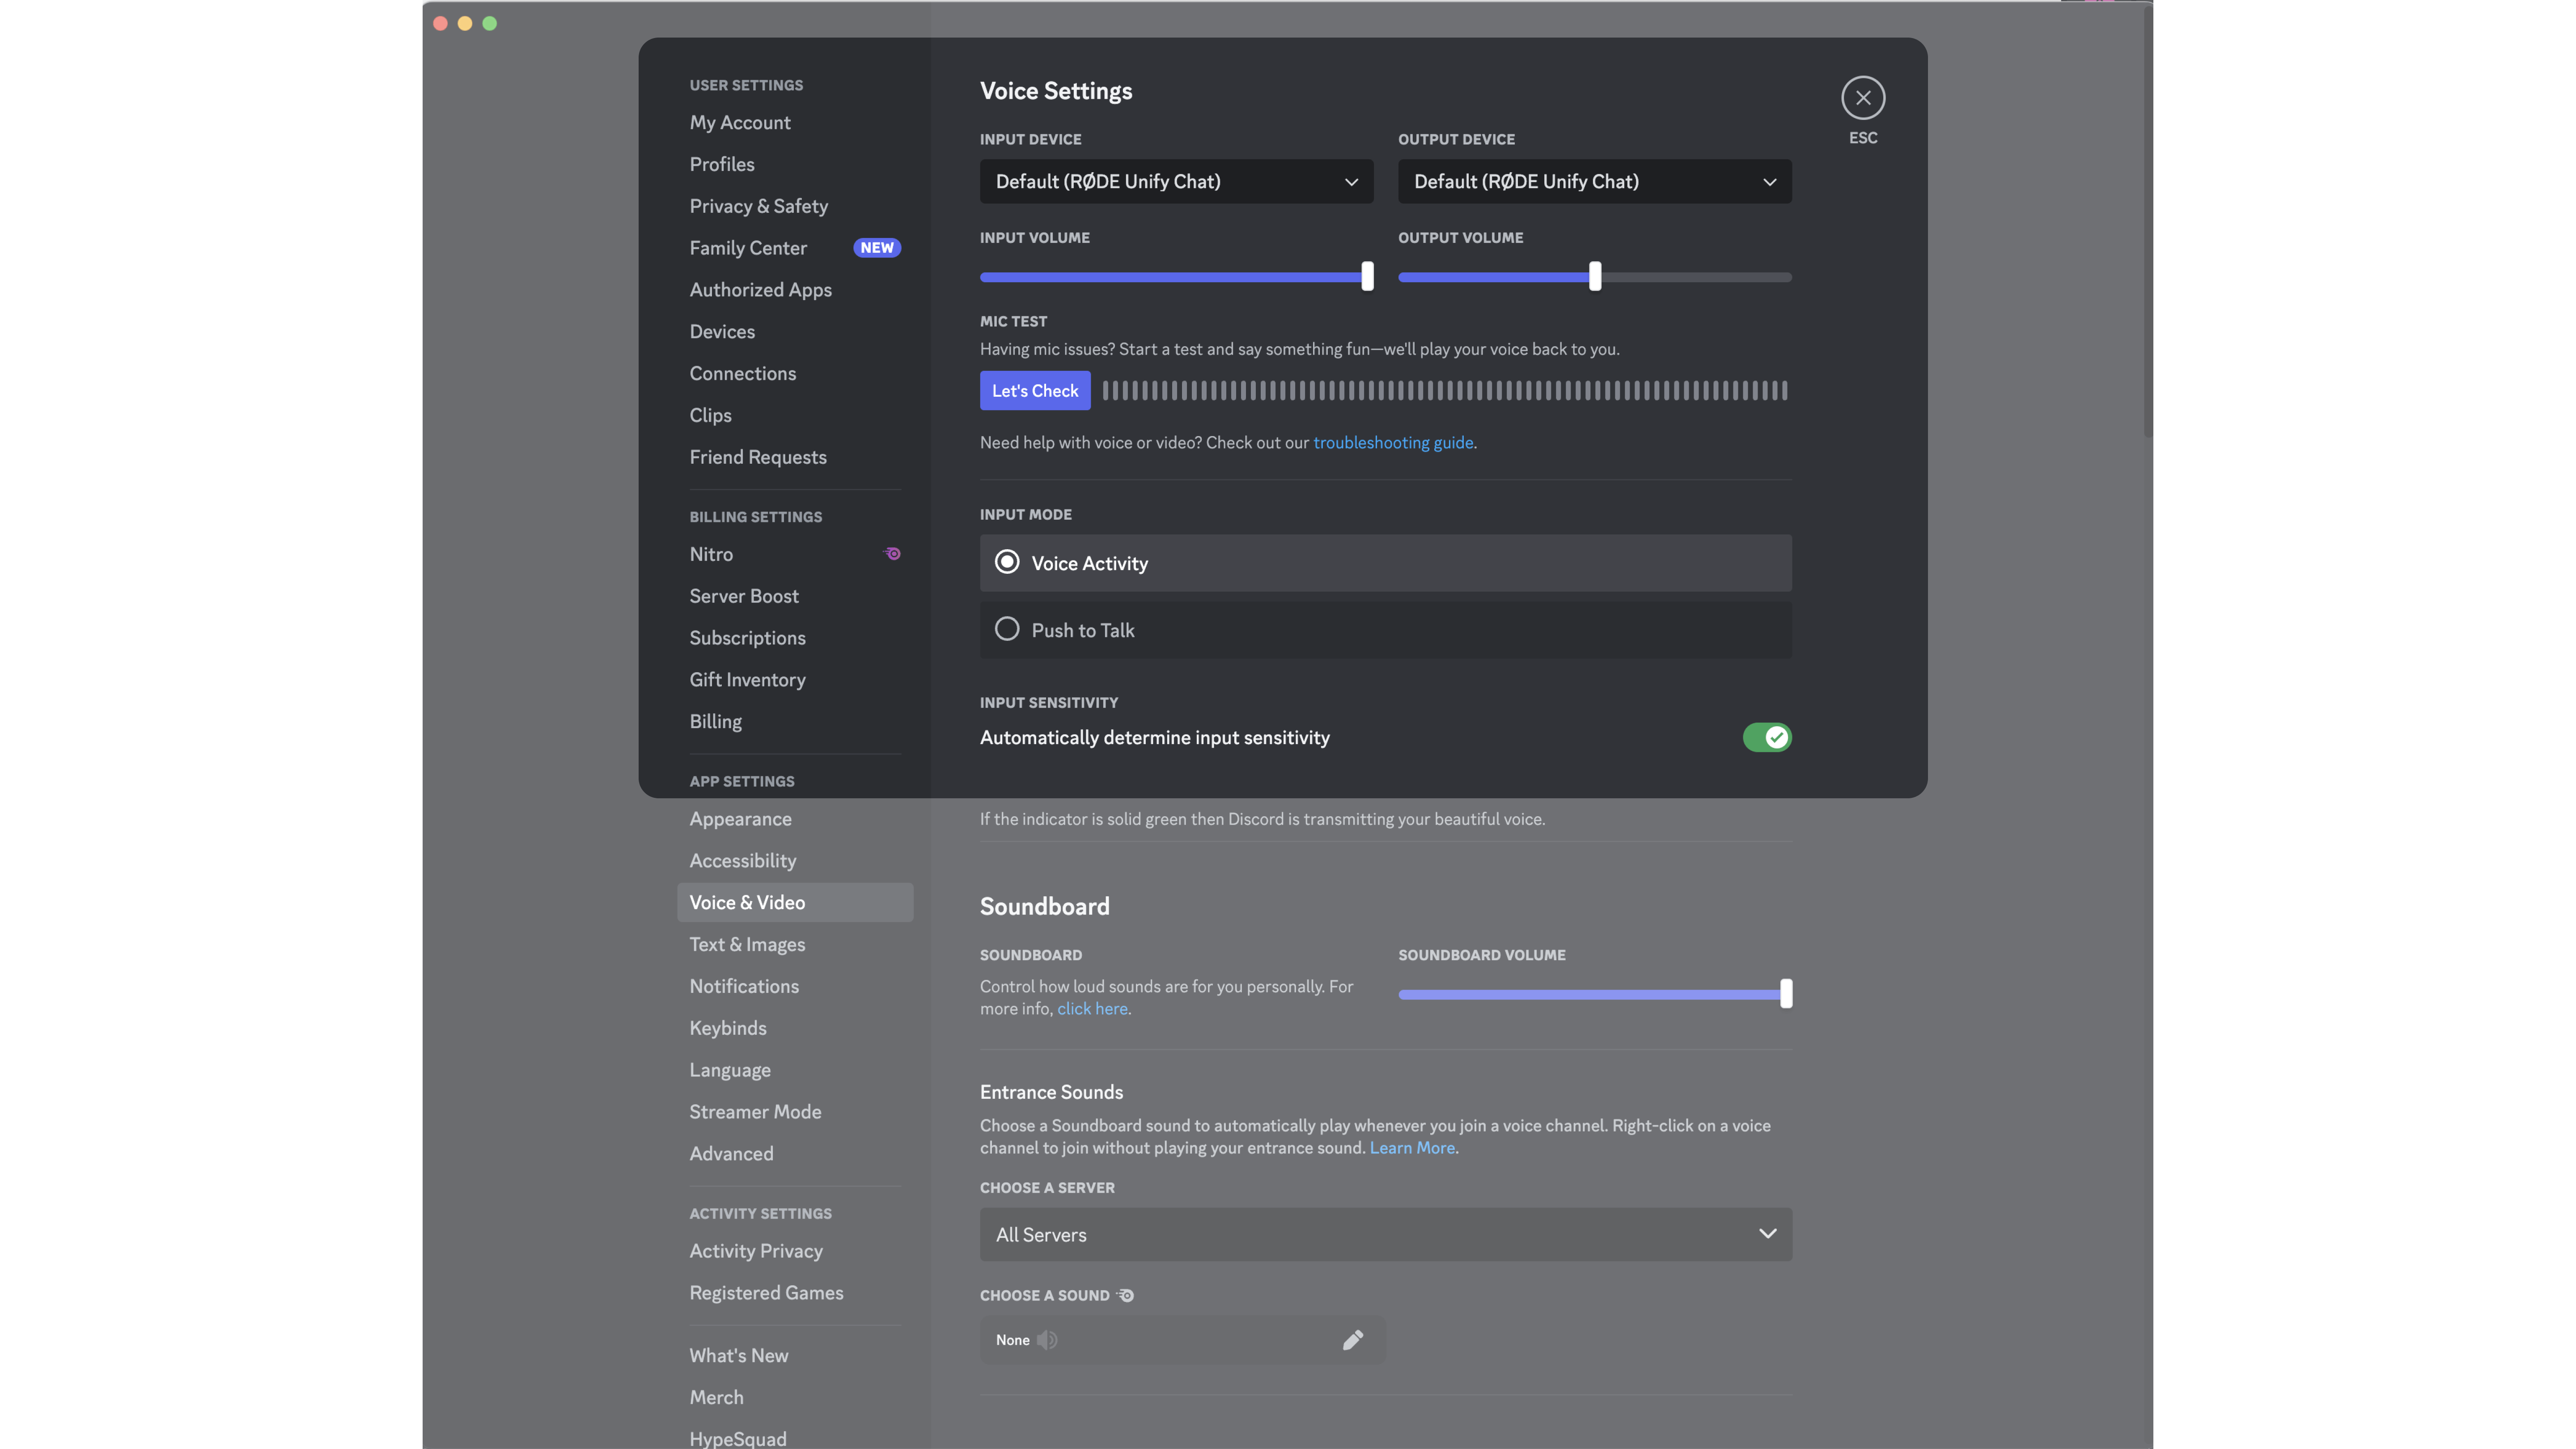
Discord's voice settings adjusted to use the RØDE UNIFY Chat for both the input and output device on macOS.
- Choose the Application’s Input: If the application also uses an audio input (like a voice chat application), decide whether it should receive just your microphone sound or the entire stream mix. For example, for a chat app, you might choose “Chat Input (RØDE UNIFY)” to include only your microphone sound.
If Your App Doesn’t Allow You to Change its Sound Preferences
- Change Your System Sound Settings: Go to the Apple menu, select 'System Preferences', and then click on 'Sound'. Under the 'Output' tab, select a UNIFY channel as your system default. This means any app that doesn’t have customizable sound settings will follow this system setting.
Using a PlayStation 5 with Your Streamer X
Thanks to the way the Streamer X and UNIFY handle HDMI and USB audio, setting up the PlayStation 5 to work with your stream is easy.
If you aren’t using “in-game chat” on your PlayStation 5:
- Connect the HDMI cable from your PlayStation into the “IN” port on your Streamer X. When using UNIFY, you’ll be able to mix this audio on the “HDMI” channel.
If you are using “in-game chat” on your PlayStation 5:
- In addition to connecting your HDMI cable, connect a USB cable from your PlayStation 5 into the USB 2 port on your Streamer X. This will automatically set this USB connection as the microphone input for your PlayStation 5.
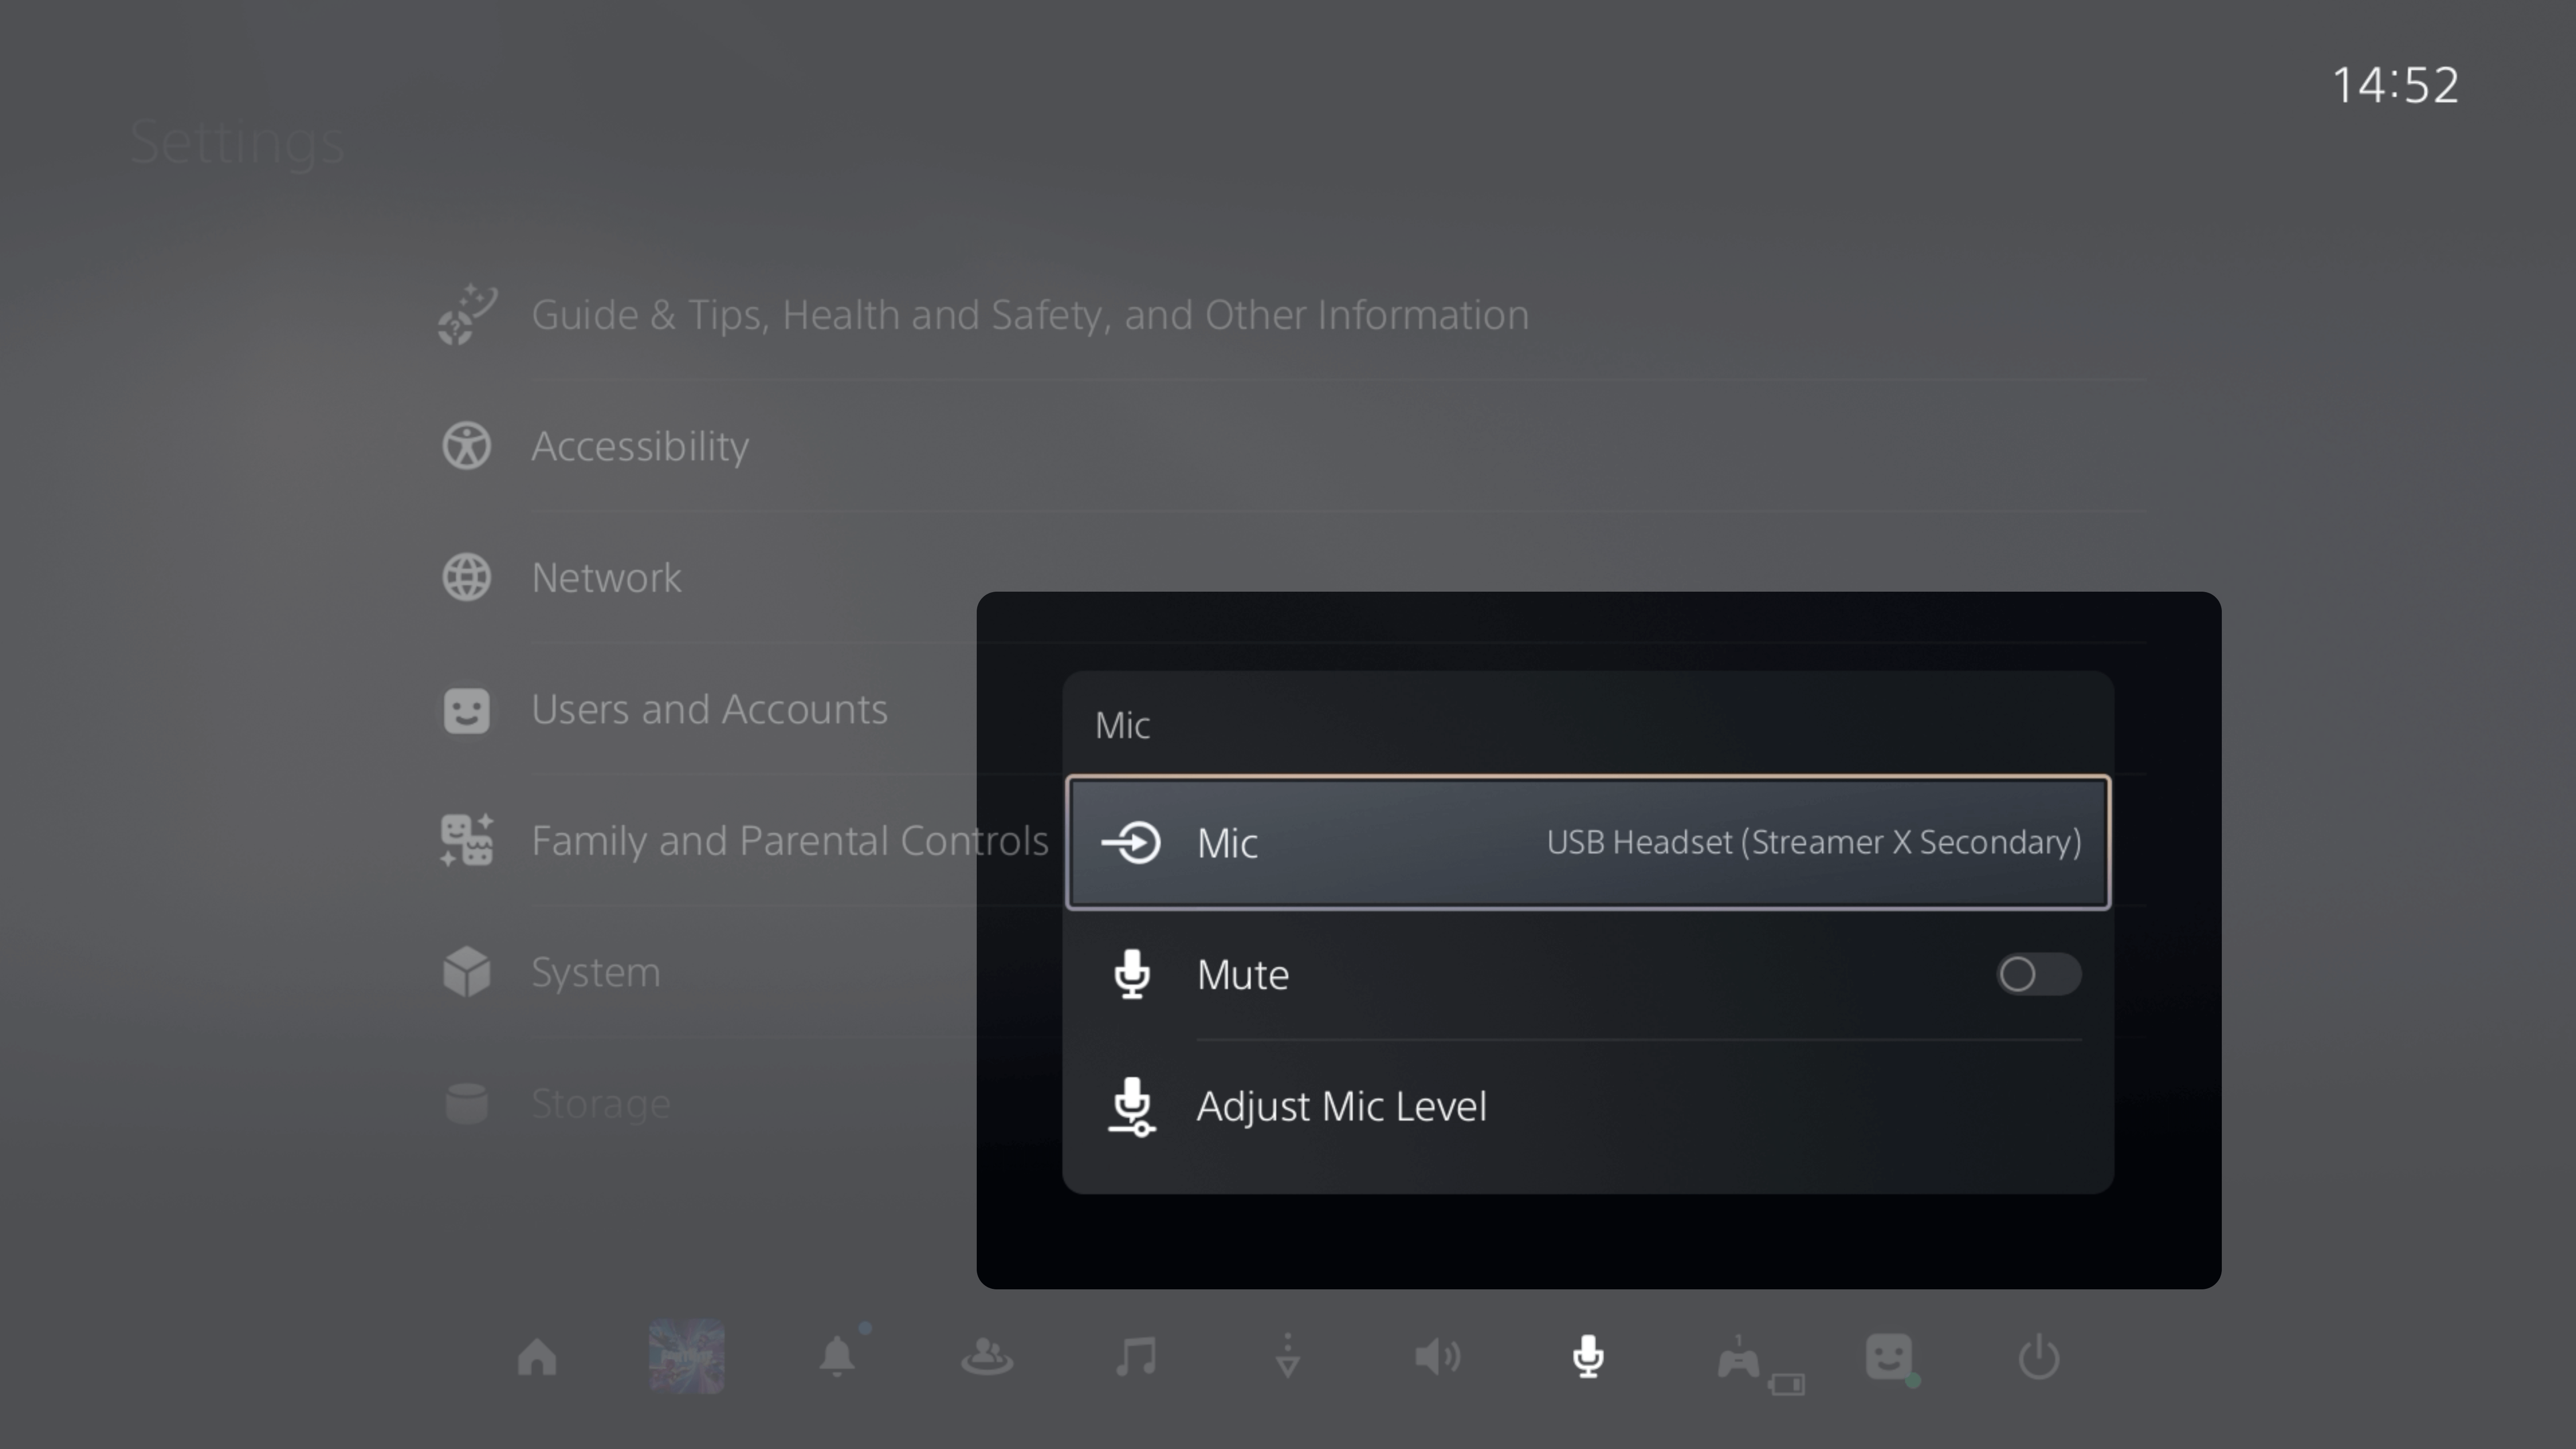
PlayStation 5 settings menu with Mic settings, demonstrating how to select the Streamer X device for input.
- Next, in UNIFY, you’ll need to set up your system to accommodate this new USB connection. First, head to your stream mix, click the “+” button to the right of all of your channels, and add “USB 2 Streamer X”
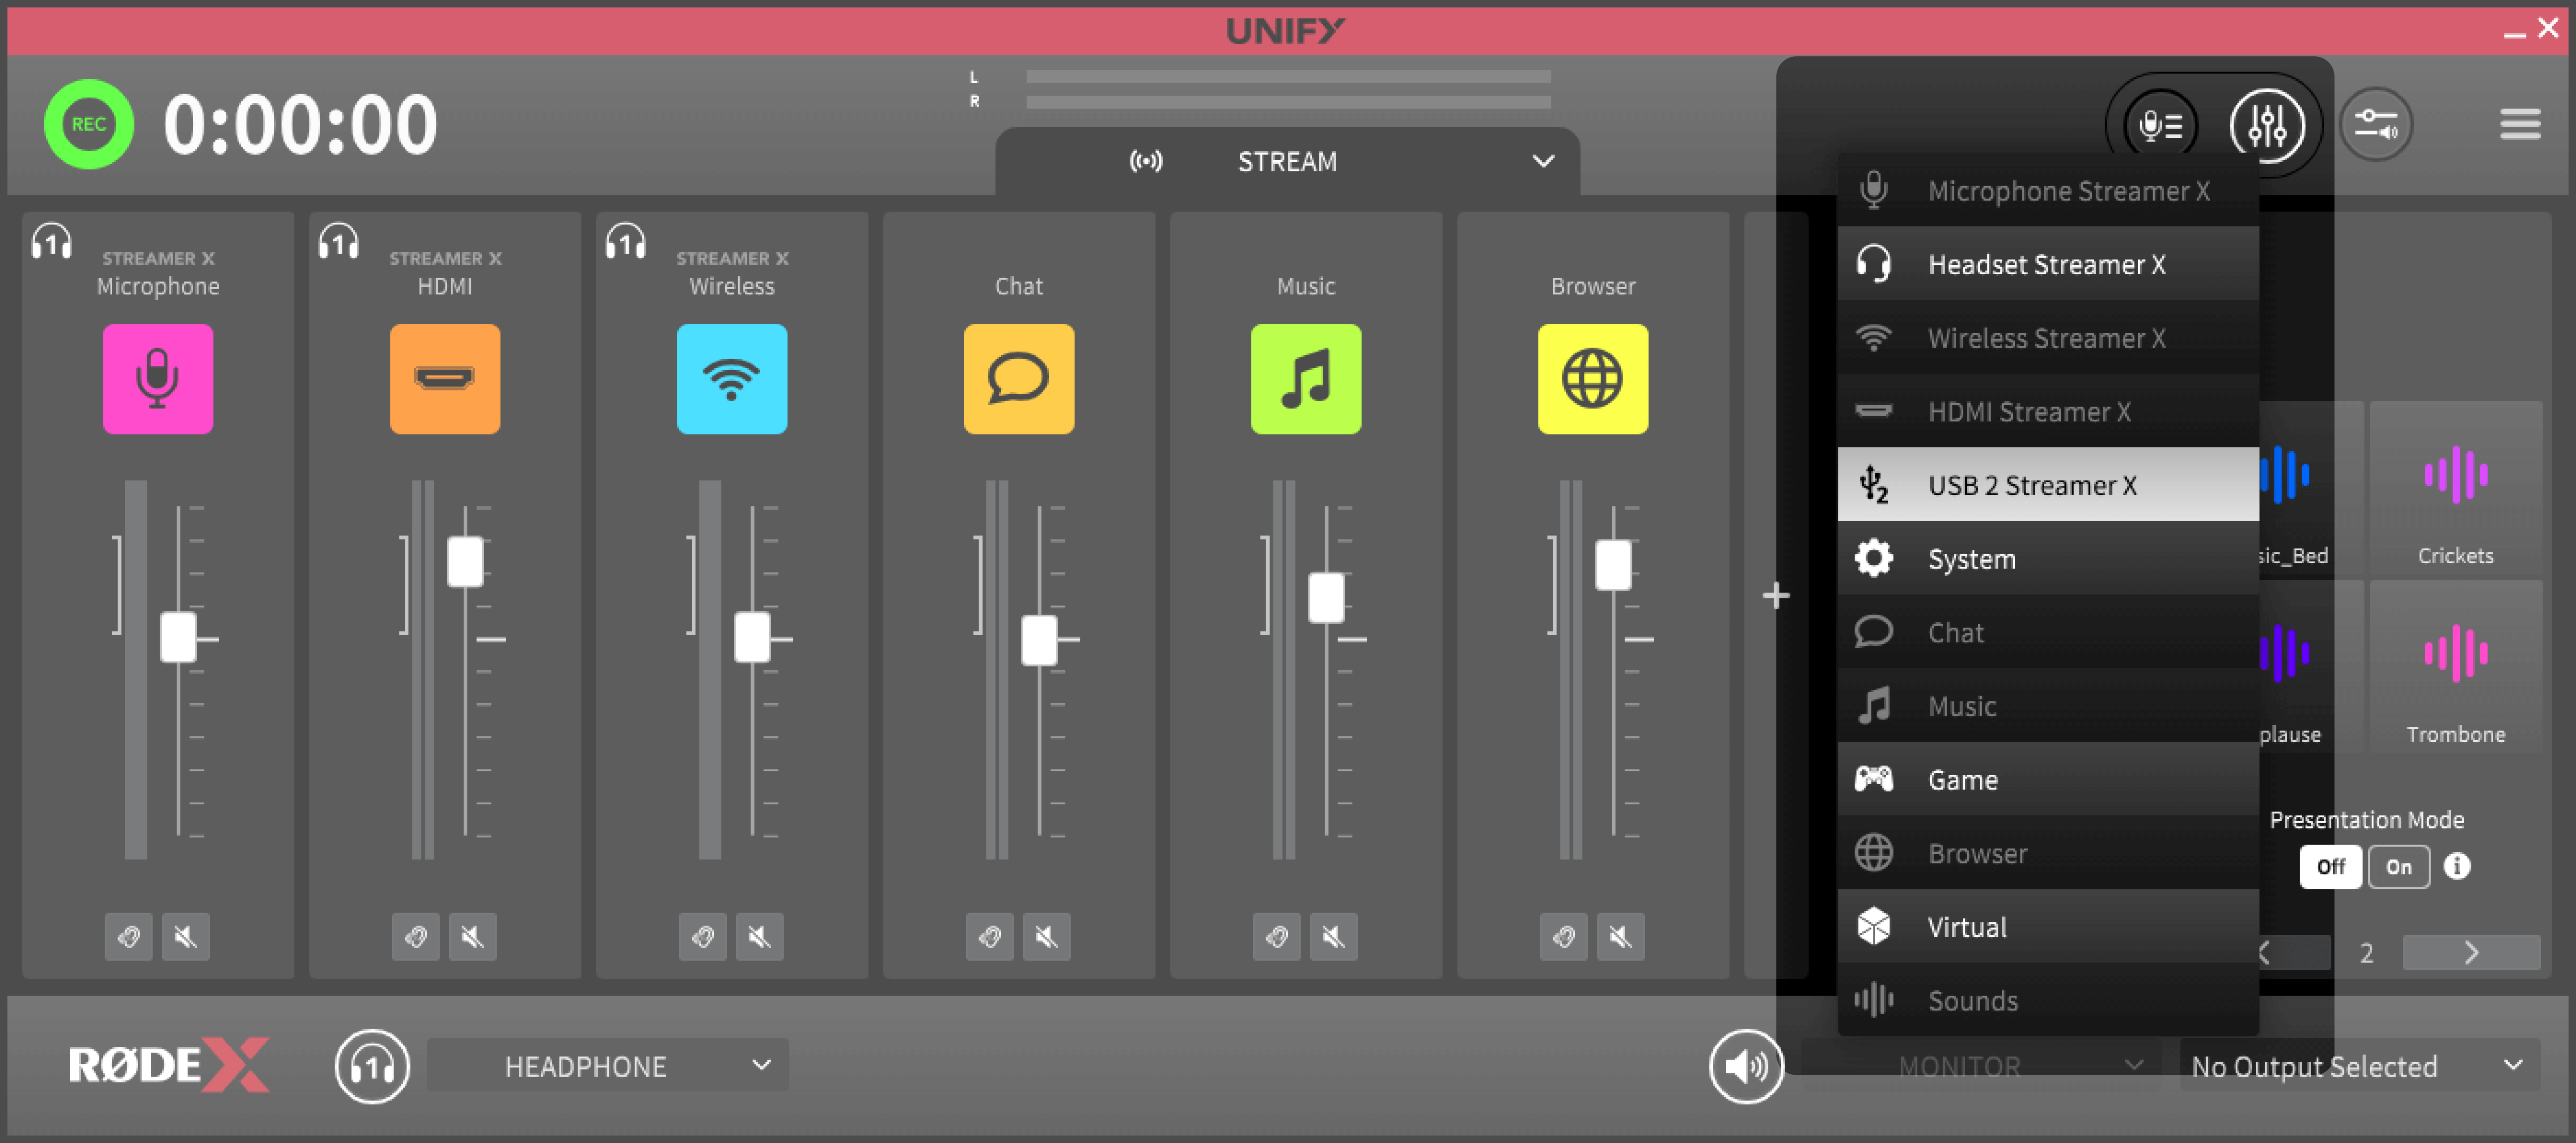
After pressing the “+” button, we press this button to add the USB2 input coming into your Streamer X.
- Then, head to the USB 2 mix. This is the mix which your friends on your PlayStation will hear.
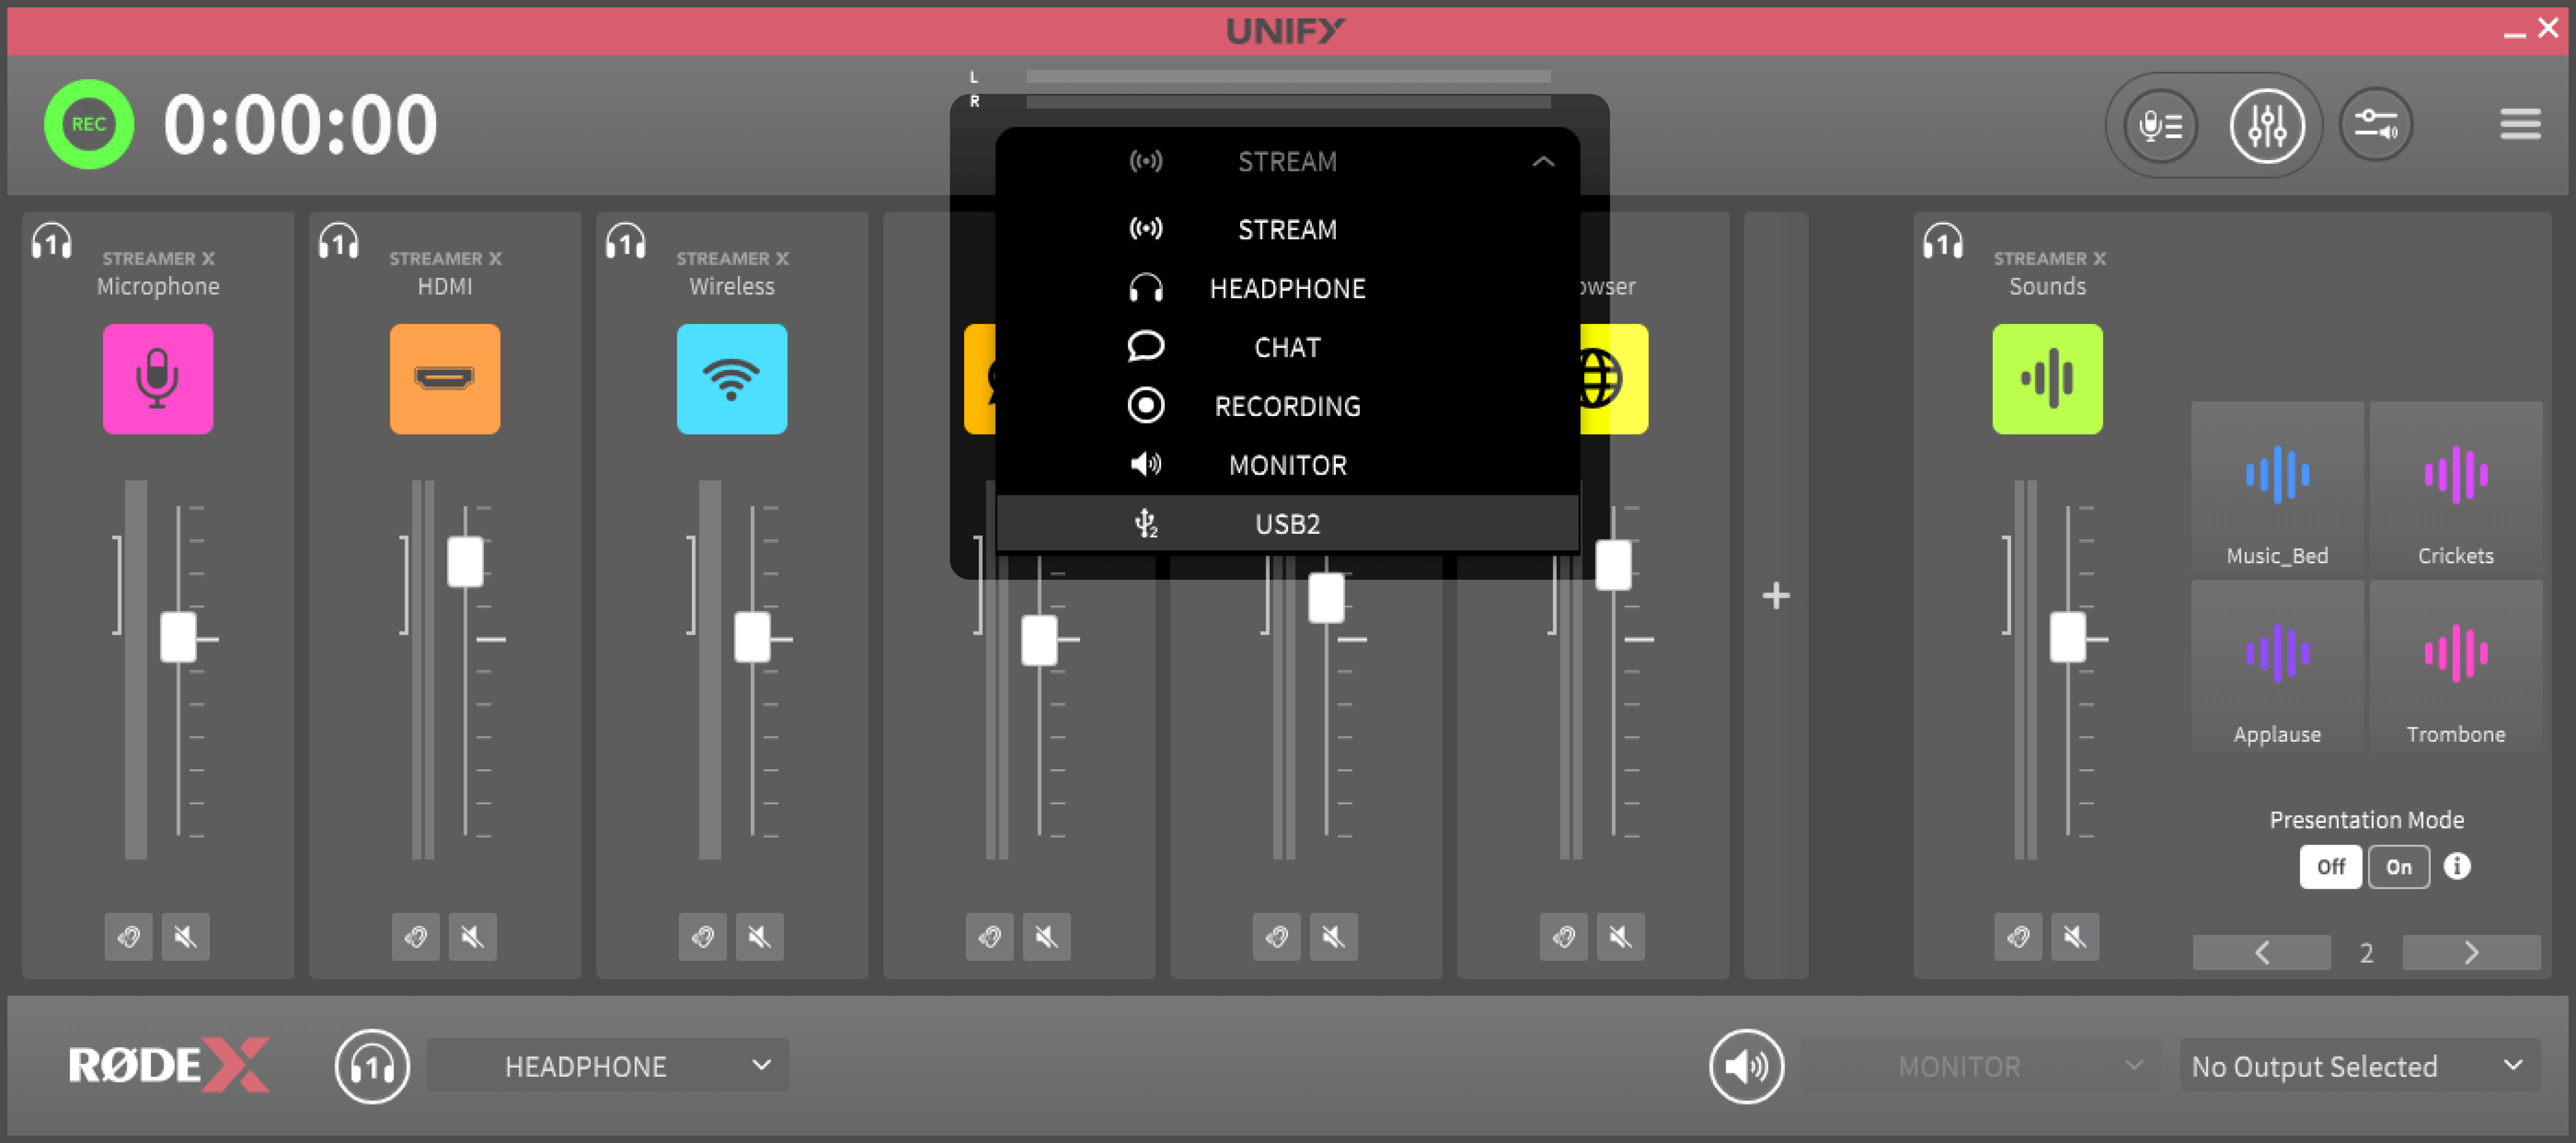
This is where you can access the “USB2” submix, which is what our teammates on our PS5’s voice chat will hear.
- Since we just want our friends to hear our voice, and we don’t want them to hear our music or game sounds, we’ll press the cancel button above every channel except our microphone.
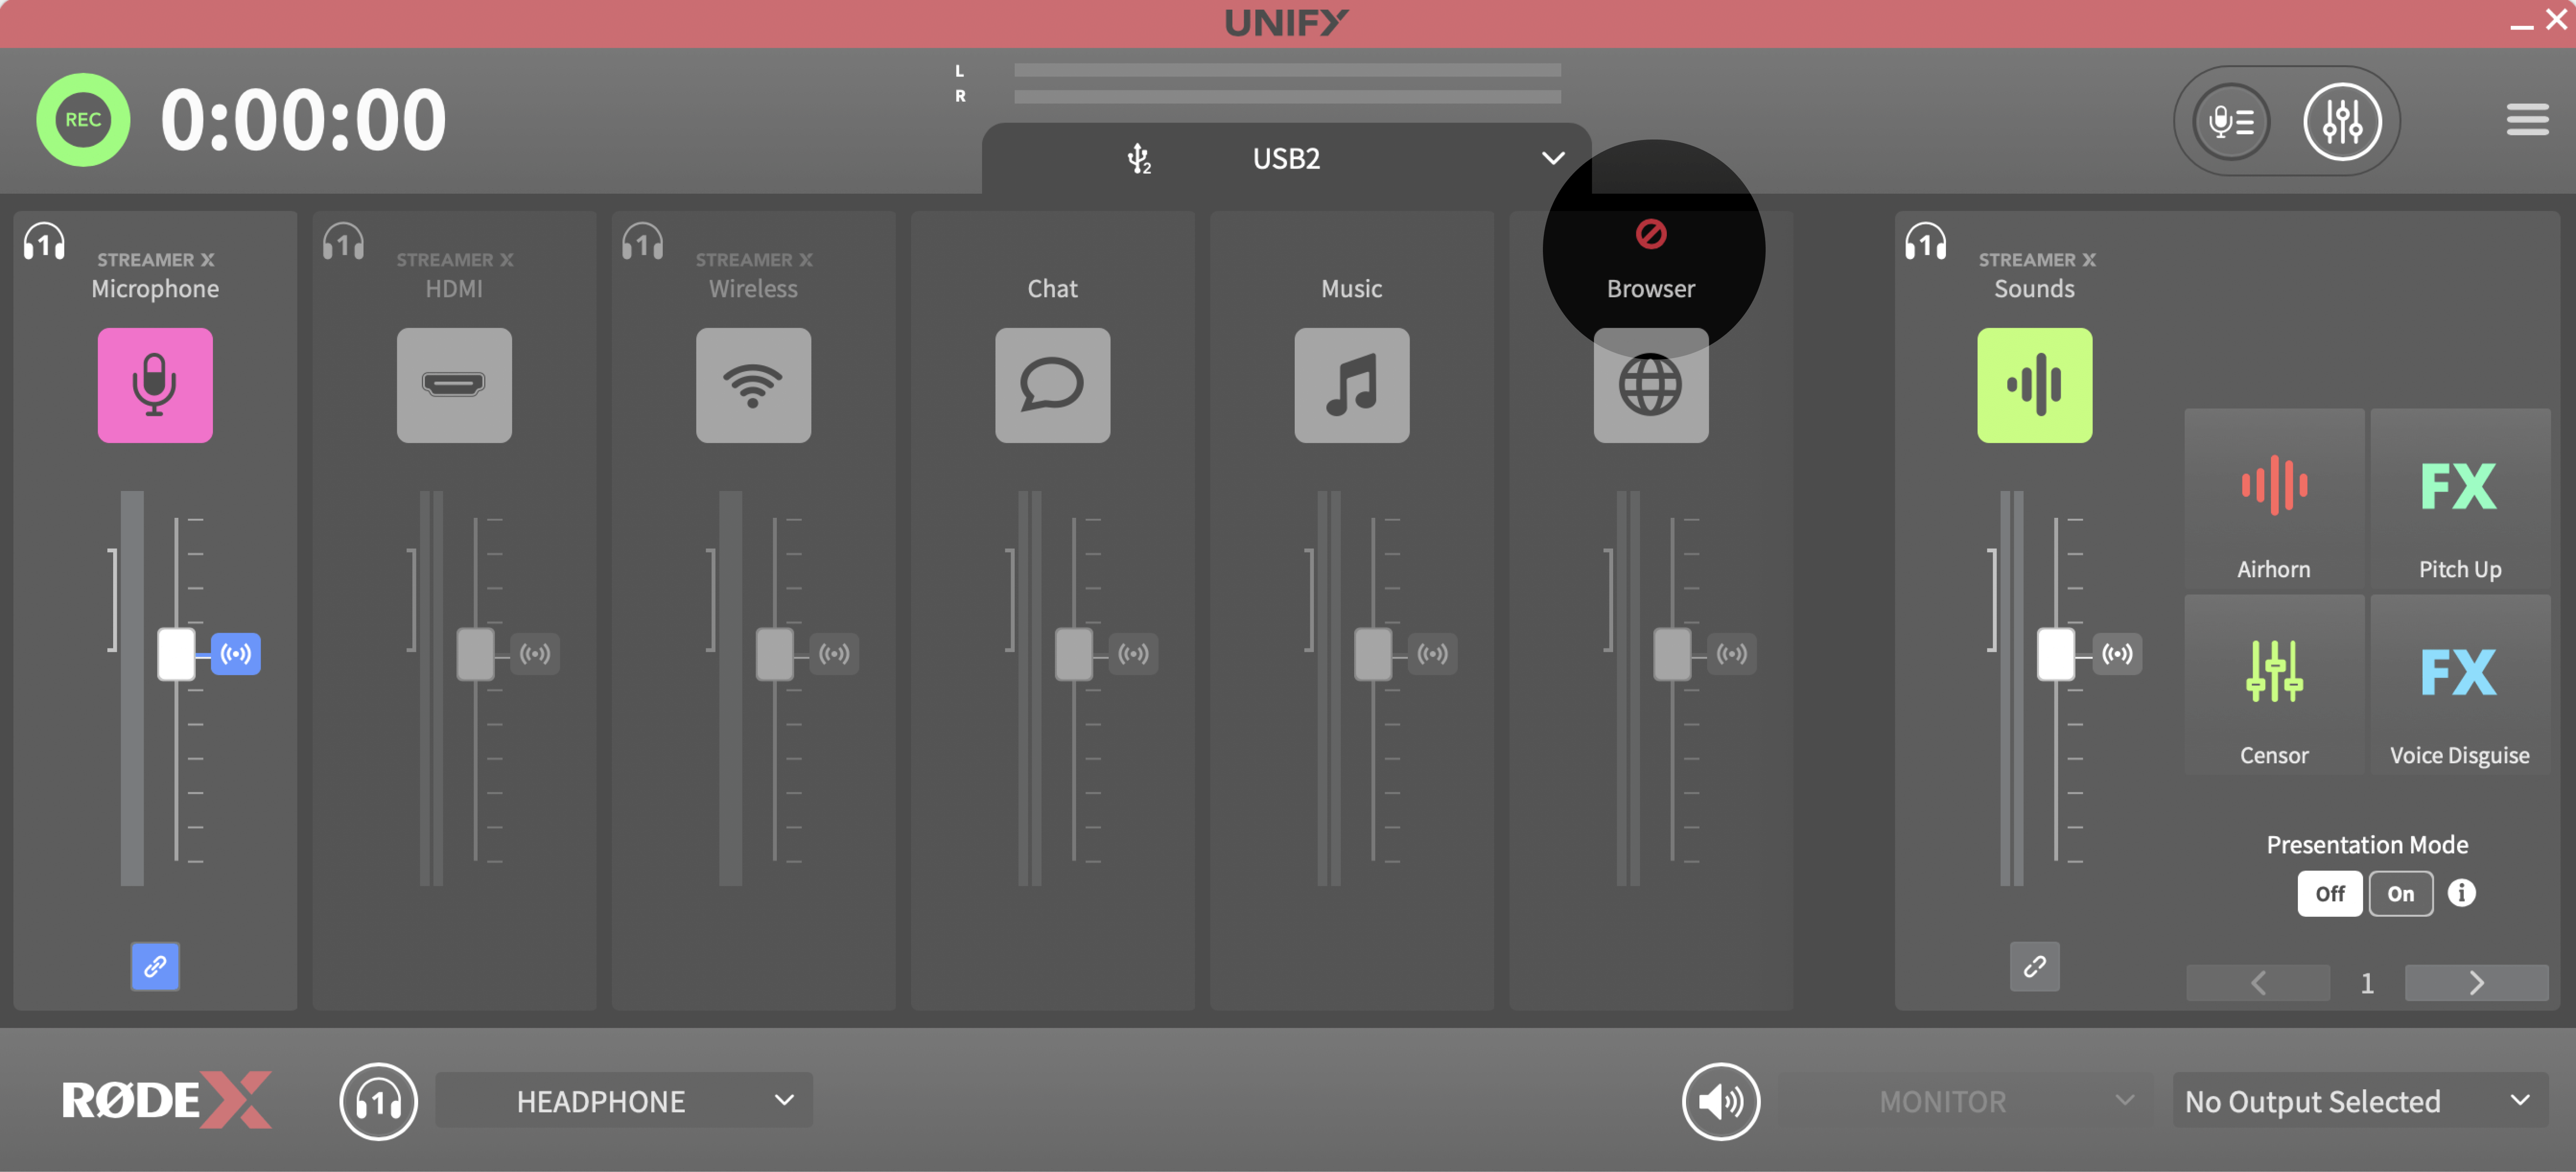
In the “USB2” submix, only the Streamer X’s microphone is enabled, because this is the only thing we want our teammates on our PS5’s voice chat to hear.
- You may notice that as you play your PlayStation, the sounds of your teammates talking and your game sounds are both going through the USB 2 channel in UNIFY. This may not be ideal for your stream as you may want to mix these sound sources separately.
- If you’d like for your game sounds to come through your HDMI input, and for your in-game chat to come through the USB 2 input, open your PlayStation 5’s settings, select “Sound”, head to the “Audio Output” page, scroll down, and for the “Output to Headphones” setting, select “Voice Chat Audio”. Now, these two sound sources will be sent separately to your Streamer X.
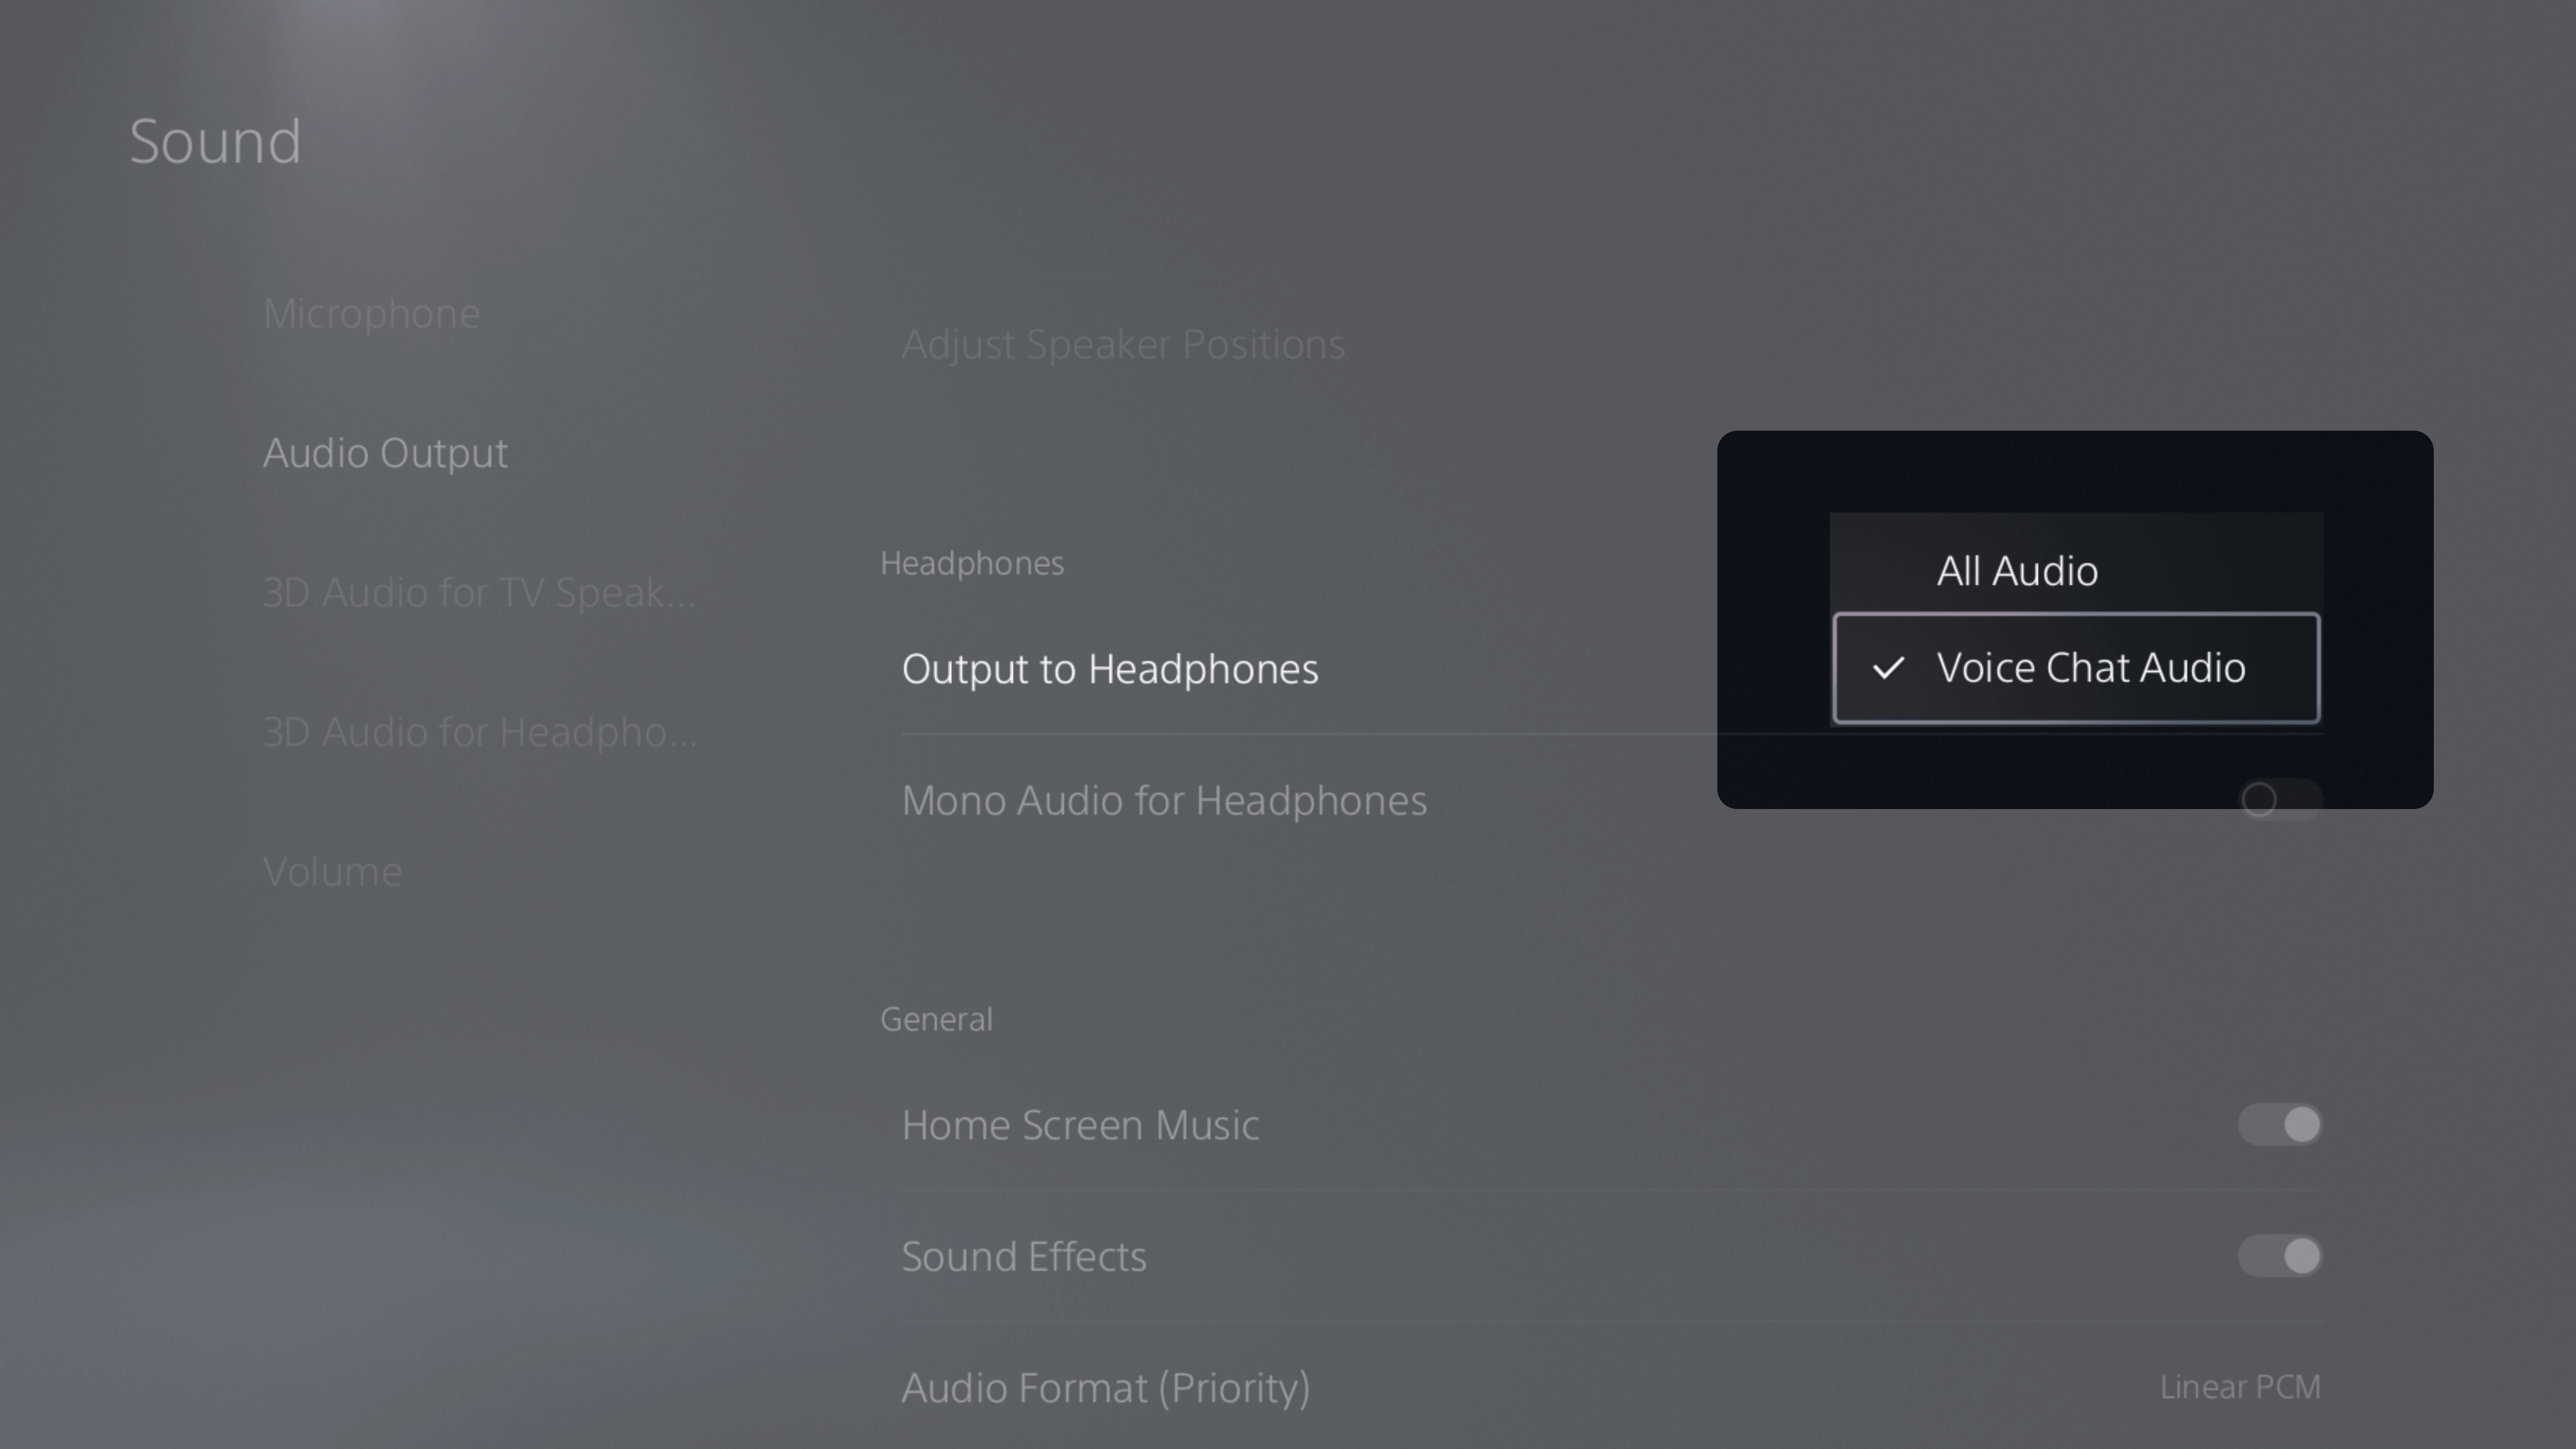
PlayStation 5 sound settings with 'Voice Chat Audio' selected to separate chat from game audio.
3. Mixing Your Stream
If you’re looking to learn about how to mix your channels, how to apply effects and use UNIFY’s SMART pads, we’d recommend checking out the UNIFY user guide here.
4. Setting Up OBS with UNIFY and the Streamer X
Now that UNIFY is configured and your virtual audio sources are correctly routed to the UNIFY faders, it's time to integrate this setup with OBS (Open Broadcaster Software) for your stream.
Adding Your Stream's Audio Mix to OBS
1. Accessing OBS Sources Menu: Open OBS and navigate to the “Sources” panel. This is where you can manage different audio and video sources for your stream. If there are any existing audio sources listed that you no longer need, delete them. This helps prevent any conflicts or unnecessary clutter in your audio setup.
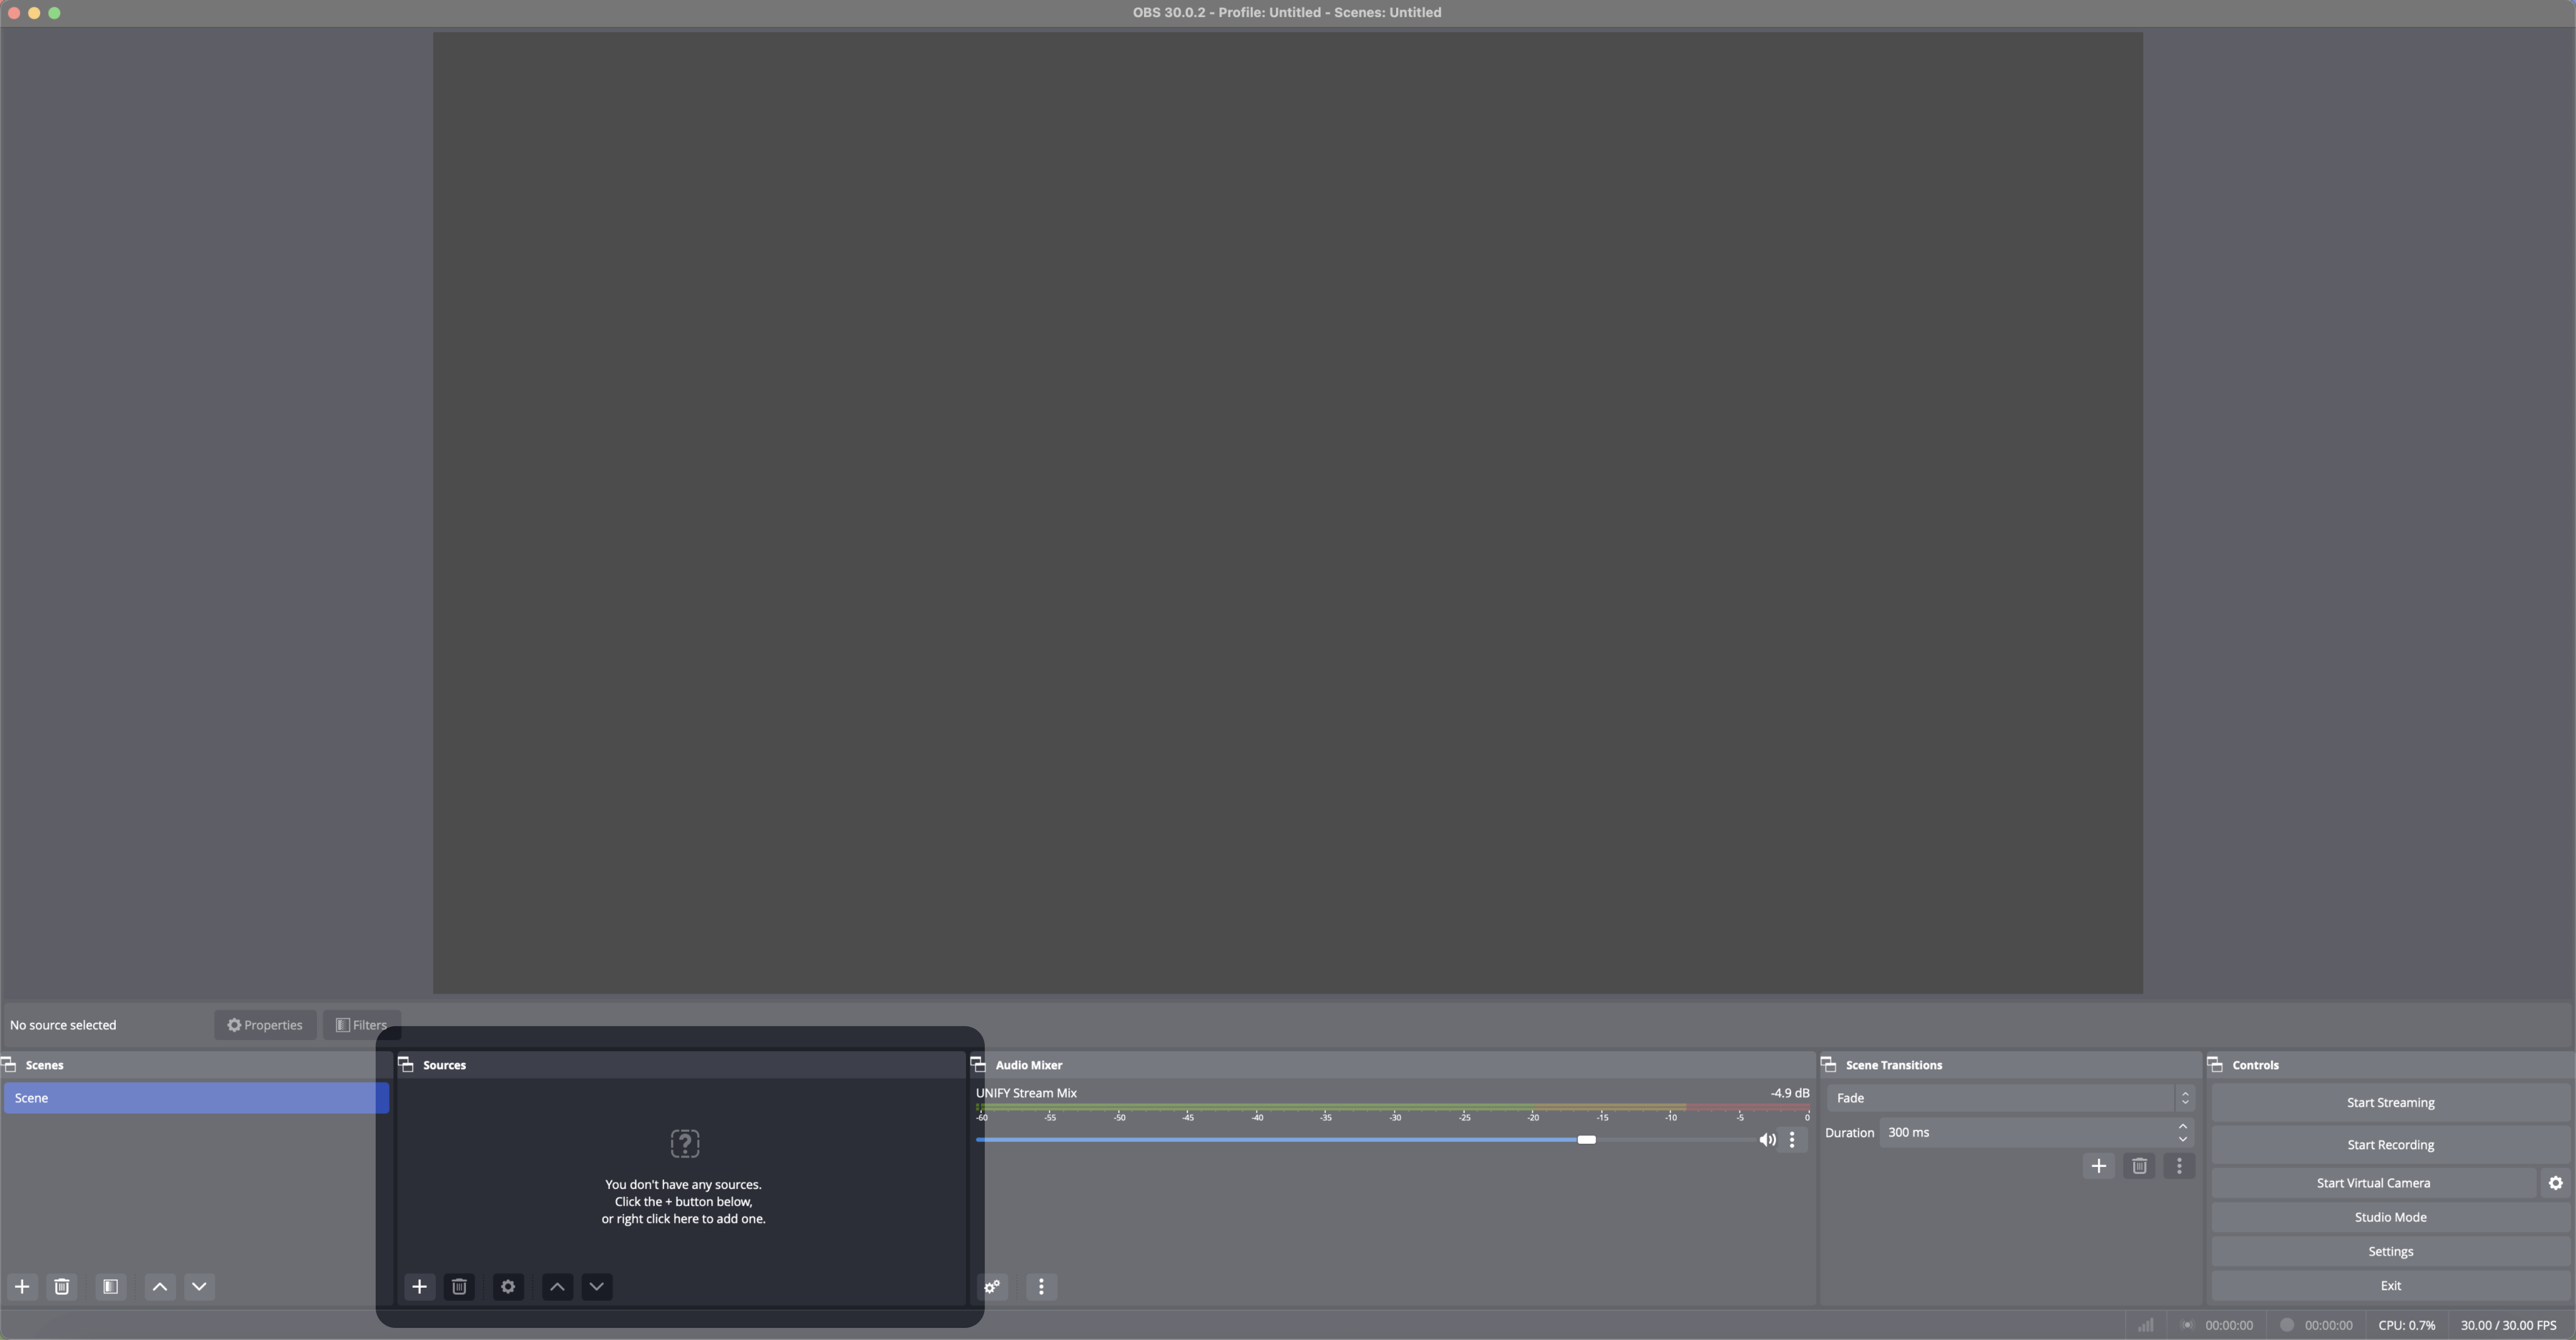
OBS interface with a clean slate, ready for adding audio and video sources for streaming.
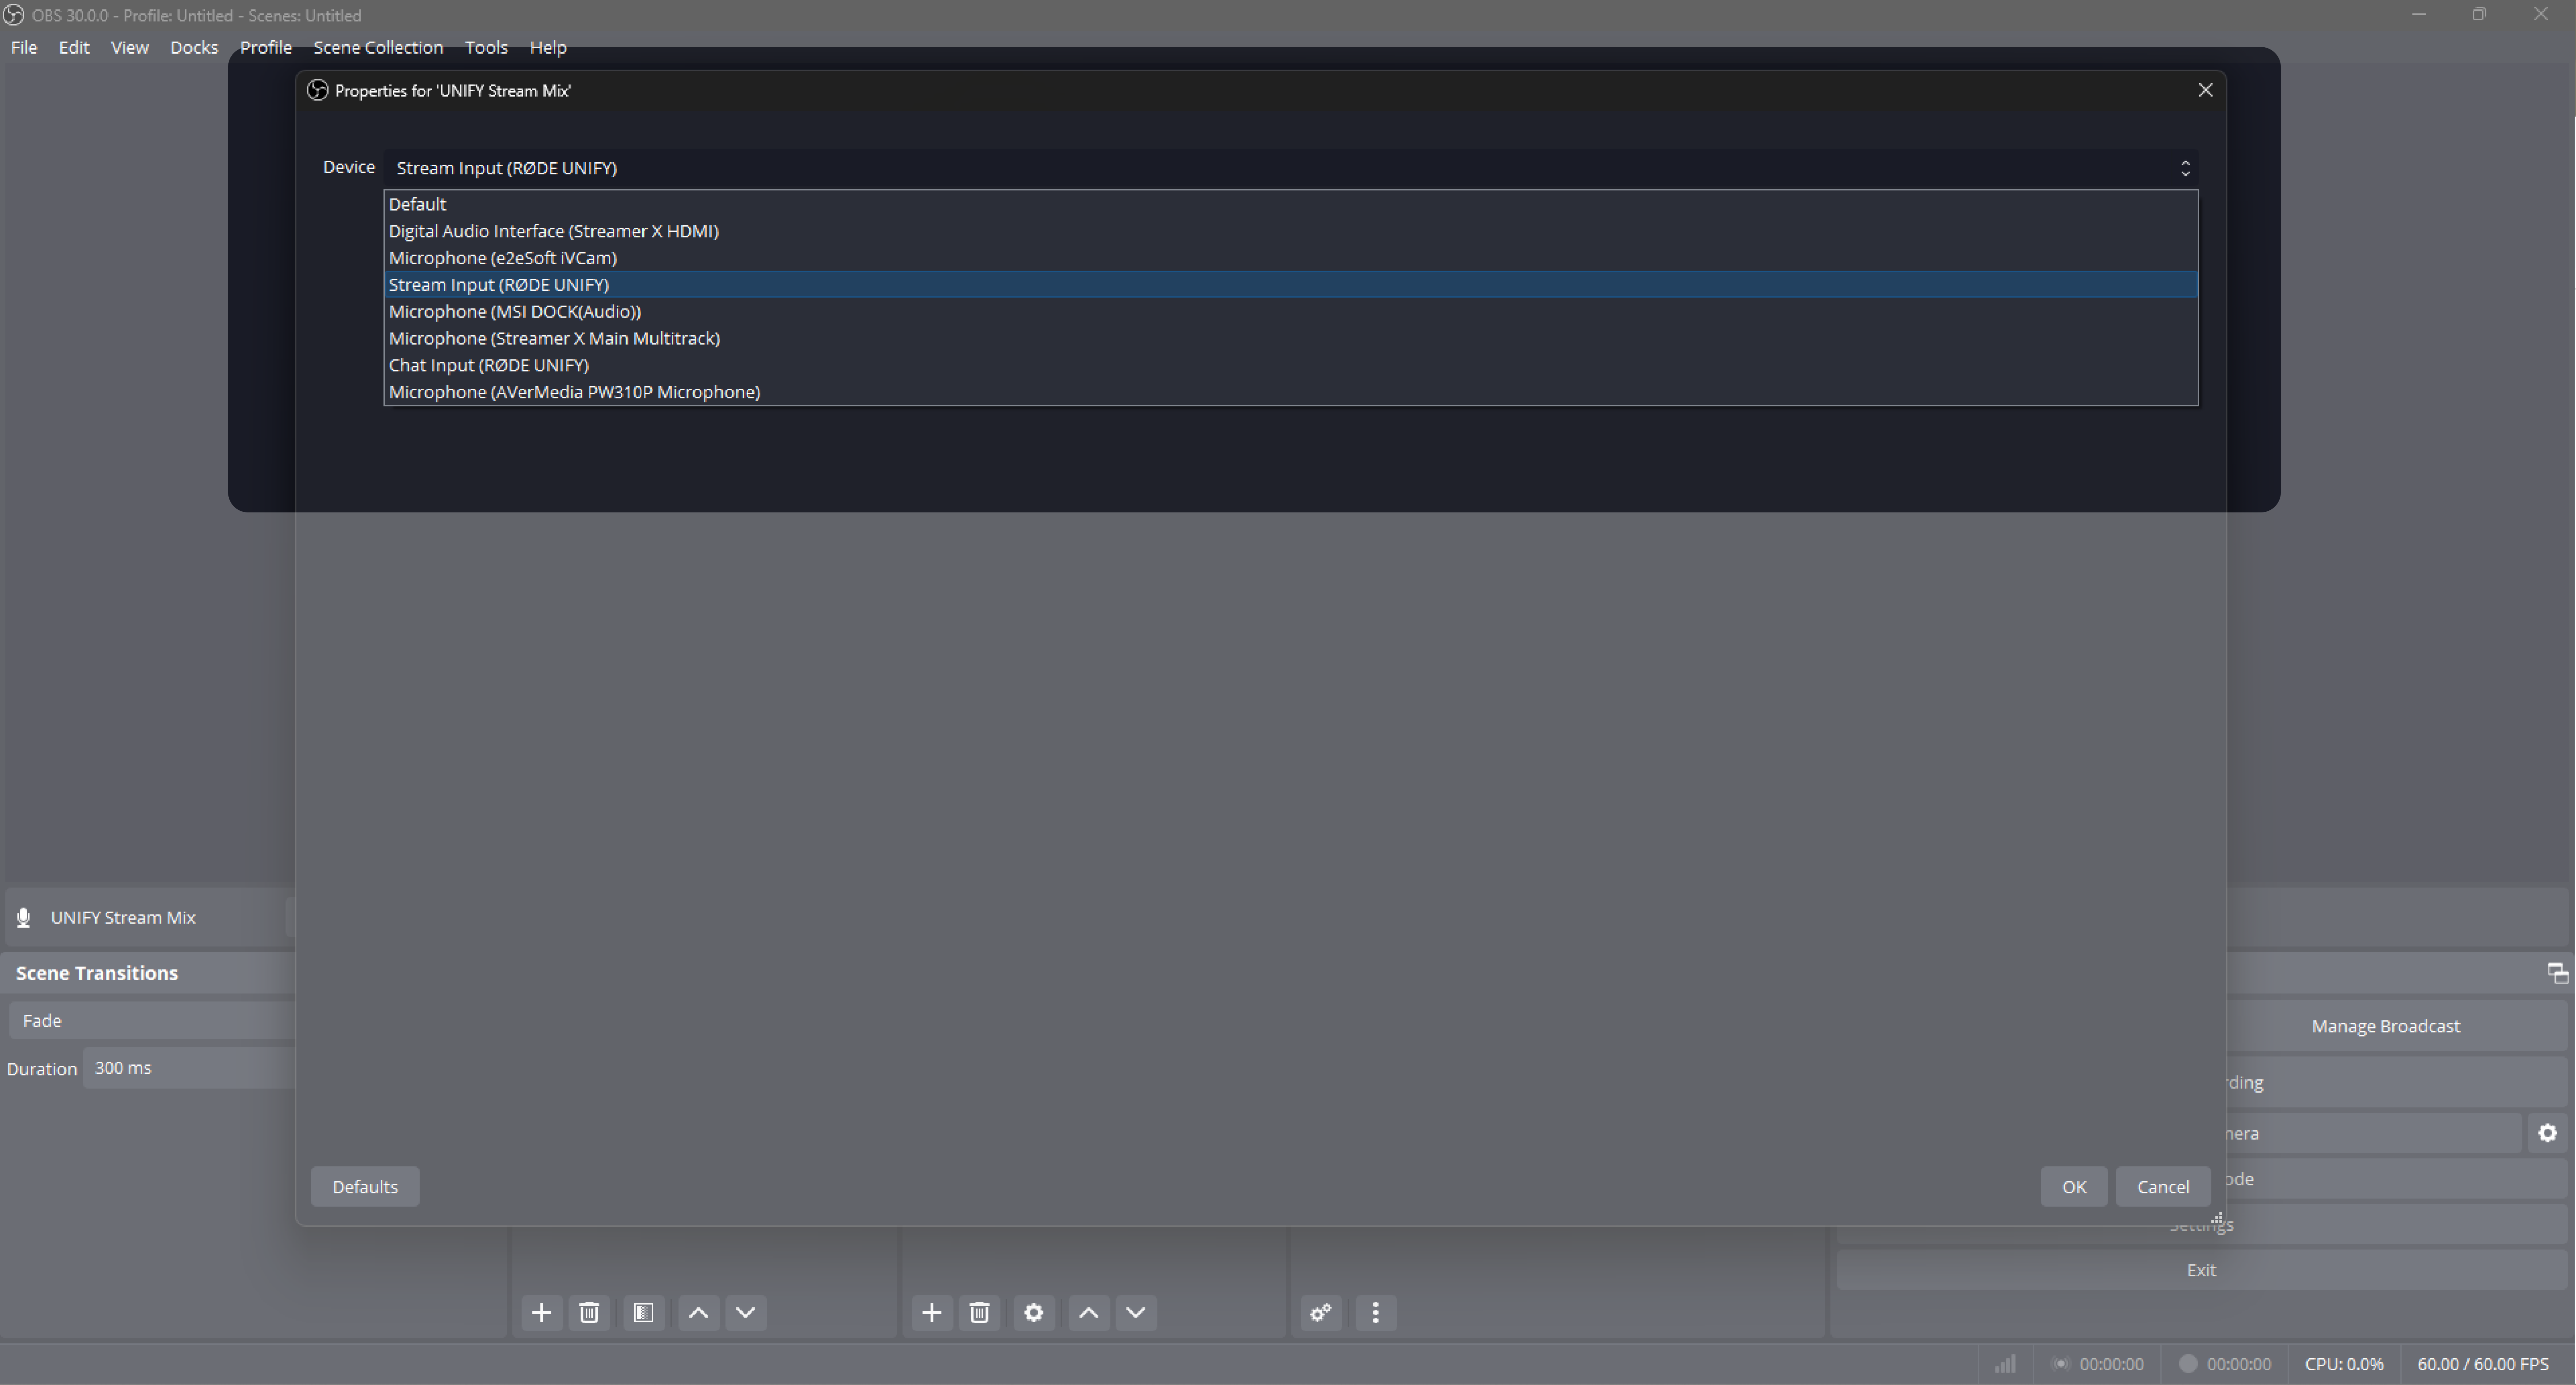
2. Adding the UNIFY Stream Mix:
- Click the “+” button in the “Sources” panel.
- Select “Audio Input Capture” from the options.
- Name this new audio source “UNIFY Stream Mix”. This helps you easily identify and manage it within OBS.
3. Finalizing the Setup: After adding “UNIFY Stream Mix”, you should see this source in the “Audio Mixer” panel of OBS. This panel allows you to monitor and adjust the audio levels of your stream in real-time.
OBS Audio Input Capture setup window, selecting the 'UNIFY Stream Mix' as the source.
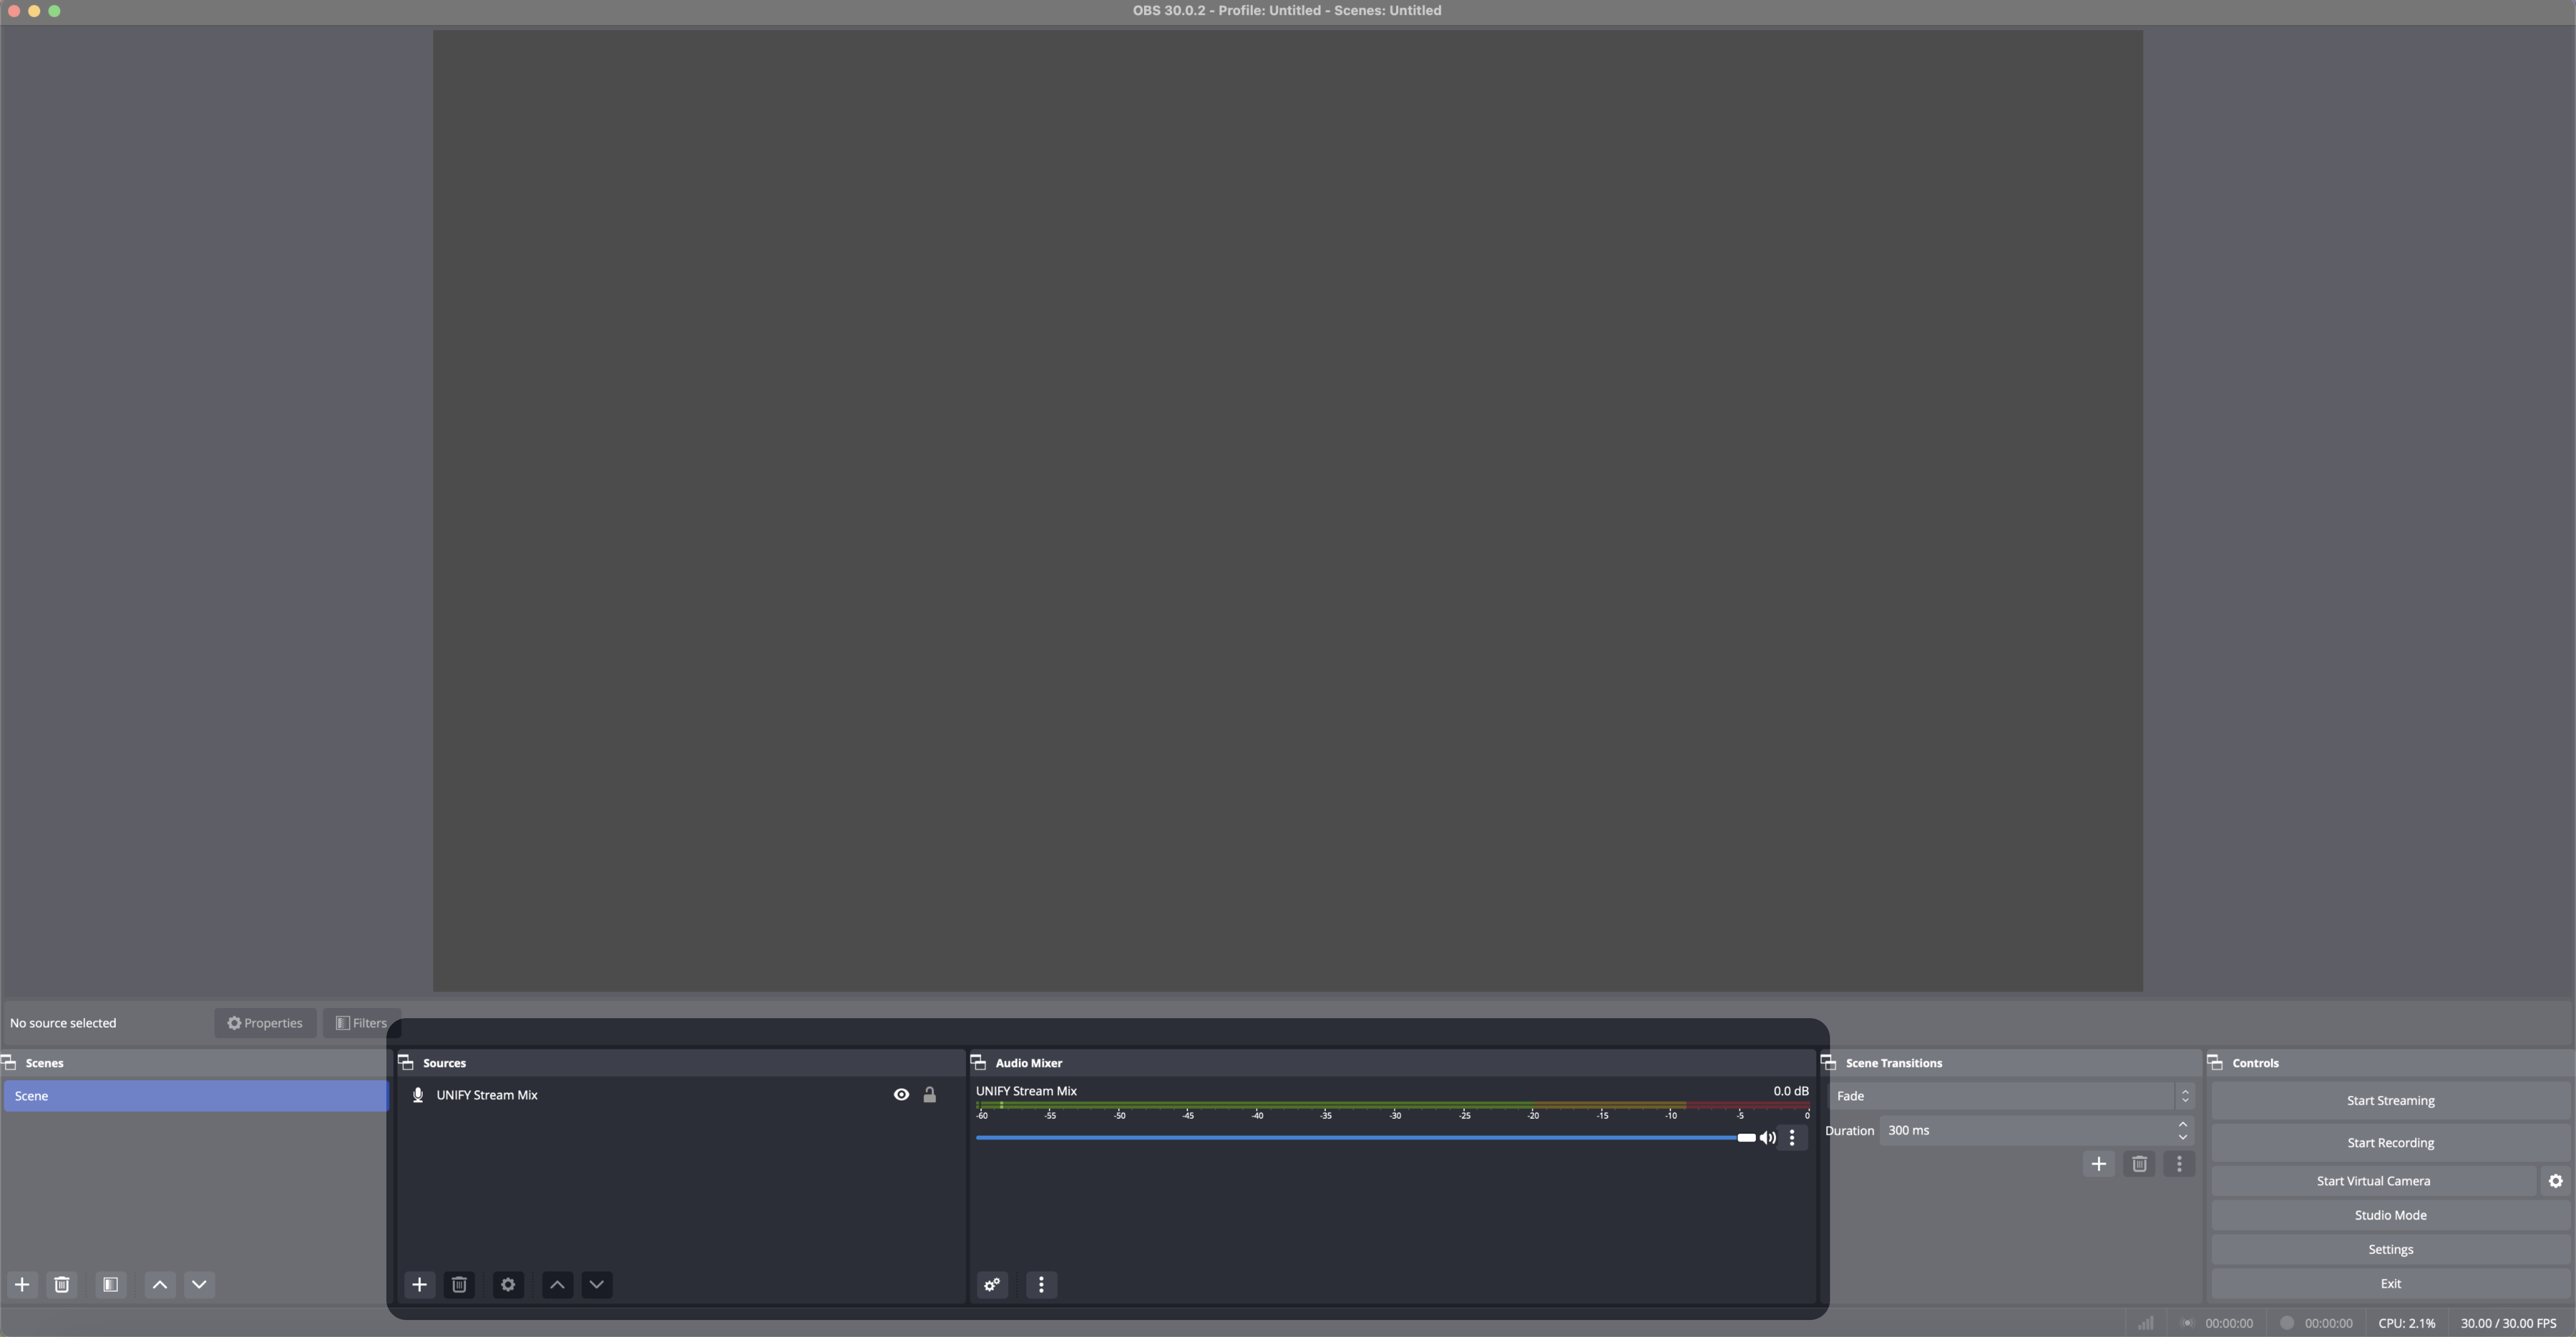
OBS interface showing the newly added 'UNIFY Stream Mix' in the audio mixer panel.
Adding Your Streamer X’s Video Feed into OBS
1. Navigate to the “Sources” panel in OBS.
2. Press the “+” button and select “Video Capture Device”
3. Name this source something similar to “Streamer X Video Input” so you can keep track of it.
4. No need to change any of the default settings on the next screen! Just click “okay”.
5. You should be able to see your video source on the screen. If you’ve got an error screen here instead, check out this part of our user guide, or this page on our help center for troubleshooting tips.
5. Creating a VOD Mix (Optional)
If you aren’t sure what a “VOD mix” is, that’s okay – you may not actually need one! A VOD mix is particularly useful for Twitch streamers who wish to have their Twitch recordings exclude certain audio elements, like music. This is important to manage copyright issues or preferences in recorded content.
There are two options for doing this:
A) If You Aren’t Using a Chat Mix
If you aren’t using your chat mix to communicate with friends using UNIFY, what you’ll be doing is using this mix to create a version of your stream mix which doesn’t have music in it. Here’s how:
1. First, ensure your music application outputs to the “Music” channel in UNIFY.
2. Adjust the Stream Mix:
- In UNIFY, go to your Stream mix.
- Mute the Music channel by clicking its mute button.
3. Set Up the Chat Mix:
- Switch to your Chat mix in UNIFY.
- Mute every channel except for the Music channel by clicking the cancel button at the top of each fader.
- On the Music channel, press the link button to un-link it from the stream mix.
4. Configure OBS for VOD Mix:
- In OBS, alongside your "UNIFY Stream Mix", add a new audio input capture and name it “VOD Mix”.
- For the device setting, choose “Chat Input (RØDE UNIFY)”.
5. Finalise OBS Settings:
- You should now see two sources in your OBS Audio Mixer: “UNIFY Stream Mix” and “VOD Mix”.
- Click the settings icon in the Audio Mixer panel to open the Advanced Audio Properties.
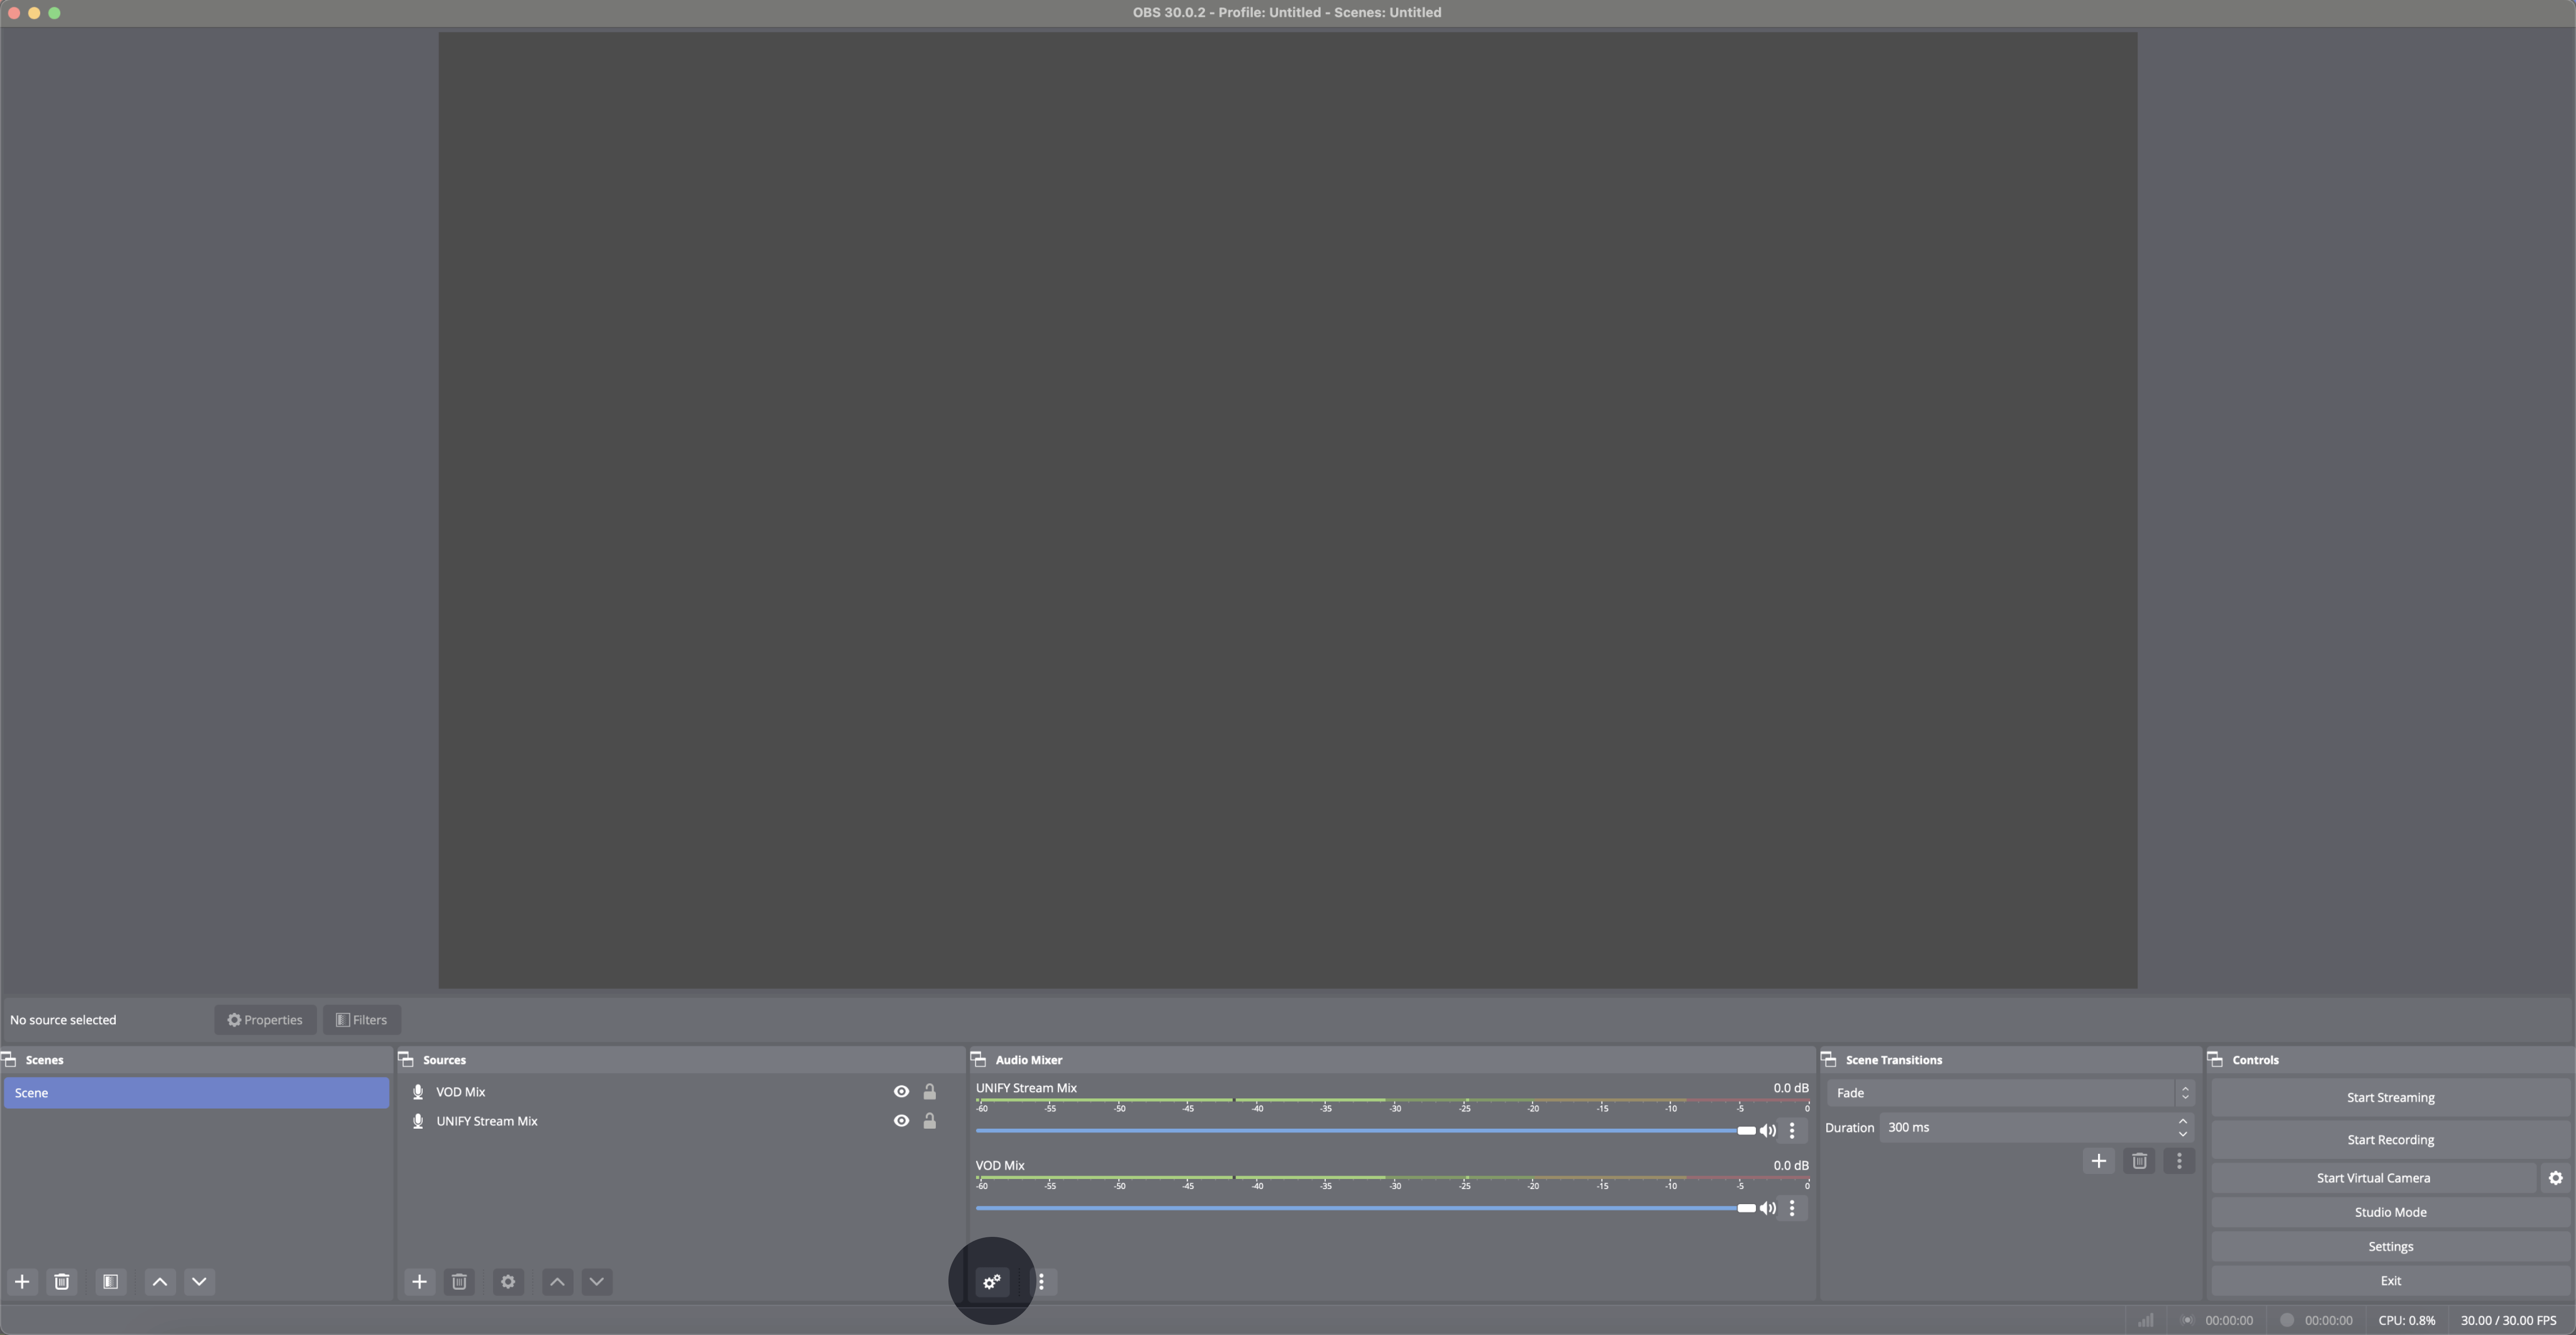
Click this button to navigate to your Advanced Audio Properties menu.
- Tick the boxes as you can see below to ensure your stream mix goes to your live stream and your VOD mix goes to your Twitch VODs.

OBS Advanced Audio Properties window illustrating which mix will be sent to your Twitch livestream (Channel 1) and which mix will be sent to your VOD channel (Channel 2).
6. To finish setting up your VOD channel, you can now follow the steps in this guide on the OBS website.
B) If You Are Using a Chat Mix
If you are using a chat mix, both of your mixes will be used up by your stream, so to create a VOD mix, we’ll exclude the music track from our stream mix, and send it to OBS separately, so that OBS can send a version of your mix to Twitch with your music taken out.
1. Exclude Music from Stream Mix: Keep running your music through the "Music Output” channel in UNIFY, but mute it in the stream mix.
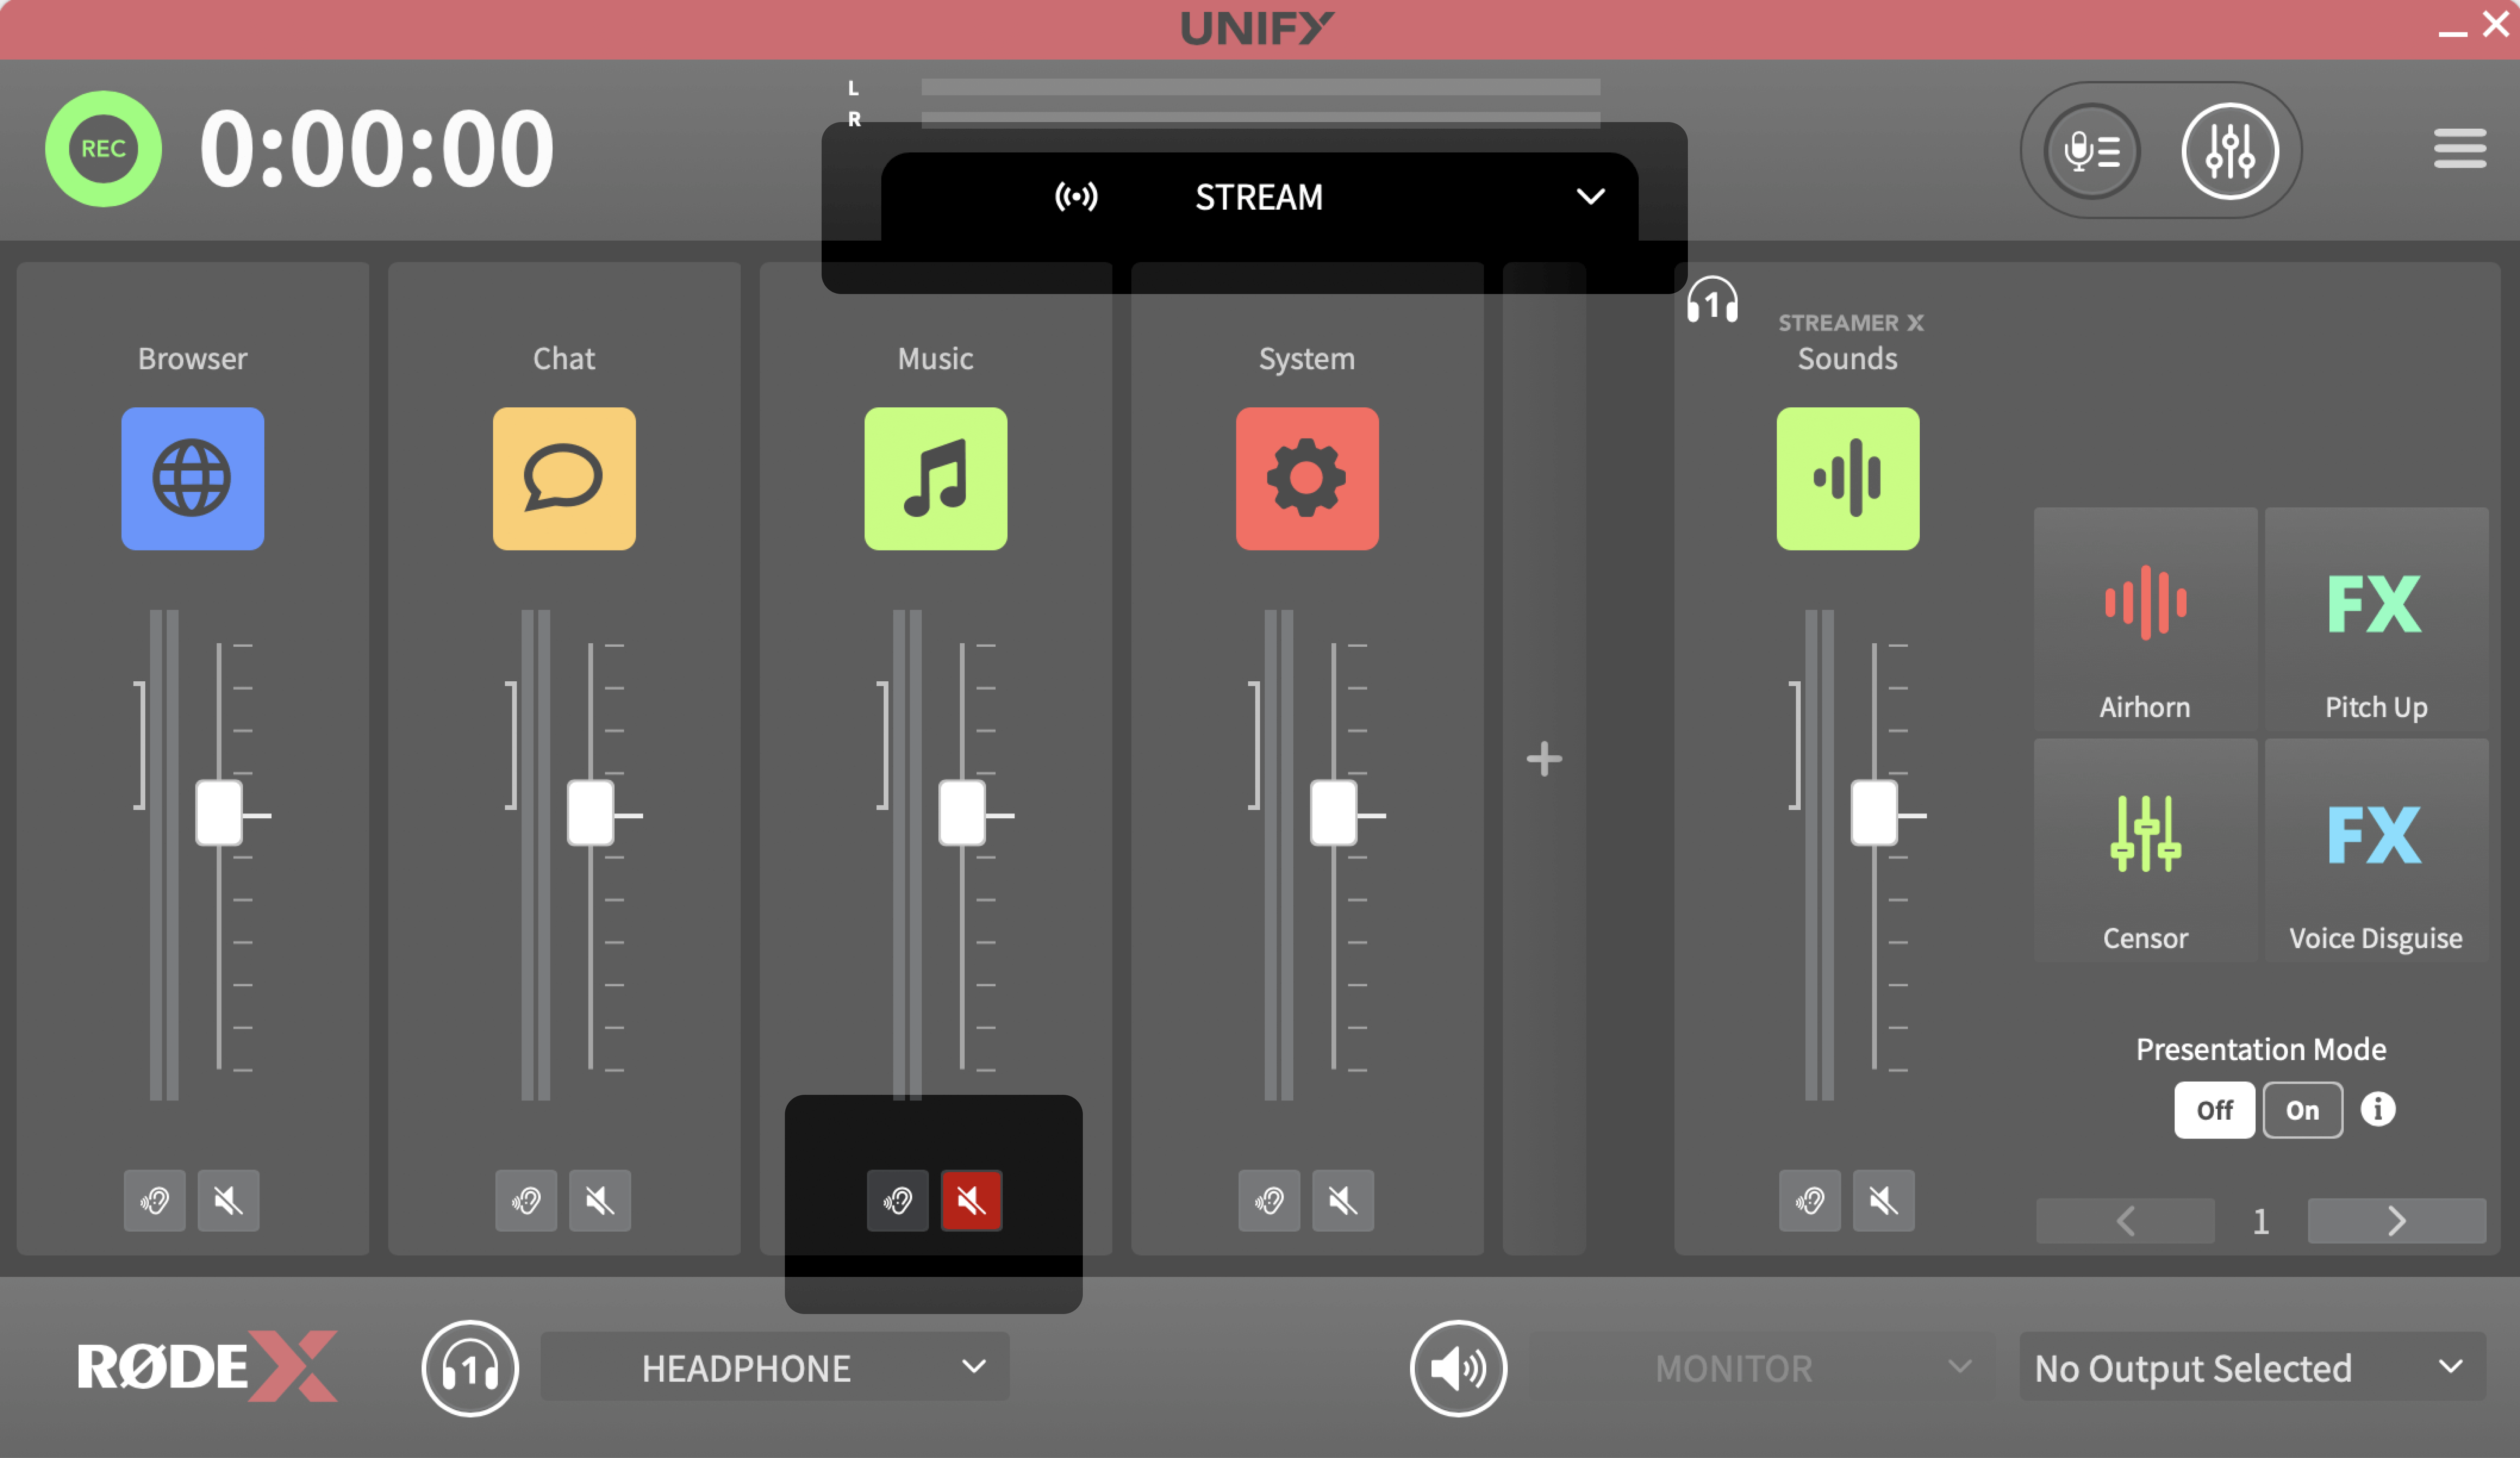
Press the mute button here to mute this channel in your Stream mix.
2. Unlink Headphone and Stream Mixes: In UNIFY, unlink your headphone mix from the stream mix to separately manage music audio. Find the music channel in your headphone mix and click the “link” button to achieve this.
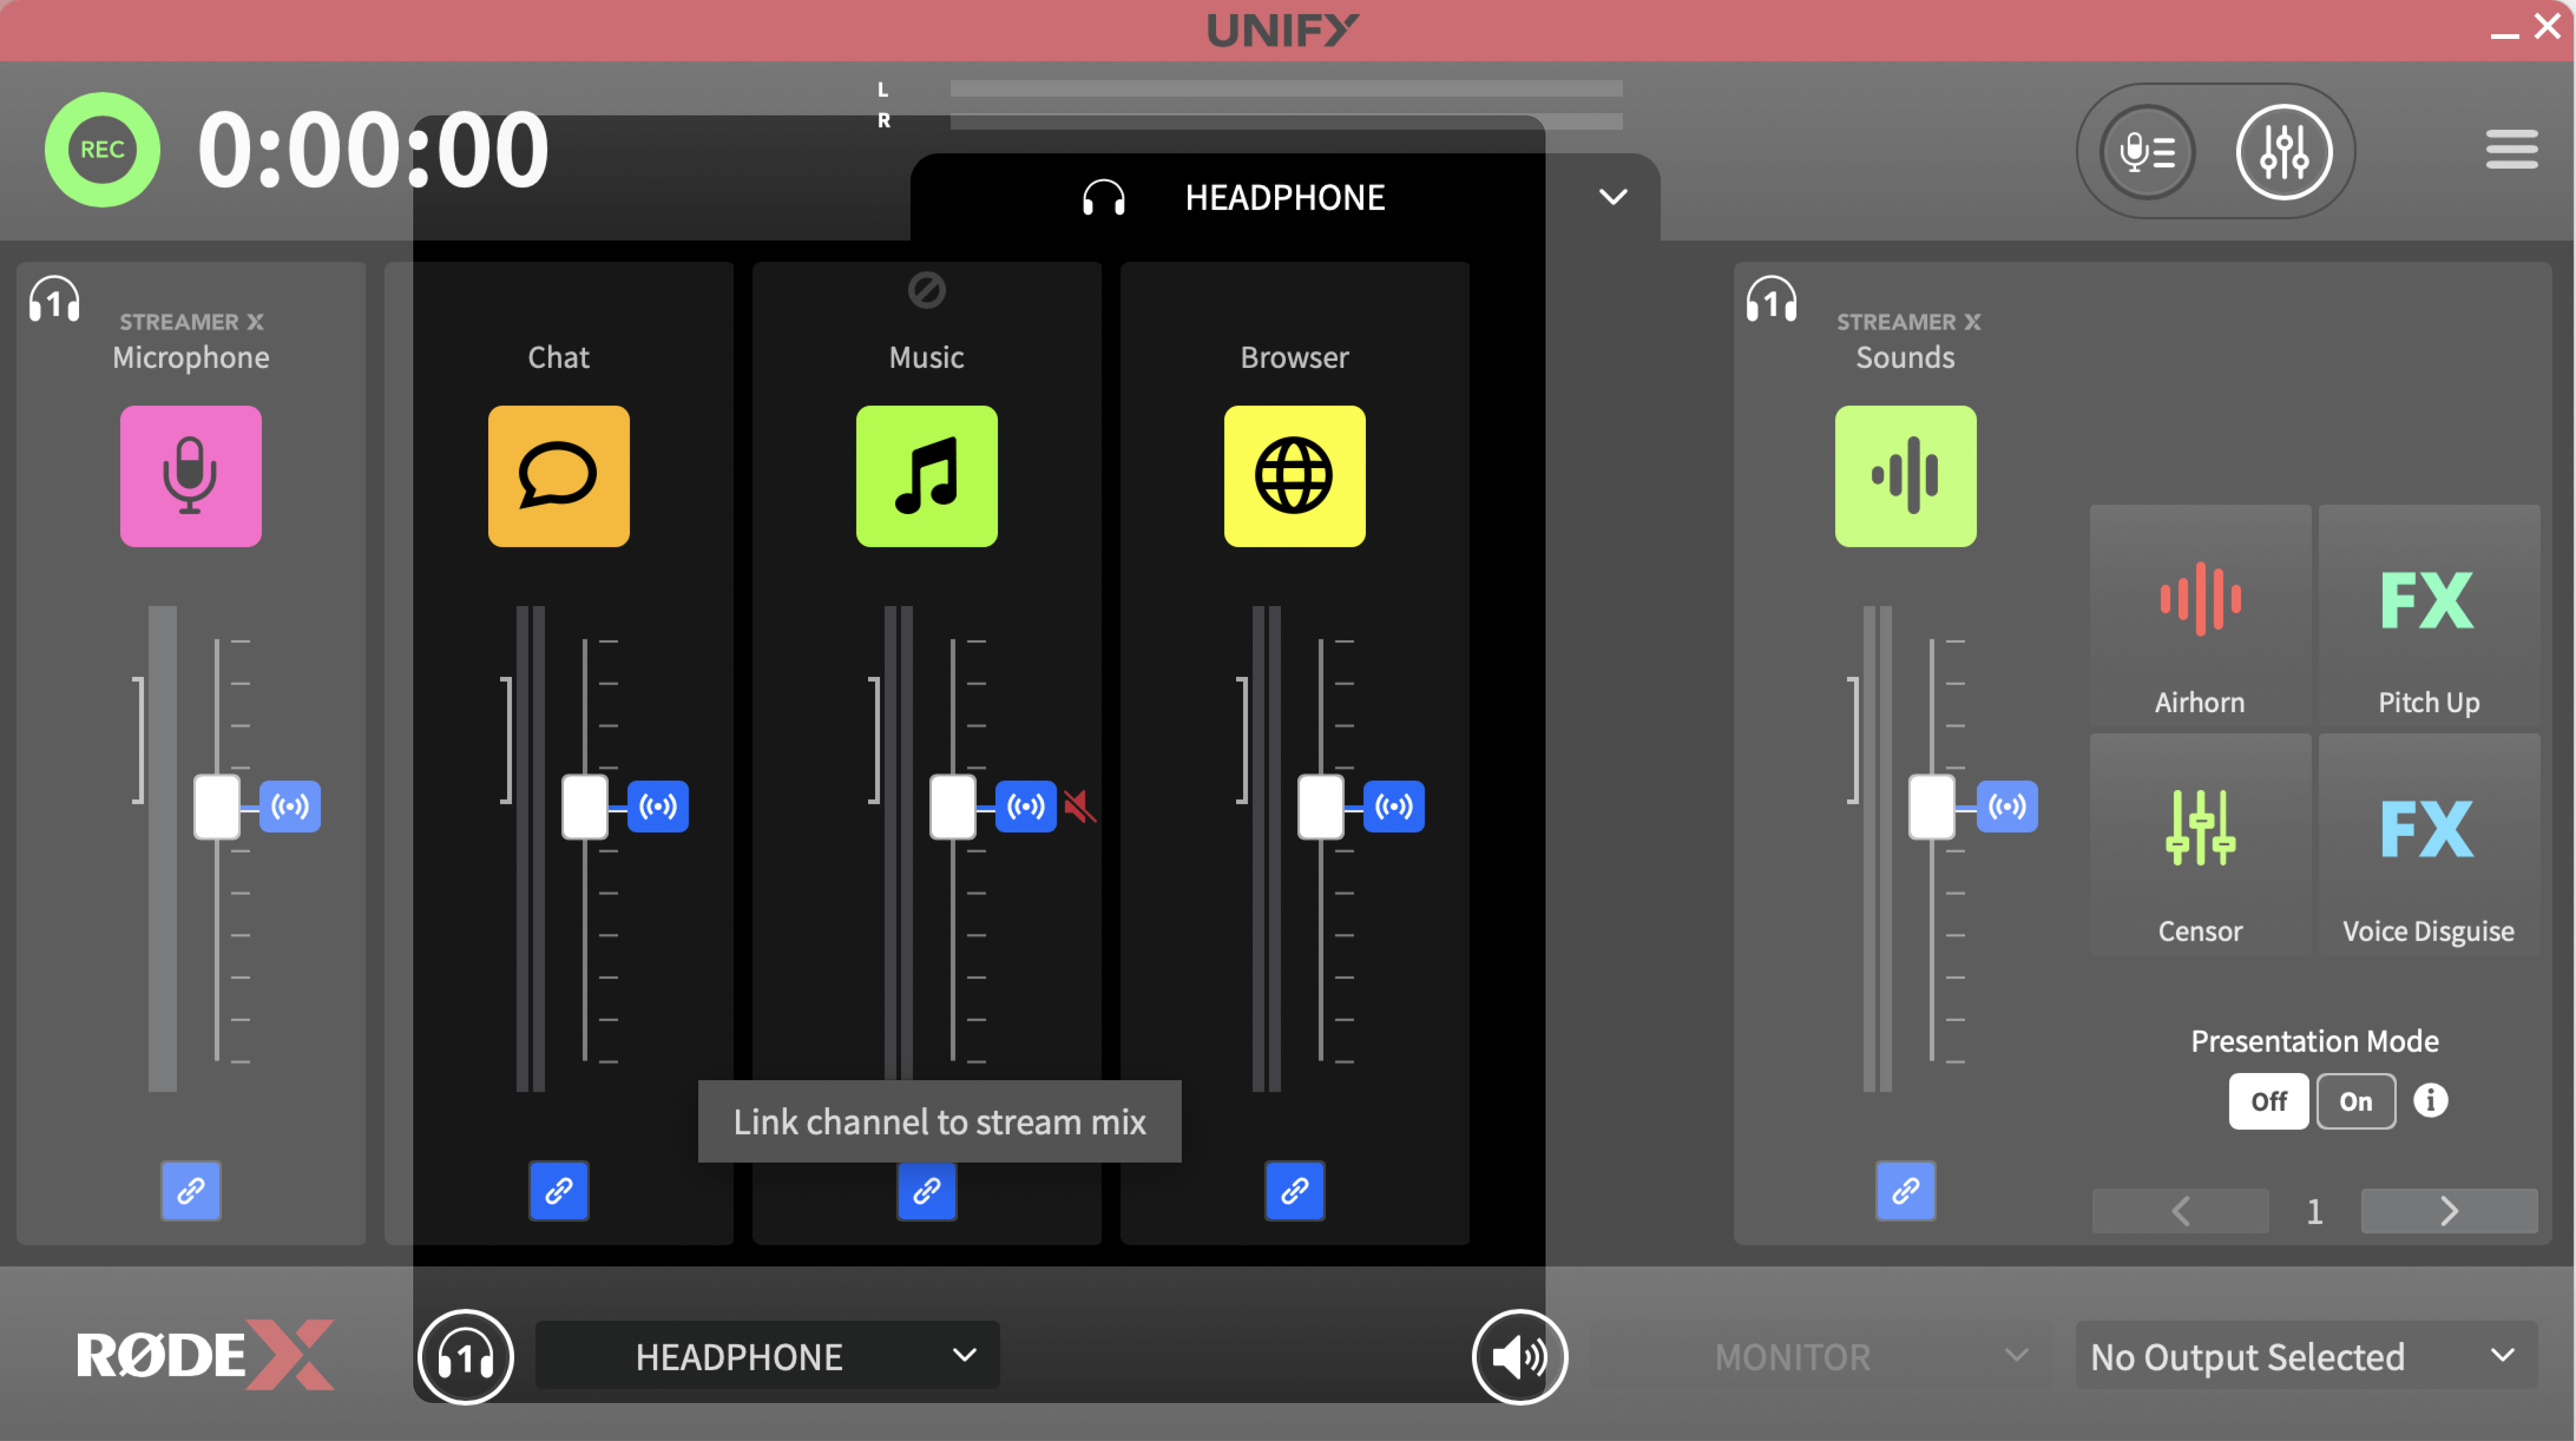
Press this button to “unlink” a channel so it doesn’t do the same thing that your stream mix does.
3. Set Up Music Output in OBS: In OBS, create a new output specifically for your music. Name it “Music Input” and select “Music Output (RØDE UNIFY)” as the device.
4. Manage OBS Audio Inputs: You should now have two audio inputs in OBS: “UNIFY Stream Mix” (excluding music) and “Music Input” (music only).
5. The rest of the steps are covered in this helpful guide on the OBS website.
This means that if you'd like to change the volume of your music, it would be best to do this from Spotify or your music platform of choice, as what you’re doing is routing Spotify directly to OBS, and monitoring the sound of it in UNIFY.