Using Timecode on the Sony A7S III With Wireless PRO
In this article, we’ll show you how to set up timecode on your Sony A7S III with the Wireless PRO. The A7S III doesn’t have a dedicated timecode port, but you can record timecode as audio via the mic input with the included RØDE SC2 3.5mm cable.
Step 1
Connect your Wireless PRO receiver to a computer or phone running RØDE Central.
Step 2
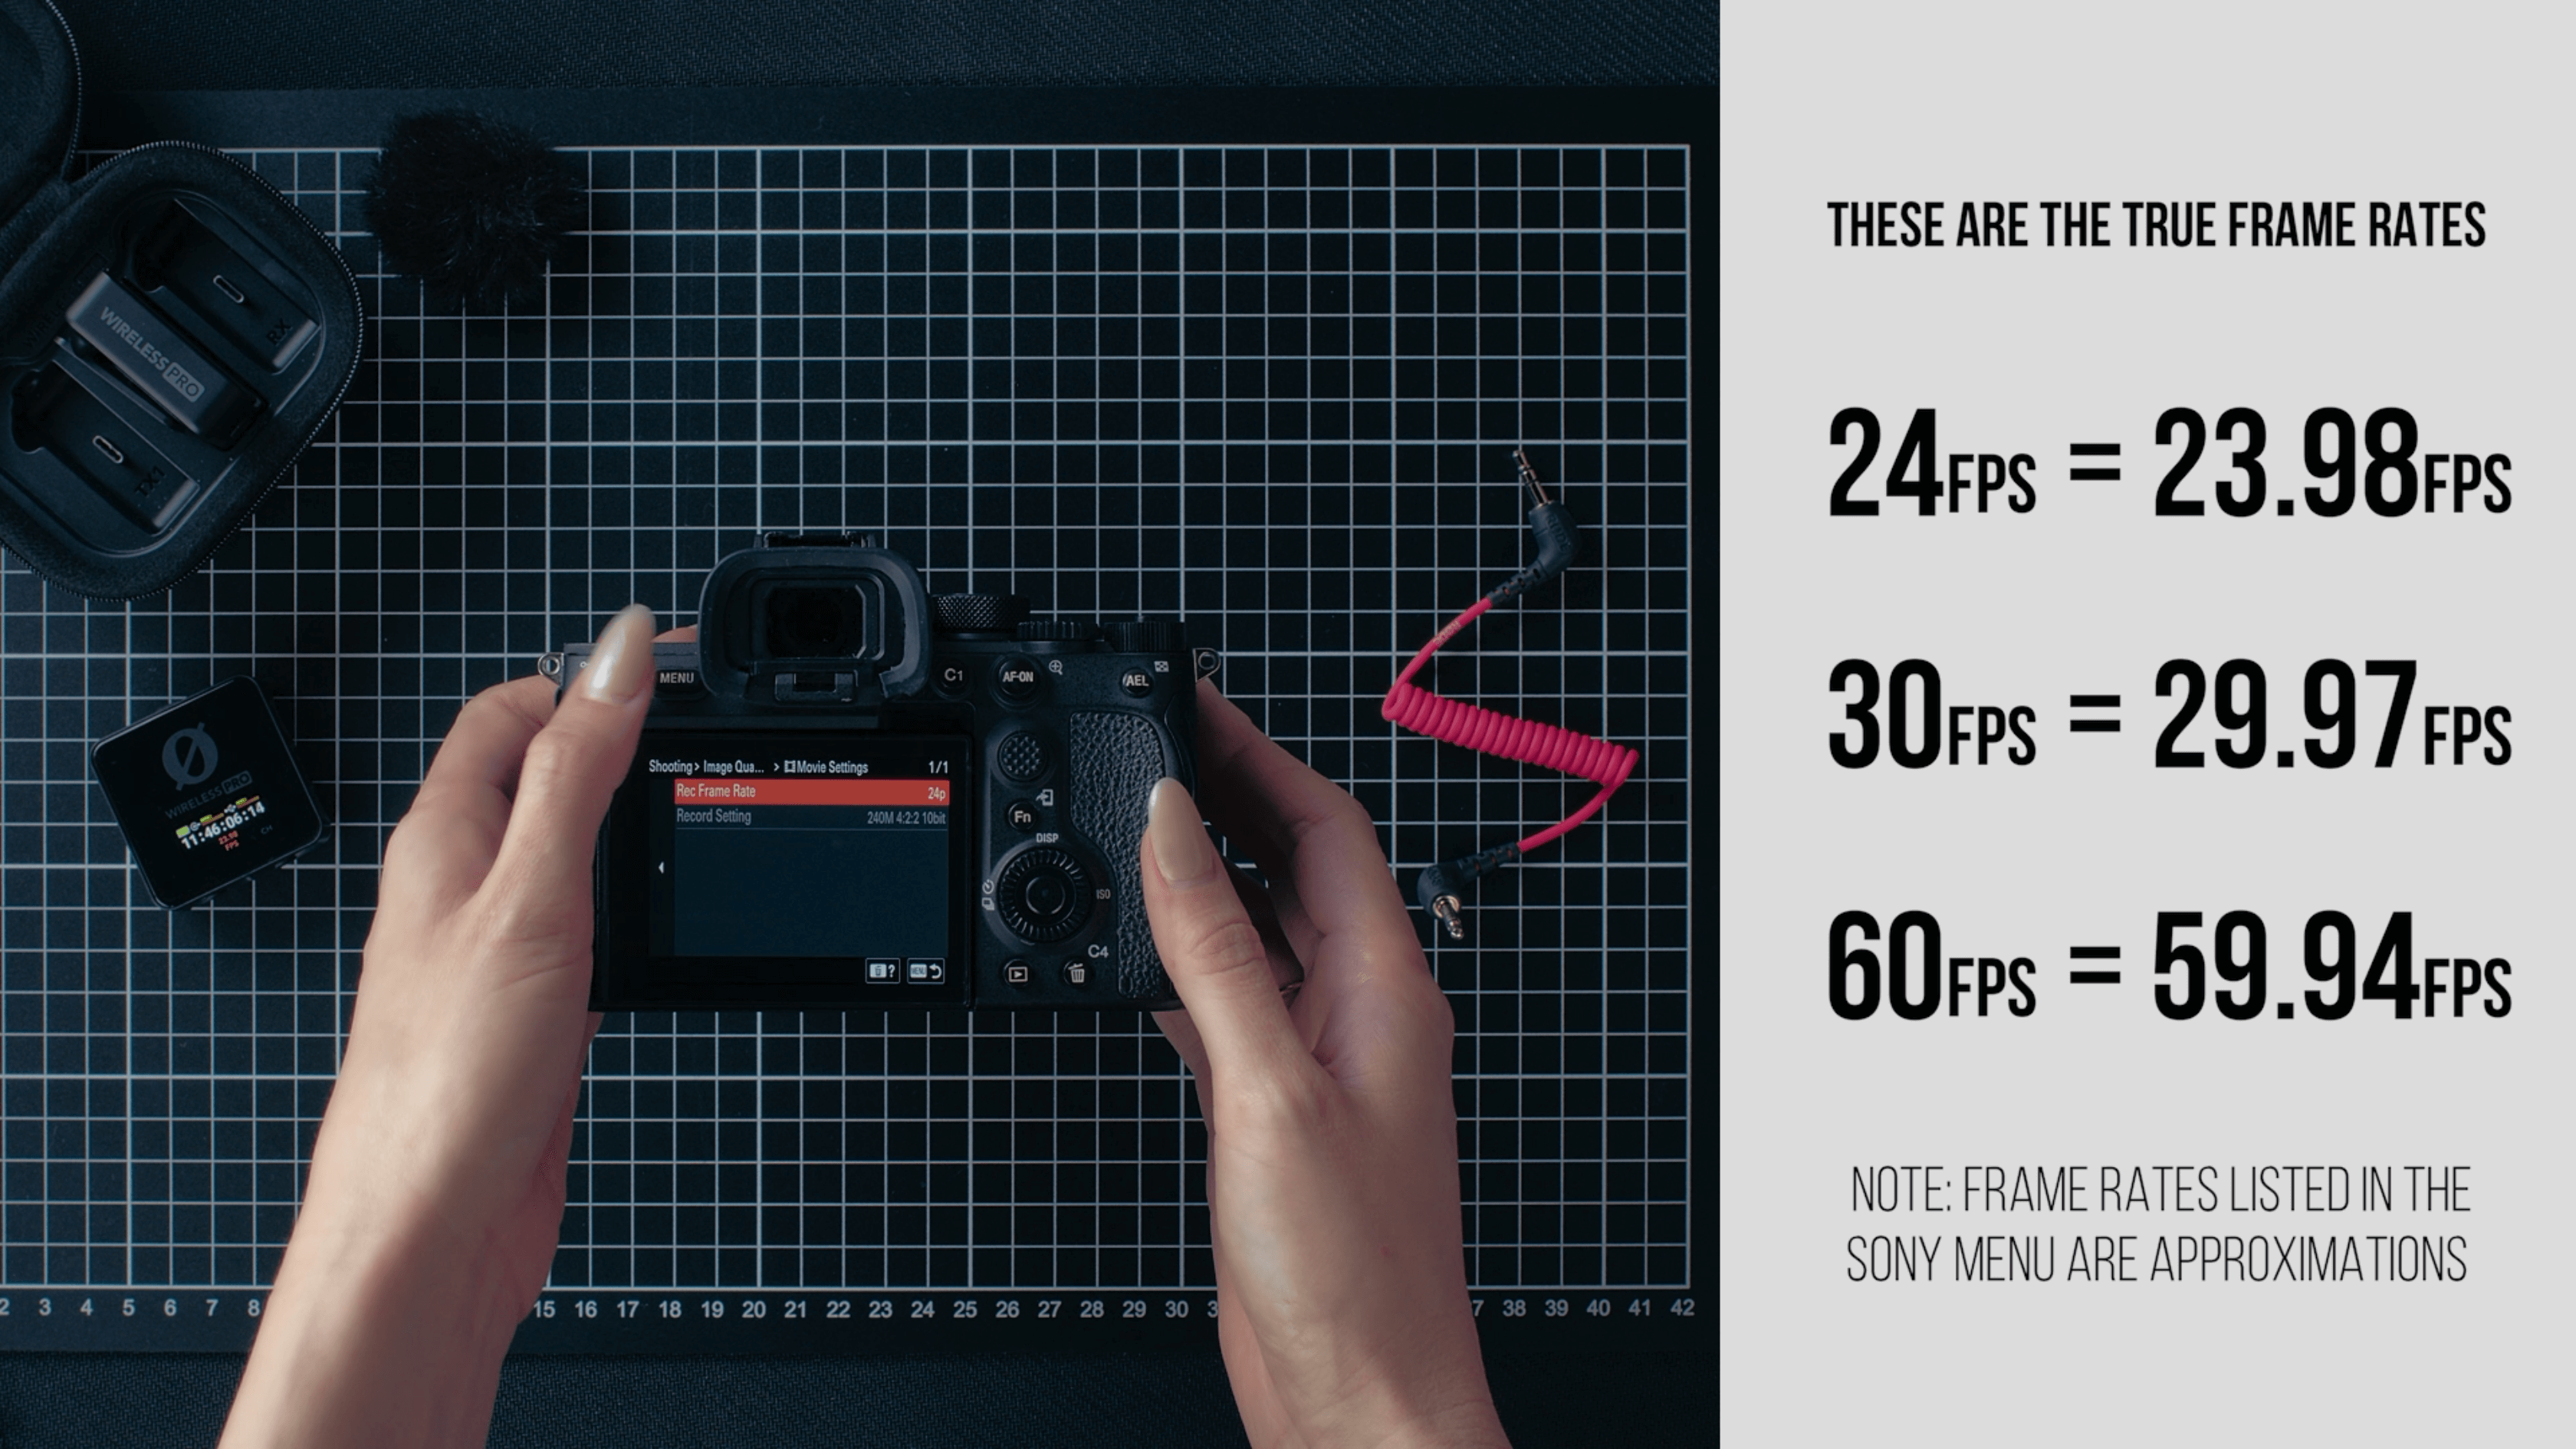
In RØDE Central, enable timecode and select the framerate you’re shooting in. It’s important to note that the frame rates listed on the Sony aren’t quite accurate, they’re approximations of the true FPS. If you’re shooting in 24fps on your Sony, select 23.98fps in RØDE Central. If you’re shooting in 30fps or 60fps, select 29.97fps in Central.
Step 3
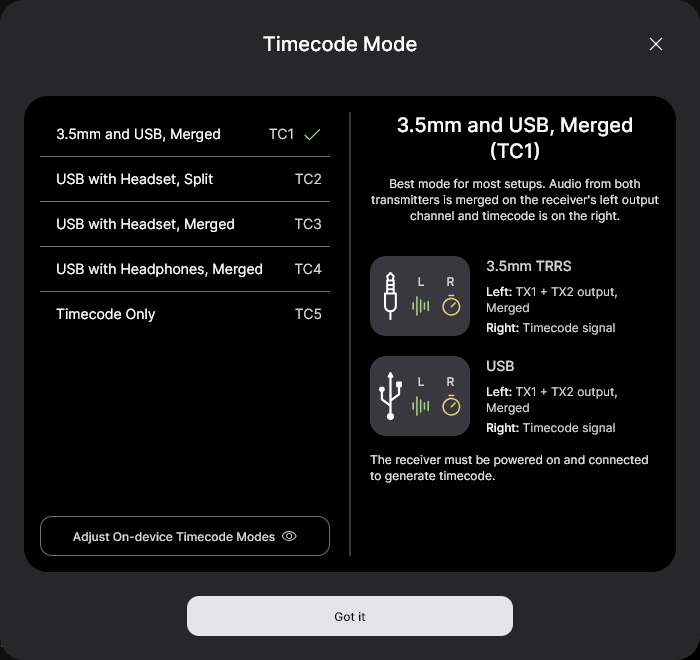
Toggle ‘Real Time’ on or off, depending on which format you’d like your timecode to appear in, then click ‘Timecode Modes’, choose ‘Timecode 1’ and click ‘Apply’.
Step 4
Ensure your camera’s framerate matches the one you just set for your timecode and adjust any other video and audio settings as per usual.
Step 5
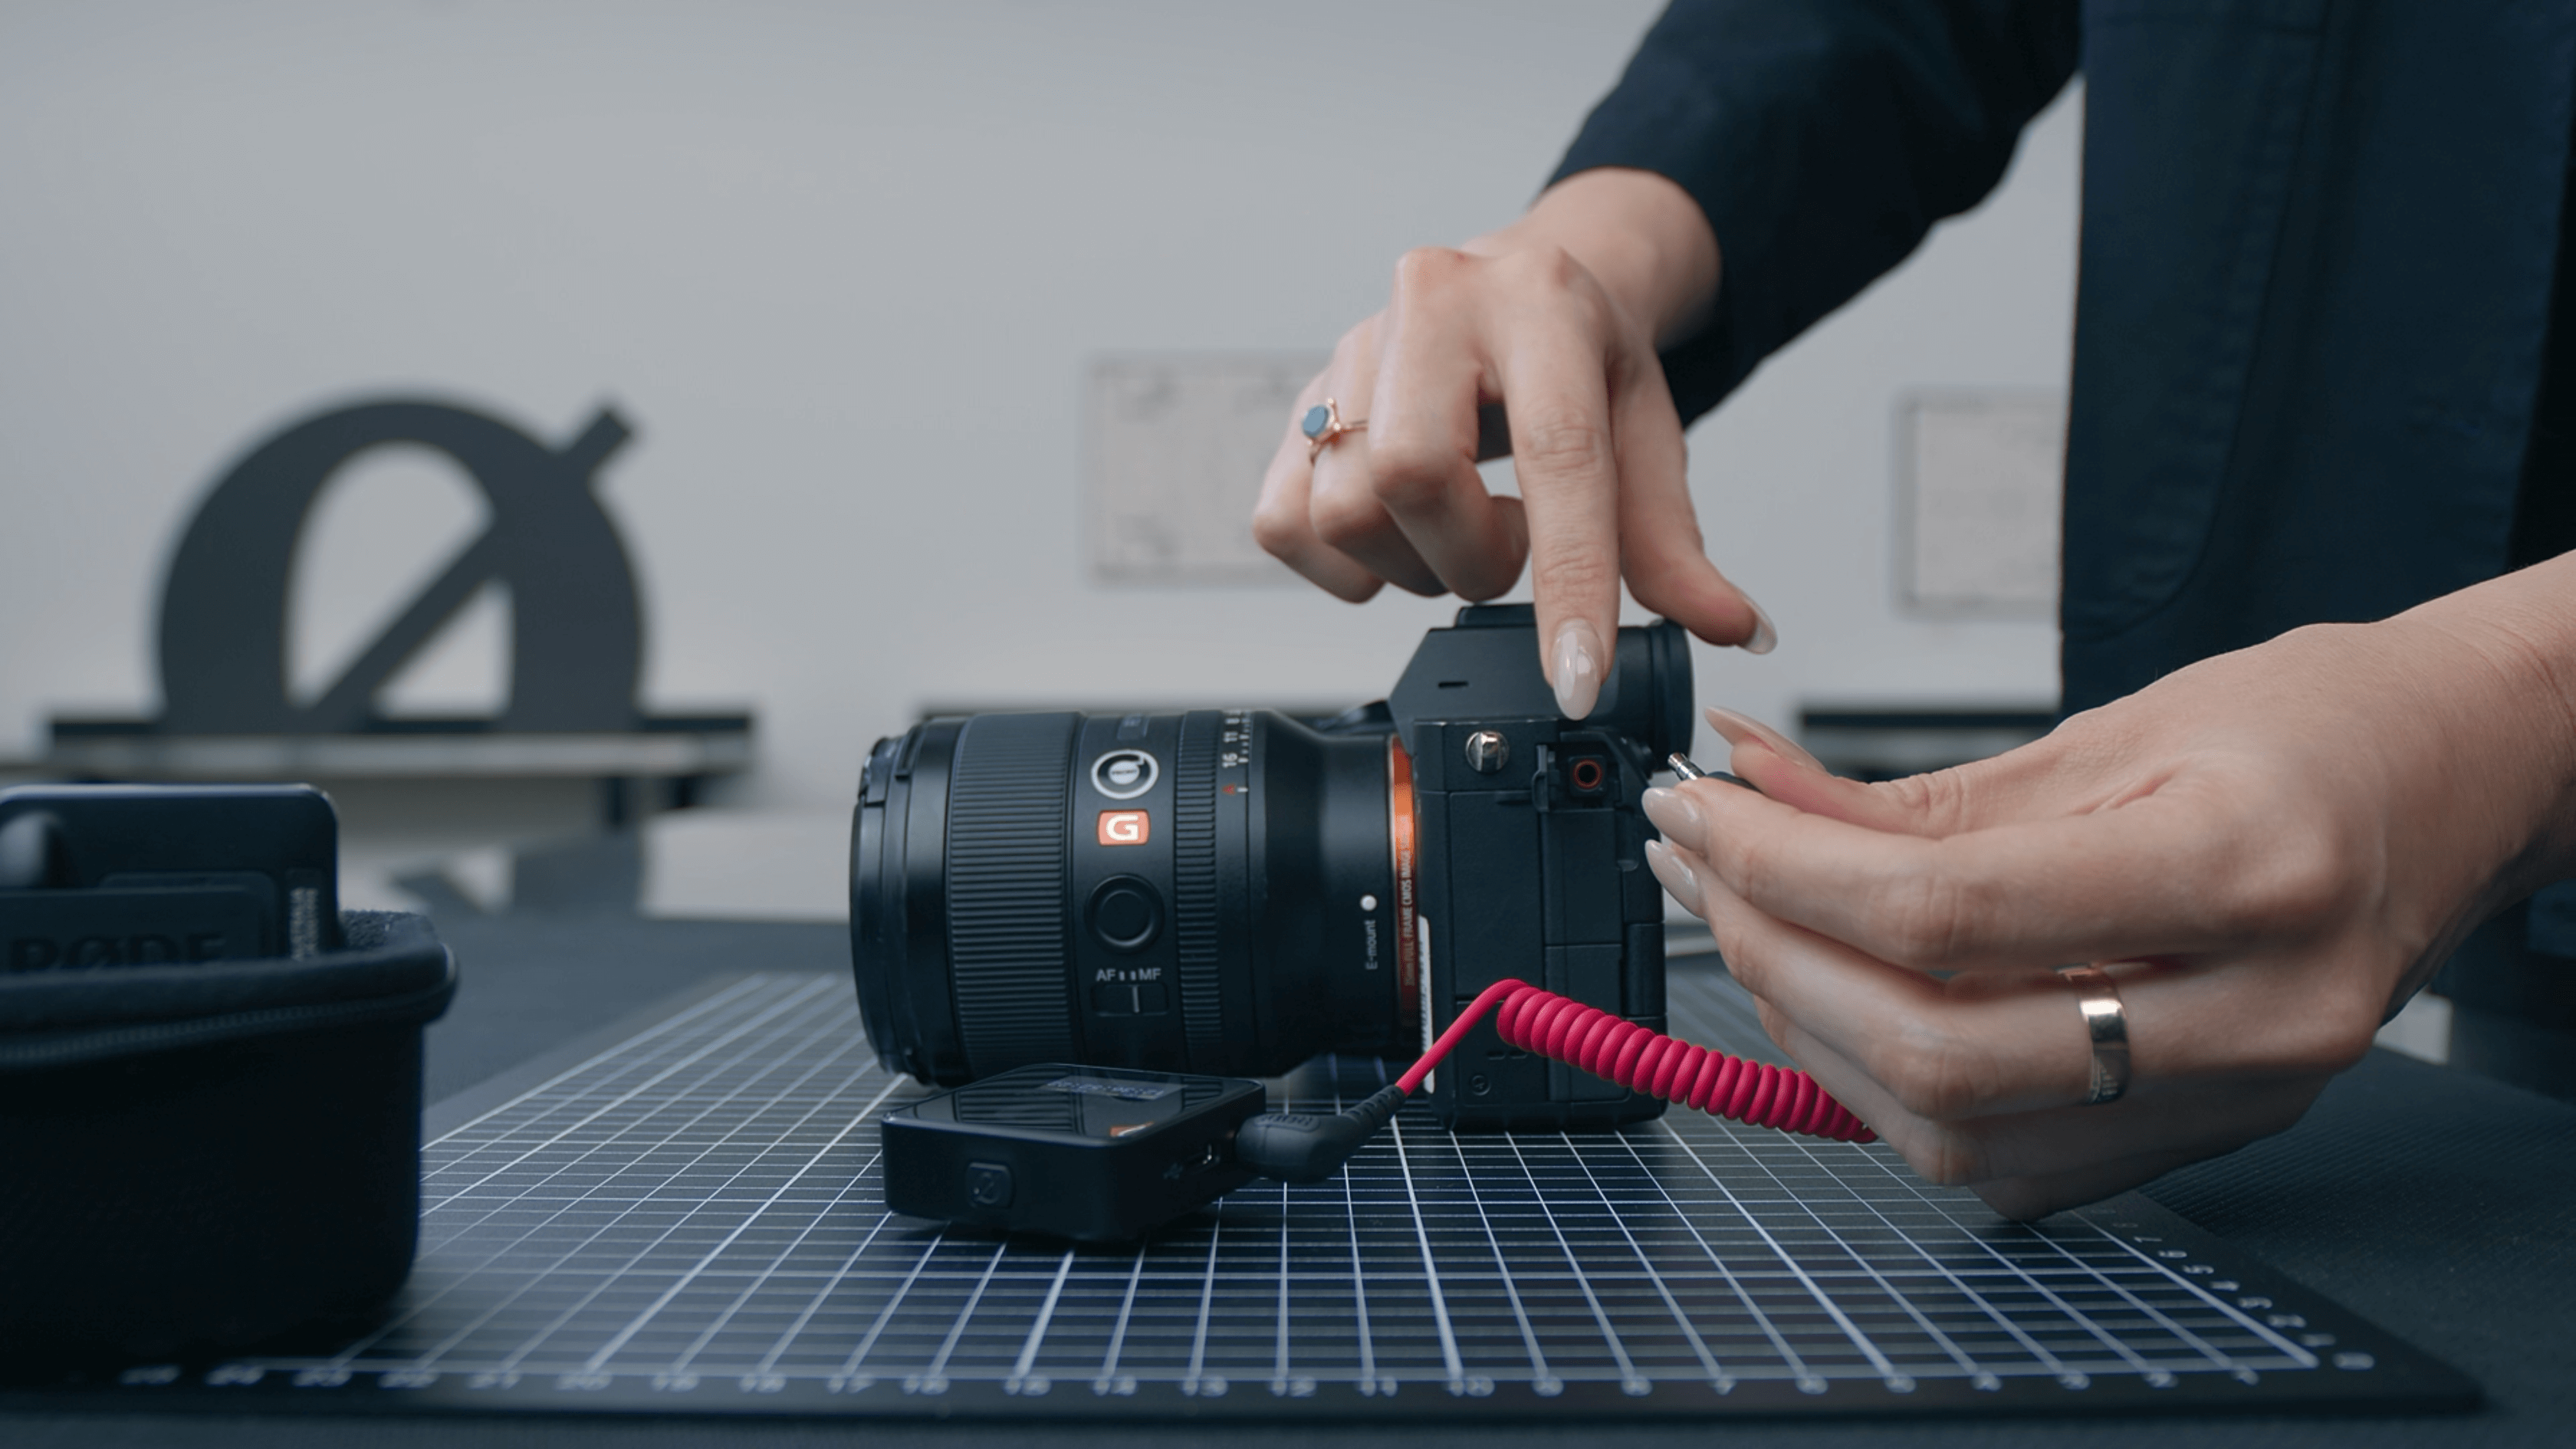
Connect the included SC2 3.5mm cable from the Wireless PRO receiver to your Sony A7S III’s red mic input, and start shooting!
Because this camera doesn't accept external timecode, its timecode display won't match the one on your Wireless PRO, but you can still use the timecode audio signal to synchronise your footage in post-production, just follow one of our guides below.
Check out our user guide for more information on Using Timecode with the Wireless PRO.