Wireless PRO
The Wireless PRO is the most powerful compact microphone system ever, packed full of professional features that offer ultimate flexibility when recording pristine audio for your content.
Discover everything you need to know about using your Wireless PRO here.
Receiver (RX)
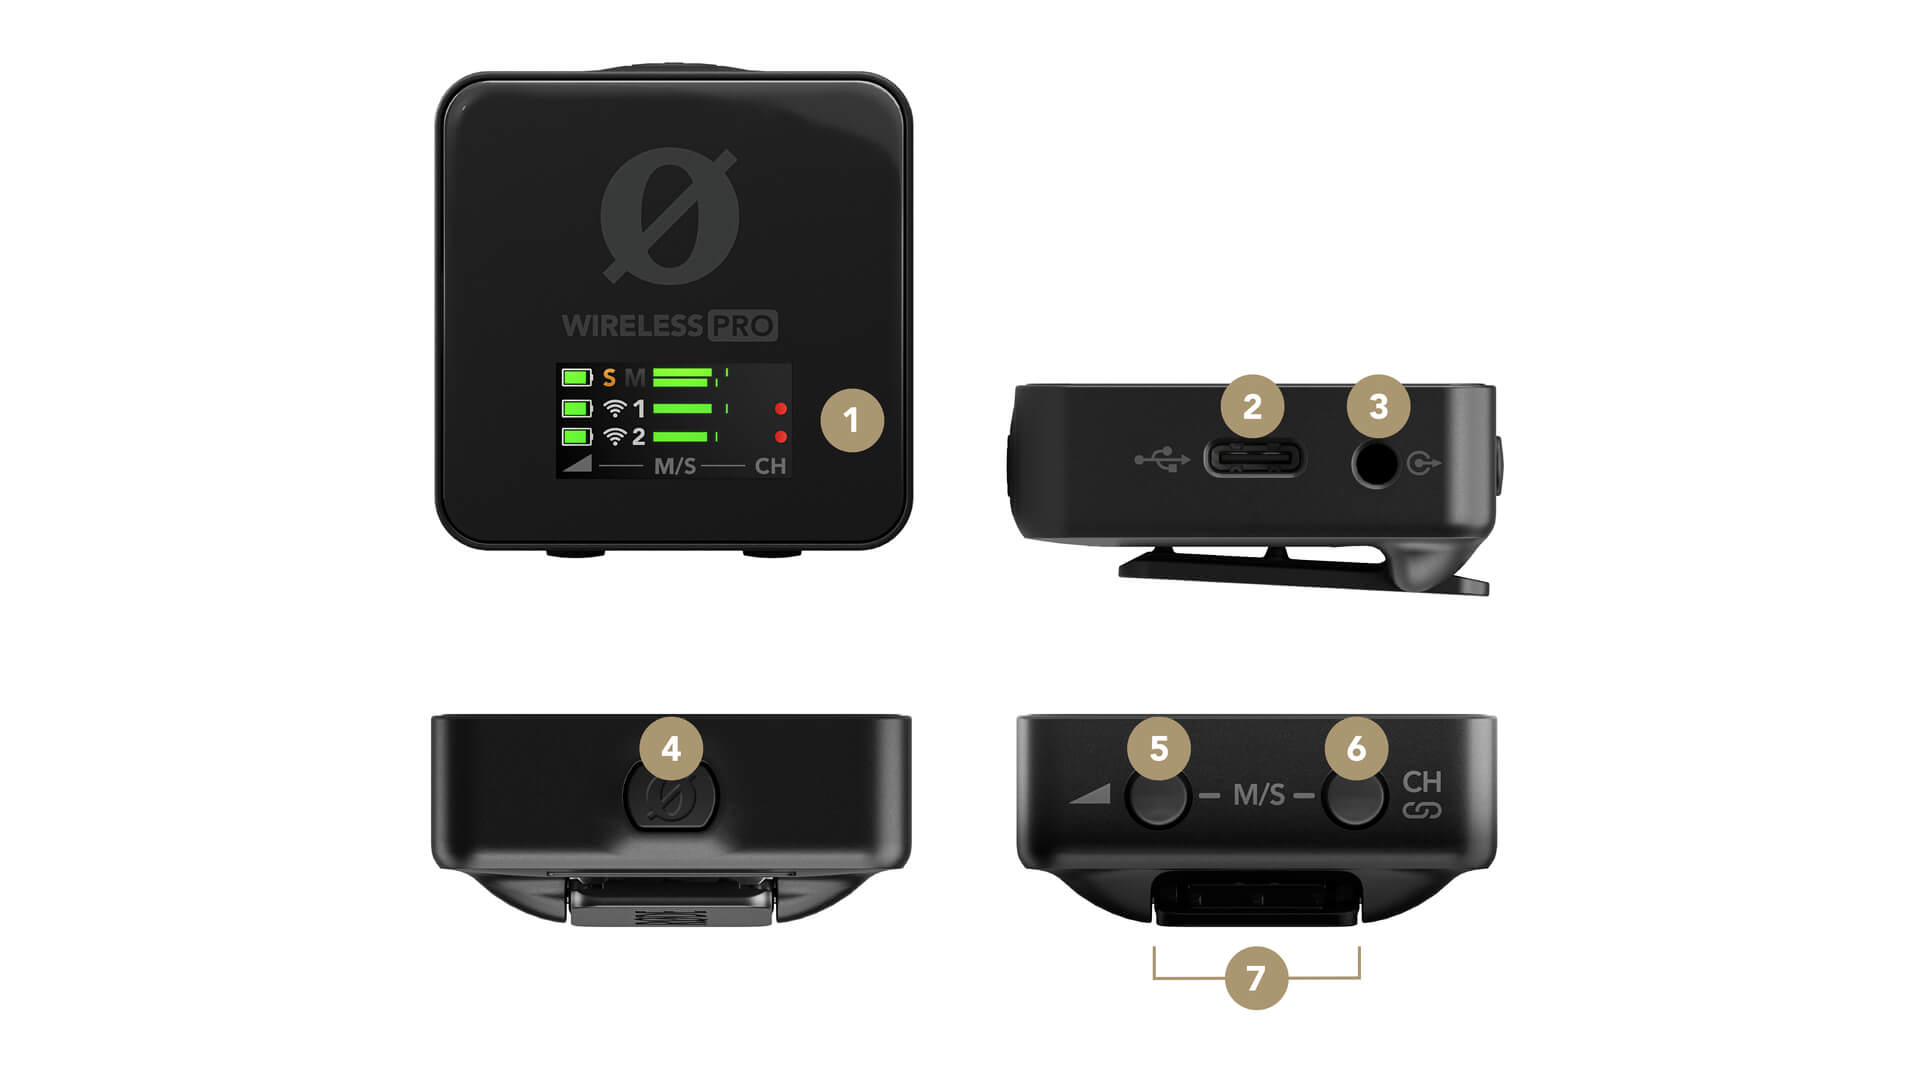
1LCD Display
2USB-C Connector
33.5mm TRRS Connector
4Ø Button
5Left Navigation Button
6Right Navigation Button
7Routing Mode Selector
Transmitter (TX)
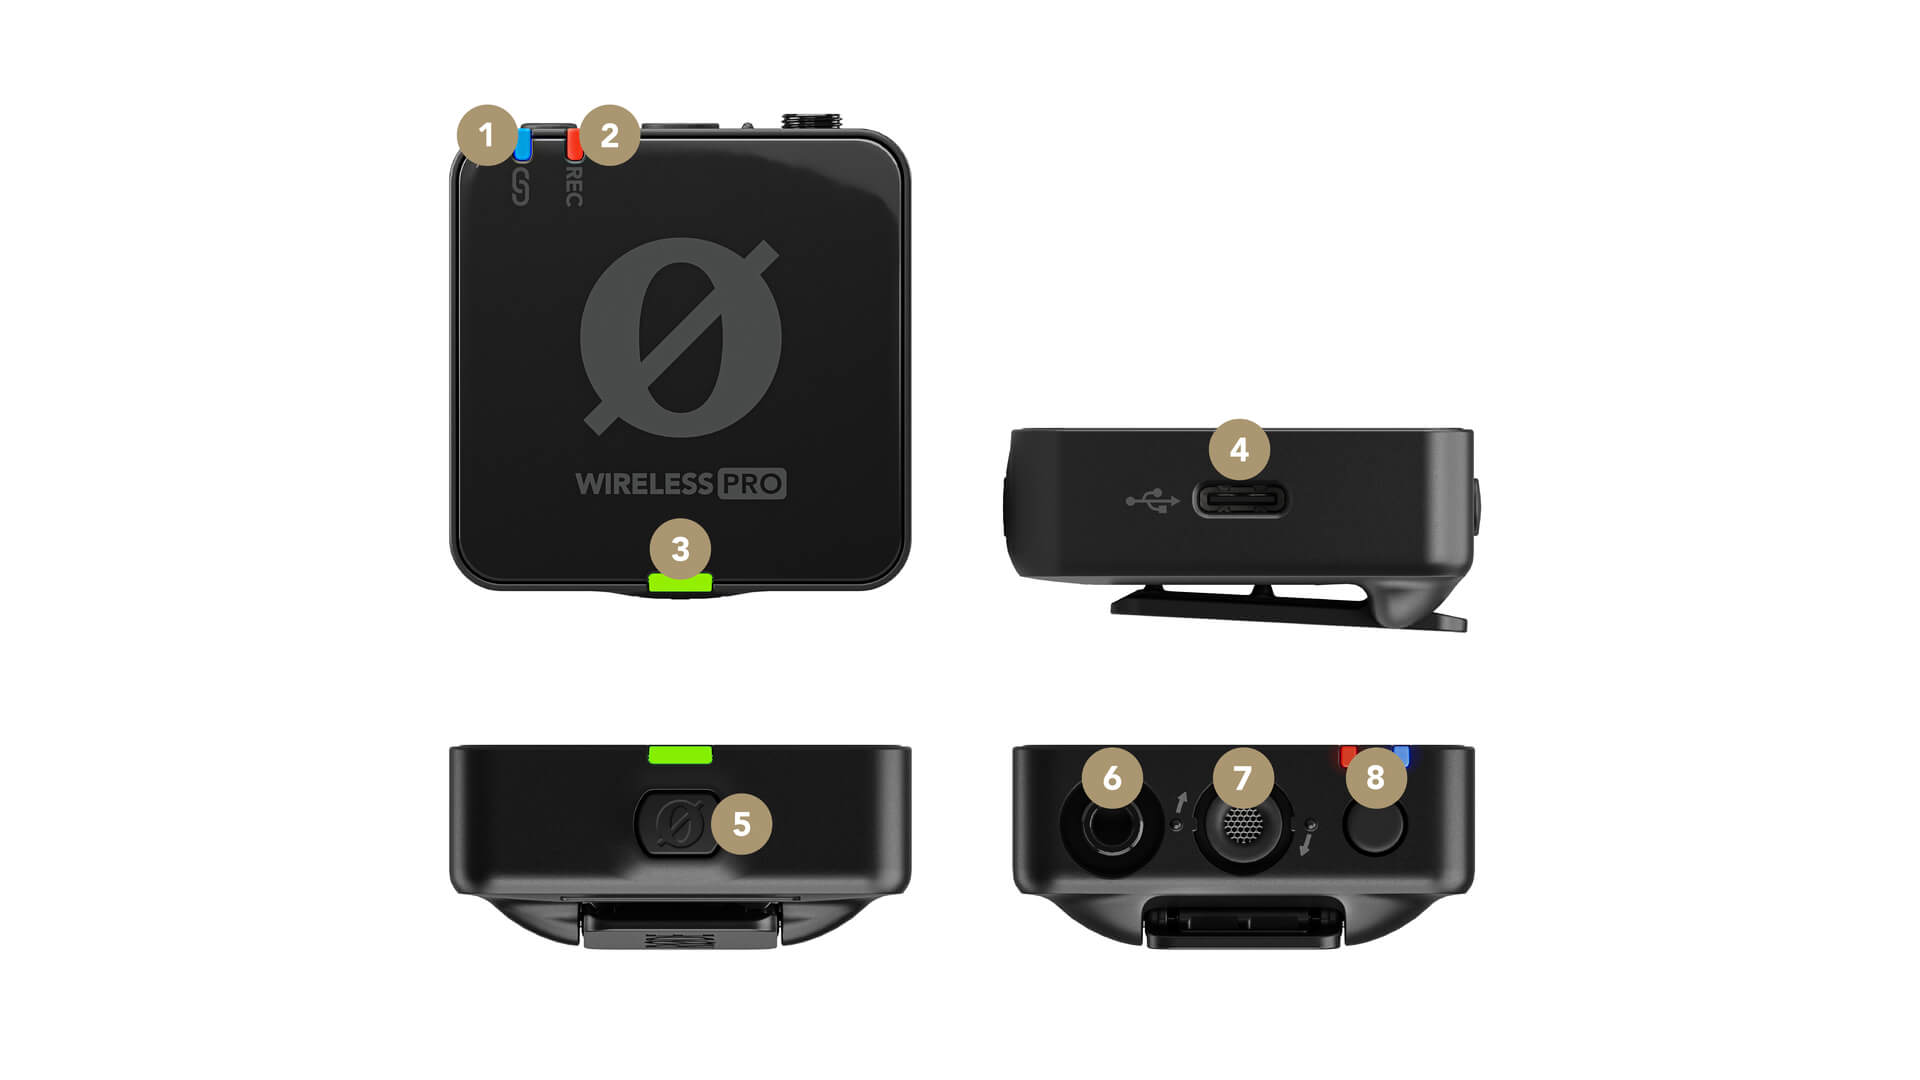
1Connectivity Indicator LED
2Recording Status LED
3Battery Indicator LED
4USB-C Connector
5Ø Button
6Locking a 3.5mm TRS Input
7In-built Microphone
8Record Button