Come Iniziare
Selezionare una lingua
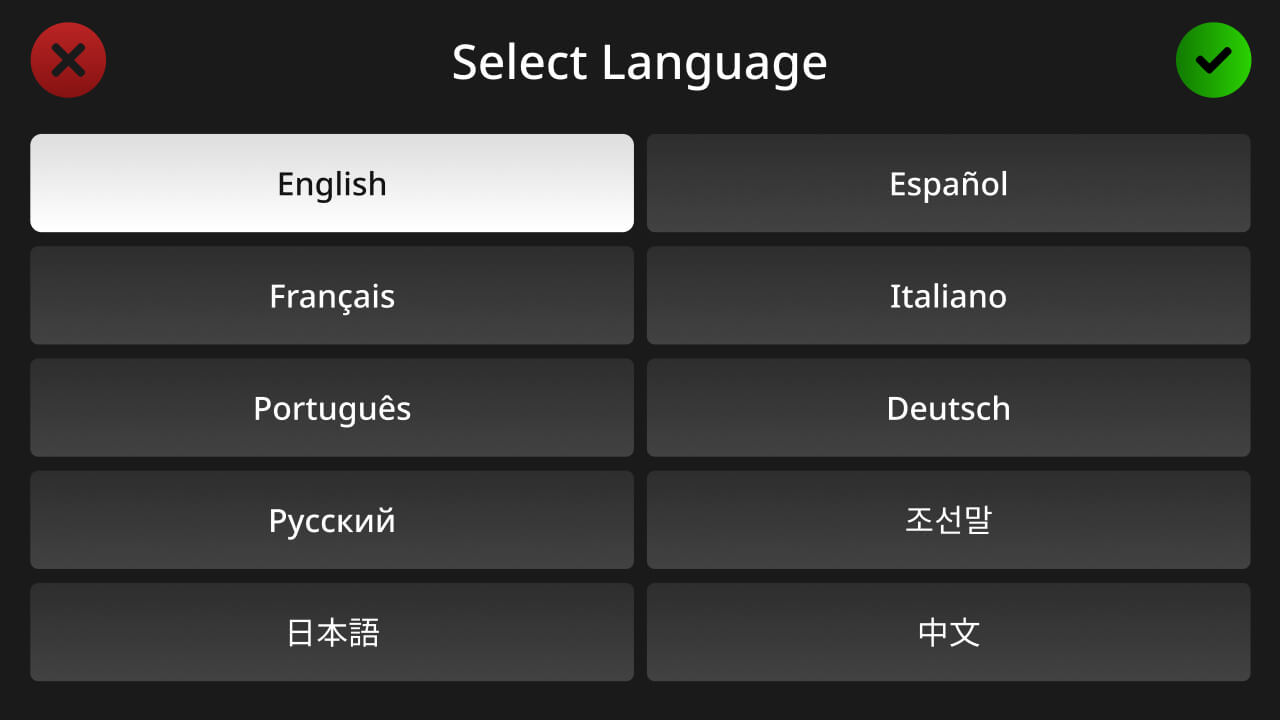
Dopo aver avviato il tuo RØDECaster Pro II per la prima volta, ti verrà chiesto di selezionare la tua lingua predefinita. Ci sono 10 lingue tra cui scegliere: inglese, cinese, giapponese, coreano, francese, tedesco, italiano, spagnolo e portoghese. La lingua predefinita può essere cambiata in qualsiasi momento toccando l'icona delle impostazioni e selezionando ‘Sistema’ > ‘Lingua’.
Data e Ora
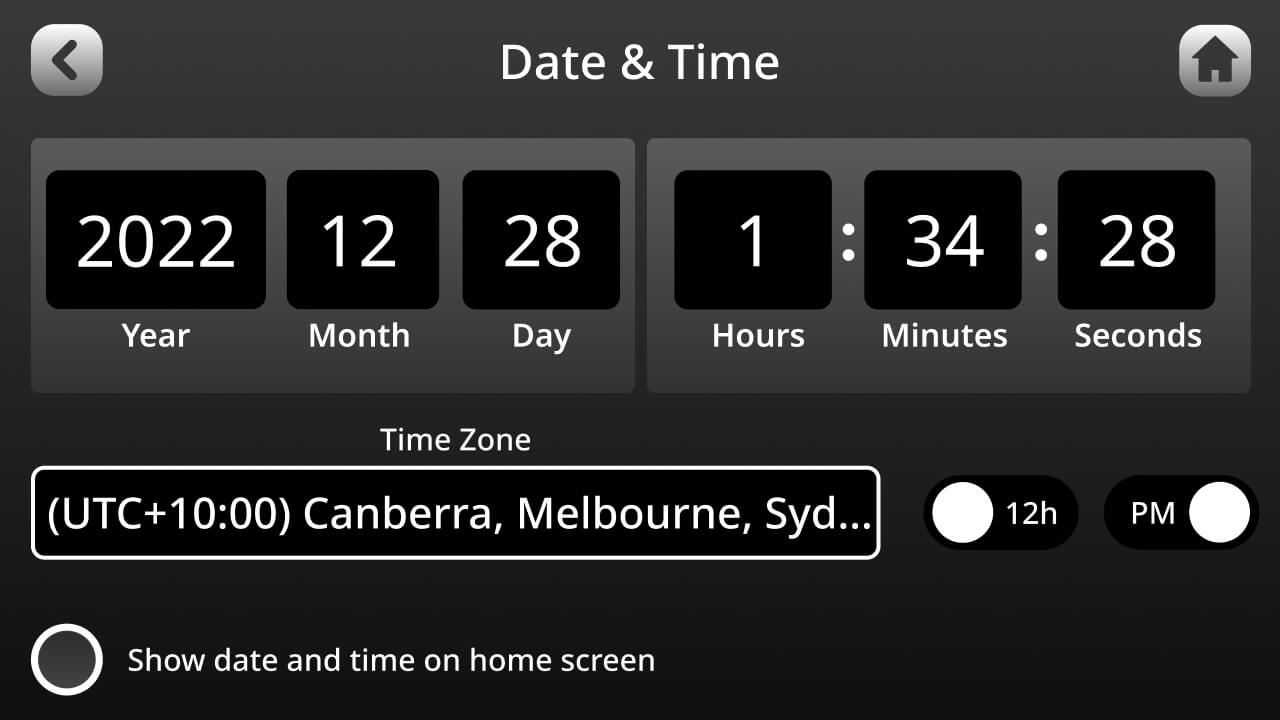
Successivamente, ti verrà chiesto di configurare la data e l'ora per la tua unità. Utilizza l'encoder rotativo e il touchscreen per impostare la tua data e ora locali. In basso a sinistra, puoi anche selezionare se desideri visualizzare la data e l'ora nella schermata principale.
Aggiornamento del Firmware
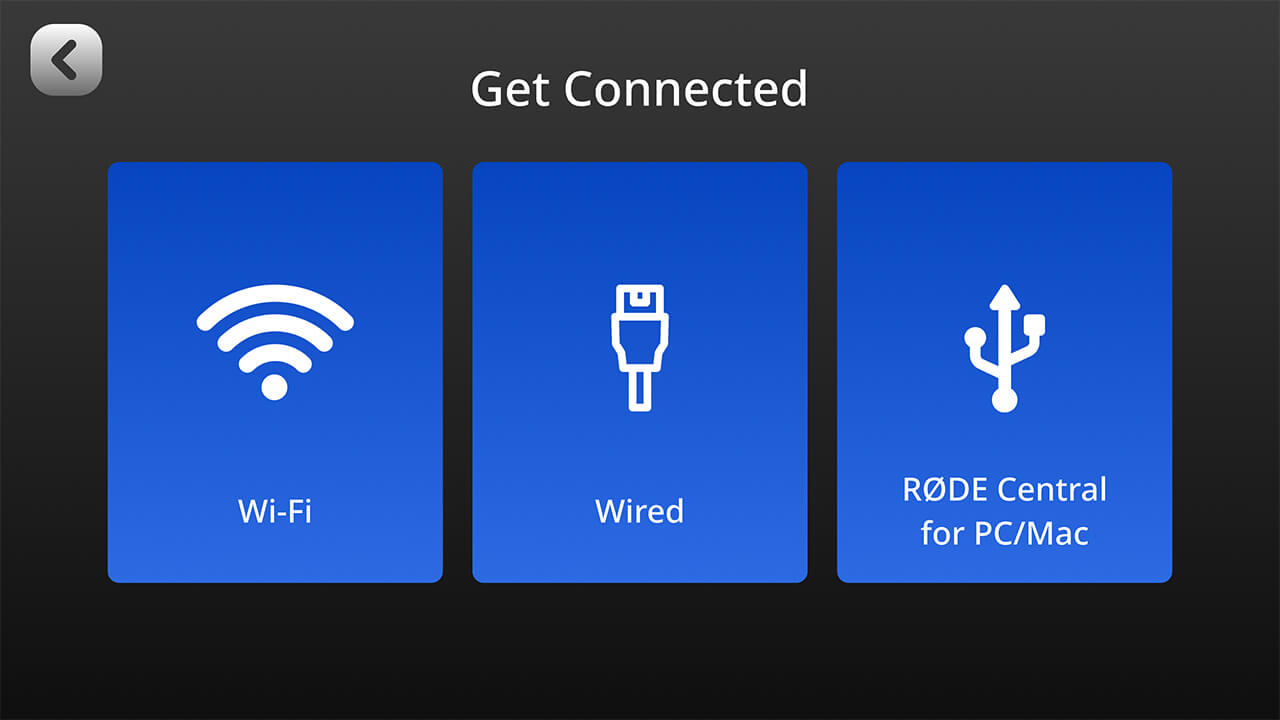
Successivamente, ti verrà chiesto di collegare il tuo RØDECaster Pro II a un computer tramite Wi-Fi, ethernet o USB per assicurarti di avere il firmware più aggiornato. Seleziona il tuo metodo di connessione preferito e segui le istruzioni per stabilire la connessione a Internet.
La Procedura Guidata di Configurazione
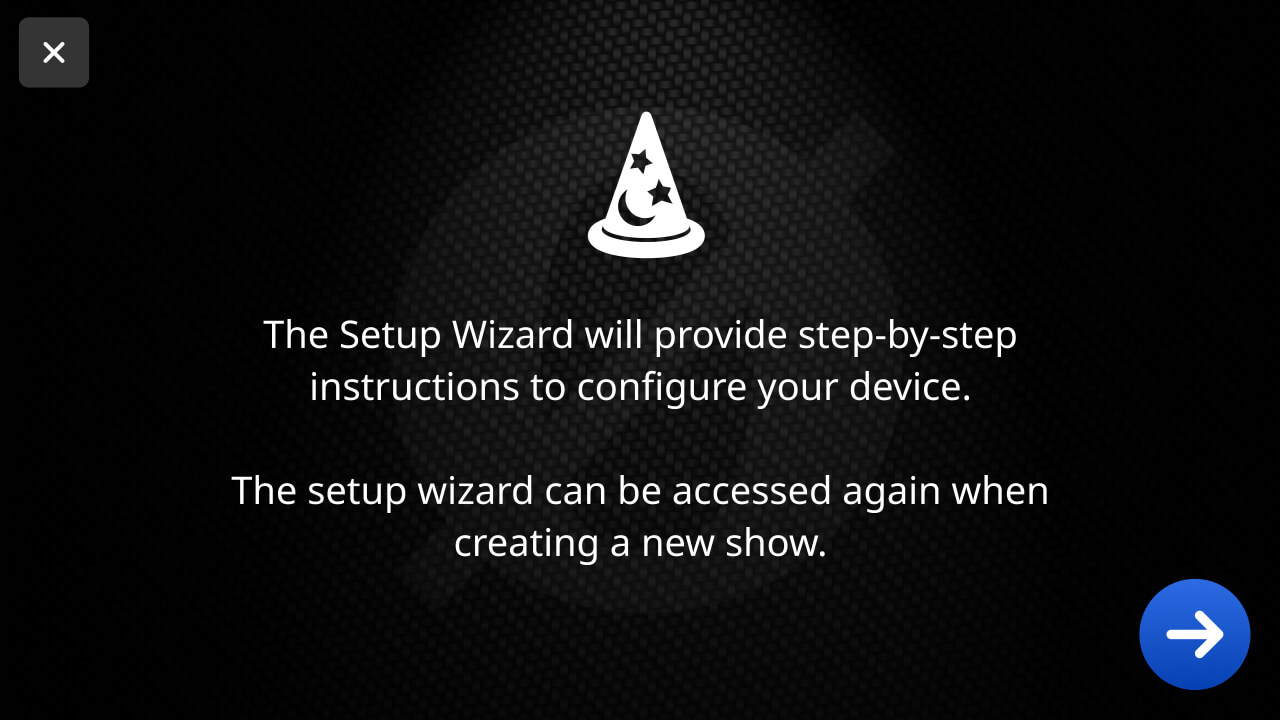
Successivamente, verrai guidato attraverso il processo della Procedura Guidata di Configurazione, che fornisce istruzioni passo-passo per configurare il tuo dispositivo. Questi passaggi sono descritti di seguito. Puoi accedere alla Procedura Guidata di Configurazione in qualsiasi momento creando un nuovo ‘Show’ (tappa l’icona ‘Show’ in alto a destra della homepage, poi ‘Nuovo Show’).
Collegare le cuffie
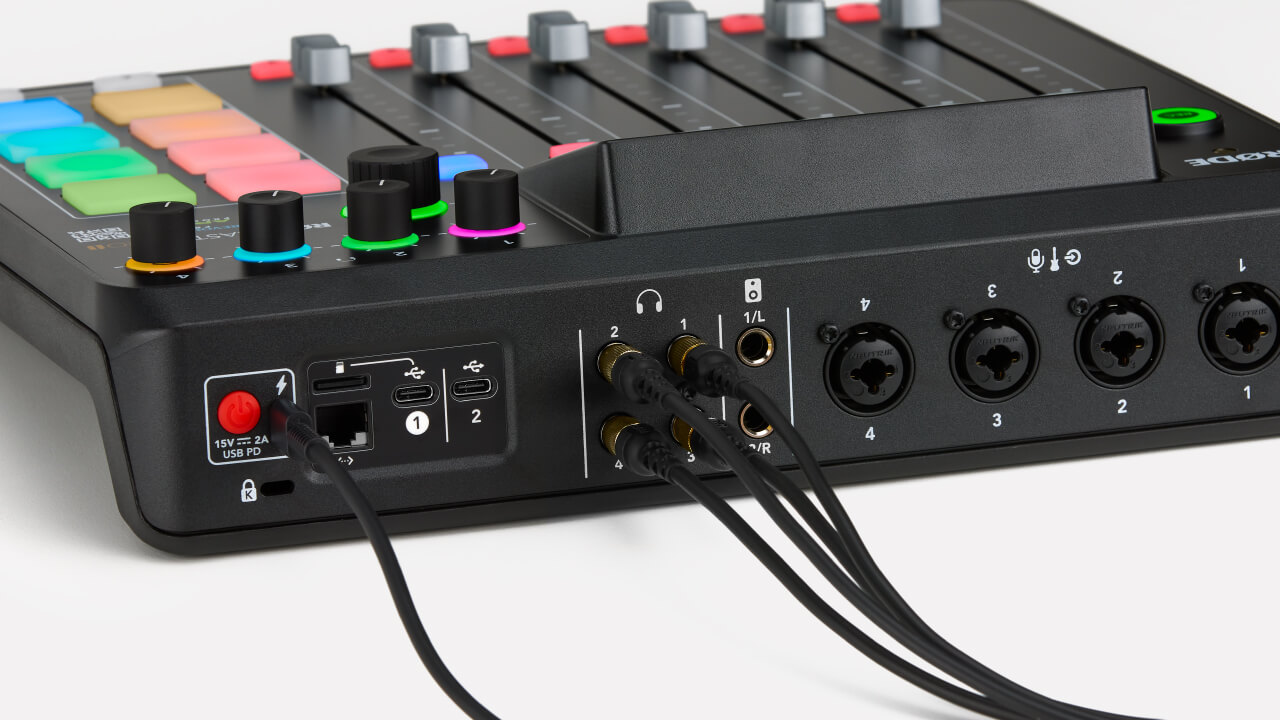
Ci sono quattro uscite sul retro del RØDECaster Pro II per collegare quattro paia di cuffie. Queste dispongono di connettori da ¼ di pollice di alta qualità. Se le tue cuffie hanno un connettore da 3,5 mm, utilizza un adattatore da ¼ di pollice a 3,5 mm come il RØDE HJA-4 per collegarle all'unità.
Consiglio Professionale
Se sei l'host di un podcast o stai producendo/ingegnerizzando una registrazione, ti consigliamo di collegarti sempre all'uscita cuffie 1. Questo perché quando premi il pulsante 'Ascolta' su un fader, verrà attivato solo per l'uscita cuffie 1, così puoi ascoltare quel canale senza interrompere il flusso della registrazione per le altre persone nella tua sessione.
Regolazione dei Livelli delle Cuffie
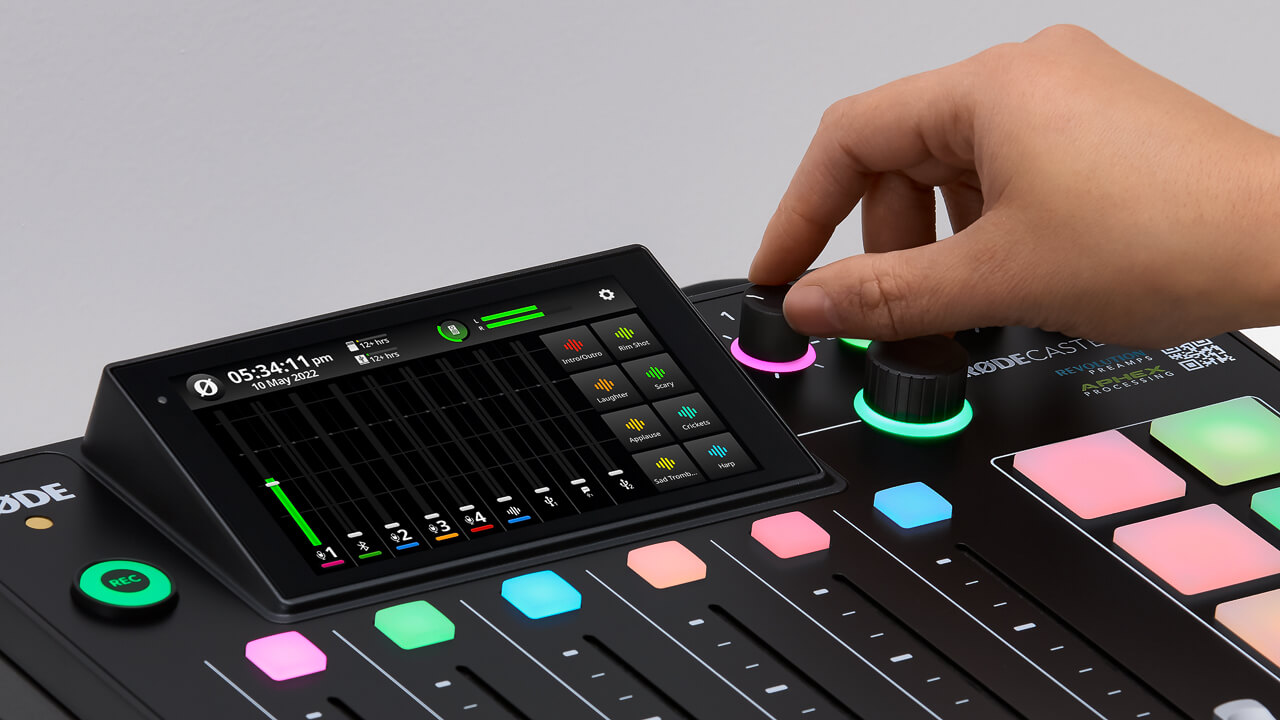
Ogni uscita per cuffie ha un controllo del livello indipendente. Questi sono situati nella parte anteriore dell'unità e contrassegnati con i numeri da 1 a 4. Questo ti consente di controllare facilmente il volume delle tue cuffie e bilanciare i livelli per gli altri con cui stai registrando.
Puoi anche ottimizzare il livello di uscita in base al tipo di cuffie che stai utilizzando (cioè, se sono ad alta sensibilità o a bassa sensibilità). Per fare ciò, tocca l'icona delle impostazioni, poi ‘Uscite’ > ‘Cuffie’, quindi seleziona il tipo di cuffie. I modelli ad alta sensibilità hanno un'uscita maggiore, mentre i modelli a bassa sensibilità hanno un'uscita minore. Selezionare l'impostazione corretta per il tipo di cuffie ottimizzerà la struttura di guadagno per rendere i livelli delle cuffie il più coerenti possibile.
Consiglio Professionale
Per evitare suoni forti inaspettati nelle tue cuffie, ti consigliamo di iniziare sempre con i livelli delle cuffie bassi prima di impostare i tuoi ingressi per la registrazione, per poi alzarli a un livello confortevole.
Collegamento e utilizzo di altoparlanti/monitor
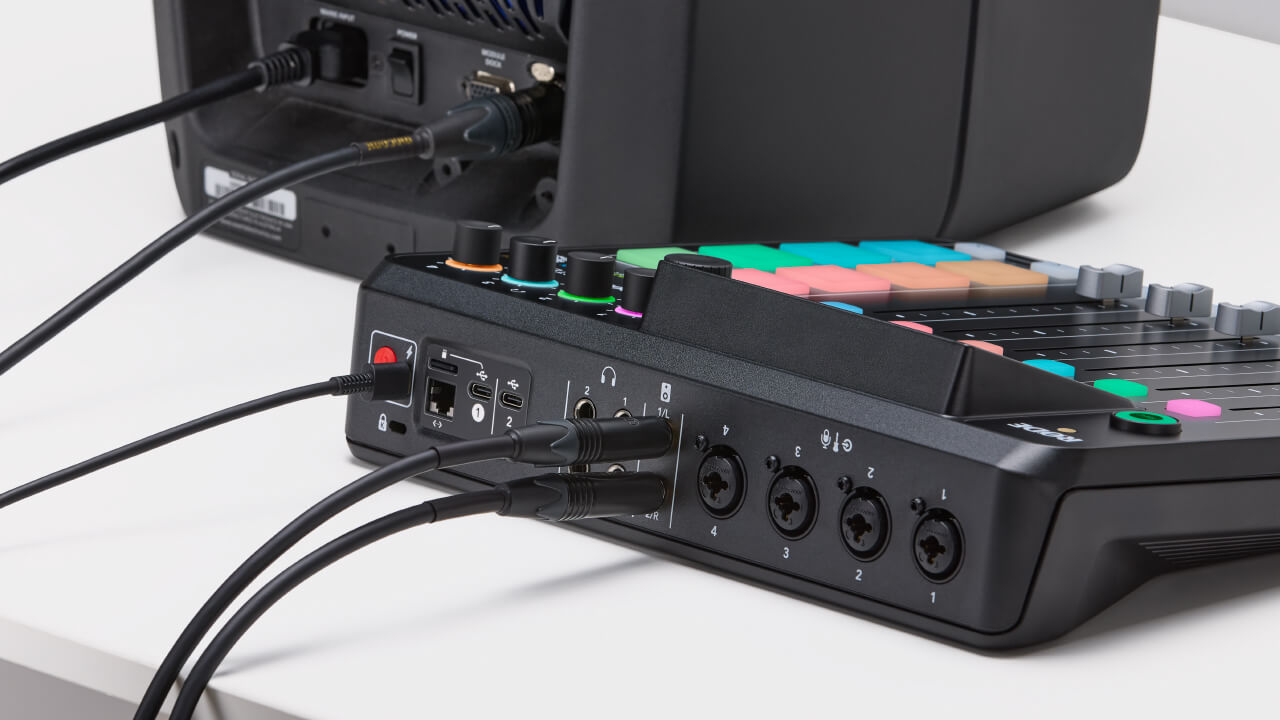
Ci sono due uscite bilanciate da ¼ pollice sul retro del RØDECaster Pro II per collegare un paio di altoparlanti/monitor. Queste sono chiaramente etichettate come sinistra e destra. Il livello di uscita del monitor è controllato utilizzando l'encoder rotativo sulla parte anteriore dell'unità e c'è un'icona sulla parte superiore dello schermo del mixer per controllare il tuo livello.
Consiglio Professionale
Per evitare interferenze o rumori elettrici quando si utilizzano altoparlanti/monitor, raccomandiamo di utilizzare cavi TRS bilanciati.
Impostazioni di Uscita Monitor
Puoi accedere a due impostazioni aggiuntive per le uscite monitor toccando l'icona delle impostazioni, quindi ‘Uscite’ > ‘Monitor’.
Silenzia Automatica Uscita
Quando abilitata, l'uscita monitor sarà automaticamente silenziata ogni volta che un fader del canale microfono viene alzato per prevenire il feedback.
Silenzia Automatica Uscita Bluetooth
Quando abilitata, l'uscita Bluetooth sarà silenziata quando un fader del canale microfono viene sollevato per prevenire il feedback.
Livello di Uscita Fisso
Quando abilitato, il livello di uscita monitor sarà impostato a livello linea e non potrà essere regolato. Questo è utile se stai utilizzando le uscite monitor per inviare audio a apparecchiature esterne, come attrezzature per trasmissioni o livestreaming, e vuoi assicurarti che i tuoi livelli non siano troppo alti o bassi.
.png)
Collegare Microfoni, Strumenti e Altri Dispositivi
Il RØDECaster Pro II è dotato di quattro jack combo Neutrik™ di alta qualità per collegare microfoni, strumenti (come chitarre e bassi) e dispositivi a livello di linea come tastiere e drum machine. In questa sezione, ti mostreremo come collegare questi dispositivi e prepararli per la registrazione.
Collegare i Microfoni
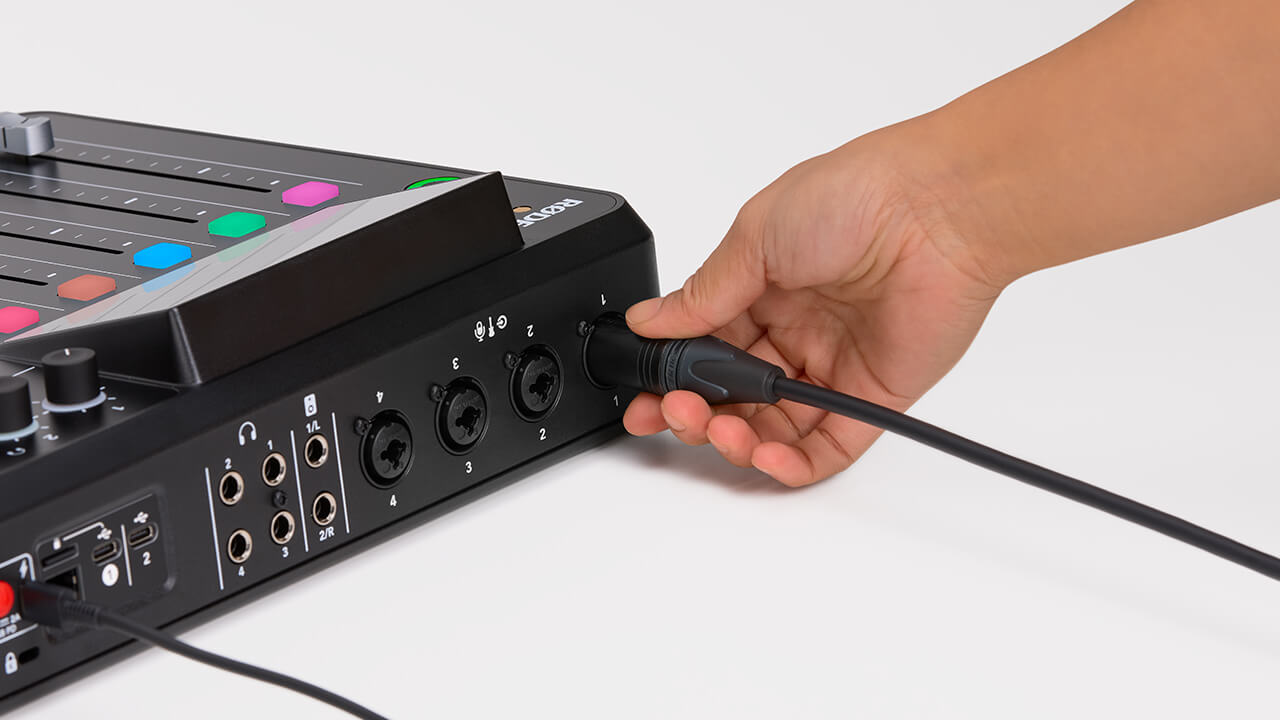
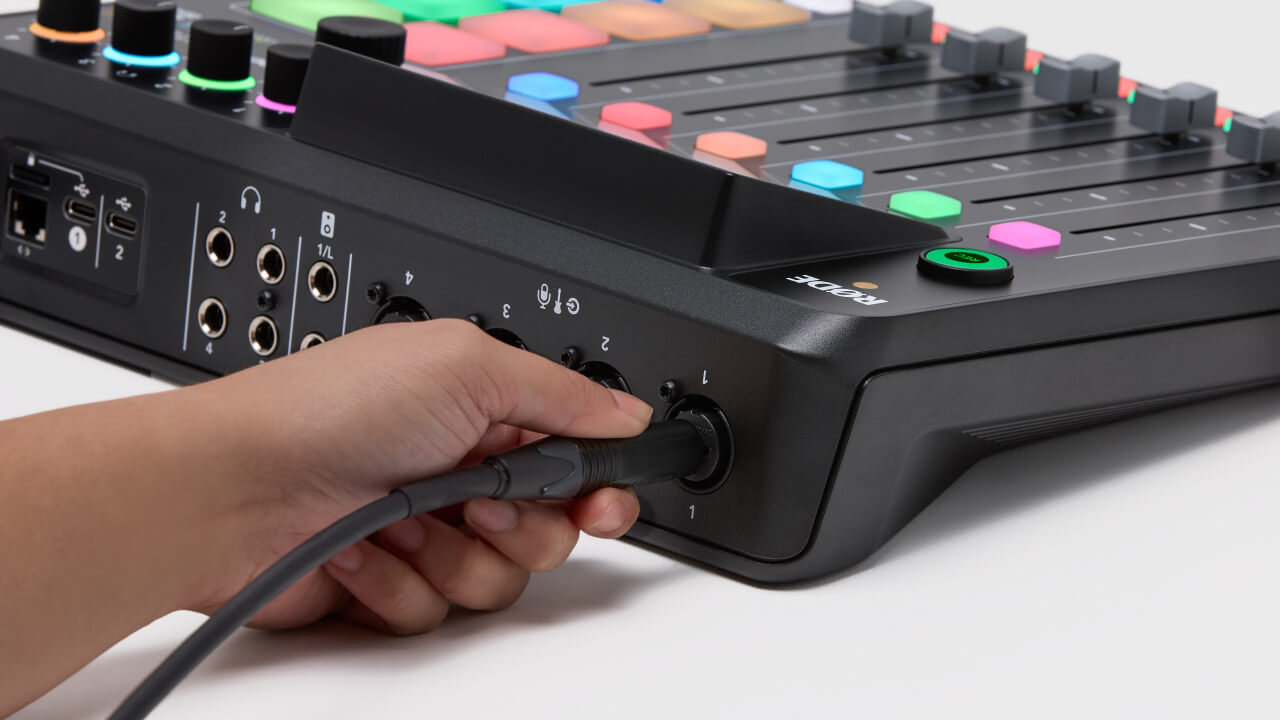
Per iniziare, collega il tuo microfono all'ingresso 1 sul retro dell'unità utilizzando un cavo XLR standard a 3 pin. Puoi utilizzare qualsiasi microfono XLR con il RØDECaster Pro II, inclusi i microfoni a condensatore che richiedono alimentazione phantom. Per impostazione predefinita, gli ingressi 1-4 saranno assegnati ai fader 1-4 sul mixer. Assicurati che il fader 1 sia completamente abbassato, quindi collega un paio di cuffie al canale cuffie 1 in modo da poter monitorare il tuo audio.
Impostazione di base del microfono
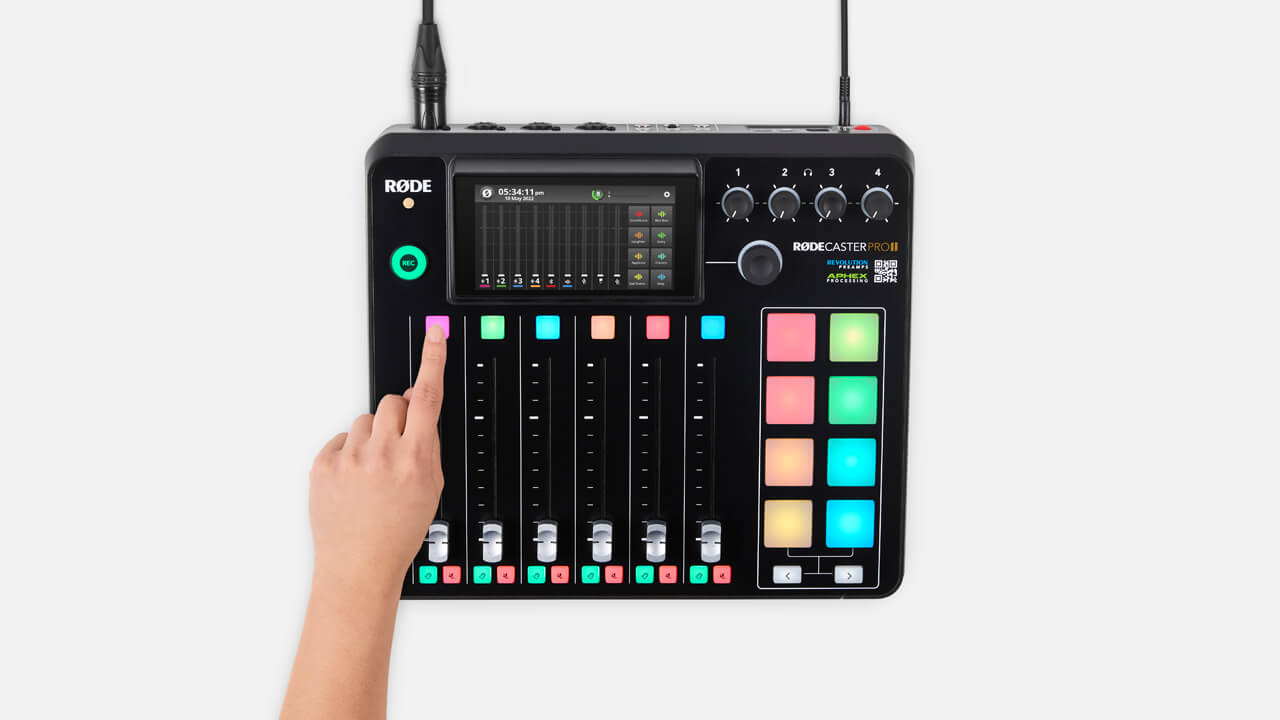
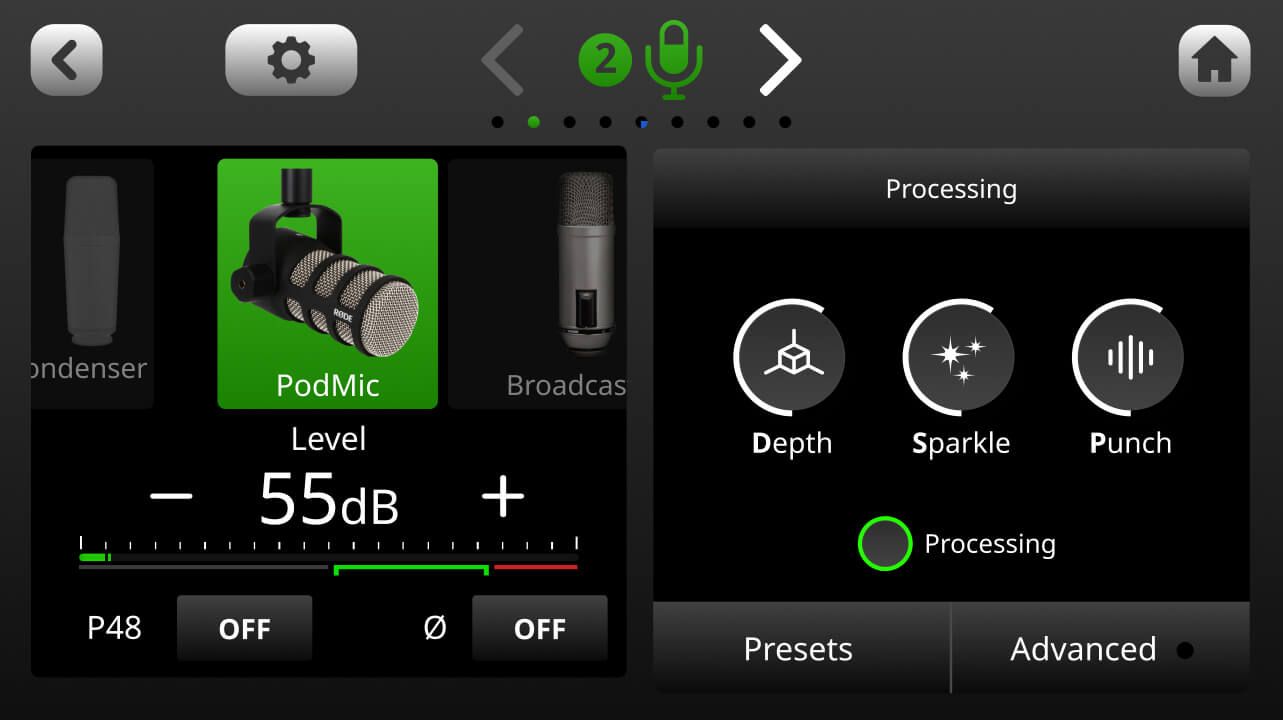
Per accedere alla schermata di impostazione del canale per il fader 1, premi il pulsante colorato sopra il fader fisico o tocca il fader sullo schermo. Qui puoi selezionare il tipo di microfono che stai utilizzando, il che regolerà il livello, la voce e attiverà l'alimentazione phantom (se necessario). Se il tuo microfono non appare nel menu "mic locker", seleziona l'opzione dinamica universale o a condensatore. Puoi anche attivare e disattivare manualmente l'alimentazione phantom.
Consiglio Professionale
Le quattro ingressi analogici sul RØDECaster Pro II presentano i nostri preamplificatori Revolution Preamps™ di livello mondiale. Questi sono preamplificatori ultra-silenziosi e ad alta guadagno che ti offriranno un'ampia uscita, anche con i microfoni dinamici più esigenti, rimanendo incredibilmente silenziosi. Questo elimina la necessità di utilizzare un amplificatore di linea o un lifter con i tuoi microfoni. In effetti, il livello di rumore dei Revolution Preamps è così basso che l'uso di un lifter introdurrà effettivamente rumore nel tuo segnale, quindi ti consigliamo vivamente di NON utilizzarne uno.
Impostazione dei livelli del microfono
Una volta configurato il microfono, alza il fader 1 fino alla linea spessa poco sopra la metà del fader. Questo rappresenta il ‘guadagno unitario’. Poi, alza il canale cuffie 1 a un livello di ascolto confortevole. Sotto il "mic locker" si trova un misuratore di livello e un controllo del guadagno. Tenendo d'occhio il misuratore di livello, parla a un livello naturale il più vicino possibile al microfono come farai durante la registrazione. Il tuo audio dovrebbe oscillare nella sezione verde del misuratore mentre parli. Se hai selezionato l'impostazione del microfono corretta, dovresti già essere a un buon livello di registrazione. Usa i pulsanti ‘+’ e ‘-’ per regolare se necessario. Ripeti questo processo per quanti più microfoni hai bisogno per la tua registrazione.
Nota
Potresti notare che stai ancora ricevendo livelli sul misuratore anche se il fader è completamente abbassato. Questo perché il fader controlla il livello che viene inviato all'uscita del RØDECaster Pro II, non il livello di ingresso del canale.
Consigli sulla Tecnica del Microfono
Una buona tecnica del microfono è incredibilmente importante per catturare registrazioni pulite e chiare e ottenere il massimo dal tuo microfono e dispositivo di registrazione, mentre una tecnica scadente può essere dannosa per la tua registrazione. Clicca sul link qui sotto per scoprire di più sulla tecnica del microfono, oltre a suggerimenti su come impostare correttamente il guadagno e scegliere lo spazio di registrazione giusto.
Utilizzo dei preset per microfono
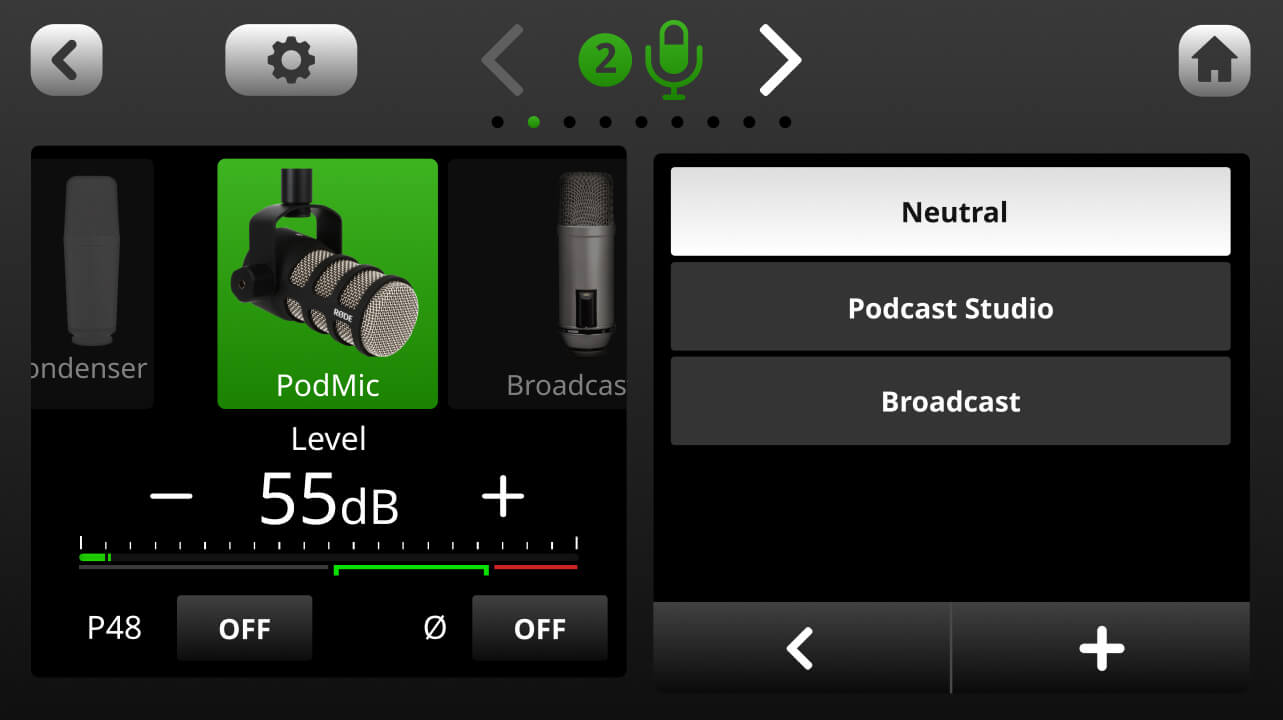
Il RØDECaster Pro II offre una selezione di preset per microfono professionalmente personalizzati, ideali per il podcasting e il livestreaming. Per accedervi, fai clic sulla scheda ‘Preset’ nella schermata di configurazione del canale. Ci sono tre preset predefiniti tra cui scegliere: ‘Neutro’, ‘Podcast Studio’ e ‘Broadcast’. Puoi anche creare i tuoi preset (dai un'occhiata alla sezione su ‘Come utilizzare l'elaborazione integrata’ per saperne di più sulla creazione di preset).
Collegare strumenti e dispositivi a livello di linea
Per collegare uno strumento o un dispositivo a livello di linea, il processo è molto simile a quello di collegare un microfono: basta collegarlo a una delle quattro porte utilizzando un cavo TRS o un cavo per strumenti. Successivamente, apri lo schermo di configurazione del canale e seleziona ‘Line-in’ o ‘Instrument’ dal menu “mic locker” – questo regolerà il guadagno di ingresso a un livello adeguato a seconda di ciò che è collegato. Utilizza il misuratore di livello e i pulsanti ‘+’ e ‘-’ per regolare il guadagno di ingresso secondo necessità.
Ingressi Stereo Collegati
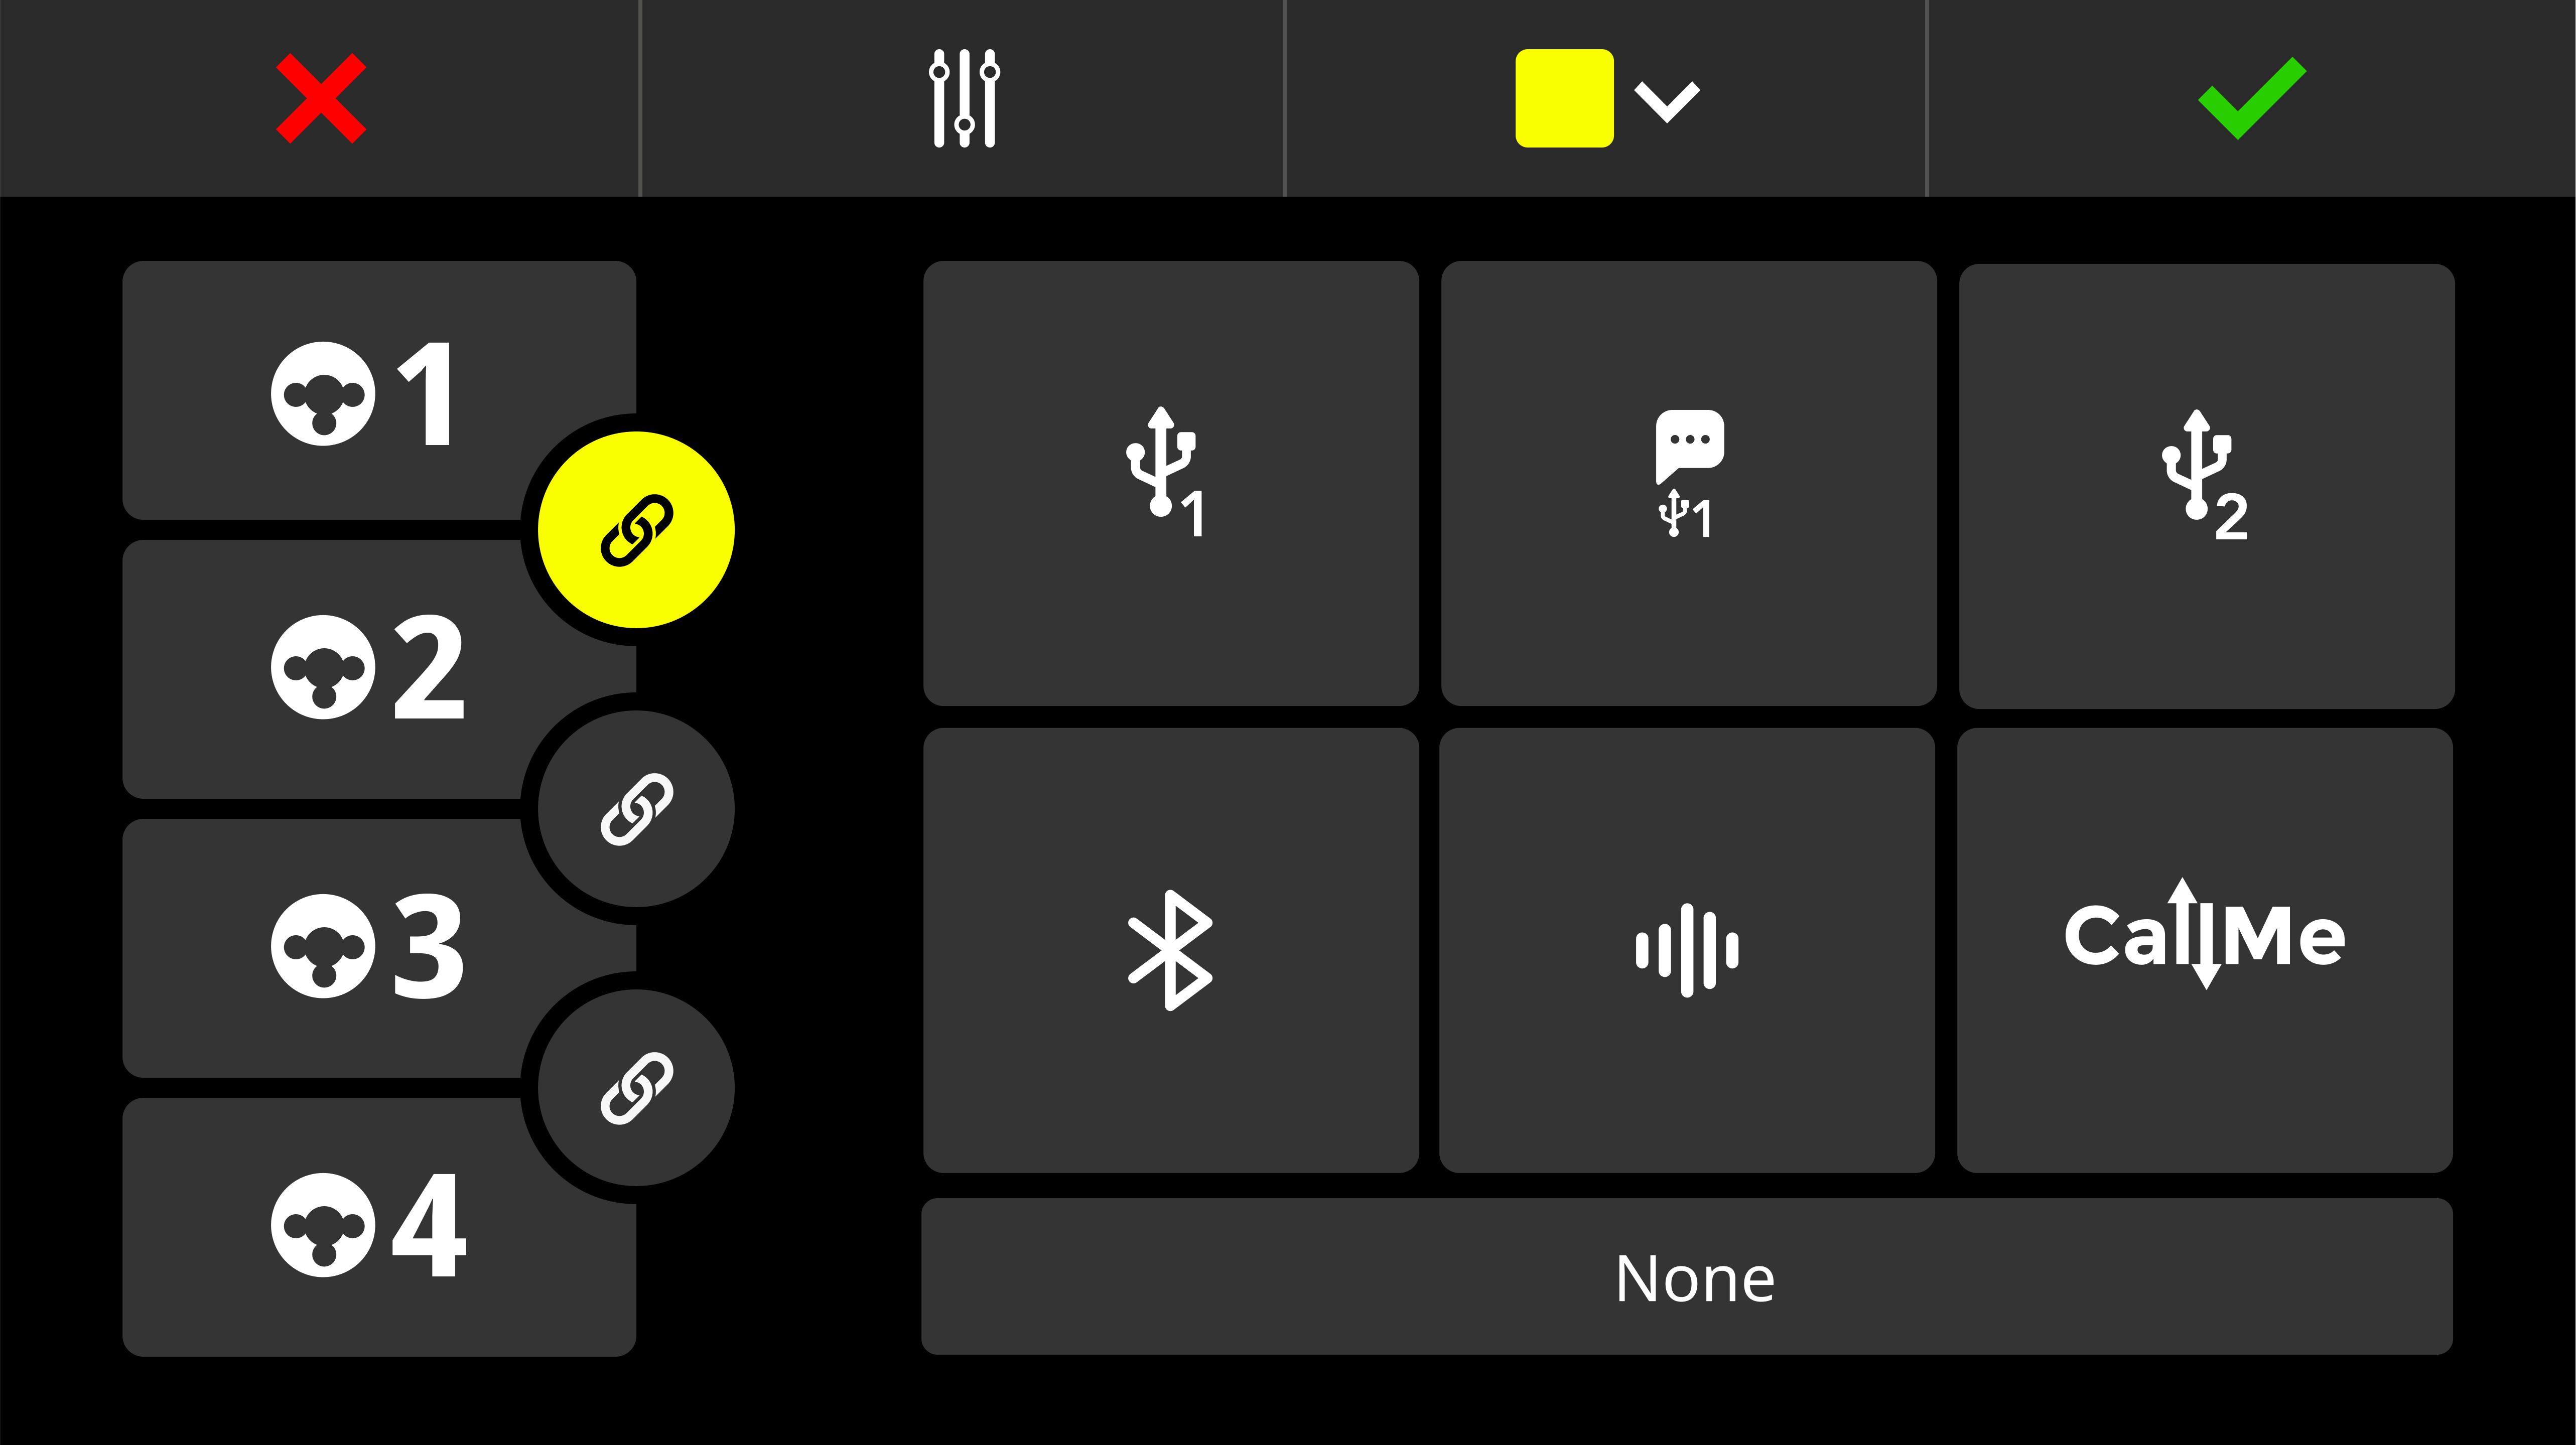
Se stai utilizzando un dispositivo a livello strumentale o di linea con uscite stereo, o registrando una coppia di microfoni stereo, puoi collegare due ingressi e instradarli a un solo canale. Questo ti permetterà di controllare il livello di entrambi gli ingressi con un singolo fader, assicurando che i livelli dei canali siano esattamente gli stessi.
Per collegare due ingressi, apri la schermata di configurazione del canale per il fader a cui desideri allocarli e fai clic sull'icona delle impostazioni per accedere alla schermata di assegnazione del fader. Successivamente, tocca l'icona 'Stereo' sotto gli ingressi che desideri collegare. Tocca l'icona del segno di spunta verde per salvare. Dopo aver salvato, assicurati di avere selezionato il tipo di ingresso corretto dal menu “mic locker”.
Note
You can only link inputs that are next to each other, i.e., 1 and 2, 2 and 3, and 3 and 4
Consiglio Professionale
Gli ingressi collegati saranno automaticamente panati a sinistra e a destra, offrendoti un'immagine stereo completa. Noterai anche che i fader con ingressi collegati assegnati avranno due misuratori di livello sullo schermo del mixer, così potrai monitorare indipendentemente il livello di ciascun ingresso.
Salvataggio ed esportazione delle impostazioni come 'Show'
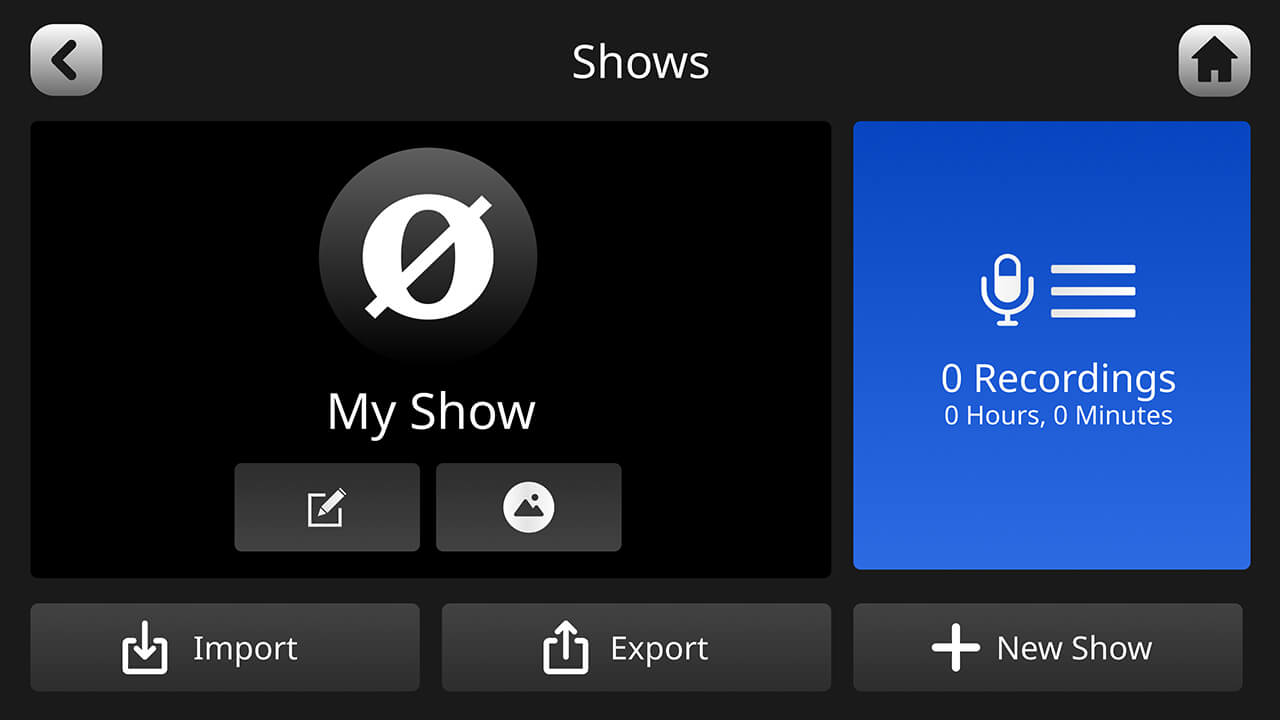
Tutte le tue impostazioni, inclusa la configurazione del canale, del mixer e del pad SMART, elaborazione, effetti e configurazione del dispositivo, possono essere salvate su una scheda microSD o su un disco rigido come 'Show'. Per farlo, tocca l'icona nell'angolo in alto a sinistra della schermata principale o tocca l'ingranaggio delle impostazioni e poi 'Show', quindi tocca 'Esporta'. Questo prenderà un'istantanea di tutte le tue impostazioni e le salverà come file sul tuo dispositivo di archiviazione, che può poi essere trasferito al tuo computer.
Puoi salvare ed esportare quante più istantanee 'Show' desideri, il che è utile se condividi il tuo RØDECaster Pro II con altri creatori o se crei diversi podcast, livestream o diversi tipi di contenuti.
Per importare uno 'Show' che hai salvato, assicurati che il file sia caricato su una scheda microSD o su un disco rigido, collega questo al tuo dispositivo, tocca l'icona nell'angolo in alto a sinistra della schermata principale o tocca l'ingranaggio delle impostazioni e poi 'Show' > 'Importa', quindi seleziona lo 'Show' che desideri importare dall'elenco.
Ripristino di fabbrica
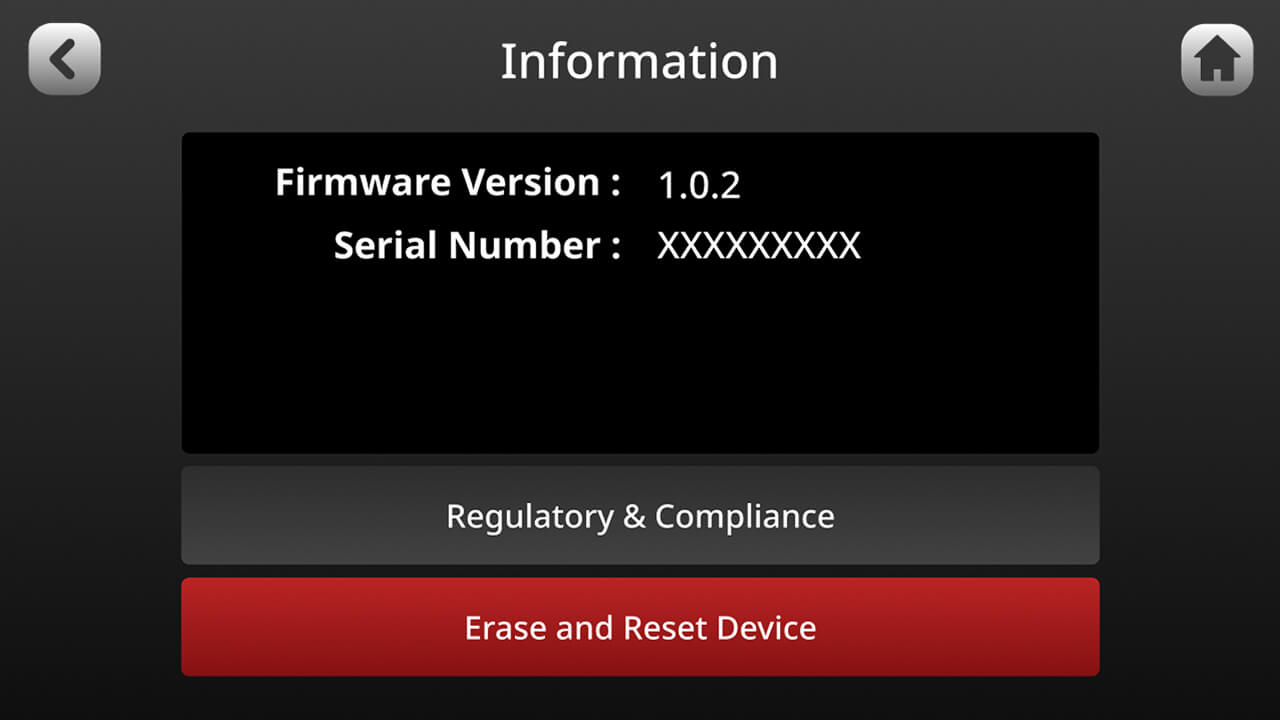
Per eseguire un ripristino di fabbrica, tocca l'icona delle impostazioni, poi ‘Sistema’ > ‘Informazioni’ > ‘Visualizza informazioni sul dispositivo’, quindi ‘Elimina e ripristina dispositivo’.
Note
This will permanently delete all current configuration data. If you would like to save this data before erasing, see section above for how to export your ‘Show'.
Alimentazione del RØDECaster Pro II
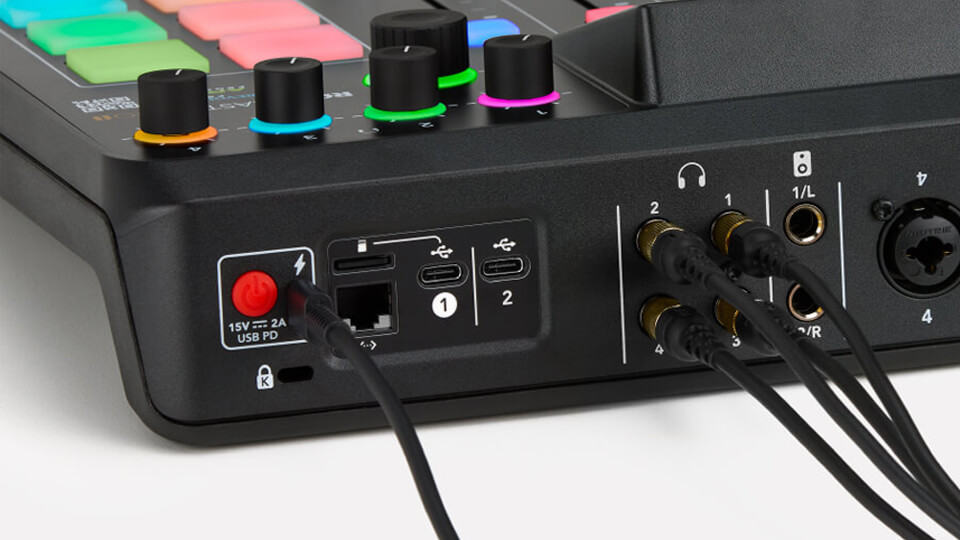
Il RØDECaster Pro II è dotato di un'unità di alimentazione. Collega questo all'ingresso USB-C accanto al pulsante rosso sul retro dell'unità per fornire energia. Può anche essere alimentato da una power bank USB, purché sia in grado di fornire 30W USB-C PD (15V, 2A). Otterrai circa un'ora di funzionamento per ogni capacità di 10W/h, quindi un pacco batteria di alta qualità ti darà circa dieci ore di energia. Se l'unità riceve un'alimentazione insufficiente, vedrai un messaggio di avviso che lo indica. In questo caso, utilizza l'alimentatore fornito o un alimentatore conforme alle specifiche sopra indicate.
Note
The power drawn from the battery depends on usage factors including screen and LED brightness, USB connectivity, and phantom power status, so results may vary.