Setting Up Channels and Outputs
The Default Mixer Configuration
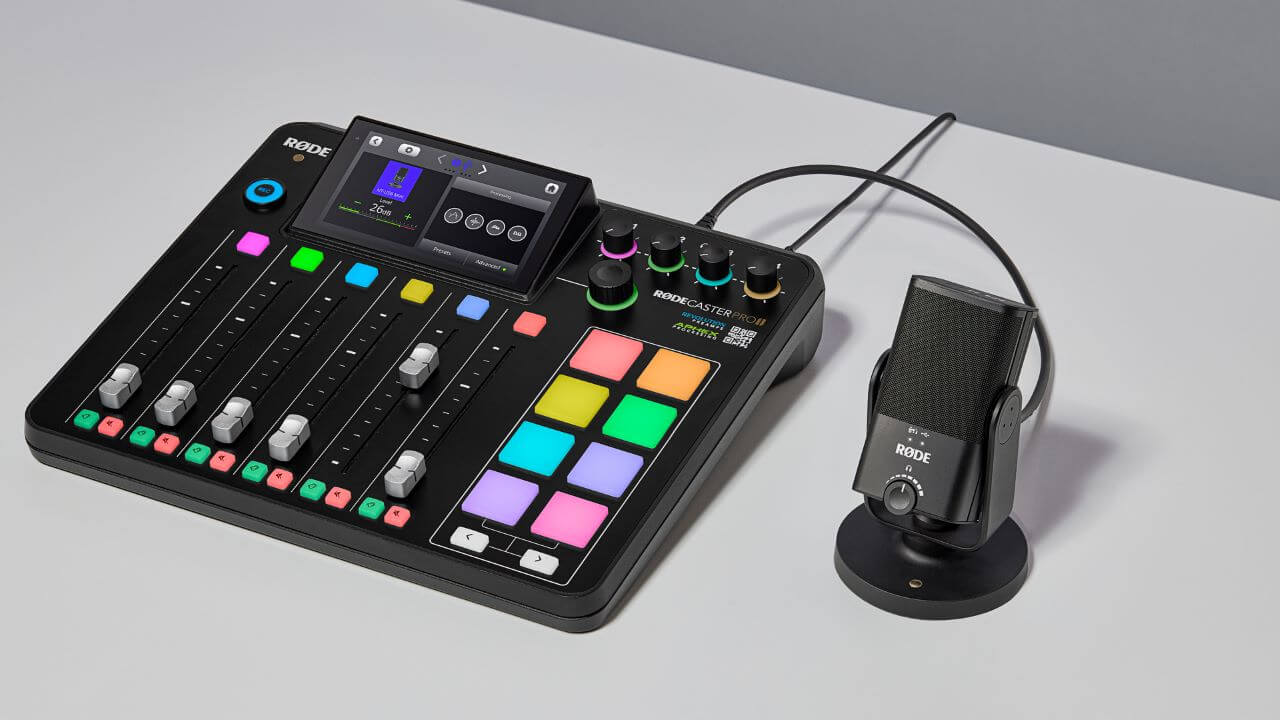
The RØDECaster Pro II has nine separate inputs for connecting a wide range of devices and audio sources: four combo jacks for connecting microphones, instruments and other devices, two wireless receivers for pairing to compatible RØDE Series IV wireless transmitters (such as the Wireless GO II and Wireless ME), a Bluetooth channel for connecting computers and mobile devices wirelessly, the SMART pad channel, and dual USB-C interfaces for connecting two computers and mobile devices, plus an extra virtual USB channel called ‘Chat’ for connecting chat apps, which is useful for livestreaming and other applications.
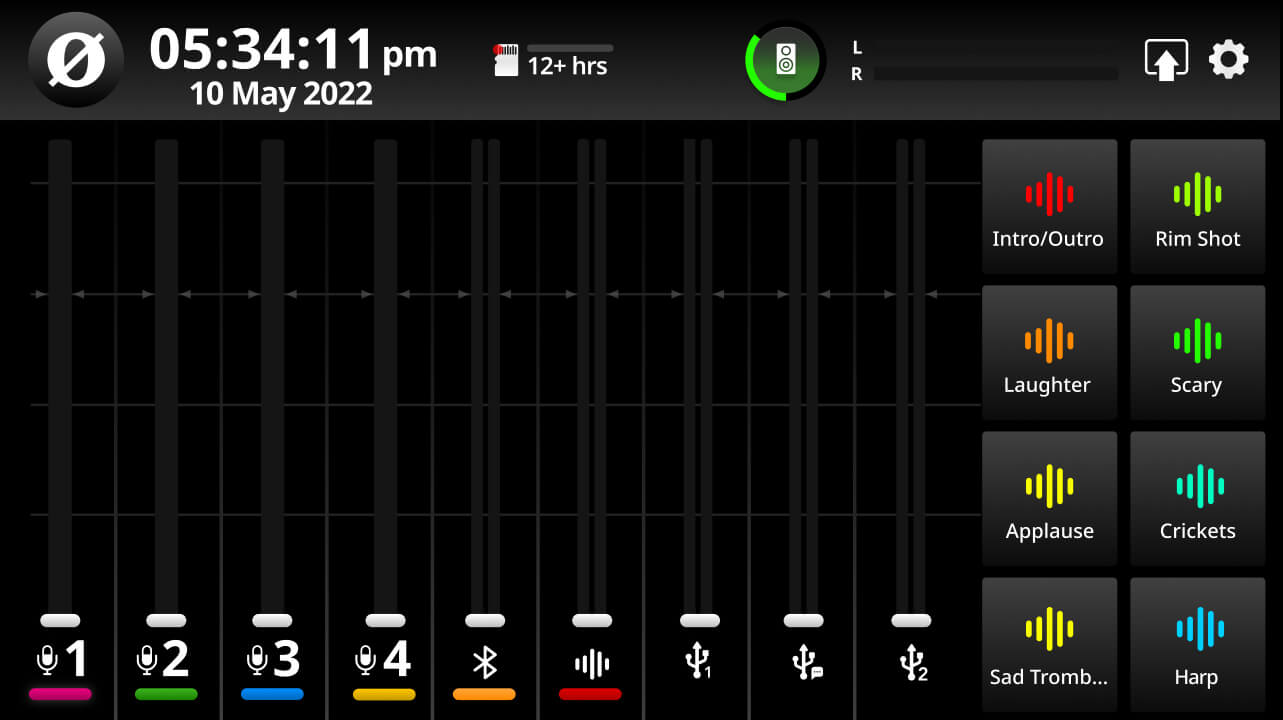
By default, these channels will be assigned to the faders as follows (unless you dictate otherwise during the Setup Wizard process):
- Fader 1-4: XLR/TRS Inputs 1-4
- Fader 5: Bluetooth
- Fader 6: SMART Pads
- Fader 7: USB 1
- Fader 8: USB 1 Chat
- Fader 9: USB 2
Assigning Inputs to Faders
There are multiple ways to change the mixer configuration. This can either be done during the Setup Wizard process, or via the fader set-up screen or the channel set-up screen.
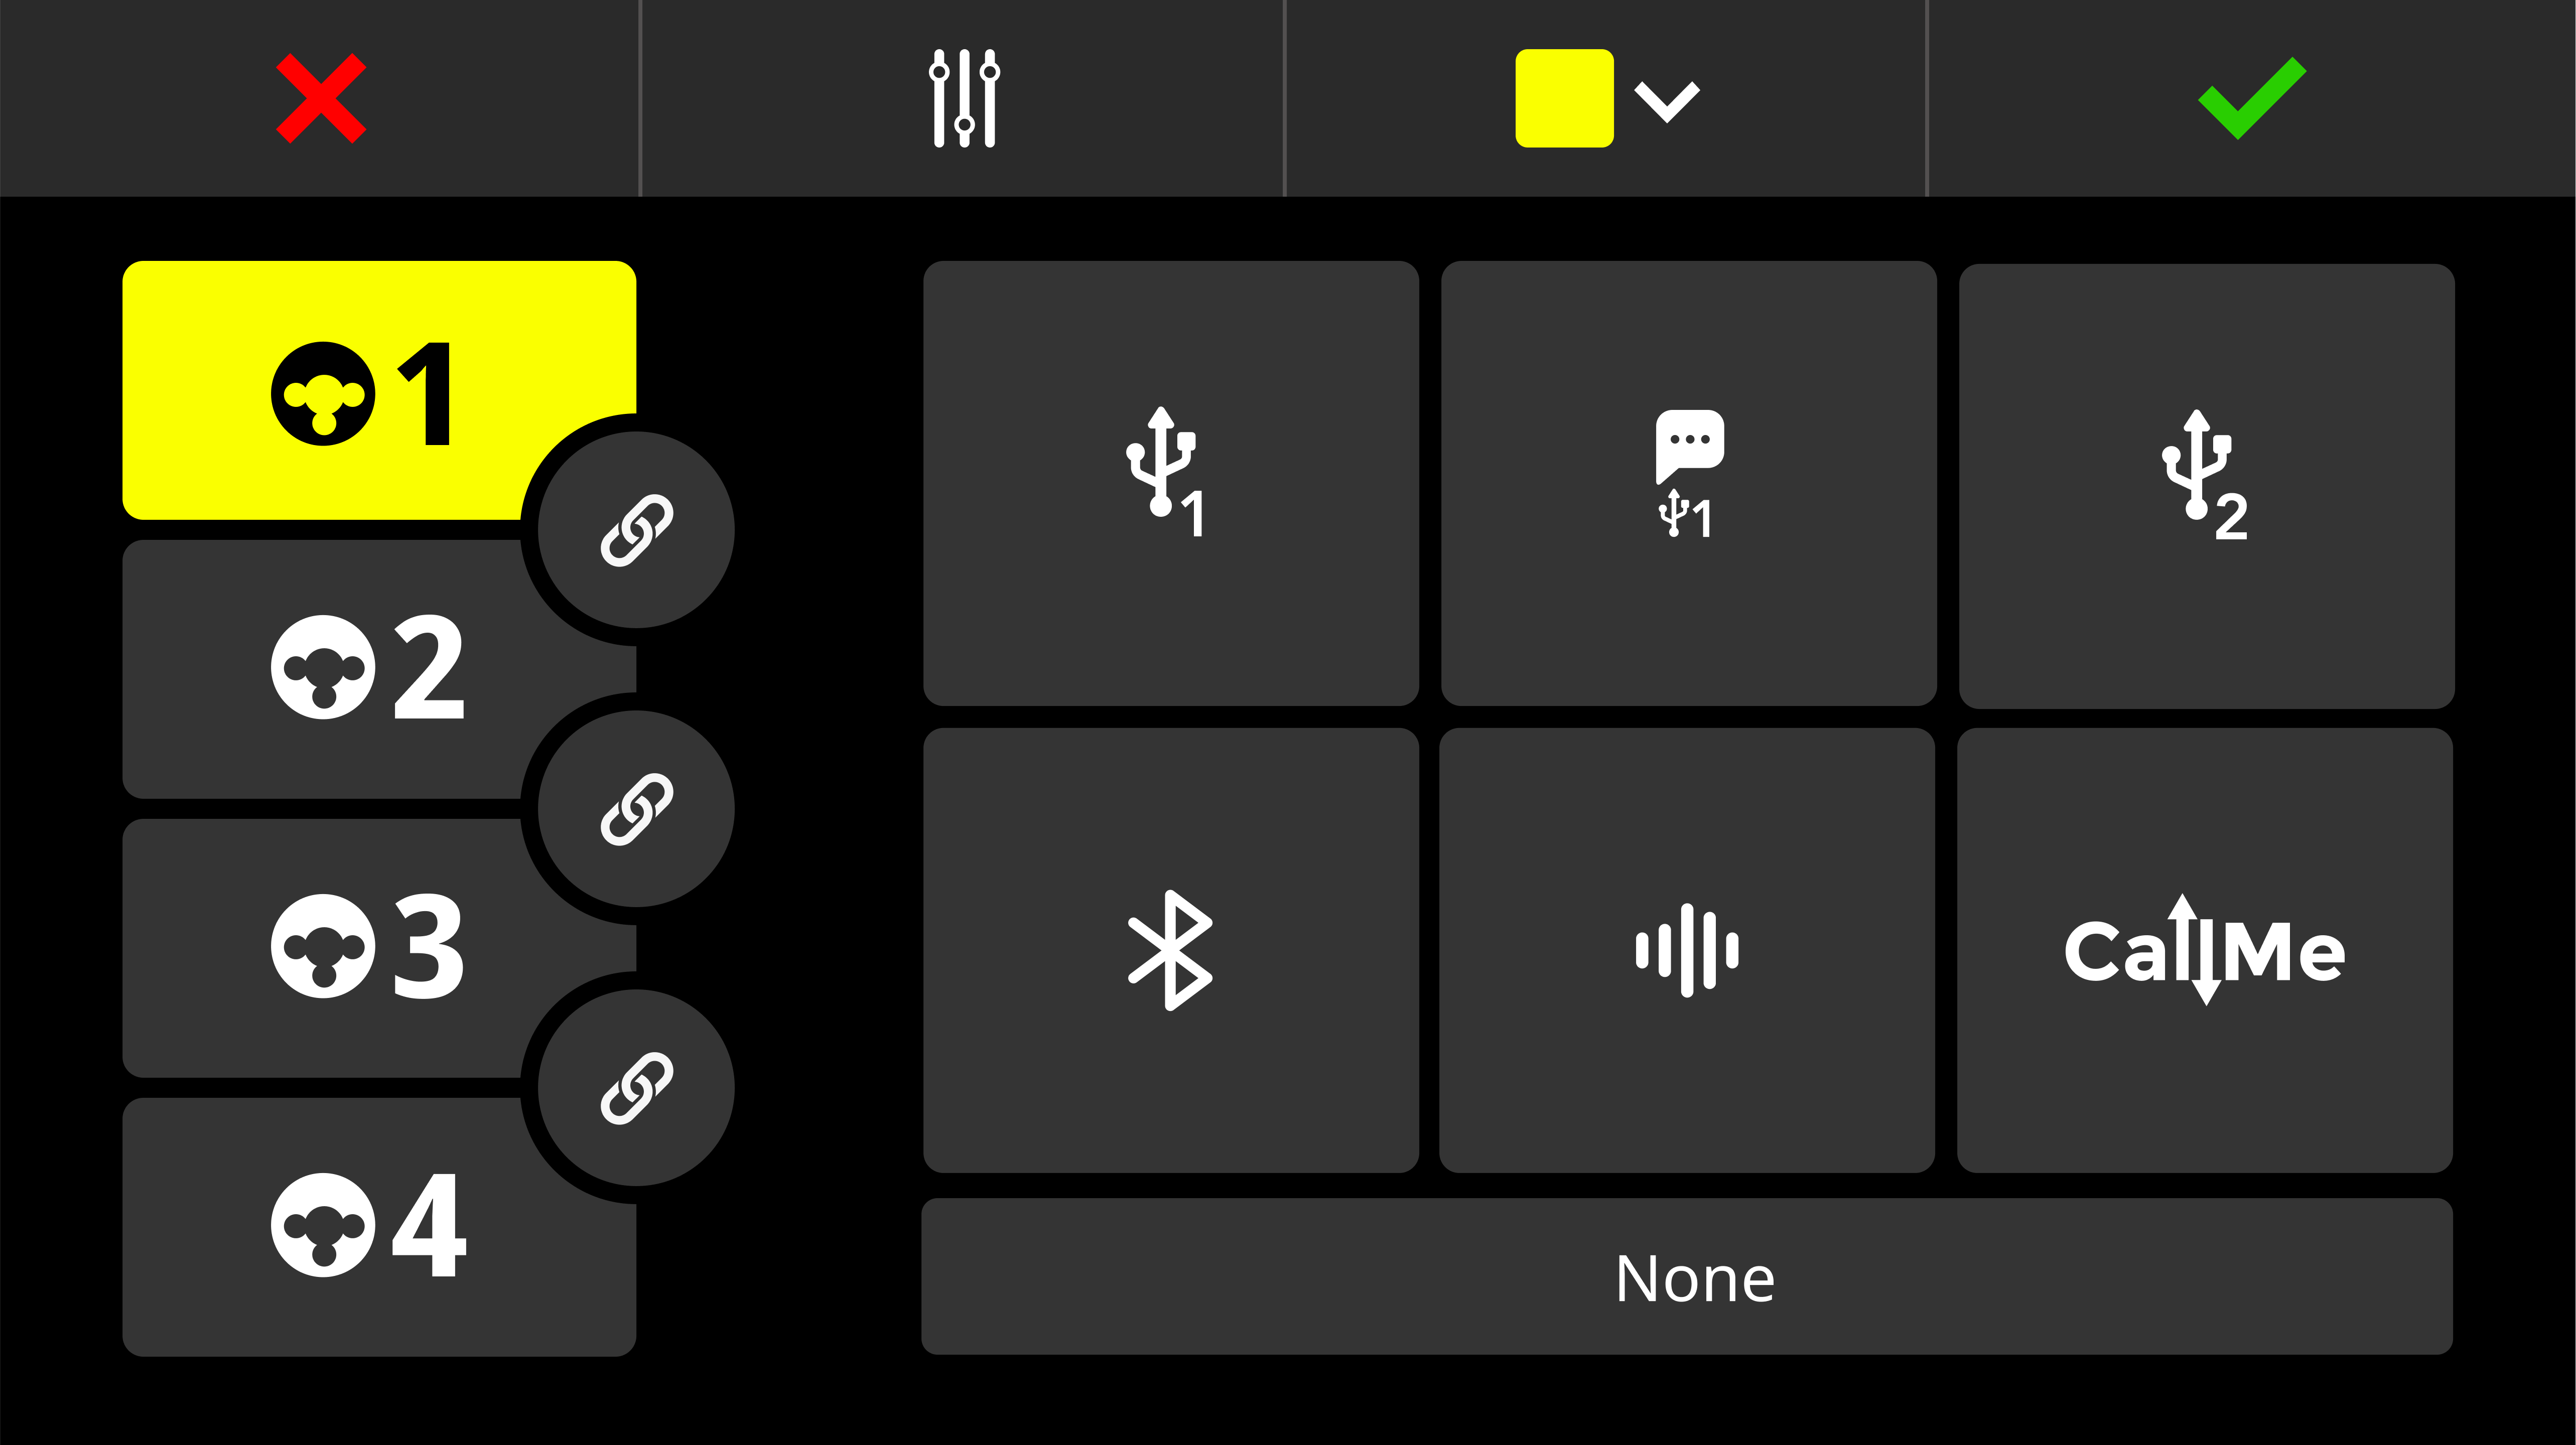
To access the channel set-up screen for a fader, simply tap the button above the fader or the icon below the level meter, then tap the settings cog to access the channel assignment screen. Here you can select what input is assigned to that channel, unassign inputs, link stereo inputs and change the colour-coding of the channel. Once you have configured the channel, tap the green tick icon to save the settings. Repeat the process for the other faders you want to assign inputs to.
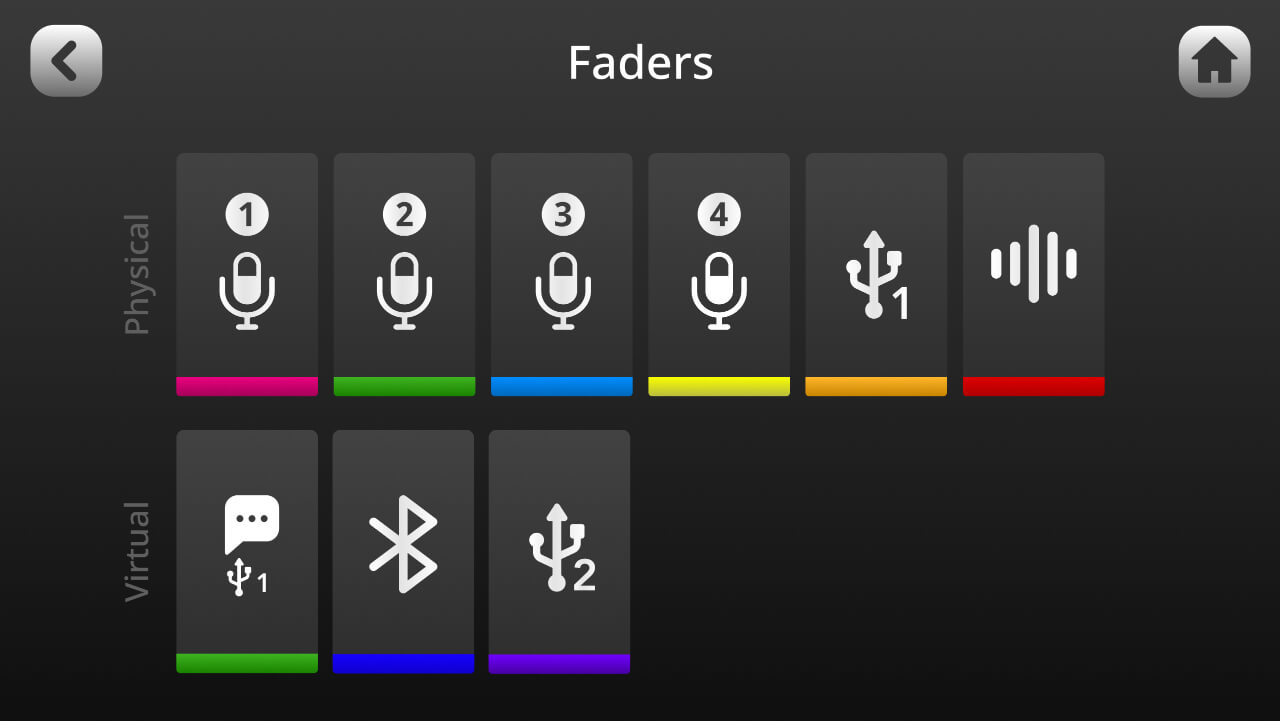
To access the fader set-up screen, tap the settings cog, then ‘Faders’ (or tap the fader icon on the bottom left corner of the channel set-up screen). Here you can assign channels to the physical and virtual faders by dragging and dropping their icons to the desired location using the touchscreen. This is a quick and easy way to change the configuration of the mixer. You can also tap a fader icon to access the channel assignment screen.
Pairing and Assigning a Wireless Device
To pair a RØDE Series IV wireless device (such as the Wireless GO II and Wireless ME) to your RØDECaster Pro II, access the channel set-up screen by pressing the physical button above the fader you wish to assign your wireless device to. On this screen, you will see a list of microphone, instrument and other input options that you can scroll through. Scroll to the left to select the ‘Wireless’ option, tap ‘Pair New Device’ to enter pairing mode and follow the pairing process for your product to connect your wireless device and assign it to this input. To put either the Wireless GO II or Wireless ME transmitter into pairing mode, simply short-press its power button when the units are turned on and not already paired to another receiver. Your device’s connectivity, recording, mute and battery status will be displayed on this screen.
 (1).png)
Note
Assigning any of the four input channels to the ‘Wireless’ option will override the associated physical XLR/TRS input, meaning that you won’t hear any audio coming from microphones or instruments plugged into that channel.
Connecting a RØDE USB Microphone
You can connect a RØDE USB microphone to the RØDECaster Pro II's USB 2 port using a USB-C-to-C cable, allowing for an additional microphone input.
Once connected, simply assign the USB 2 channel to a fader and treat it as if it were any other microphone input channel. You can control the USB microphone's on-board processing in the channel setup screen, although the RØDECaster's own channel processing and effects will not apply. In the case of the PodMic USB, NT-USB Mini, XCM-50 and XDM-100, you can mute or un-mute the USB 2 channel by pressing the physical button on the microphone.
Compatible devices include:
Note
In order to achieve zero-latency monitoring with the USB microphone, you will need to connect headphones directly to the microphone. You can then adjust headphone monitoring levels with the microphone's on-board controls.
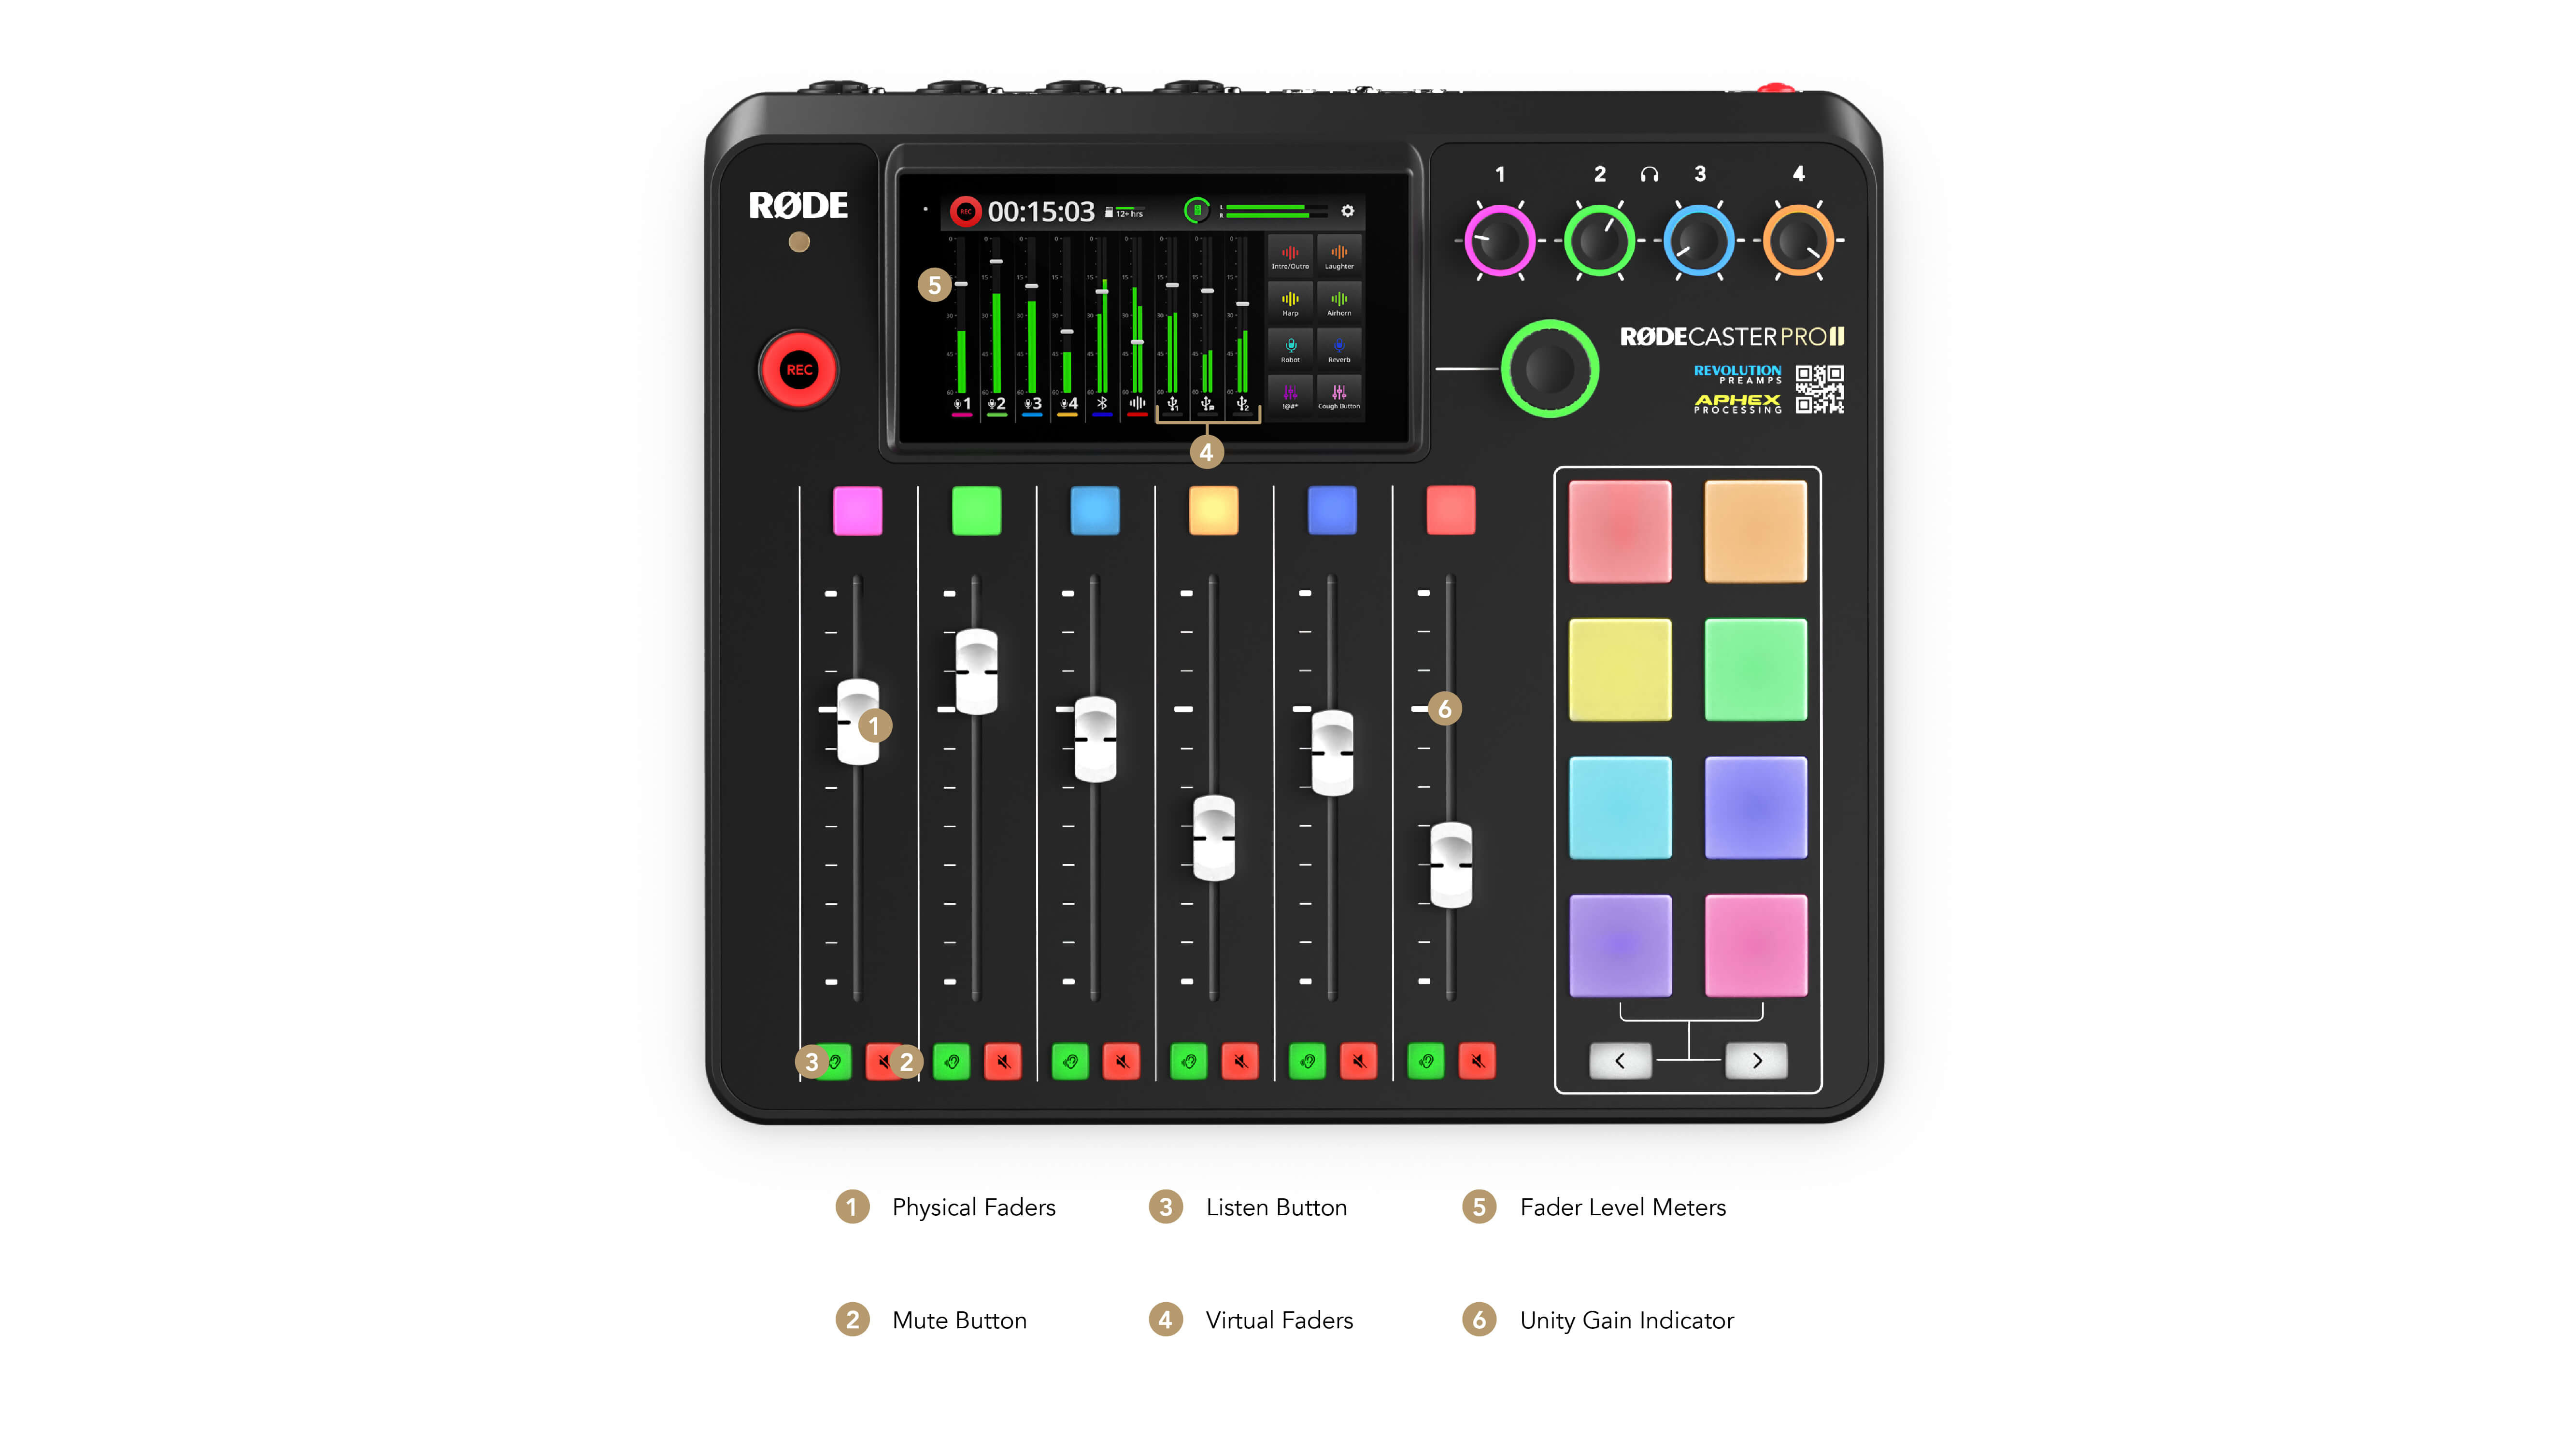
Using the Physical and Virtual Faders
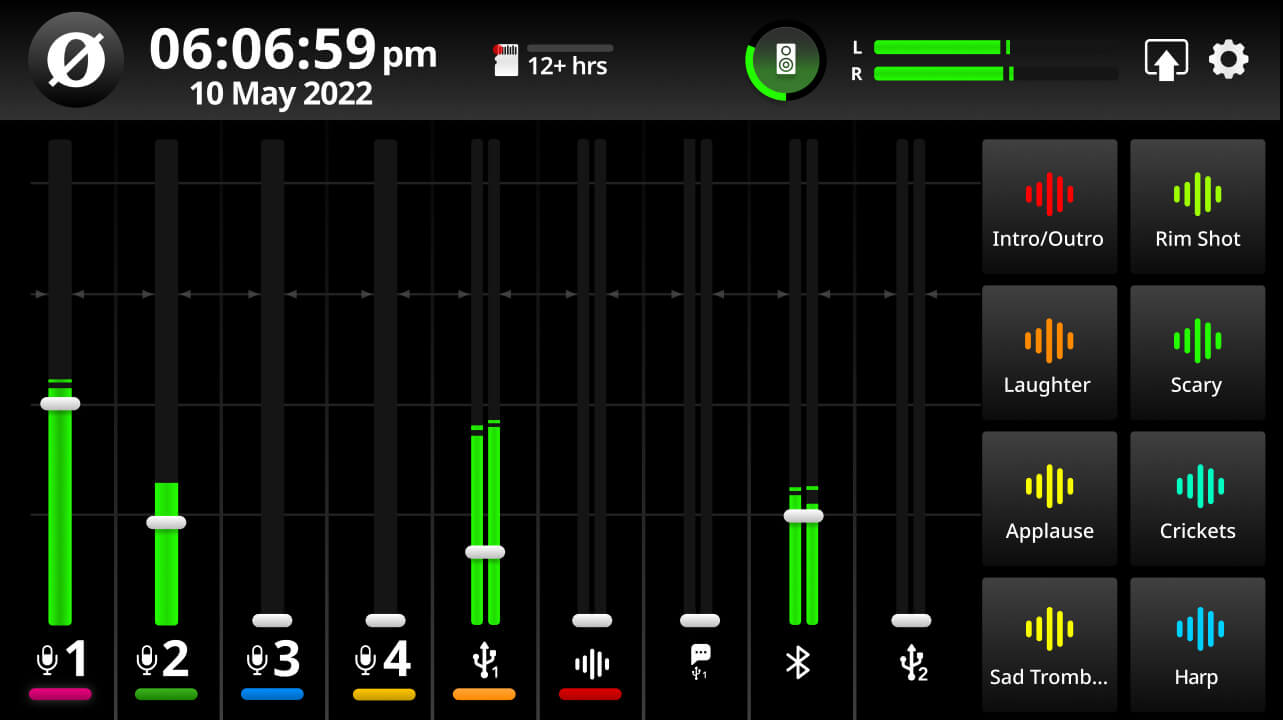
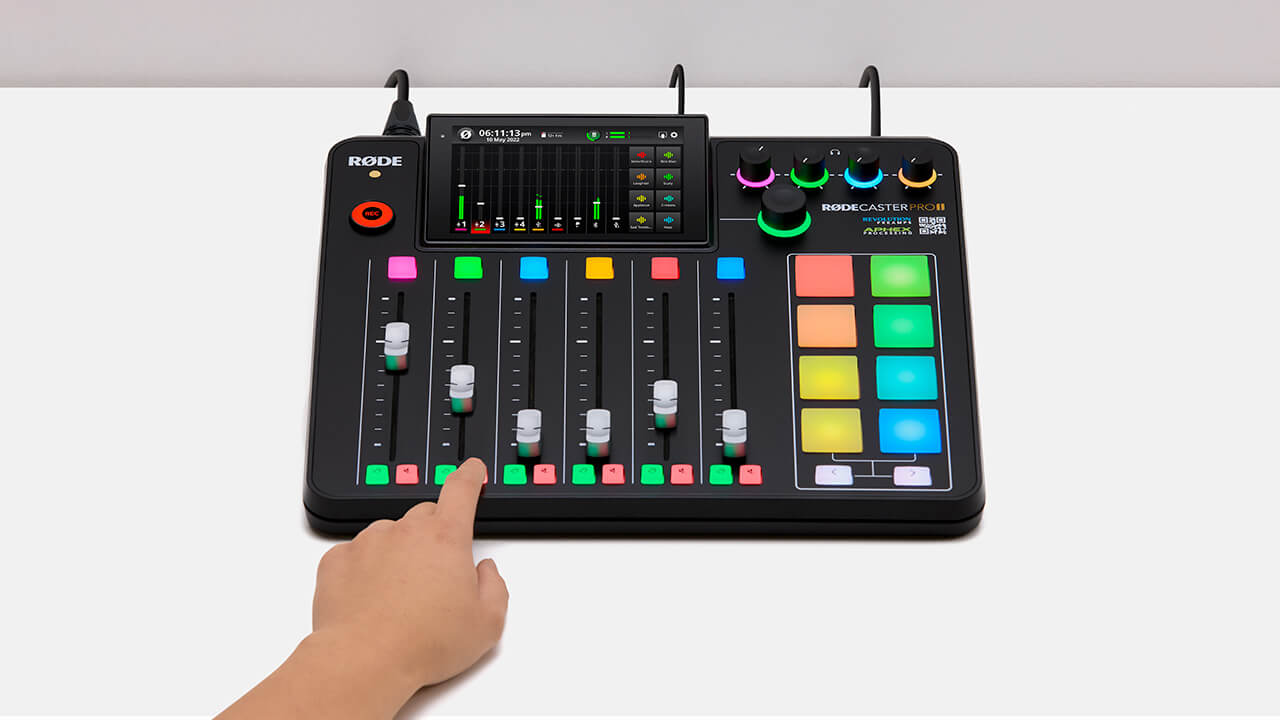
The RØDECaster Pro II features six broadcast-quality physical faders and three virtual faders, allowing you to mix a total of nine separate inputs with complete hands-on control. The physical faders function like any other mixer: simply use the sliders to adjust the level for that channel. The fader position will be mirrored in real-time on the mixer interface.
The virtual faders work just like the physical faders, only you have a digital fader that is controlled by tapping the level meter then using the rotary encoder. You can also easily scroll through the virtual channels by pressing the rotary encoder. Pressing and holding the rotary encoder will mute the selected virtual channel.
Pro Tip
‘Unity gain’ for each fader is indicated by the white markers on the physical mixer and the small arrows on the virtual mixer (in default level meters mode only). This is helpful for balancing the input level with the output level and is a good starting point when setting your levels. If a fader is at unity gain and the signal is still too low, boost the preamp gain level in the channel set-up screen rather than pushing the fader up further. This will help you achieve a healthy signal with minimal noise.
Changing the Level Meter Display
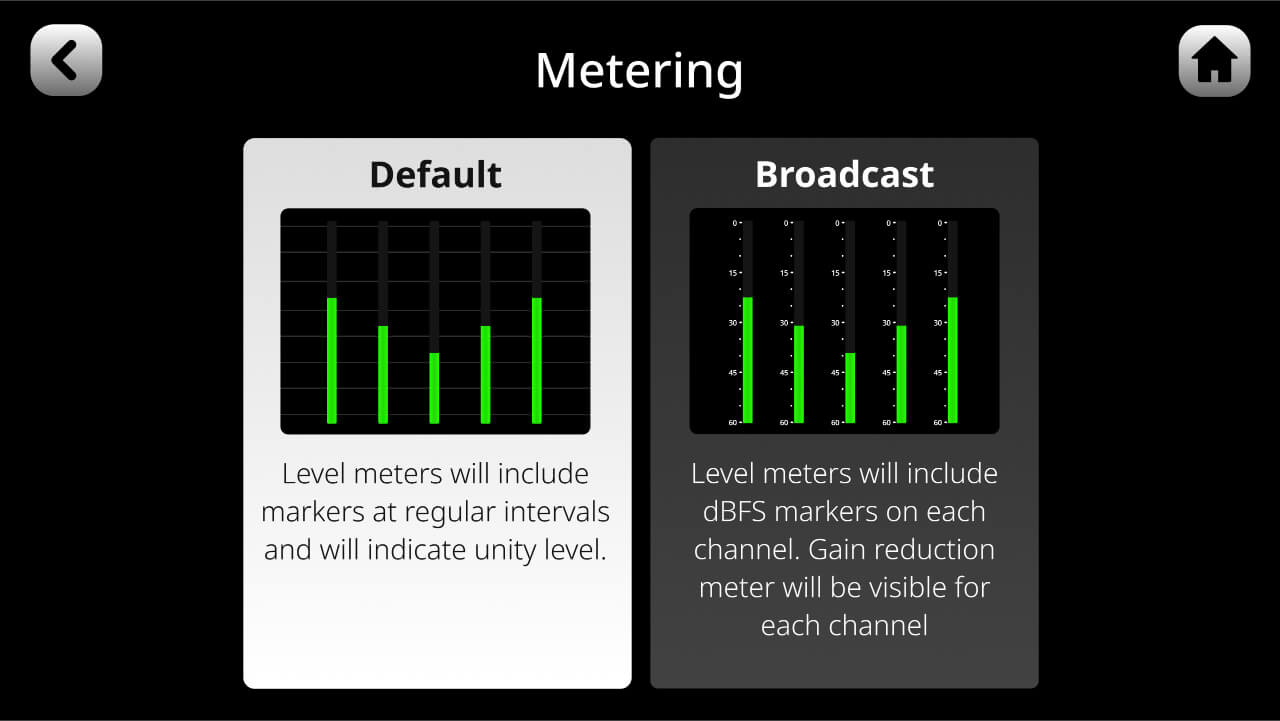
There are two ways to display the level meters on the virtual mixer: ‘Default’ mode and ‘Broadcast’ mode. In ‘Default’ mode, there are markers at regular intervals, allowing you to easily visualise your levels, as well as a marker for unity gain. In ‘Broadcast’ mode, the level meters will include dBFS (decibels full scale) markers as well as a gain reduction meter (if you have the compressor activated on that channel). To switch between the two modes, go to settings then ‘Display’ > ‘Metering’ and select either ‘Default’ or ‘Broadcast’.
Using the Mute Buttons
The red button under each of the RØDECaster Pro II's physical faders is a mute button. This will simply mute that channel on the output. You can also access a mute button for the three virtual channels by tapping the level meter then tapping the mute icon, or by pressing and holding the rotary encoder when a channel is selected. When a channel is muted, the button and fader on the virtual mixer will be illuminated red.
Pro Tip
When a channel is muted, audio will still be coming though at the preamp stage but will not be sent to the output, meaning you can still adjust the gain level in the channel setup screen while a channel is muted, though you will not be able to hear it.
Using the Listen Buttons
The green button under each of the RØDECaster Pro II's physical faders is a “listen” button (also known as a solo button). This allows you to monitor the audio from a channel by itself, without the rest of the audio mix. You can also access this feature for the three virtual channels by tapping the level meter then tapping the ear icon.
There are two different listen button modes: ‘After-fader Listen’ and ‘Pre-fader Listen’. To switch between these, go to settings, then ‘Outputs’ > ‘Listen’.
‘After-fader Listen’: When ‘Listen’ is engaged, the host/producer on headphone channel 1 will hear the channel at the fader level.
‘Pre-fader Listen’: When ‘Listen’ is engaged, the host/producer on headphone channel 1 will hear the channel at unity gain, regardless of the fader position.

Note
The solo’d audio will only be heard by the host/producer on headphone channel 1). You can also access this feature for the three virtual channels by tapping the level meter then tapping the ear icon.
Note
Pressing both the listen and mute buttons will activate ‘Back Channel’ mode, allowing the host/producer and guest to communicate “off-air”. This action can also be allocated to a SMART pad – check out the 'Using the SMART Pads' section for more information.
Pro Tip
You do not need to select the green listen buttons for all of the channels you are using when recording. They are for “listening” to a particular channel without hearing the rest of the audio. Selecting the listen buttons for all of your channels may result in audio being recorded that you do not expect (for example, if you have all of your active channels solo'd using the listen buttons, you may not notice audio coming through another channel because it will be muted in your headphones, though it will still be recorded).
Understanding the Outputs
The RØDECaster Pro II has a total of ten audio outputs. These comprise of both analog outputs, including the four headphone outputs and the stereo monitor output, as well as digital outputs, including the Bluetooth channel, the audio that is recorded to the on-board microSD card, and the three USB outputs.
By default, the levels that you set using the physical and virtual faders on the main mixer will dictate the audio mix that is sent to all of these outputs. However, you can also create custom sub-mixes for these outputs (see below). This is particularly useful for streaming applications where you want full control over what audio sources and audio levels are sent to your stream, chat, headphones and other audio destinations. For channels that are used for two-way communications, you can also set the output configuration as mix-minus to mitigate unwanted echo or delay (see below for more information).
Creating Custom Sub-mixes
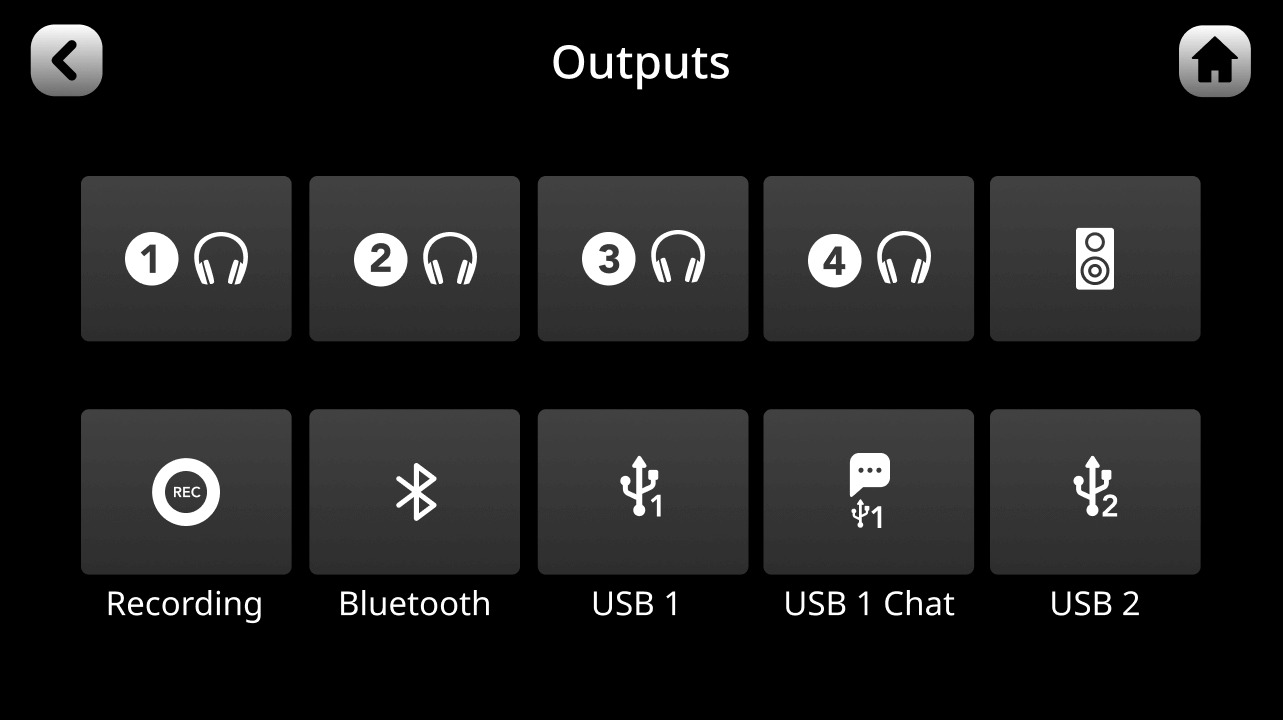
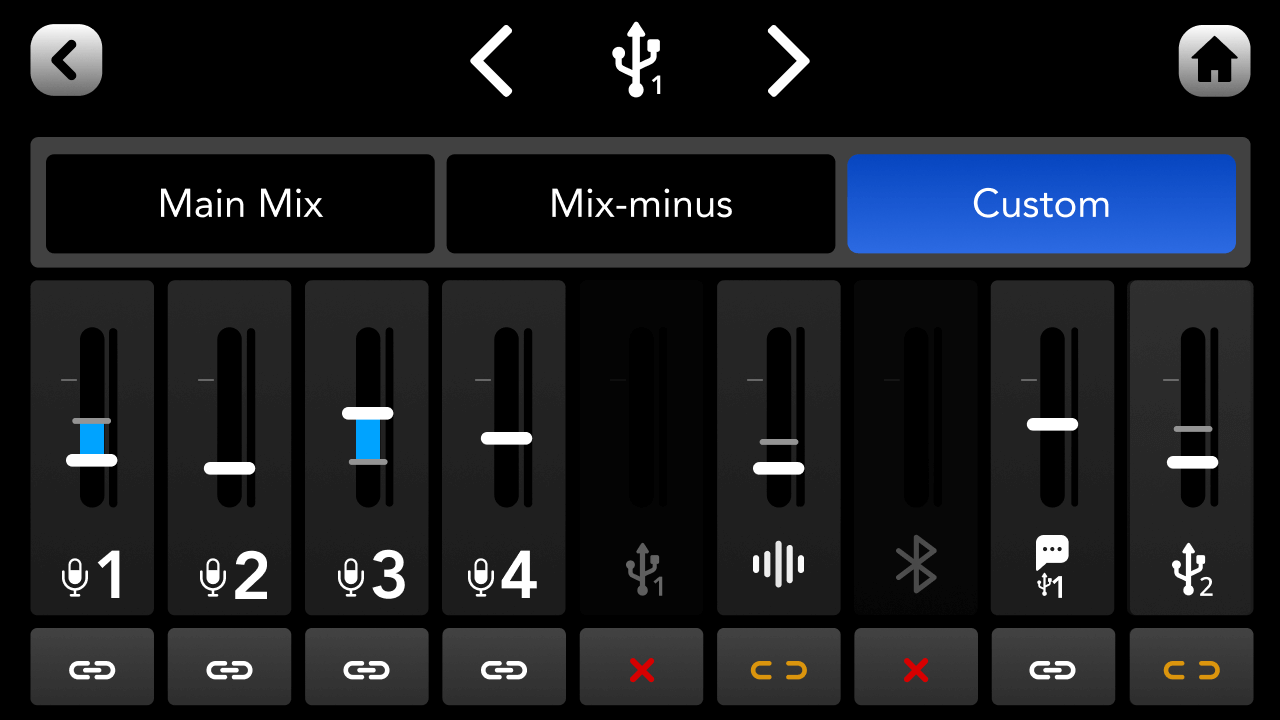
To create a sub-mix for any outputs, tap the settings cog in the top-right corner of the main mixer screen and then navigate to ‘Outputs’ > ‘Routing’. Here you will see a menu with each of your ten different audio outputs. Tap the output you want to configure and select ‘Custom’ at the top of the screen.
Levels: Tap on one of the sliders and use the rotary encoder to adjust the level of an individual input channel up or down for the selected output sub-mix.
Links: The ‘link’ button below each fader allows you to tie the volume level for that channel to the main mix level, which are set by the physical faders and virtual faders on the main mixer screen. By default, all channels are linked (indicated by the white link icon with the dash in the centre), but tapping this button unlinks the fader in the sub-mix (yellow icon with no dash in centre).
When linked, adjusting individual levels in a sub-mix will create offset levels that are relative to the main mix fader, indicated by the blue bar on the fader. This means that any fader adjustments on the main mix will increase or decrease the sub-mix level but with this offset maintained. When unlinked, fader levels in a sub-mix will not change when the associated channel is adjusted in the main mix.
Mutes: The third option on the link button (a red ‘x’) mutes the associated channel in this sub-mix.
Note
When you select the mute setting on a channel in a sub-mix, this will clear the custom level you had set on that input’s fader and return it to the level set by the main mix).
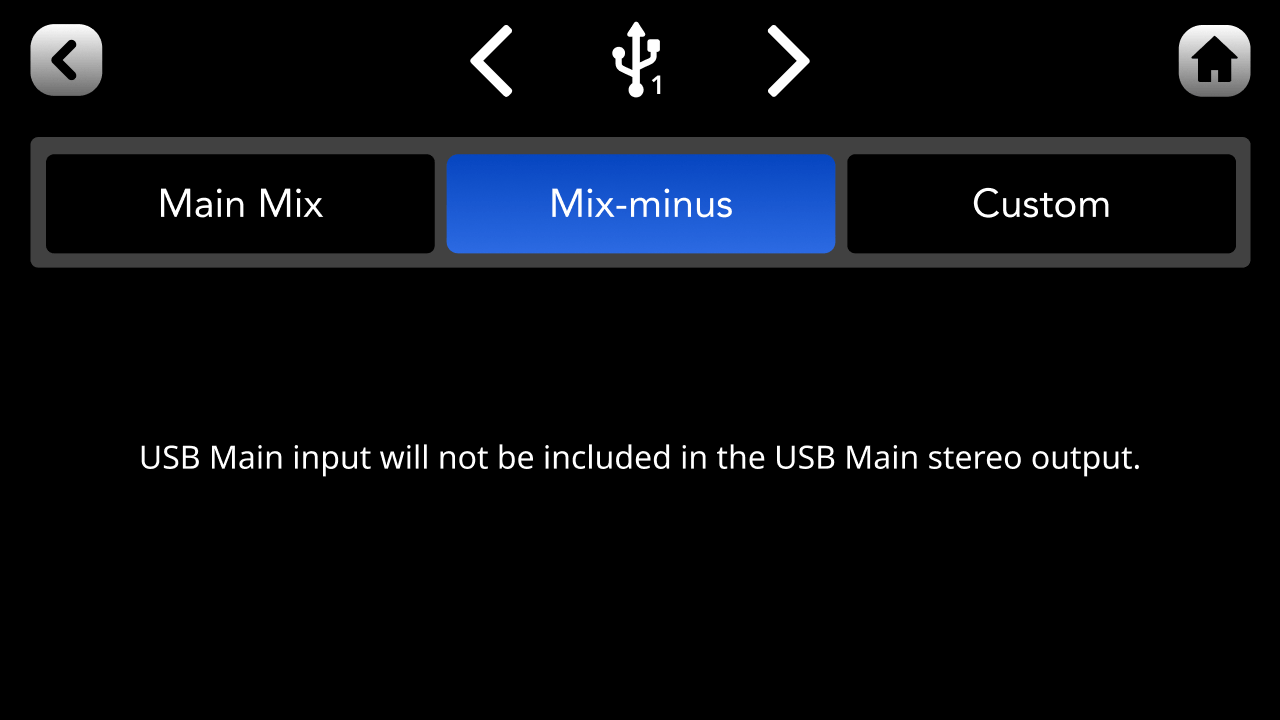
Main Mix and Mix-Minus
Along with the ‘Custom’ setting, on some outputs you can also select ‘Main Mix’ (which simply uses the levels set by the physical and virtual faders on the main mixer) or ‘Mix-Minus’ for the output mix. For the Bluetooth and USB outputs, the ‘Mix-Minus’ option uses the same settings as the main mix but excludes the selected channel’s input (USB 1’s input on USB 1's output channel, for instance) in order to avoid feedback or echo. See our guides on USB connections and connecting online callers for more information on mix-minus.