VideoMicro II
The VideoMicro II is an ultra-compact, lightweight and easy-to-use shotgun microphone that will instantly elevate the audio quality of your camera or smartphone.
Discover everything you need to know about using your VideoMicro II here.
Features
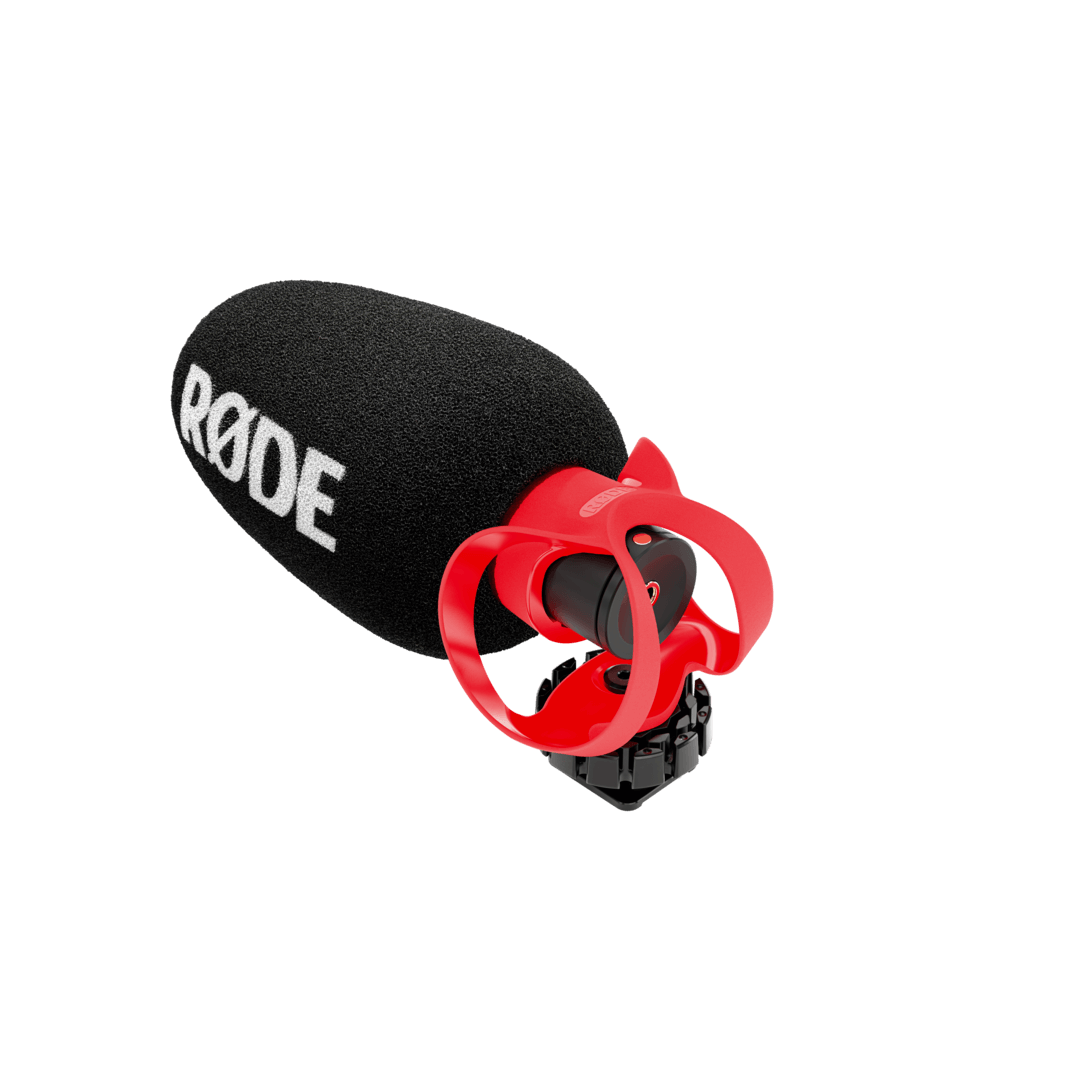
1Annular Line Tube
2HELIX™️ Isolation Mount
33.5mm TRS Output
4Cable Management Slots
5Cold Shoe Mount with 3/8” Thread
6Deluxe Foam Windshield
7Deluxe Furry Windshield
8SC13 3.5mm TRS to TRS Cable
9SC7 3.5mm TRS to TRRS Cable
Size and Weight
Measuring just 80mm in length and weighing in at 39g (including the shock mount), the VideoMicro II is perfect for use with compact cameras, smartphones and action cam rigs, and can comfortably fit in your camera kit or backpack.
Acoustic Design and Pickup Pattern
The VideoMicro II features a highly directional supercardioid polar pattern. This means that it picks up sound clearly from in front of the microphone while rejecting sounds from the sides and rear. When recording, be sure to aim the VideoMicro II directly at the subject you want to capture.
Using the HELIX™ Isolation Mount
The VideoMicro II comes with our innovative HELIX™ isolation mount, which ensures the highest level of protection from knocks, bumps and handling noise when using the microphone. Insert the microphone into the circular cradle, sliding the back end in first and ensuring that the gold dot faces upwards. There are two white arrow markers on the top of the microphone that indicate how far you should push the microphone into the mount. The lip of the cradle should align with these two marks to ensure the mount is not obstructing any perforations along the microphone body.
Cable Management and Mounting
The HELIX mount has an integrated cold shoe mount that you can slot into your camera’s cold shoe. Simply turn the ring clockwise to secure it in place. The base of the HELIX mount also features a 3/8” thread so you can attach the VideoMicro II to boompoles and other stands like the Tripod 2.
The mount also features handy cable management slots located on the tightening ring that can be used to keep your setup neat and tidy. If you are using the included SC13 flat TRS to TRS cable, insert it into the slots sideways from the top. If you are using a standard rounded cable like the included SC7, push it into the slot from the sides.
Connecting to a Camera
The VideoMicro II features a 3.5mm TRS output for connecting to cameras and other devices with a TRS input. This is used to transfer the audio signal and also to power the microphone. Simply connect this output to your camera’s microphone input using the included SC13 TRS to TRS (flat) cable and turn on your camera – this will automatically turn on your VideoMicro II.

Pro Tip
When using the VideoMicro II with a camera, we strongly recommend switching off any automatic gain settings or audio processing that may be enabled by default as this is not required when using a high-quality microphone like the VideoMicro II. Instead, use your camera’s gain control to adjust your levels as required. The VideoMicro II is a sensitive microphone, so you may need to set your camera gain level quite low. Keep an eye on the level meter on your camera. If it is turning red while recording, turn your audio level down.
Connecting to a Smartphone or Tablet
To connect your VideoMicro II to a smartphone or tablet, you’ll need to use the included SC7 TRS to TRRS (coiled) cable, as most mobile devices have a TRRS input. Connect the black end of the cable (with two rings on the plug) into the microphone, then connect the grey end of the cable (with three rings on the plug) into your device.
If your phone doesn’t have a 3.5mm headphone port, you'll also need to use the 3.5mm-to-Lightning adaptor or 3.5mm-to-USB-C adaptor that came with your device. Alternatively, you could use a compact audio interface like the AI-Micro. Once connected, your device should automatically detect the VideoMicro II and set it as the default microphone.
Learn more about how to use your VideoMicro II with an iPhone or Android smartphone.

Pro Tip
If you need an easy-to-use app for recording high-quality audio, we recommend using RØDE Reporter.
Using the Windshields
The VideoMicro II comes with two deluxe windshields to help mitigate unwanted wind noise when recording. If you are recording indoors and not moving around or not speaking with your mouth close to the microphone, you do not need to use a windshield. If you are moving around while recording indoors or recording outdoors when there is no wind, you should use the foam windshield. If you are recording outdoors and there is some wind present, use the furry windshield.
Simply slip the windshield onto the microphone body, ensuring it is pushed all the way down to the isolation mount.