Recording and Streaming
Using External Drives
The RØDECaster Video Core supports external drives and other USB mass storage devices connected to USB 3, allowing you to record high-quality video and audio directly to your drive.
Your drive will need to be in the ExFat storage format. If it isn’t, back up any files from your drive onto your computer, connect the drive to your RØDECaster Video Core, and then navigate to Device Configuration > System > Storage > USB Storage within the RØDECaster App and click "Erase”.
Note
We recommend that you use an SSD with write speeds that support simultaneous audio and video recording.
Isolated (ISO) Video Recording
The RØDECaster Video Core supports Isolated Recording (ISO), which allows you to record each of the 4 video inputs separately. This feature is perfect if you would like to live switch your show and make adjustments later, whether it’s tweaking switch timing or applying different edits to each of your cameras’ footage.
To enable ISO recording, open the RØDECaster App and navigate to Device Configuration > Video > Recording and toggle the ISO setting on.
Program Quality
You can choose to record your Program feed in either “Normal” or “High” quality, with different bit-rates suiting different uses. If you plan to upload directly to YouTube or other platforms, or just want a smaller file size, then the Normal setting is more than enough. If you plan on doing more editing with your program recording, then the High mode will give you maximum quality for maximum flexibility – this setting records in the same high bit-rate as your ISO recordings.
What is EDL Export?
EDL Export is a feature for the RØDECaster Video range that allows you to generate an Edit Decision List (EDL) along with your recorded production. You can use this file to automatically recreate your entire production in an NLE (Non-Linear Editor) such as Da Vinci Resolve, automatically building your project with your switch timing, scene structure, media and overlays – this can be a tremendous timesaver in post-production.
Note
It’s important to note that your stream key is unique to your account, so treat it like a password and don’t share it around.
How to Use EDL Export
- Before recording your show, connect your RØDECaster Video to the RØDECaster App, navigate to Device Configuration > Video > Recording and ensure both “’ISO” and “EDL Export” are enabled
- Once your show has been recorded, safely eject your SSD (or other USB storage device) and connect it to your computer
- Copy across your project folder to your desktop, as well as the media folder, making sure to keep your folders in the same relative structure
- Open Da Vinci Resolve, create a new project, and then navigate to File > Import > Timeline and select the “timeline.otio” file in your copied project folder
Note
While RØDECaster Sync is in Beta, EDL Export will handle all video, media, scenes, overlays and transitions, but you will have to manually import your audio files onto your Resolve timeline.
Multitrack Audio Recording
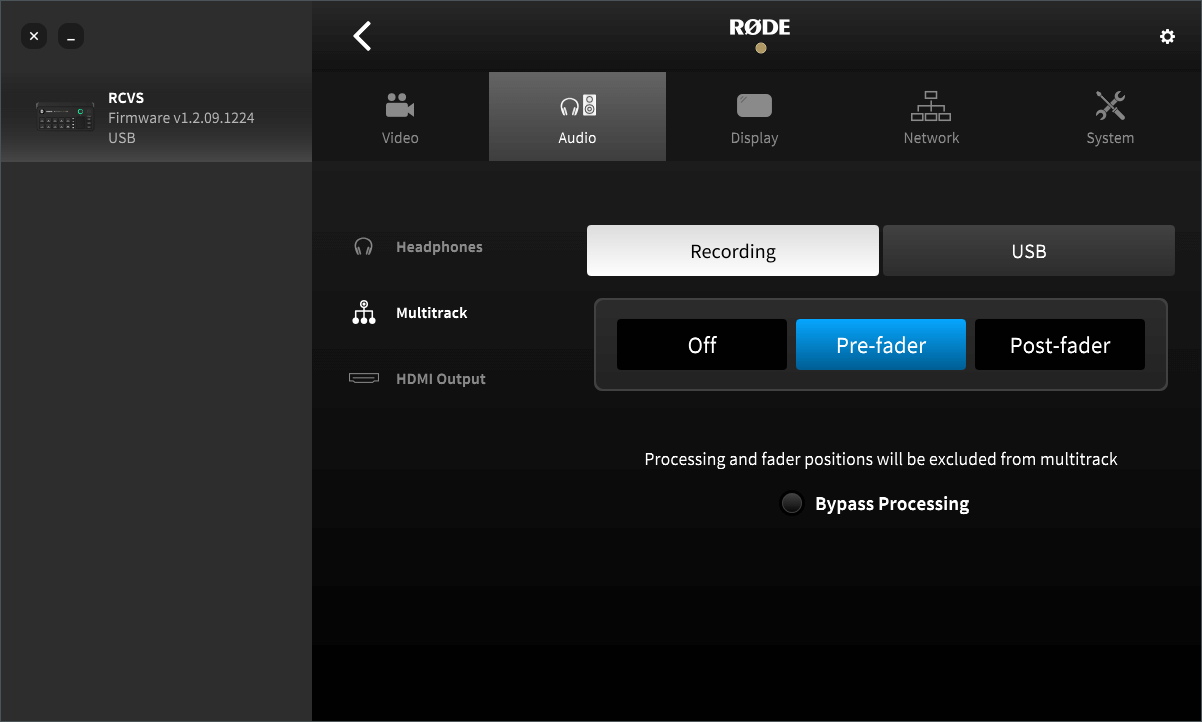
The RØDECaster Video Core is able to record your audio either as a single stereo audio file or as individual tracks for each input when multitrack mode is enabled. Access this setting in the RØDECaster App by navigating to Device Configuration > Audio > Multitrack > Recording.
Toggling Multitrack on allows you to select “Pre-fader", “Bypass DSP” or “Post-fader".
Pre-Fader: The position of the audio channel’s virtual fader will have no effect on the audio being recorded (i.e. even if faded down, it will still be recorded at unity gain).
Bypass Processing: Identical to “Pre-Fader”, except none of the processing and effects will be applied to your recorded audio.
Post-Fader: The virtual fader’s position will affect the recorded audio – it will record quieter or louder depending on the fader’s position.
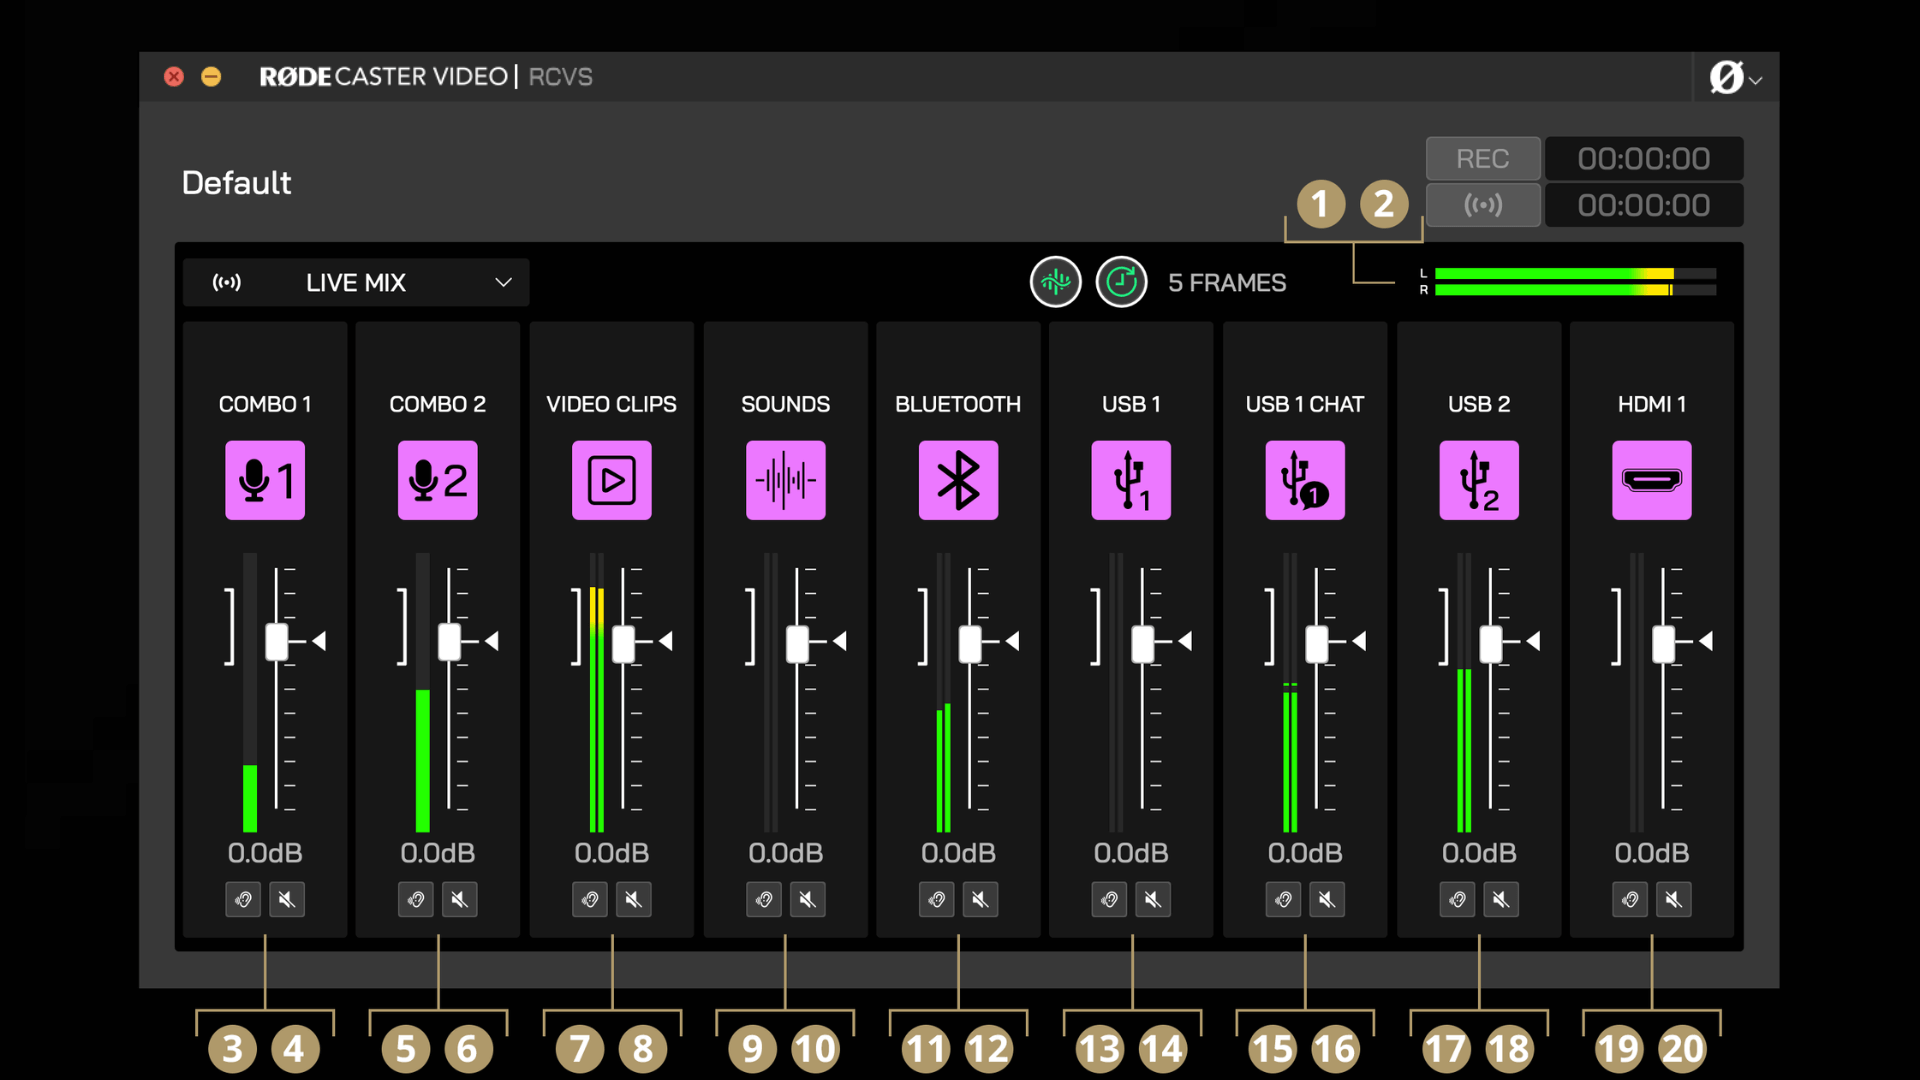
Multitrack Recording via USB
When multitrack mode has been enabled for USB, there will be a total 20 channels available to use (10 stereo channels).
The main stereo mix will be on inputs 1 and 2, with the remaining channels from 3 to 20 reflecting the current order and layout found in the audio mixer.
1Stereo Mix L
2Stereo Mix R
3Channel 1 L
4Channel 1 R
5Channel 2 L
6Channel 2 R
7Channel 3 L
8Channel 3 R
9Channel 4 L
10Channel 4 R
11Channel 5 L
12Channel 5 R
13Channel 6 L
14Channel 6 R
15Channel 7 L
16Channel 7 R
17Channel 8 L
18Channel 8 R
19Channel 9 L
20Channel 9 R

Commencing Recording and Streaming
In the top-right corner of the RØDECaster App, you will see the Record and Stream buttons, each next to a timer. This is how you start and stop recording and streaming, as well as check how much time has elapsed in your recording or live stream.
Before recording, ensure you have a compatible USB storage device connected to USB 3, the device is formatted to the correct exFAT format, and the device has free space. Before you can start streaming, you will need to set up a streaming profile (see below).
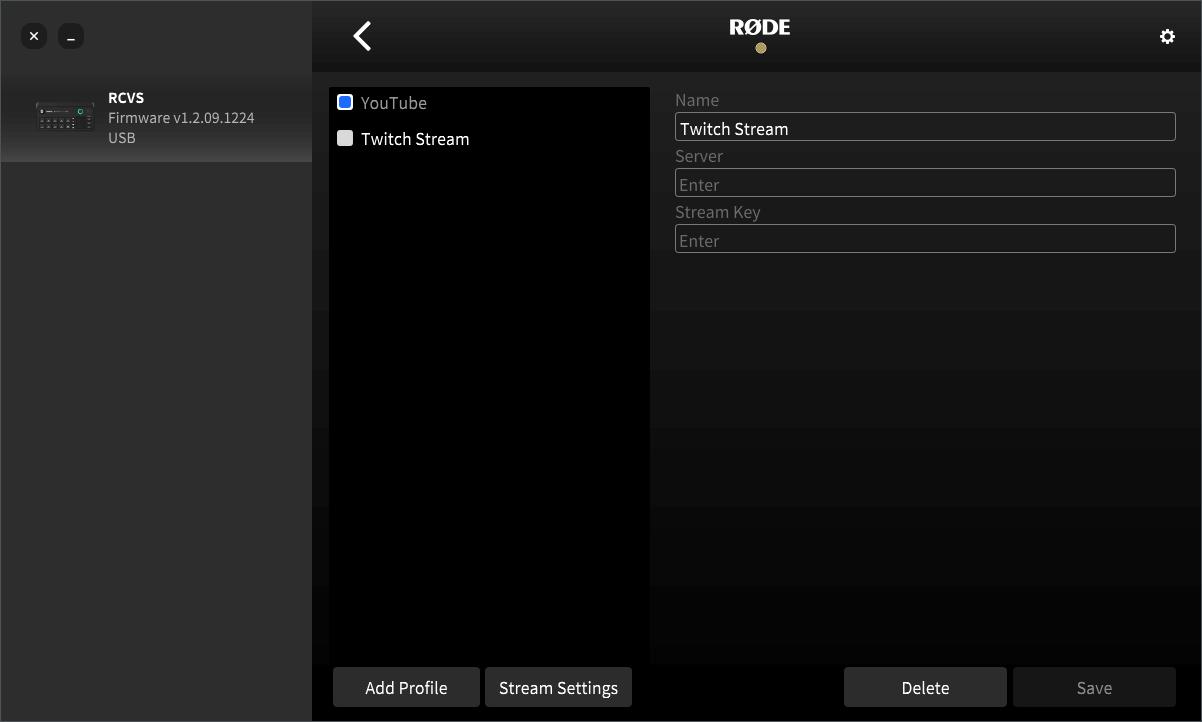
Creating a Stream Profile
With your RØDECaster Video Core on the same network as your computer, open the RØDECaster App, select your device from the left-hand side, and then open the Stream Profiles menu. Here you can create, enable, edit and delete your stream profiles as well as adjust their quality settings.
To start, click “Add Profile” and give it a name. Next, enter the server and stream key from your streaming platform then hit Save. If you don't have your server and stream key info handy, see below for a quick guide on how to find these details with a few popular streaming platforms.
Note
It’s important to note that your stream key is unique to your account, so treat it like a password and don’t share it around.
Server and Stream Key
YouTube: Sign into your account and go to the YouTube Studio dashboard. Click “Create” and then “Go Live” from the dropdown in the top-right of the page. On the Stream page, you’ll see a “Stream Settings” tab. Here, you can see your Stream Key and a Stream URL field that you can copy and paste into the RØDECaster App.
Twitch: Sign into your account and go to “Settings” and then “Stream” in the “Creator Dashboard” menu on the left. Here you’ll find your stream key, which you can copy and paste into the RØDECaster App. To find the best server address for you, visit Twitch’s “Ingest Recommendation” web page.
Facebook: Visit the “Facebook Live Producer” page and log in, then select the destination you want to stream to from the sidebar on the left. Click “Stream Setup” and you will find your Stream Key and Server URL, which you can copy and paste into the RØDECaster App. It’s worth noting that Facebook Live will reset your Stream Key automatically if you log out, so if you’d like to keep using the same key, select “Persistent Stream Key” in the settings.