Getting Started
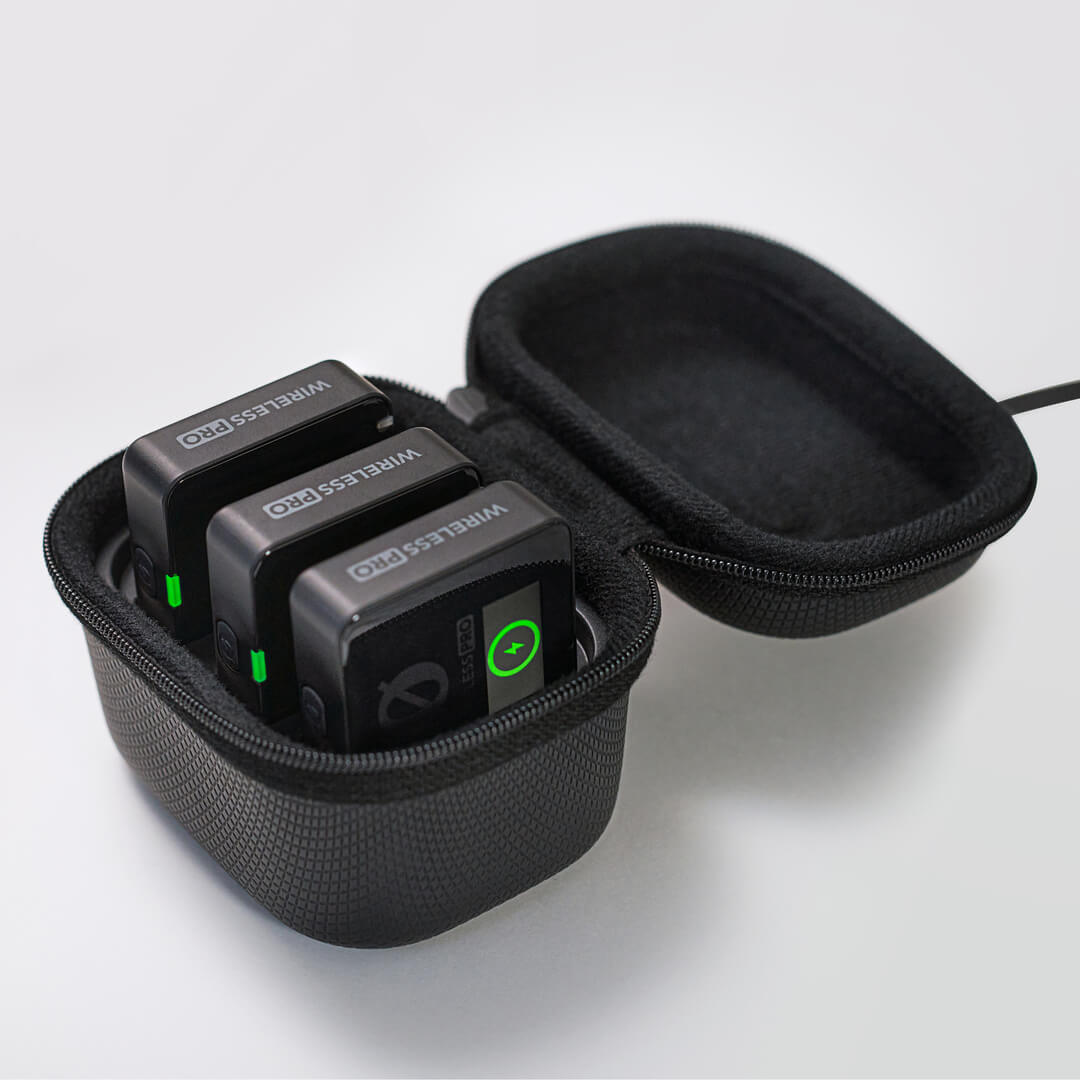
The Wireless PRO comes with everything you need to record broadcast-grade wireless audio, including a smart charging case, pair of lavalier microphones, windshields, magnetic clips and all necessary cables for plugging into your devices. The system itself consists of a pair of transmitters and a single receiver. Each transmitter picks up audio via its built-in microphone, or an external mic such as a lavalier, which can be connected via the 3.5mm input. This audio is transmitted wirelessly to the receiver unit, which connects to your camera, smartphone, computer or other recording device either via USB or its 3.5mm output. Audio can also be recorded directly to the transmitters, giving you maximum flexibility.
Turning on Your Wireless PRO
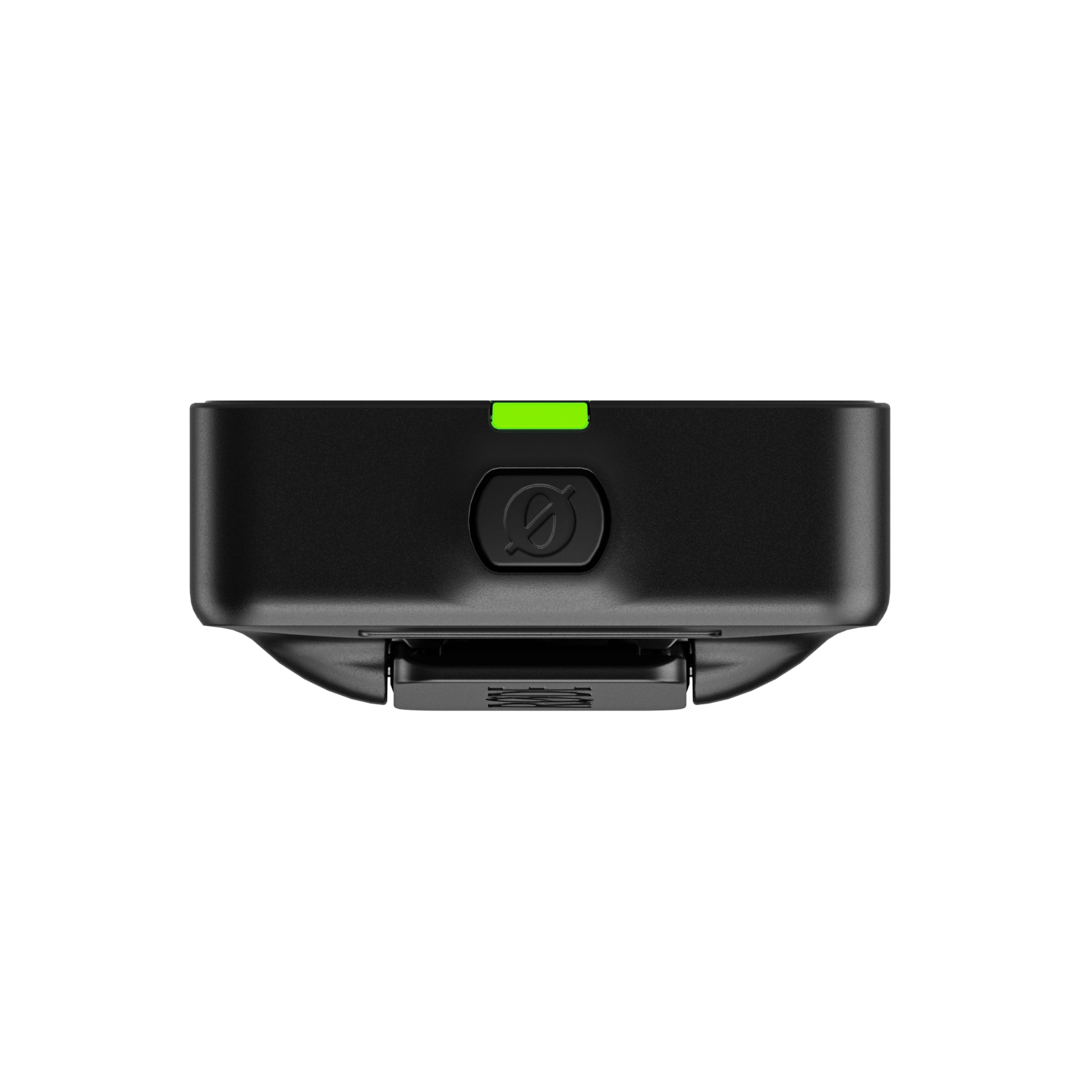
Each transmitter and receiver unit features a ‘Ø’ button that functions as the power button as well as performing various other functions. Simply long-press this button to power on or power off your units. By default, the Wireless PRO transmitters will automatically power down after 15 minutes if they are unpaired and not recording, but this can be disabled via RØDE Central with the ‘Timeout’ toggle. The receiver does not power down automatically.
Understanding and Navigating the Display
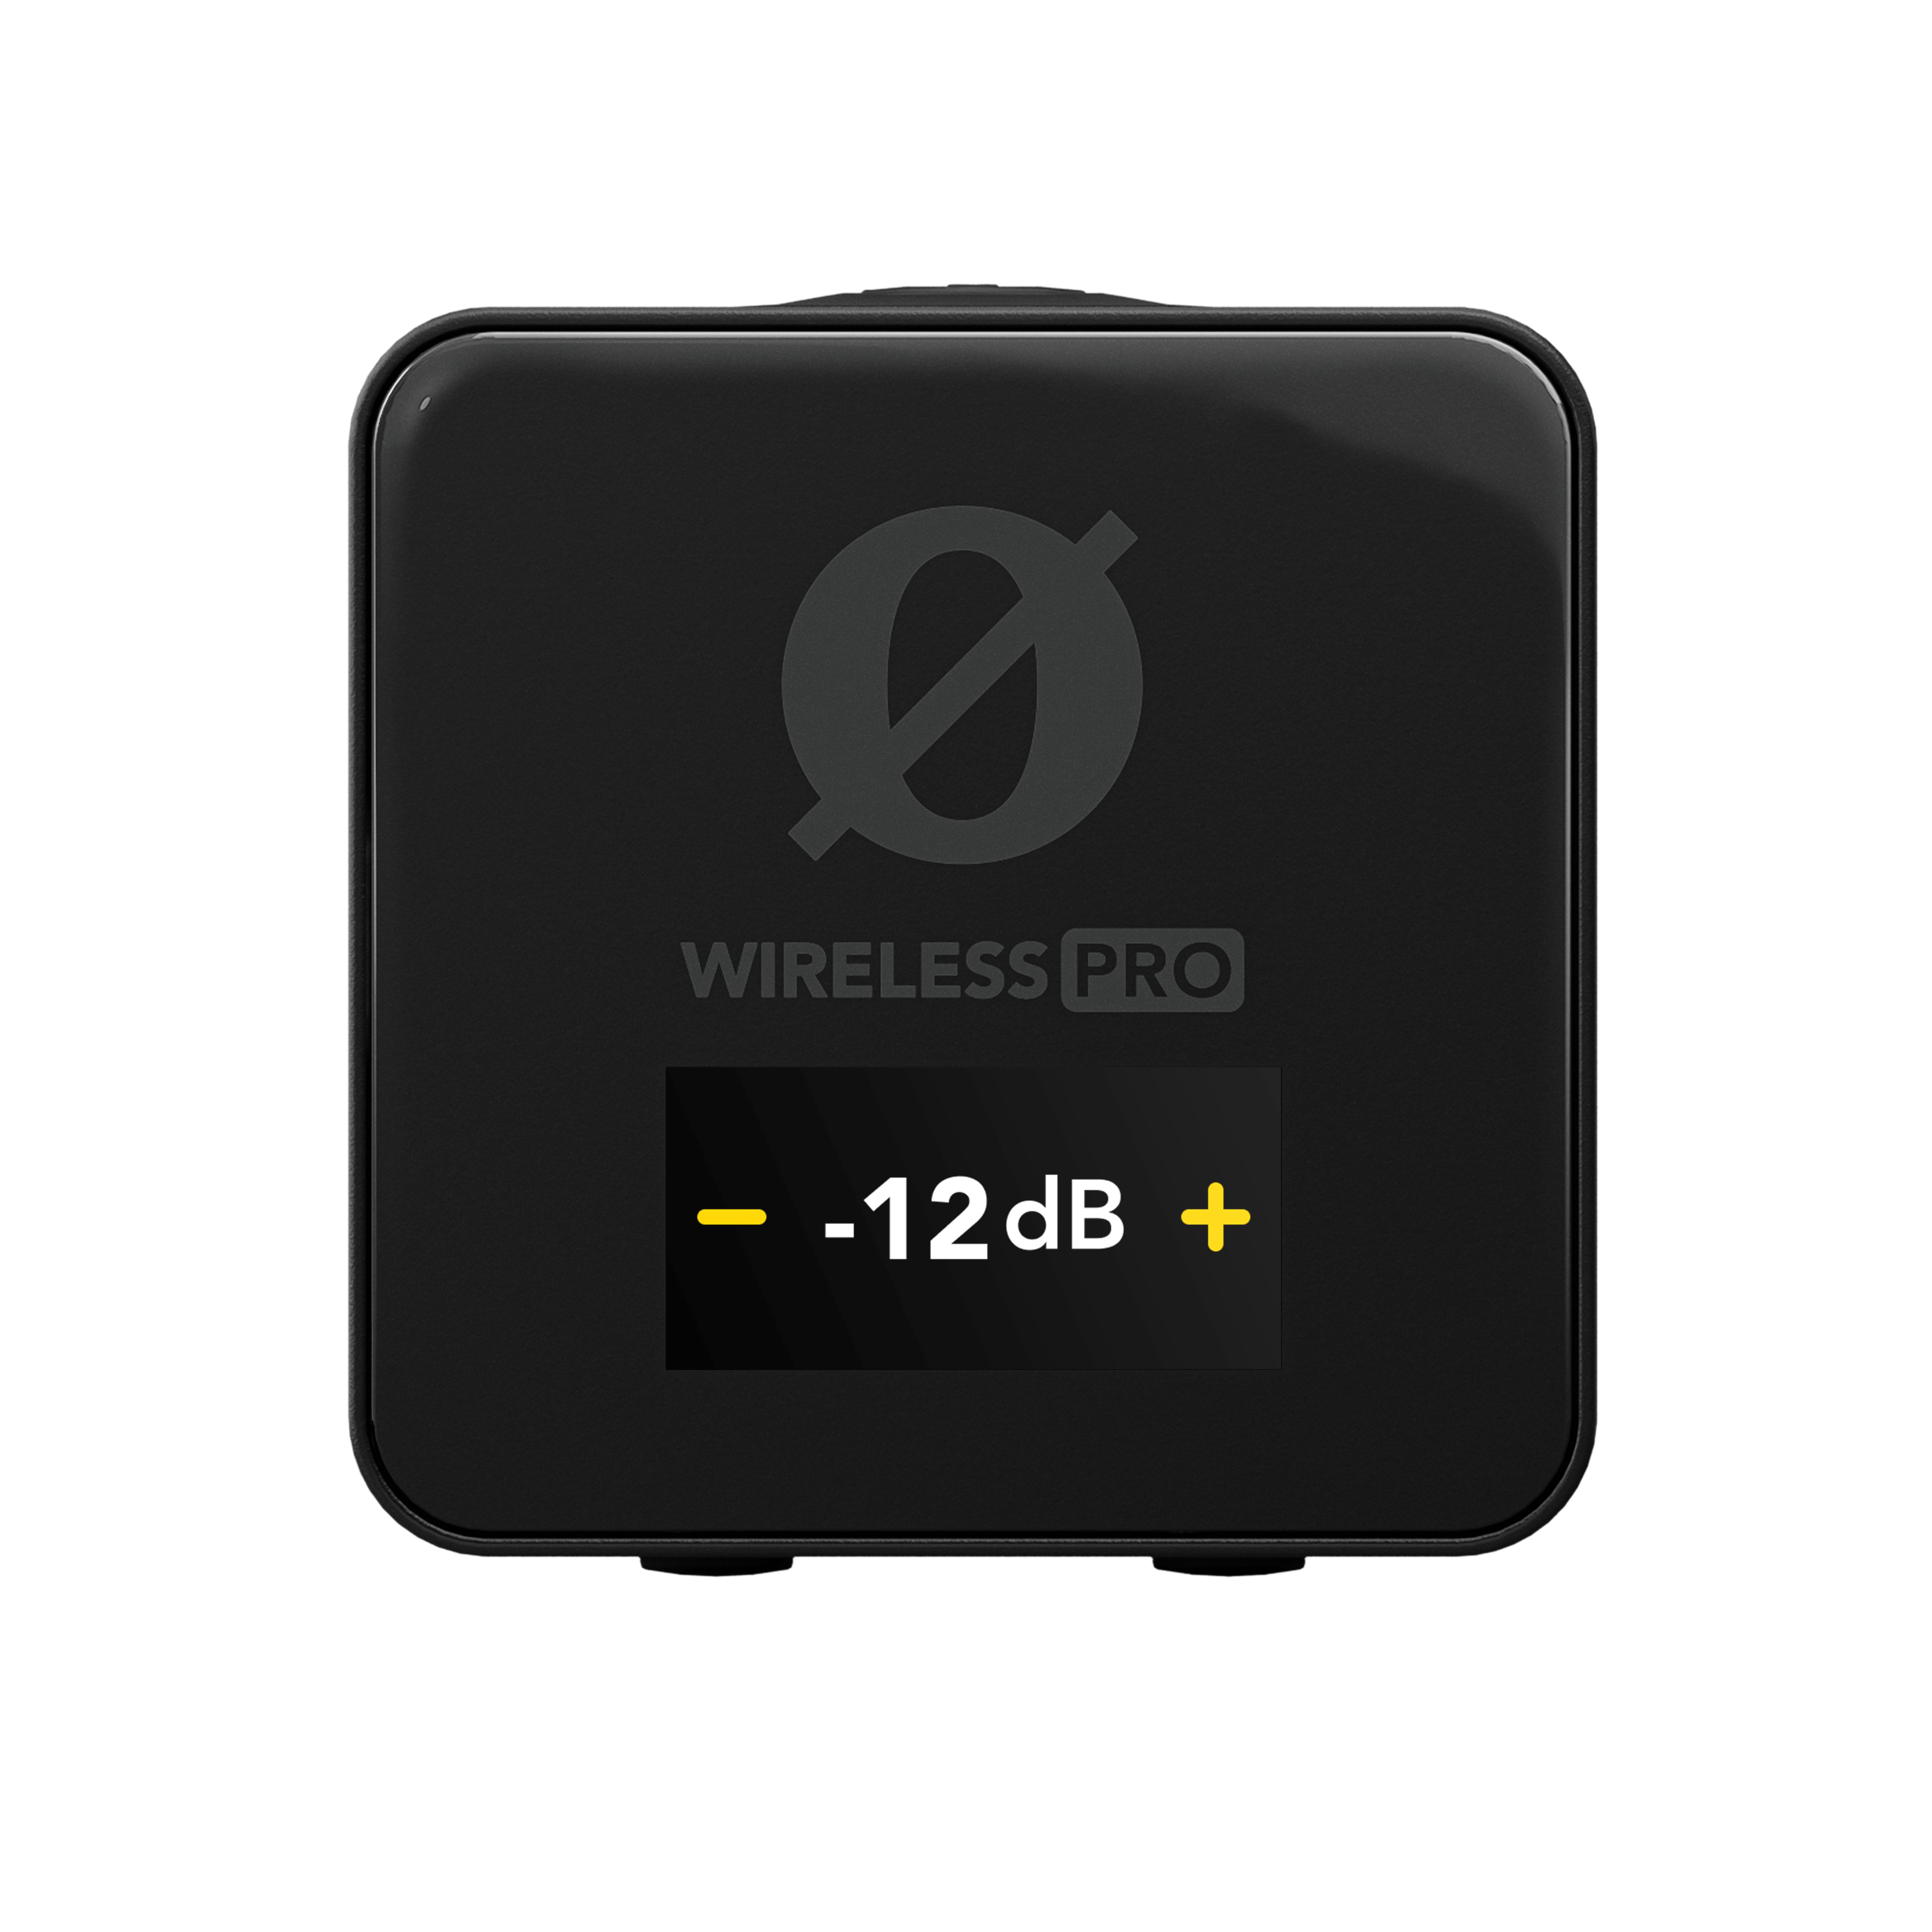
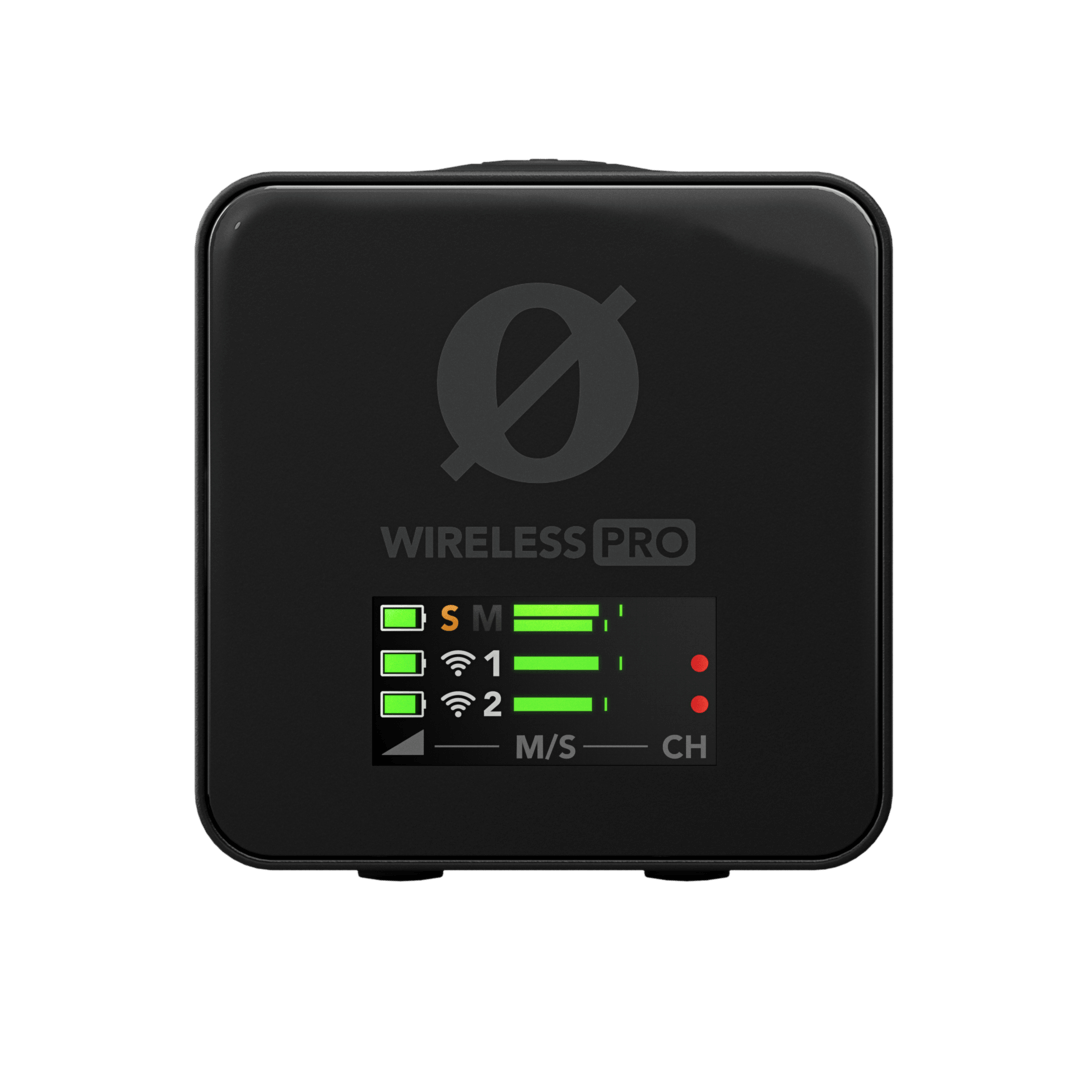
The Wireless PRO receiver features an LCD display that shows you critical information about your audio levels, connectivity, recording status and more. It also allows you to navigate the system’s various settings. To navigate these options, you use the Left and Right Navigation buttons on the receiver, either with a short-press (less than 1 second) or long-press (1 second or more).
These three buttons will perform different functions depending on which screen you are currently on, but they correspond to the on-screen symbols and settings that are physically closest to them for quick identification. For instance, when in the output gain adjustment screen, the Left Navigation button lowers the gain level as it is closest to the on-screen ‘–’ symbol, while the Right Navigation button raises it as it is closest to the ‘+’ symbol.
Pairing Your Wireless PRO
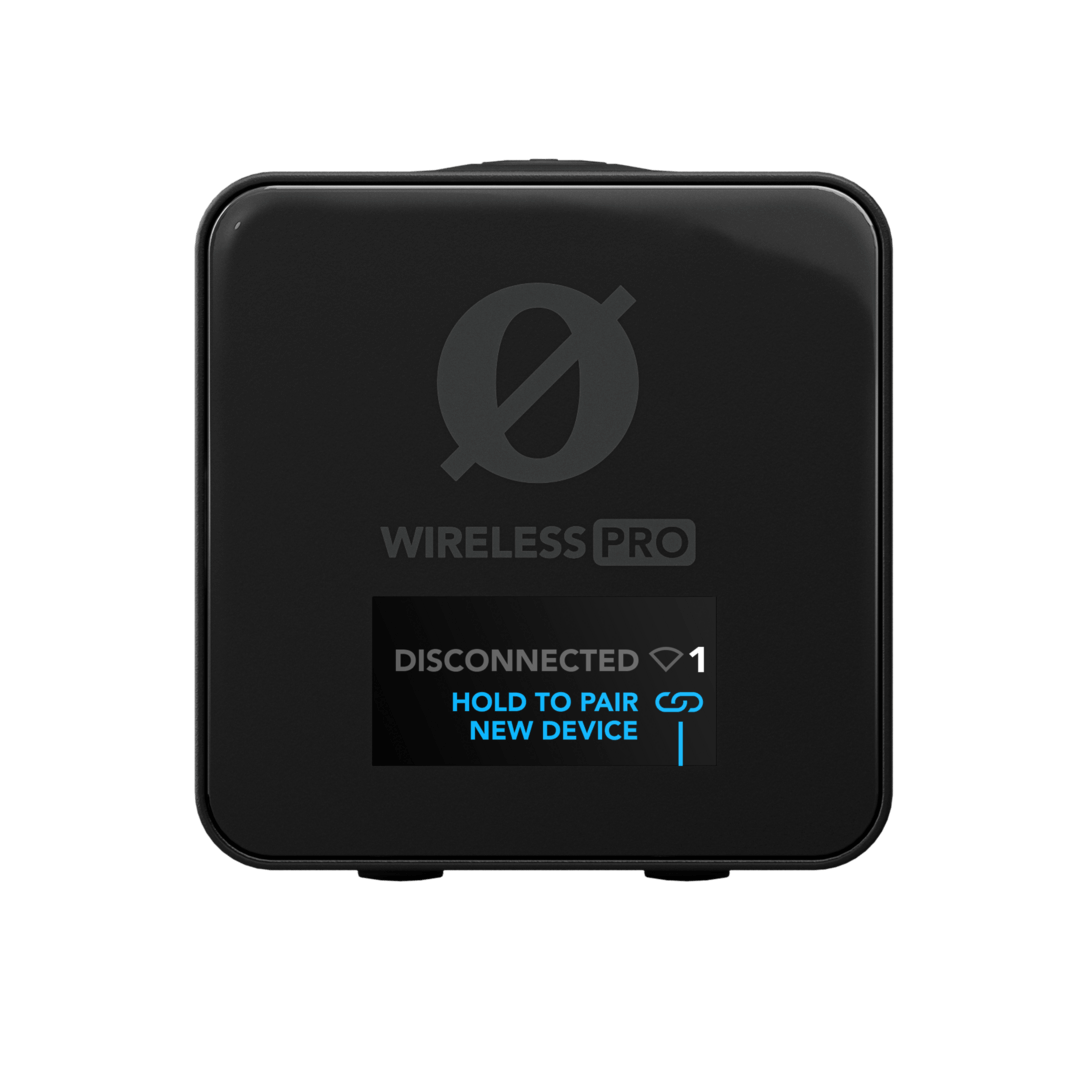
When you first power on your Wireless PRO, the transmitters and receiver will automatically pair. You can also manually pair them if required.
Manual Pairing
With all your units powered on, short-press the Right Navigation button on the receiver to cycle to the first transmitter screen and then long-press the Right Navigation button to enter pairing mode – the display will read “PAIR TX NOW”. Short-press the Ø button on one of your transmitters to enter pairing mode – the pairing LED on the transmitter will start quickly flashing blue until it turns solid blue when successfully paired. Navigate to the next transmitter page on the receiver with a short-press of the Right Navigation button and repeat the process for your second transmitter.
To unpair a transmitter, short-press the Right Navigation button on the receiver to cycle to the desired transmitter screen and then long-press the Right Navigation button (you will need to manually re-pair the transmitter after doing this).
Pairing in RØDE Central
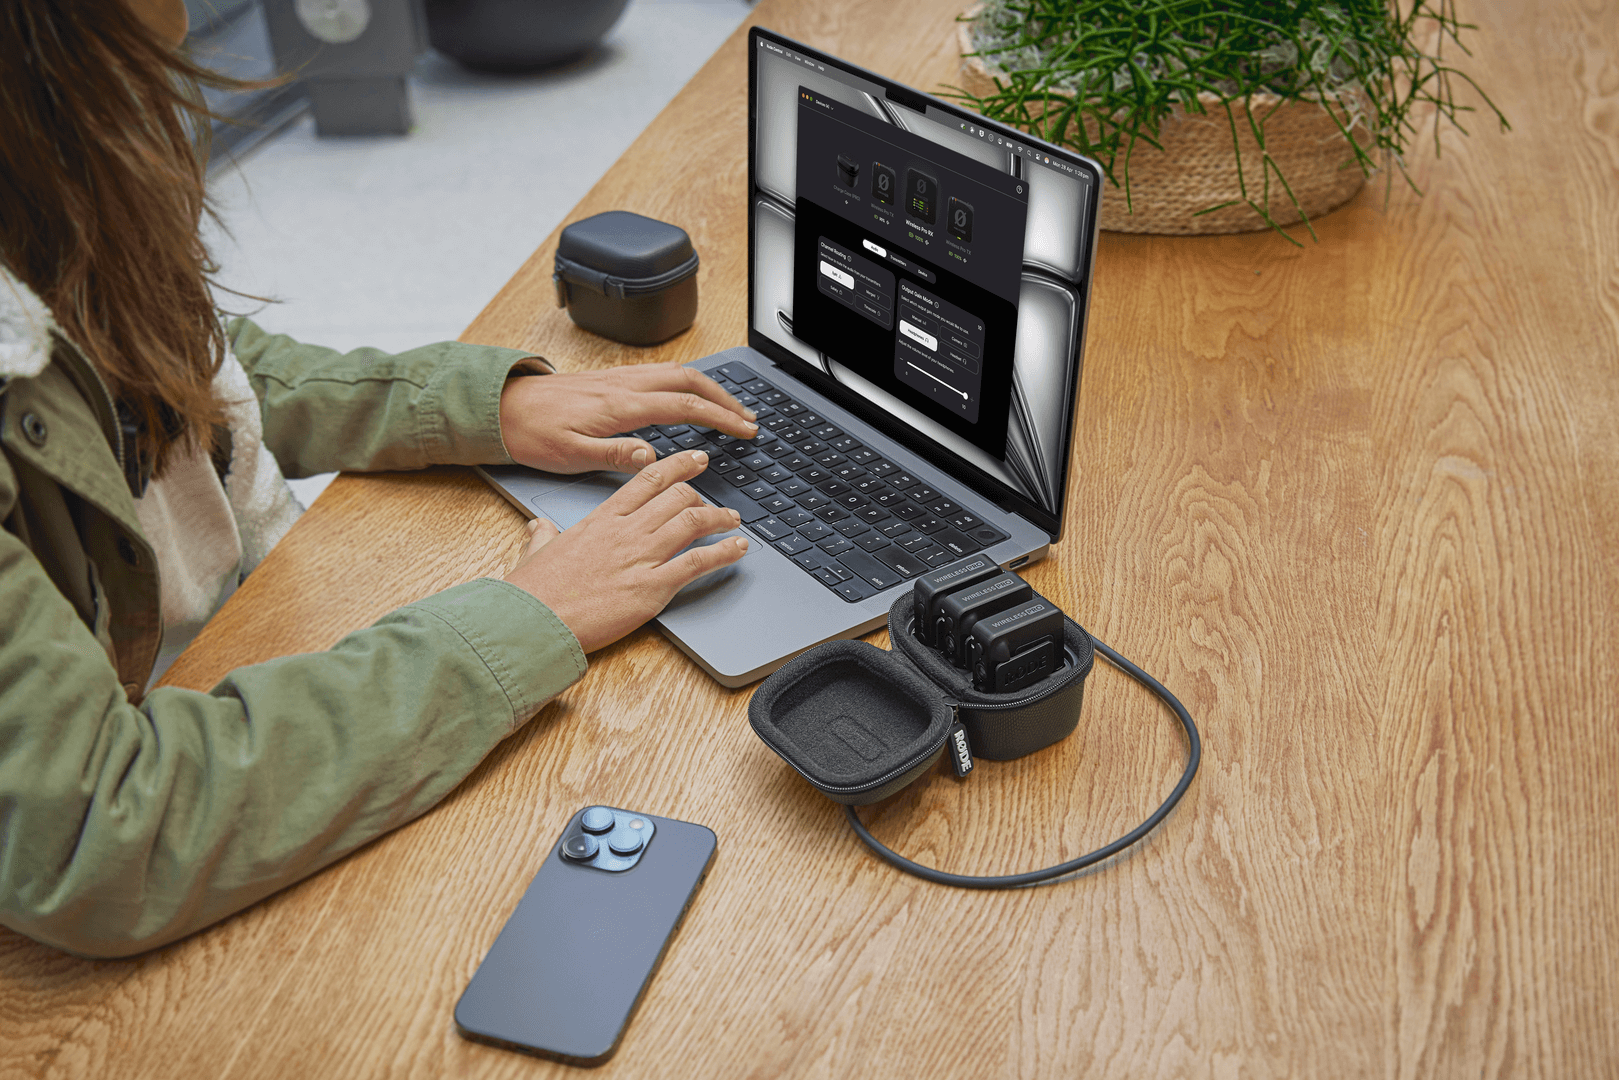
With your Wireless PRO receiver connected to a computer running RØDE Central (learn more about RØDE Central here), you can see if transmitters are currently paired to your receiver in the top-right section of the app. If a transmitter isn’t paired, turn it on, short-press its Ø button, and then click ‘pair’ in the app. Here, you can also unpair your transmitters.
Battery and Charging
The receiver and transmitters each contain a rechargeable lithium-ion battery capable of up to seven (7) hours of use when fully charged. You can charge each transmitter and receiver individually via the unit’s USB-C port using computer or other USB charging device, but it’s much more convenient to use the included smart charging case.
Charge Case
The included charge case can store more than two full recharges for the whole system (two transmitters and one receiver) for extended use. To recharge your Wireless PRO, simply place all three units in the case, ensuring the receiver is placed in the slot marked ‘RX’ and that the USB-C port for each unit lines up with the USB-C connections in the case.
When the charging case isn’t connected to power, its LED will be solid blue when the case is charging any of the units placed inside of it. Pressing the button next to the LED will display the internal battery’s status. This will be solid green when it has a healthy charge, amber when low, red when very low, and flashing red when critical. If the charging case runs out of battery, you can top it up while simultaneously charging your mounted transmitters and receivers by connecting the case to a power source via USB-C.
Note
When the charge case is connected to certain computers (including some Intel-based MacBooks) you may see an error message that says “USB Accessories Disabled. Unplug the accessory using too much power to re-enable USB devices”. This is because these computers are not compatible with simultaneous high-speed data transfer and fast charging. If you see this error, use the standard SC22 USB-C cable instead of the SuperSpeed SC34 cable.
Battery Level Indicators
The display on the Wireless PRO receiver will show you the battery level of each transmitter as well as the receiver itself, on the left of the home screen.
Each transmitter features a dedicated battery level LED indicator. When the battery is getting low, this LED will change from green to amber, and from amber to red when it is very low. The LED will flash red when the battery level is critical. When charging, this LED will flash green until it turns solid green when fully charged.
Attaching or Mounting Your Wireless PRO
Both the Wireless PRO's transmitters and receiver feature an integrated clip. These can be used to attach the transmitter units to clothing and other items, and slot the receiver into the cold shoe mount of a camera or similar device to firmly secure it in place.
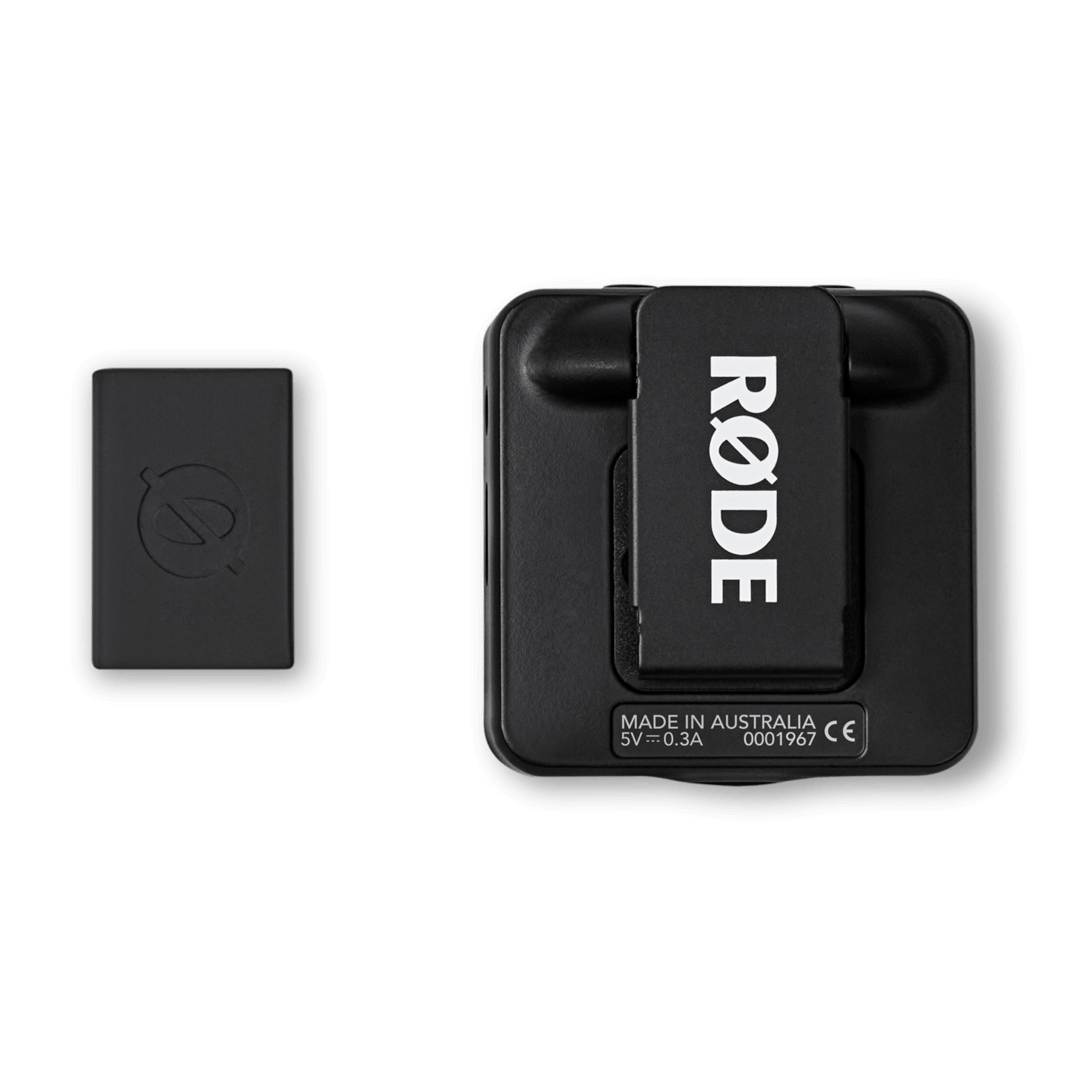
MagClip GO
The Wireless PRO comes with two MagClip GO accessories included in the box, one for each transmitter. You can use this attachment for more flexibility when attaching a Wireless PRO transmitter to clothing. Simply slide the MagClip GO clip (the larger component) over the Wireless PRO clip to attach it, place the transmitter where you wish on clothing, and use the magnet (smaller component) on the other side of the clothing to secure it in place. You can also use the MagClip GO to attach the receiver unit to magnetic surfaces, such as MagSafe-equipped iPhones.
Connecting an External Microphone
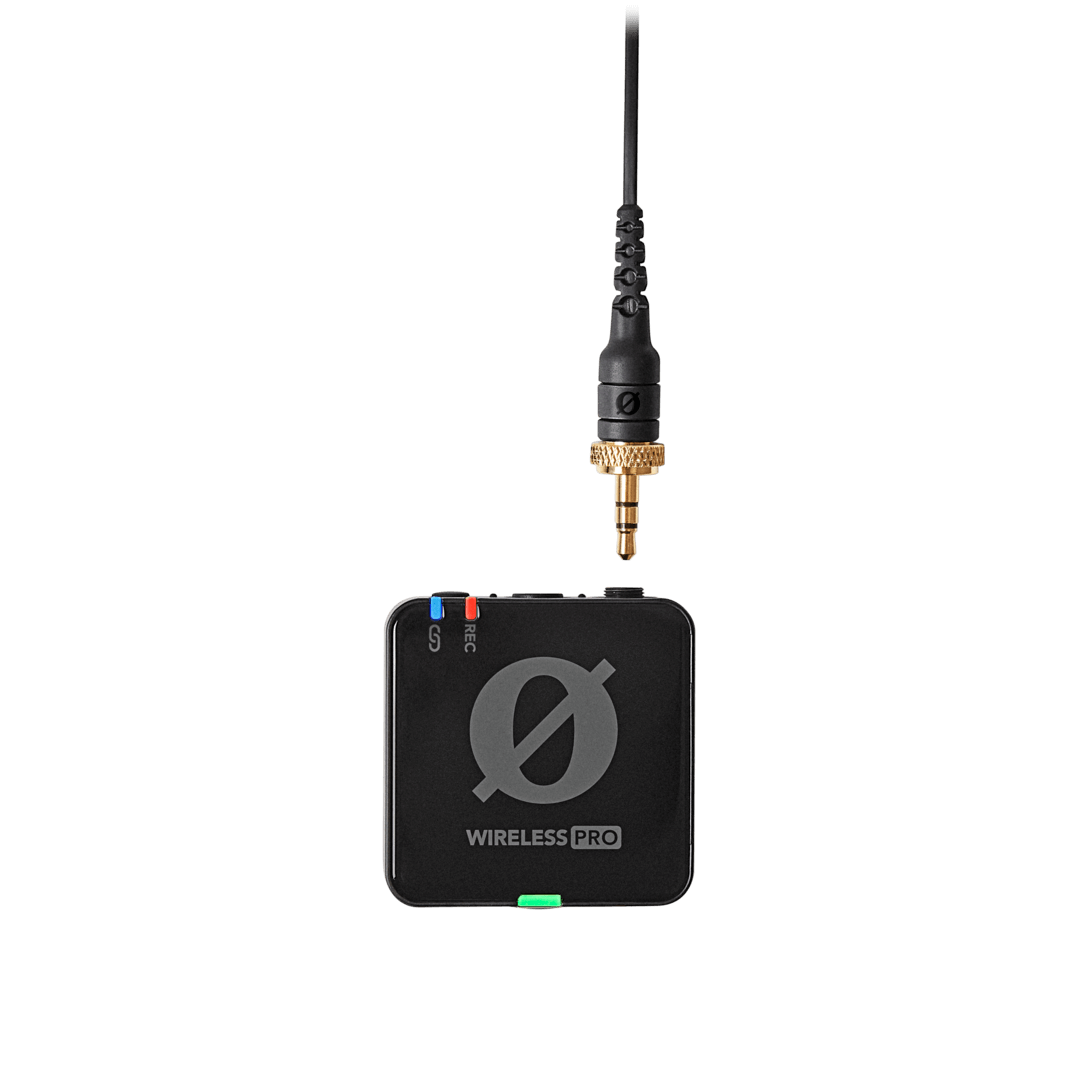
Alongside the built-in microphones, the Wireless PRO transmitters also feature 3.5mm inputs for connecting external microphones such as the included Lavalier II microphones and RØDE VideoMics. When you connect an external microphone, it will replace the built-in mic as the input source.
Locking Connectors
The 3.5mm inputs on the two transmitters feature locking threads for microphones that feature locking connectors, such as the included Lavalier II. This allows you to securely attach your microphone so it can’t be accidentally unplugged while in use. Simply insert the microphone’s 3.5mm jack then twist the golden locking ring clockwise to secure the cable in place. Reverse the process to disconnect.
VideoMics and Other 3.5mm Audio Sources
You can connect any microphone or audio source that features a 3.5mm TRS output to the Wireless PRO, including on-camera shotgun microphones such as the VideoMic NTG. Plug-in power will be provided if needed.
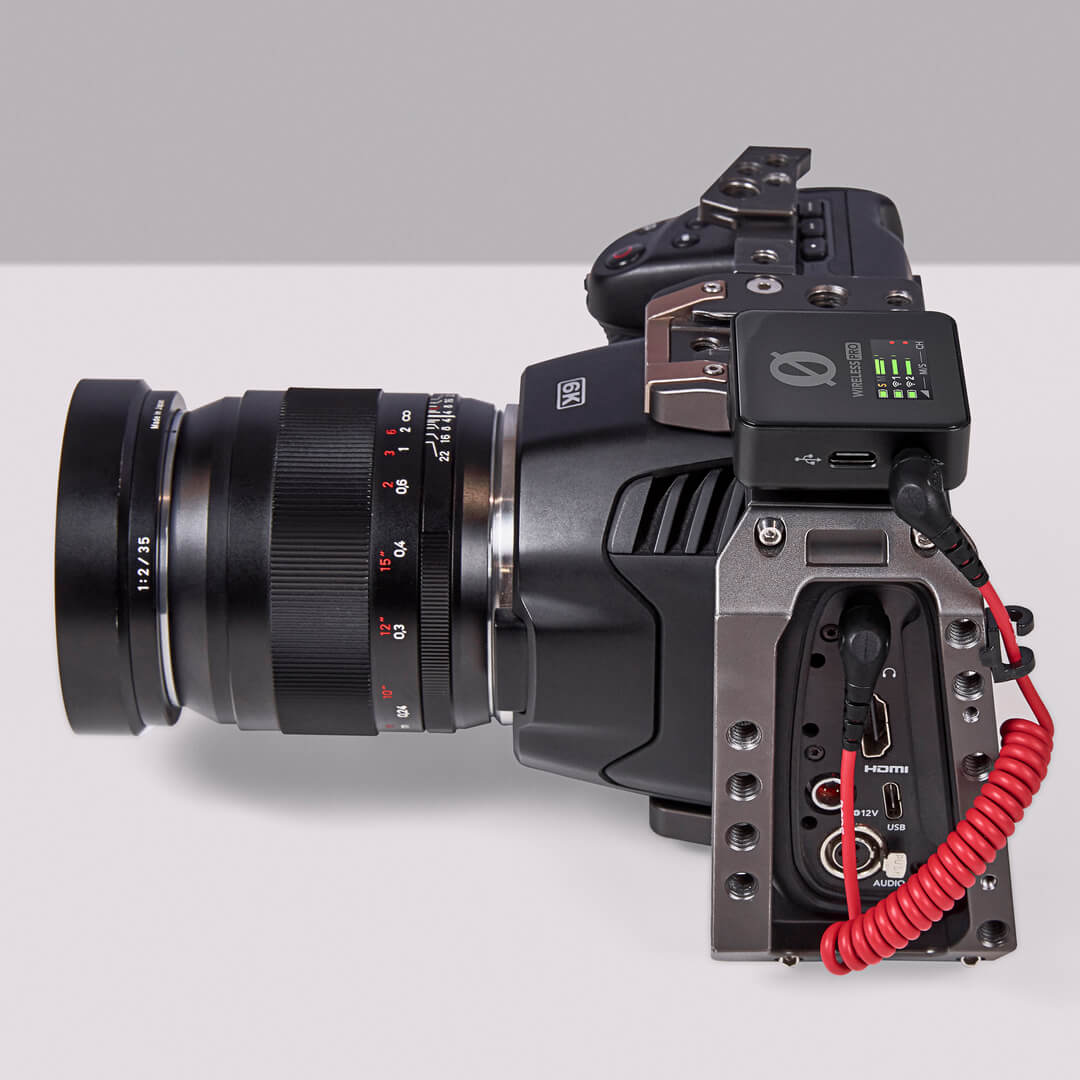
Connecting Your Wireless PRO to a Camera
You can connect the Wireless PRO's receiver via the 3.5mm TRS output using the included TRS to TRS cable, or via USB using the included USB-C to USB-C cable, if your camera has a USB audio input. Simply connect one end of the cable into the Wireless PRO receiver and the other end to your camera’s audio input.
If you are using the 3.5mm output, first ensure the output gain mode is set to ‘Manual’, which is the default setting. To do this, press the Right Navigation button until you cycle through to the Gain Mode screen, and then press the Left Navigation button to cycle through the options until you have ‘Manual’ (indicated by the ‘level’ icon). You can also use the ‘Camera Preset’ gain mode (indicated by the camera icon) – see the ‘Camera Preset’ section for more information.
Plug-in Power Detect
By default, the Wireless PRO receiver will automatically power on or off when the camera it’s connected to also powers on or off, as long as the receiver detects power. Just be sure that your receiver is powered off before first turning on your camera for this mode to function correctly. You can disable this setting via RØDE Central.
Connecting Your Wireless PRO to a Smartphone
To connect the Wireless PRO to a smartphone or tablet, connect the receiver using the included USB-C to Lightning cable or USB-C to USB-C cable, depending on what connection type your device has.
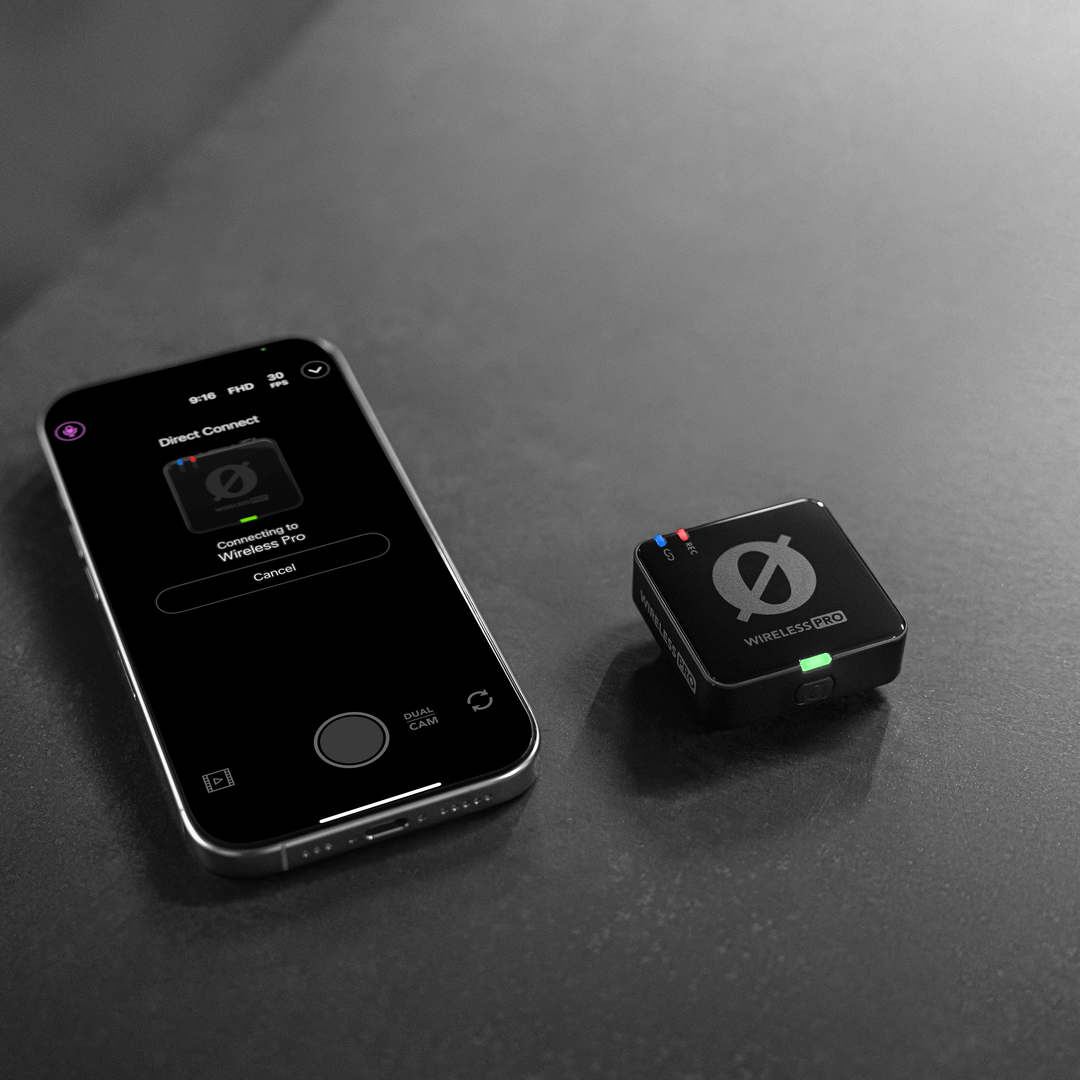
With the latest firmware version you can also connect your Wireless PRO transmitter directly to the RØDE Capture app via Bluetooth® – no receiver required.
To update your firmware, connect your device to your Mac or PC via USB and follow the prompts in the latest version of the RØDE Central desktop app. Once your transmitters are up to date, getting connected is simple:
- Turn on your transmitter
- Open the RØDE Capture app on your iOS device
- Tap the Microphone icon at the top left
- Select "Direct connect to TX"
- Quick press the power button on the PRO transmitter
The Wireless PRO transmitter should then show signal in the RØDE Capture app, then you are ready to record.
Connecting Your Wireless PRO to a Computer
You can also connect the Wireless PRO to a computer and use it as a USB audio input. To do this, simply connect the receiver to your computer’s USB port using the supplied USB-C to USB-C cable, then go to your audio settings and select “Wireless PRO RX" as your input device. You will also need to do the same in any audio software you are using. If your computer only features a USB-A port, use a USB-C to USB-A cable like the SC18.
Connecting to a computer is also how you export on-board recordings from the transmitters, adjust settings, and charge the units. To do this, place both transmitters and the receiver into the charge case and use the included SuperSpeed USB-C cable to connect the case to your computer. This will allow for the fastest possible transfer rates and will charge your case and Wireless PRO units. See the ‘Configuring Wireless PRO with RØDE Central’ and ‘On-Board Recording and 32-bit Float’ sections for more information.
Note
Simultaneous use of the 3.5mm analog and USB-C digital outputs is not recommended – depending on which devices you're recording to and how they are powered, a ground loop may occur that can produce digital noise in your signal.
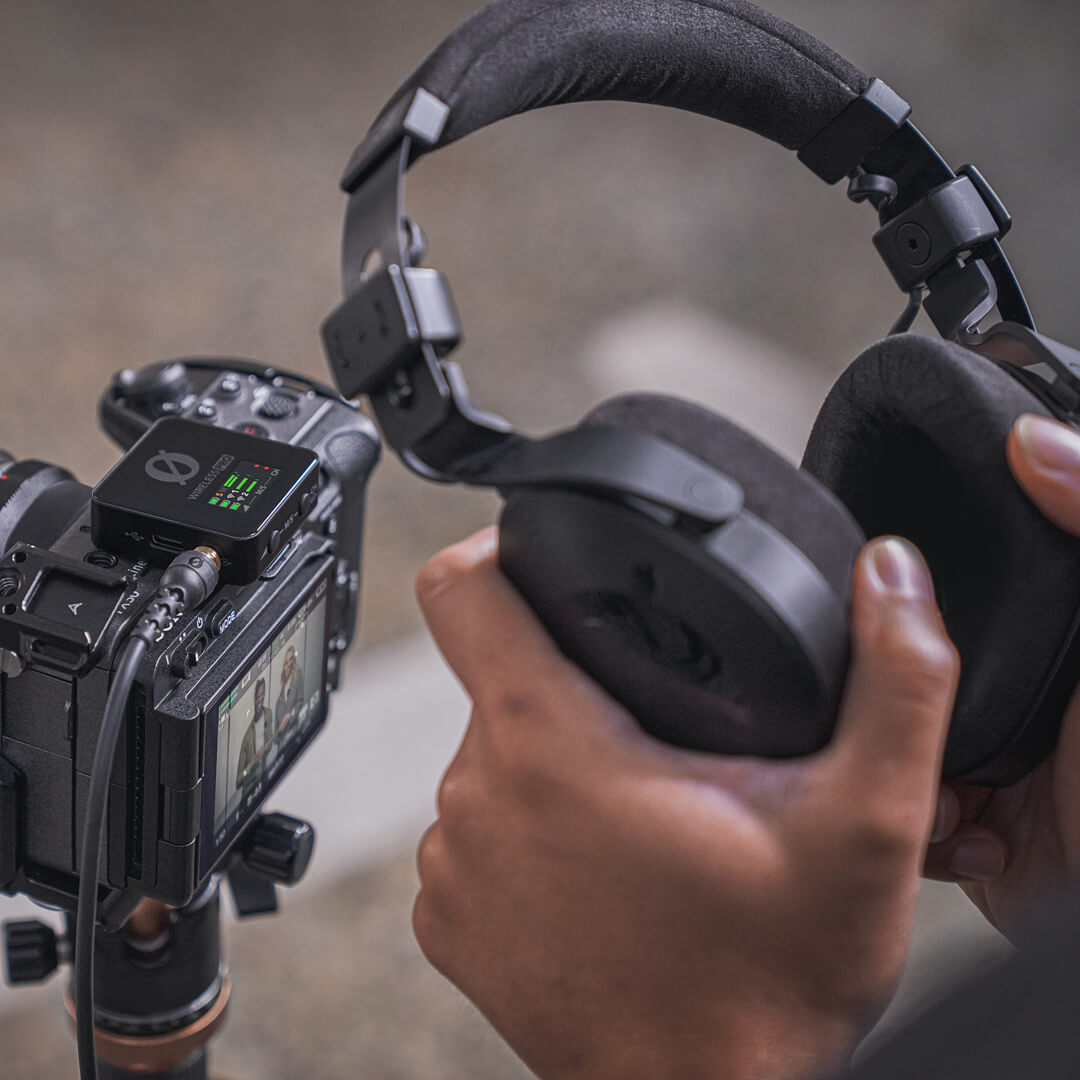
Connecting Headphones or Headsets to the Receiver
The 3.5mm TRRS connection on the Wireless PRO receiver is super versatile and able to connect to a number of different audio input and output devices, such as headphones and microphones.
When the 3.5mm output is not being used to connect the receiver to a camera (such as when you’re using the USB-C output or only using the transmitters’ on-board recording function), you can connect headphones like the NTH-100 for monitoring your audio, or a headset like the NTH-100M. Connecting a headset allows you to both monitor your audio as well as record your voice via the headset microphone – for more information on how this third channel of audio (RX Mic) is routed, please see the ‘Audio Routing’ section.
Before plugging your headphones or headset into the receiver, ensure the output gain mode is set to either “Headphones” or “Headset”. To do this, press the Right Navigation button until you cycle through to the Gain Mode screen, and then press the Left Navigation button to cycle through the options until you have either ‘headphones’ or ‘headset’ displayed, and then press the Right Navigation button to select the mode. Once selected, you can adjust the headphone output level by pressing the Left Navigation button from the Wireless PRO’s home screen, and then use the Left and Right Navigation buttons to adjust the volume.
Note
The Wireless PRO features a high-power headphone amplifier with enough output for high-impedance headphones that require a lot of volume.
Using the Windshields
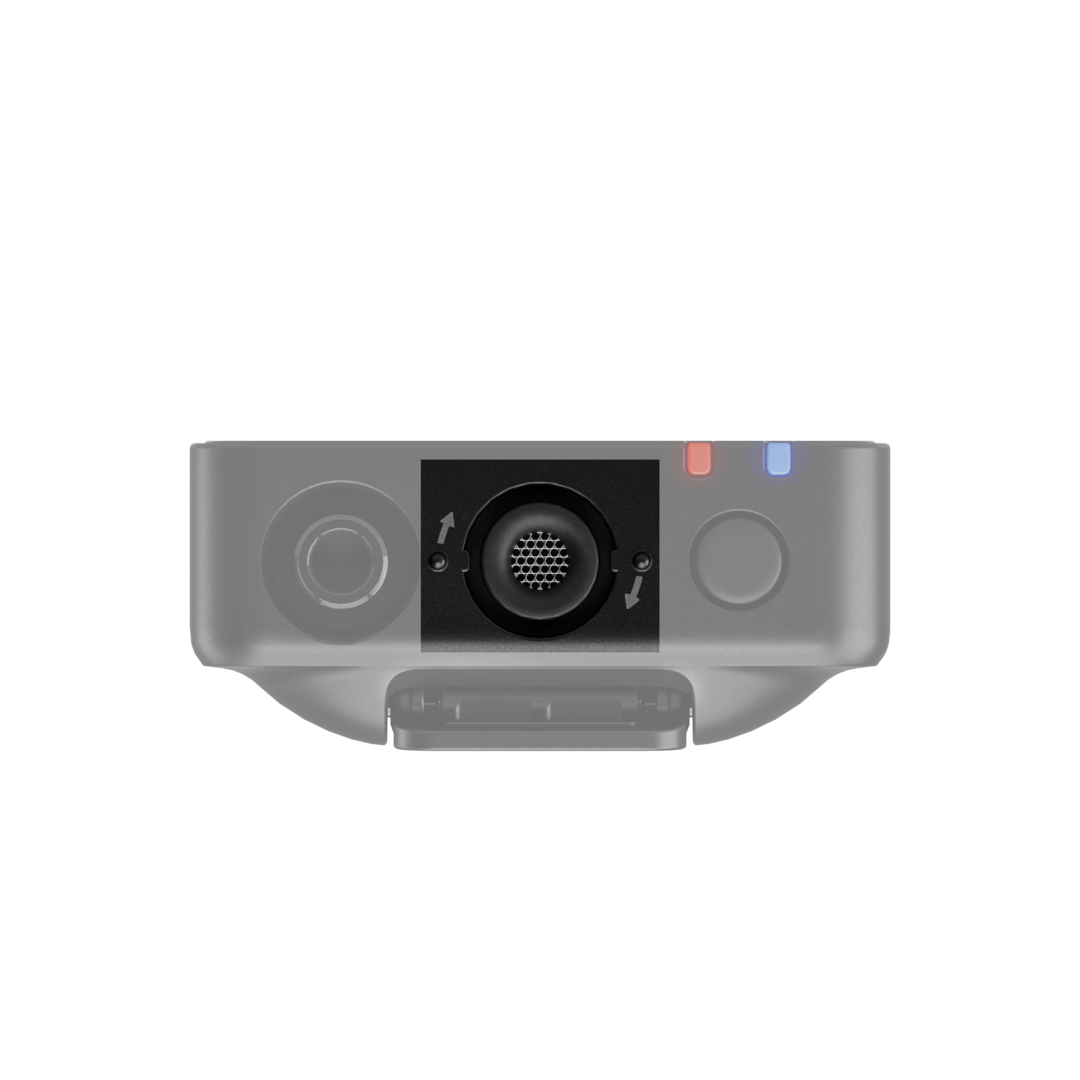
The Wireless PRO’s transmitters feature high-quality in-built omnidirectional condenser microphones. These are sensitive microphones that are designed to pick up sound from all around in great detail. When recording outdoors or in windy environments, it’s recommended you use the supplied furry windshields to help protect the capsules and reduce any wind or background noise in your recording.
The Wireless PRO comes with three furry windshields. These have been designed to ensure an extremely strong connection and will not fall off your transmitters, even with vigorous use. To attach them securely, align the two white dots on the windshield with the black dots on the transmitter, then push the windshield down and twist to lock it in place. Reverse the process to remove them.