Getting Started
Powering Your RØDECaster Video Core
Connect the included power supply to the USB-C power port and press the red button next to it to switch on your RØDECaster Video Core – the encoder ring will spin as it powers up.
To power off your RØDECaster Video Core, press the power button twice within 5 seconds – the encoder ring will indicate this time once you first press the button.

Using the RØDECaster App and Updating Firmware
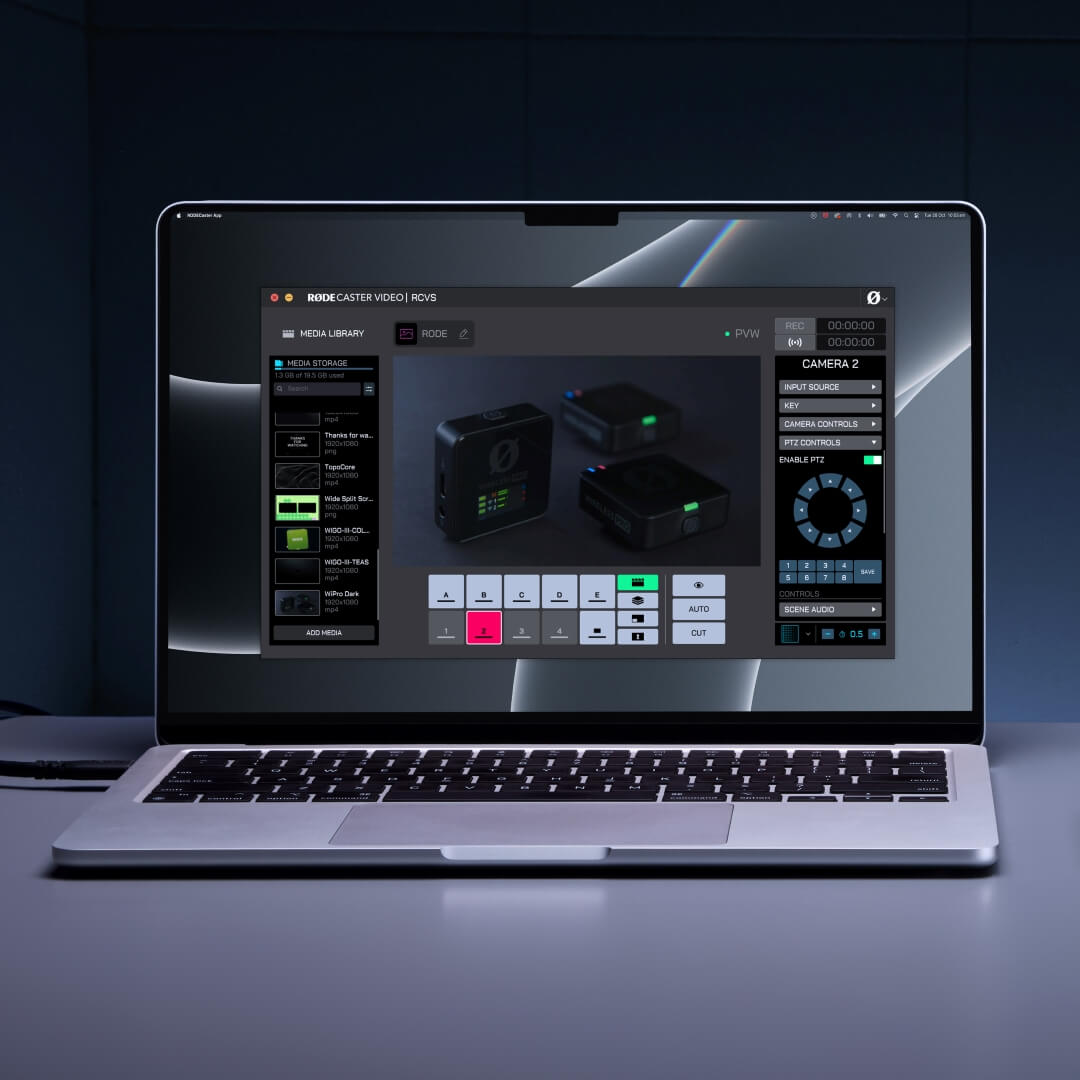
In order to configure and control your RØDECaster Video Core and update its firmware, you'll need to use the RØDECaster App, which you can download and install below.
You can either directly connect USB 1 to your computer with the included SuperSpeed USB-C cable, or connect the RØDECaster Video Core to the same network as your computer via Ethernet. This Ethernet connection also allows you to stream directly from your RØDECaster Video Core.
Select your RØDECaster Video Core from the left-hand menu in the RØDECaster App and follow the prompts to update to the latest firmware if required.

USB-C Inputs (1-3)
USB 1 – Video and Audio Interface and Control
USB 1 is used to control and configure the RØDECaster Video Core when connected to a computer running the RØDECaster App – just be sure to use a SuperSpeed USB cable, like the one included. It is also able to send a video stream from the RØDECaster Video Core to your computer, as well as a multitrack audio interface and an extra “USB Chat” audio channel. Connect this port to your computer using the included SuperSpeed cable and choose which video output to send by heading to Device Configuration > Video > Outputs and then selecting one of the following options for USB 1: Program, Preview, Multiview or Camera 1 – 4.
USB 2 – Secondary Audio
USB 2 is a secondary audio interface and is MFi-certified, meaning that it’s ideal for connecting to secondary computers, iOS and Android phones. You can also connect both USB 1 and USB 2 to the same computer for even greater flexibility.
USB 3 – USB Storage
USB 3 is used for connecting USB mass storage devices, such as external hard drives and thumb drives. This is where your video and audio will be recorded, either as single files or multitrack files.
Note
The RØDECaster Video Core requires storage devices to be in the exFAT file format. You can format your drive by navigating to Device Configuration > System > Storage > USB Storage and tapping “Erase”.
USB Inputs (4 and 5)
The RØDECaster Video Core features two multi-purpose USB-C ports (USB 4 on the rear and USB 5 on the front) that can be used to connect a variety of USB devices as well as utilised for RØDECaster Sync.
USB 4 (Video and Audio)
USB 4 (on the rear) can be used to connect both USB audio and video devices. This includes compatible webcams and capture cards, as well as other RØDECasters and a range of RØDE USB microphones including the NT-USB+, PodMic USB and more. By default, USB 4 will be assigned to Input Button 4.
USB 5 (Audio)
The front-facing USB 5 input supports RØDE USB audio devices, including microphones and other RØDECasters.
RØDECaster Pro II or Duo (RØDECaster Sync)
Please see the RØDECaster Sync section of this guide for more information on connecting either the RØDECaster Pro II or RØDECaster Duo to USB 4 or 5.
Note
From firmware version 1.3, the RØDECaster Video Core can support both uncompressed and compressed USB video devices, so long as they can provide a minimum 1080p24 UVC stream. Supported uncompressed formats include YUV and NV12, while the supported compressed format is MJPEG.
For more information, view our USB Video Device Compatibility article.

HDMI Inputs and Outputs
The RØDECaster Video Core features 3 HDMI inputs labelled 1-3, and a HDMI Output labelled A.
HDMI Inputs (1-3)
The 3 HDMI inputs are for connecting cameras and other video devices. By default, the inputs 1-3 will be assigned to the first 3 Input Buttons. The RØDECaster Video Core accepts any video source that is able to output a 1920x1080 video stream – this resolution will be automatically requested if your video device is capable of producing it.
HDMI Output (A)
The HDMI output is for connecting displays for monitoring and outputting your production. In the RØDECaster App, navigate to Device Configuration > Video > HDMI A to select which video feed you want to send to each output (Program, Preview, Multiview or Camera 1 – 4).
Note
If an image isn’t appearing via your RØDECaster Video Core from one of your HDMI video sources, check the resolution of the video source (camera, capture card, etc) to ensure it can support 1920x1080 output.
Network Video Inputs and Output
Your RØDECaster Video Core can both receive NDI® video from other devices on your network and send its own NDI video stream. Simply connect your RØDECaster Video Core to your local network with an Ethernet cable to access these features.
NDI Inputs
There are 4 network input sources available to connect cameras or other devices. This can be done via the RØDECaster App's Scene Builder by clicking the relevant input button (or its settings cog) and then selecting 'Network 1 – 4' from the Input Source dropdown. Once selected, a list of available devices will appear that you can choose from.
NDI Output
The NDI output can be enabled to cast a video stream over the local network, allowing the RØDECaster Video Core to appear as an input option to other devices, such as software or hardware decoders. This can be enabled via the RØDECaster App by navigating to Device Configuration > Video > Outputs, then selecting an option from the NDI drop-down list.
Using the RØDECaster Video Core to control PTZ cameras
With the RØDECaster Video Core you also have full Pan, Tilt, Zoom and Focus control of compatible PTZ cameras on your local network.
In the RØDECaster App's Scene Builder, you can enable PTZ control on an input under the PTZ Controls dropdown. Once enabled, this will allow you to remotely control compatible PTZ cameras and even save presets directly to the camera input, which you can then assign in a scene to recall the preset with the touch of a button.
This can be used to frame shots and create dynamic camera angle adjustments for each scene you create.
Adding iPhone Cameras Using RØDE Capture
With the NDI feature, you can connect your iPhone directly to your RØDECaster Video Core and add its cameras into your production using the free RØDE Capture app. This means you can use your iPhone's main camera, or use both the main and selfie cameras as separate video sources, and do so without any cables connected to your phone.
To enable this feature:
- Ensure your iPhone is on the same network as your RØDECaster Video Core. Your RØDECaster Video Core needs to be connected to the network physically via Ethernet, but your iPhone can be connected either via Wi-Fi (to the same network) or via Ethernet using an Ethernet adaptor
- Open the settings arrow in RØDE Capture and toggle "NDI Cast" on
- If you only want to use your main camera, ensure "Dual Cam" mode is toggled off. To send both front and rear cameras, enable Dual Cam mode (with either the "PiP" or "Split" setting) and then in Capture's settings, choose "Separate" for two discrete feeds, or "Combined" to have both cameras in a single feed.
- When selecting the input source on your RØDECaster Video Core via the RØDECaster App, choose Network 1, 2, 3 or 4 and then select RØDE Capture Stream A. There will also be a 'Stream B' available if you are in the Separate Dual Cam mode.

Note
You can rename your RØDE Capture NDI streams by heading to your iPhone's Settings app, then Apps > RØDE Capture and editing the "NDI Device Name". Here, you can also adjust the NDI Stream Codec.

Audio Inputs and Outputs
Alongside its video switching prowess, the RØDECaster Video Core also features a fully-integrated professional audio interface.
Combo Inputs
The RØDECaster Video Core features a pair of high-quality Neutrik™ combo jacks for plugging in microphones, instruments and line-level devices with either XLR or 1/4-inch connections. If your microphone requires phantom power, read the Audio Mixer section to learn how to enable this on either combo input.
Headphone Outputs
There are two outputs on the back of the RØDECaster Video Core for connecting two pairs of headphones such as the NTH-100. If your headphones have a 3.5mm connector, use a 1/4-inch to 3.5mm adaptor such as the RØDE HJA-4 to connect them to the unit.
To adjust the output level of headphones 1 or 2, press the Audio Encoder on the front panel until the LED next to the headphone 1 or 2 icon is lit, and then rotate the encoder to adjust volume.

Input Buttons (1 – 4)
Within the RØDECaster App's Scene Builder, the bottom row of buttons labelled 1-4 are the Input Buttons and correlate to the 4 possible input sources that can be simultaneously assigned on the RØDECaster Video Core. These buttons will show as light grey when an input source is assigned to them, red when they’re currently live (the Program Output), or green when they’re cued to be sent live (the Preview Output).
Clicking one of these buttons when it has an input source assigned to it will switch that input to the live Program feed (if in Instant mode) or to the Preview feed (if in Studio mode).
Assigning an Input Source to an Input Button
By default, HDMI 1-3 will be assigned to the first 3 input buttons and USB 4 will be assigned to input button 4, but you can assign any input to each of the 4 buttons. To do so, you can either click on the Input Button or the settings cog in the top-right corner of the button — choose the latter if you'd prefer to configure an Input Button's settings without switching to it or previewing it. Once selected, you can click the Input Source dropdown in the right-hand menu panel and make your selection.
Scene Buttons (A – E)
Each of the seven scene buttons can be completely customised with different configurations of input sources, images, videos, graphic overlays and keying layouts, allowing you to quickly switch between pre-configured setups on the fly. Scenes can be created by using the RØDECaster App Scene Builder — visit the dedicated section for more information.
FTB and Marker Button
Clicking the FTB Button (next to the Input buttons) will transition to a blank screen (by default), overriding the current Program feed, and will also fade out any playing audio. This is useful if you quickly need to cut a live feed or wish to fade to black to end a show or segment. The time it takes for this fade out is set by your transition timing.
Clicking the settings cog on this button allows you to disable this button completely (by choosing 'off') or change its function to instead place a Marker, which can be used alongside the EDL Export feature to mark significant moments in your production.

Media Button
The Media button provides access to the videos, images and sounds you have loaded onto your RØDECaster Video Core and assigned to a Media button. When clicked, the Media button will light purple and the Scene Buttons (A – E) will alter their function to represent assigned media. Any buttons that have media assigned to them will be purple, and those with no assignments will remain dark grey.
You can interact with these buttons in the same way as the Input Buttons and Scene Buttons, meaning you can switch to videos, images and sounds as well as use them within scenes.
Click the Media Button again to exit this mode – the Scene Buttons will return to their default function of selecting scenes.
Note
Video files will not play in the Preview feed, but will start playing as soon as they are switched to the Program feed.

Overlay Button
The Overlay button provides access to the images you have loaded onto your RØDECaster Video Core and assigned to an Overlay button. When clicked, the Overlay button will light blue and Scene Buttons (A – E) will alter their function to represent assigned graphic overlays. Any buttons that have graphic overlays assigned to them will be blue, and those with no assignments will remain dark grey.
Pressing one of these buttons will enable the corresponding graphic overlay, showing it over the top of your existing feed in both Program and Preview. Overlays will remain on-screen until the button is pressed again, allowing you to switch inputs, scenes and media without them disappearing.
While you can use JPG files for simple overlays, using PNG files with a transparency layer allows you to maintain that transparency in your show. This makes them ideal for use as lower-thirds, logos, watermarks, and other such elements.
Click the Graphic Overlay Button again to exit this mode – the Scene Buttons will return to their default function of selecting scenes.
Note
Only one graphic overlay can be active at a time.

Keying Button
The Keying button automatically applies a chroma key (green screen or blue screen) or a luma key to the Preview feed in Studio mode, or the Program feed in Instant mode, allowing you to place your subject in front of images, videos, and even other input sources.
Click the Input button you wish to apply the key to, open the Key dropdown in the right-hand menu panel and enable the key with the toggle at the top. Now, you can select whether to use Green, Blue, Luma or Alpha keying as well as choose your background, leaving this option blank if you'd like to use a transparent background.
Once you apply a key to an input source, this setting will be automatically linked every time you use this input source – you’ll need to disable keying for the source to un-link it.

Cut, Auto and Transitions
The Cut and Auto buttons offer two different ways to switch between video feeds, and will behave differently depending on whether you’re in Instant or Studio mode.
Cut
Cut is the default mode and allows you to instantly switch between inputs, media and scenes in Instant mode, and between the Preview and Program video feeds in Studio mode.
Auto
In Instant mode, Auto will switch between your input, media or scenes using your transition settings, or between the Preview and Program feeds when in Studio mode.
Transition Settings
To adjust transition timing, simply increase or decrease the number in the bottom-right corner of the Scene Builder, with the stopwatch icon. To change transition type, click the icon next to this to select Fade, Dip or Wipe (the latter of which has multiple sub-types).
Advanced Keying
For more advanced set-ups, you can use the Luma Key and Key Mask features to create overlays and visual effects.
The Luma Key filters video based on brightness values, which helps remove black backgrounds from input video sources.
Then the Key Mask gives you precise control over your keying area by letting you crop the frame to force transparency in specific regions that may not fully cover the camera frame.
For this keyed section, you also have control of the softness and shadow.
The Softness control allows you to smooth out the edges of the mask for a more natural blend. Then the Shadow control, you can darken the inside of the masked area to improve contrast and allow important visuals like white text stand out clearly.

Pro Tip
As the Luma Key works on a gradient, the darker the area, the more transparent that area will appear.

Inspect Button
The Inspect button allows you to safely view information about, and adjust settings of inputs, scenes, media or overlay without switching or cueing them. In Instant mode, it also allows you to send any input, scene, media or overlay to the Preview output, allowing you to safely view it before sending it live. When clicked, the Inspect button will light up green and the Scene Builder's display will show the Preview rather than Program feed – it will remain that way until you exit the mode by clicking the button again.

Record Button and Storage
The record button in the top-right of the Scene Builder can be used to start and stop recordings. The 'REC' will be white when ready to record, red while recording, but if it is dimmed/greyed out, it means that you do not have a compatible USB storage device connected to USB 3, the device is not formatted to the correct exFAT format, or the drive has run out of free space.
Frame Rate
The RØDECaster Video Core’s global frame rate determines the frame rate of the stream, recording and HDMI A output. It’s important to choose just one frame rate for your project and set all of your cameras and other video devices to output at this frame rate for best results.
To set the global frame rate on your RØDECaster Video Core, head to Device Configuration > Video > Frame Rate.
Frame rates: 23.98, 24, 25, 29.97, 30, 50, 59.94, 60

Audio Output Delay
Generally speaking, any camera (or other video device) will have a slight delay present in its video feed. The delay from audio devices, however, is typically much lower. To help combat this difference, the RØDECaster Video Core features an audio output delay function, which allows you to perfectly sync your audio with your video on your live stream and recording.
By default, the delay will be set to 5 frames, which should accommodate for the widest possible range of cases, but you can fine tune this setting on the RØDECaster Video Core via the Audio Mixer in the RØDECaster App. You can adjust the delay in increments of 1 millisecond or 1 frame.
How to Measure Audio Output Delay
To determine how much delay is suitable for your setup, you’ll only need to perform the following process once:
- Make sure your RØDECaster Video Core and all your video devices are set to the same frame rate
- Record a quick clip of yourself clapping on-camera, ensuring you also record the audio
- Eject your USB storage device, connect it to your computer, and bring across your video file into your NLE (Non-linear Editor) of choice, such as DaVinci Resolve or Adobe Premiere Pro
- In your NLE, find the video frame in which your clap occurs, and look for the spike in audio in your waveform
- On your timeline, highlight the difference between the audio spike of the clap and the visual of the clap to measure the delay (either in frames or milliseconds)
- Set your audio output delay to this number
Note
The audio output delay only applies to your live stream and recording – for the sake of monitoring your own voice live, the delay is not applied to your headphones or monitor speakers.